Ultralight Hiking 2016:
See also:
Ultralight Hiking Advice
The Upper Yarra Walking Track
Hiking 2015
Hiking 2014.htm
Hiking 2013 & Earlier
Steve's Blog
World Travel Kit for Son
Finnsheep.com
NEW MOBILE
FRIENDLY SITE: THE
ULTRALIGHT HIKER


Della & I (combined age then 120) heading
off from Freney Lagoon on the second day of our walk across Tasmania in 2011. We took seven days.
Between us we were carrying @ 20 kilos & enough food (& booze!) for 10
days. These zpacks ‘Blast’ packs are 52 litres including pockets. Today we
would be carrying several kilos LESS.
All about light weight, ultra light
hiking, backpacking, bushwalking, hunting, tracks, trails, adventures, gear,
reviews…
I have been hiking/hunting now for over sixty years, a little more slowly
than I once did, walking in the Victorian Alps & elsewhere often in
winter and in all weathers. I have camped out a lot, more than two years of my
life in toto. I have seen the failure of just about every type of gear, and
experienced most disasters which can befall you in the wilderness, and
survived. So, if you dream of doing a bit of camping/hiking, maybe I can offer
some useful advice?
This is a ‘work in progress’. I will be adding to it on a regular basis
adding new photos, adventures, product/ideas, suggestions, etc. You should also
look at HIKING ADVICE also a section of gear
advice for my son written in 2011 WORLD TRAVEL KIT FOR SON. You can
also see my older posts here: Hiking 2014.htm & Hiking 2013 & Earlier. Hope you
find something interesting.
PS: UPPER YARRA TRACK: I have recently created this site The Upper Yarra Walking Track
Australia’s oldest (& best), an approx. 10-14 day walk
with numerous resupply points, plentiful water and camping spots now extending
from Moe railway Station @ 150 kilometres up the Latrobe, Tyers & Thomson
River valleys, via Yallourn North, Erica & Walhalla, across the Baw Baw
Plateau, along the Upper Thomson River, past the Yarra Falls & Mt
Horsefall, along the Little Ada, Ada and Yarra valleys via Warburton to
Lilydale Railway Station.
Now, complete with Track Instructions
28/12/2016:
Ultralight Toothpaste: ‘Tactical
skills weblog Imminent Threat Solutions shares a simple method for making
toothpaste dots by squeezing small, chocolate-chip sized "dots" of
toothpaste onto aluminum foil, allowing those dots to harden for a week or so,
and then transferring to a small waterproof bag. To use, all you need to do is
pop a toothpaste dot in your mouth, chew for a few seconds, and start
brushing.’ http://lifehacker.com/5979236/toothpaste-dots-keep-down-toiletry-bulk-when-carrying-light & http://gossamergear.com/wp/toothpaste-dots
27/12/2016:
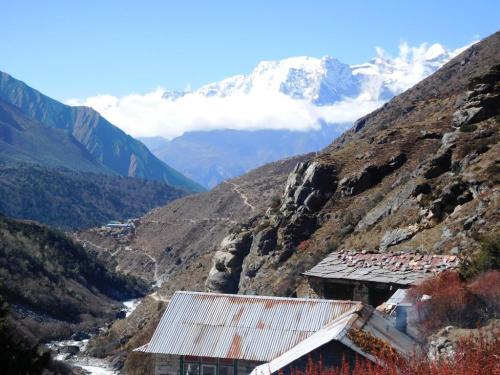
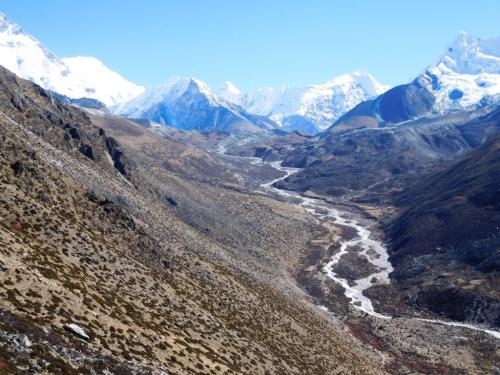
The Diamond
Desert: Everest Base Camp Trek
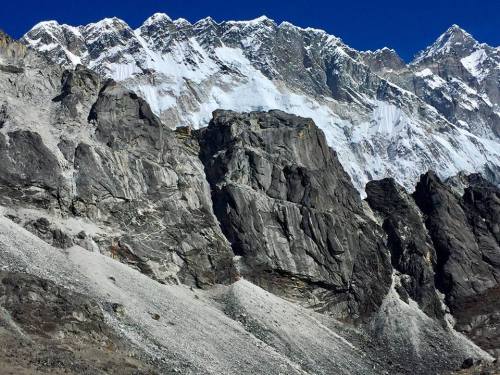
# 8: Once you reach Pangboche you are definitely out of the trees and the
vista changes utterly. The absence of softening vegetation makes the panorama
seem larger and harsher – and of course the colours change. You start to see
lots more snow and ice, as well as vast shiny grey scree slopes as the Himalayas catapult downwards under their own steepness.
In places huge mountainsides have simply cleaved and fallen off, sometimes
damming vast ice rivers and forming beautiful turqoise lakes.
Even
along the river it is barren lands.
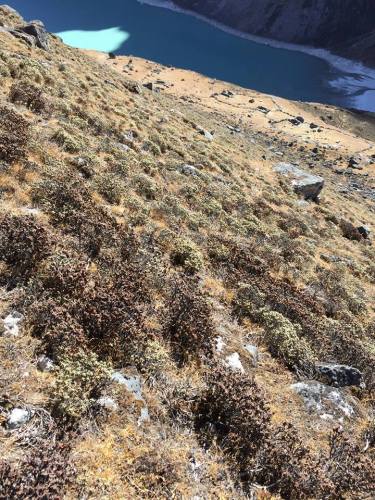
View
from Nangartschang Hill of one such cataclysmic lake.
About
half way looking back towards Pangboche.
About
half way looking towards Dingboche – could be out of a ‘spaghetti western’!
It
is not until you see this that you are aware that the mountains are a vast
crystalline growth on a truly gigantic scale. Of course you knew this
intellectually all along: it is what the clash of continental plates and the
uplift of crustal magma which creates them is all about, but not until you see
the monstrous facets of stone mountains fissuring and fracturing away onto
valley floors thousands of feet below are you truly aware that this is the same
process yous see in your salt shaker or on your battery terminals at home but
on a garagantuan scale.
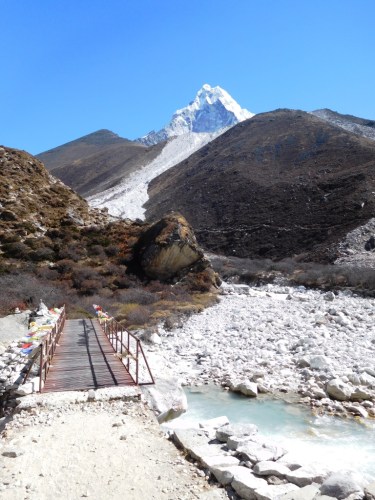
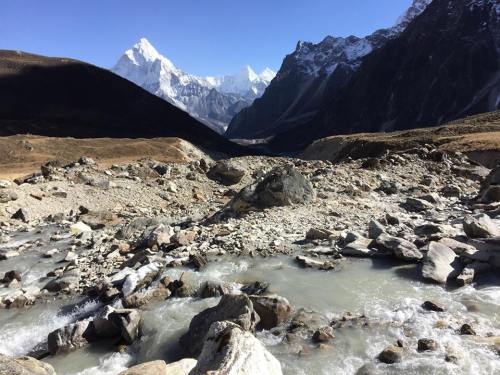
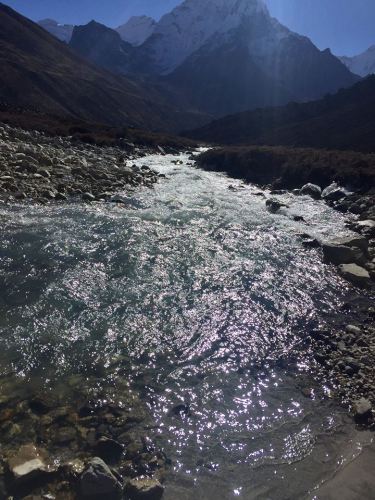
Tsola River:
Turnoff to Pheriche.
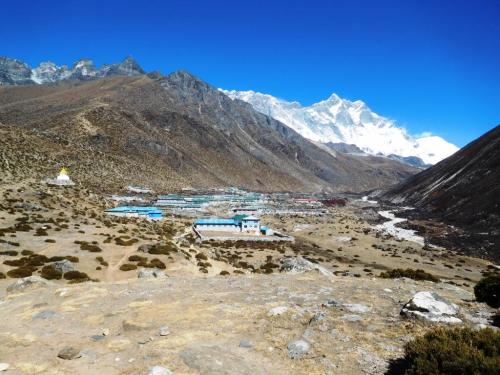
Dingboche:
Nangachang Hill left
In
Dingboche you are right below the Western slopes of Ama Dablam where there were
apparently intrepid souls making their best efforts to commit suicide trying to
reach the top. It looked impossible to me! Maybe the other side. It is the most
photogenic of mountains. Some such suicide victim was clearly being rescued by
this chopper in the morning. I did not notice when I snapped the scene the
really super, supermoon hovering in the sky above it – yet that was weeks
before the ‘official supermoon’! They do things differently in Nepal!
To
me Ama Dablam is forbidding.
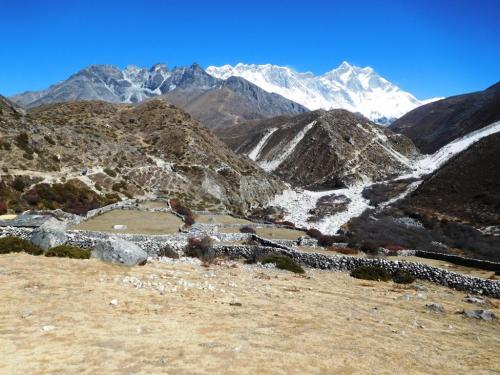
We
had an acclimatisation day in Dingboche 4410 metres during which we climbed
Nangartschang Hill just behind the French bakery where we were staying to
approx 5200 metres. BTW the bakery also have a small Pharmacy which can be very
handy if you are beginning to feel some symptoms of altitude sickness &/or
Khumbu cough (they stock both Diamox and antibiotics, for example – also throat
lozenges which you will also probably need by now!) If you take ½ a Diamox
twice per day this will help prevent the symptoms of altitude sickness, which
if you begin to suffer from, you must immediately descend – as
it can be fatal! You should have begun this prevention strategy before you left
Kathmandu (or Jiri).
View
od Dingboche from Nangartschang Hill: all the tiny brave potato fields.
Literally
hundreds of folk were attempting the ascent of Nangartschang Hill as I
set out after breakfast (Steve had preceded me – the young are always rushing
ahead or lagging behind – why is it so?) Most turned back before the summit.
When I arrived there I had only three others for company, including Steve. It
was definitely a photo opportunity, but I must say I prefer greenery!
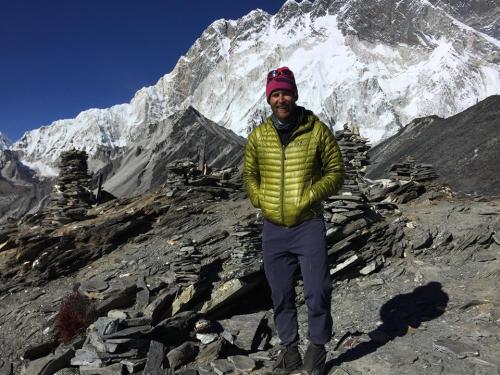
The
Ultralight Hiker on top of Nangartscang Hill @ 5200 metres.
My
head cold and sore throat became worse over the next 24 hours. I also felt very
tired after the descent so reasoned that the planned foray to Chukkung Ri
and the Kongma La Pass were not for me. I decided I would go on to Luboche and
meet up with Steve at Gorek Shep. He would take my sat phone and I would take
the sat messenger. I offered him the Escape Bivi but he still would not take
it. The young. How they ever get to be old is a mystery – well, many of them
don’t!
We
parted just after breakfast and I headed off towards Luboche. However, I had to
climb a couple of hundred metres over the hill I had climbed to the top of the
day before with relative ease and after a while I could tell I was not going to
make it. I could not tell whether it was altitude sickness or an onset of
pneumonia at that stage, but I needed to get downhill immediately whichever it
was and get well, so I headed off back towards Namche instead. I had a terrible
two day walk there and on to Lukla as I decribed elsewhere, then a long,
tortuous month recovering from the pneumonia which also struck young Steve down
a couple of days later. I will let him carry on with his story of venturing on
to Everest Base Camp:
Views
(above and below) up the valley from Nangartschang Hill towards Chukkung.

‘I
left Dingboche early (after saying goodbye to Steve J) and didn’t leave
Chukkung until just before noon. I made it to the false summit of Chukkung Ri
at 2 pm at 5,404 meters (17,725 feet). My lungs were feeling surprisingly
strong. The views were unbelievable. You could even see the iconic Pumori in
the distance to the north.
Steve
H atop Chukkung Ri
And
a friend!
When
I realized that the actual summit was further up, I pushed on, but it was
already quite late. The route was rather difficult as I was climbing across
loose rock on a ledge that dropped several hundred meters. Very close to the
top, I even became bluffed out and had to turn back around to find the correct
route marked by small cairns.
I reached the summit at 4 pm, which is rather late for Himalayan standards, as
I still had a very long descent.
From
the summit, I could see that clouds were rolling into the valley and began
whipping up and over the saddle, from which I would descend. So, I did not stay
long. The descent took forever. It was late in the evening and the sun began to
set, casting its beautiful golden light on the high peaks to the east. I took a
lot of pictures of this evening magic, which is why I didn’t arrive back in
Chukkung until a long while past darkness.
I’ve
done some crazy hikes before, but the next day was definitely the hardest
hiking day of my life. It’s one thing to hike above 18,000 feet and another
thing to do it with a 30 lb backpack. I’ve now had two consecutive days above
18k feet – higher than the altitude of Everest Base Camp.
It
was freezing this morning when we left Chukkung and we had a few initial
problems crossing the icy, glacial-fed stream, as the ‘local’ advice was
completely inaccurate. We eventually headed upstream and found a makeshift
bridge to cross.
Once
on the true right, we traversed the Nuptse Glacier and picked up the unmarked
Kongma La Pass trail…Hiking further, a beautiful bowl opened up with frozen
waterfalls and glacial peaks looming high as a backdrop. Even a massive condor
or eagle with a wingspan of some six feet soared above us.
Once
we turned the corner, it became clear that we had to climb straight up. With my
pack fully loaded, I could only manage climbing five meters at a time before I
had to catch my breath. The secret is to keep your heart beat as low as
possible and just move slowly in a zombie-like fashion with one foot in front
of the other…
Upon
reaching a plateau, I passed these beautiful frozen lakes before climbing again
to the main plateau en route to the pass. On the main plateau, I was starting
to feel a bit sick. Not overly nauseous, but just enough to make me unsteady.
The weight of my backpack was really holding me back, but I knew that I had to
push on.
Walking
further on the plateau, I could see the pass and the prayer flags in the
distance. All of a sudden, a beautiful turquoise lake opened up out of nowhere,
so I took the opportunity to rest and to munch on two Snickers bars.

Eventually,
I jumped back on the path again and began the final ascent to the pass. It was
very steep with a huge drop down to the lake. There was so much sediment on the
ground that it was very difficult to have much traction. A hiker from New Zealand
coming down slipped and almost went over the edge. Finally, I made it to the
pass at 5,535 meters (18,159 feet) feeling absolutely shattered. My body was
completely spent. Fortunately, the views were just incredible.
On
the back side, the route descended through huge boulders before giving way to
loose scree. It was a tough descent after already reaching exhaustion at the
pass. After descending for well over an hour, I reached the bottom of the
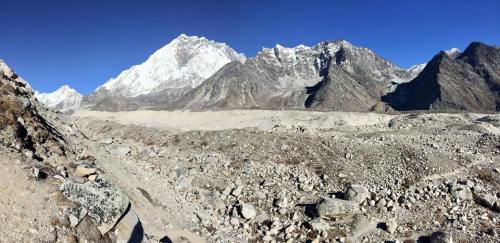
valley. The moraine from the Khumbu Glacier was just massive. Traversing it for
roughly 1.5 km was slow going, as the rocks were loose and the route was not
well defined. I was utterly exhausted, but had to push beyond my limits again
in order to concentrate and avert injury.
Finally,
I reached the other side. Turning around, I stood in awe at what I had just
descended and traversed. The size of the Khumbu Glacier was just unreal. I then
proceeded to descend into the village
of Lobuche, where I
stumbled around looking for a room. Eventually I found a dark and dingy tea
house where I could rest my head. I changed my clothing and immediately passed
out.
Next
day I made it to Everest Base Camp (and also climbed Kala Pattar). Normally,
people hike from Lobuche and do this itinerary in 2-3 days. I’m feeling pretty
good. It is the third day in a row above 18,000 feet. Everything is literally
freezing up here so I cannot write much of a message. For now, here are some
pictures. Everest is absolutely beautiful…
Just
a bit of an additional update. Yesterday was an amazing, but it is very, very
cold to sleep up here at 17,000 feet. It was less than 5 degree F weather
overnight here in Gorakshep. My Nalgene froze within 15 minutes. I could barely
sleep due to the extreme cold and could definitely feel the altitude after such
a long day. Throughout the night, you could hear huge chunks of glaciers
careening off the mountains, creating a rumble that also keeps you awake…
Khumbu
Glacier.
I
can’t believe just how many people are doing the EBC trek, which is precisely
why I elected to do the much less trodden and much more challenging Three
Passes Trek. From Lobuche to Gorakshep, I was literally running past groups
just so that I could reserve a room in Gorakshep. Almost everything was booked
out, but fortunately, the Snow
Land lodge had one more
room available…
Upon
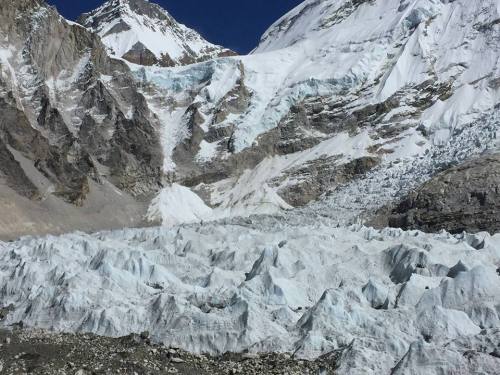
reaching Everest Base Camp…You could only see a small section of Everest, but
the real view was of Nuptse, the Khumbu Glacier and the infamous Khumbu
Icefall. It was crazy to think that I was only one kilometer from Tibet…

Once
we headed back to Gorakshep, I grabbed a plate of spaghetti and then began
climbing Kala Pattar…I kept pushing on to 5,465 meters. The sun was beginning
to set, so I stopped and began to watch one of the most amazing sunsets of my
life. The view of Everest was clear as crystal, with Chomolungma nestled
between Nuptse and another unnamed peak…How could you not be spiritual in that
moment. It really was an incredible sight.

Even
long after the sun had gone over the horizon and was no longer shining
brilliant gold on these majestic peaks, these mountains remained as white as
ever. The glow of orange and red and pink behind these mountains was also
stunning…I then descended for the next 45 minutes using the moon glow to find
my way back down. It was freezing. Every other person had his/her headlamp out,
but I’ve done enough night hiking in my life to see and know the path…
Today,
I am hiking all the way to Dzongla, which is supposed to be the most beautiful
mountain town in Sagarmatha. I’m still batting a lump in my throat (due to a
combination of cold and exhaustion), so I may spend an additional night there
in order to recharge my batteries for the very challenging Cho La Pass…

So,
I’ve arrived in Dzongla with a rather nasty throat cold. While hiking, the wind
has, at times, been ferocious and, while sleeping, the air temperature has been
averaging 5-10 degrees F. In the morning, I always find my window frozen with
ice crystals due to the moisture coming from my exhalation. It is so cold in
the lodges that the bathrooms are always frozen over with urine and faeces, presenting
a not-so-appetizing trip to the loo. How people are able to avoid water-borne
illnesses is beyond me. Mix in the Khumbu dust or cow dung smoke that you are
constantly breathing in, and you have the perfect recipe to get sick. Tea
houses are generally filled with a cacophony of coughs, of which I am now a
contributor…
Walking
from Gorakshep to Lobuche, I was really moving quickly. Unfortunately, due to
my cold, the second portion of the hike to Dzongla really wore me down. I was
very, very tired and struggled to put one foot in front of the other…my throat
is completely swollen, which restricts my breathing – not a great attribute to
have at 16,000 feet. My nose has constantly been running and it is very
apparent that I must take a ‘zero’ day tomorrow so that I can rest. I need to
be very fit to make it up and over Cho La Pass, so I’ll have to make a decision
on my fitness tomorrow night.
My
eyes keep crying…my throat still hurts, and I have fluid constantly dripping
from my nose. I’ve already gone through two rolls of toilet paper and that’s
just from blowing my nose  Last
night, my throat and lungs were so constricted that I could barely breathe in
the thin air. Hopefully, tonight will be more bearable…
Last
night, my throat and lungs were so constricted that I could barely breathe in
the thin air. Hopefully, tonight will be more bearable…
For
all of these reasons, I have decided to throw in the towel and descend to
Namche tomorrow.’
26/12/2016:
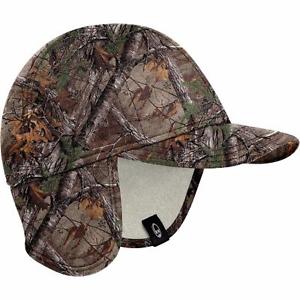
Best Deer Hunter’s Cap, Best Ultralight Cap: At 76 grams
in 61% Merino wool, 19% Tencel, 14% Nylon, 6% Lycra these are just the
best caps I have ever found. (Black colour only) Your head stays drier and
either cooler/warmer (depending on season) than any other head wear I have worn
when you are working hard: http://au.icebreaker.com/en/mens-hats-neckwear/cool-lite-quantum-cap/102249.html?dwvar_102249_color=001
They
are on special now (Boxing Day) at A$39.96, so snap one up; I did. You will
note they also have a camo version in a slightly heavier, warmer merino fabric
for winter hunts: 111 grams & A$29.97: http://au.icebreaker.com/en/accessories/explore-hat-real-tree/102359_WS.html?dwvar_102359__WS_color=901
25/12/2016:
The New Science of Exercise: http://time.com/4475628/the-new-science-of-exercise/ “We
almost completely prevented the premature aging in the animals,”
‘Doctors, researchers,
scientists--even ancient philosophers--have long claimed exercise works like a
miracle drug. Now they have proof.
As I have said before, a
rigorous exercise program might not extend your life. It will definitely
enhance and extend your quality of life even if you begin it at any age.
Everybody knows that they ought to do it, but it's hard and it hurts and we're
lazy and "busy." Plus there is
that terrible part: delayed gratification. Everybody hates that. As I say,
"The flesh is willing but the spirit is weak."
Our quite well-informed
recommendations for general fitness and conditioning for the ordinary person
who wants to achieve or maintain maximal functionality for life:
1. Nutrition: Don't be
visibly overweight - it's the worst thing you can do to yourself besides being
an addict, and no exercise can help being fat. Does a demanding exercise
program require a specific pattern of nutrition? Yes. We have discussed that in
previous posts here. With a serious exercise program, you have to keep up with
the protein and fats - approx. 70-100 gms of protein/day.
2. Weight training - as
heavy as possible, approx 50 minutes twice a week
3. Approx one hr total of
calisthenics/wk for mobility, balance, and athleticism
4. 2 or 3 twenty-min
sessions of cardio intervals/wk (HIIT).
(For HIIT, I do stairs once, elliptical once, rowing once. Occasionally sprints
in the pool.)
Under age 35, it can take
12 months to be whipped into decent shape. Over 35-40, depending on your
fitness starting point, 18-24 months. Intense sports like basketball can
substitute for calisthenics. Yoga is excellent, but does not substitute for any
of the above. Many men find Yoga to be quite challenging and helpful. Lots of
pro football players do it. If your day job is physical, all of the above
recommendations would differ.’
24/12/2016:
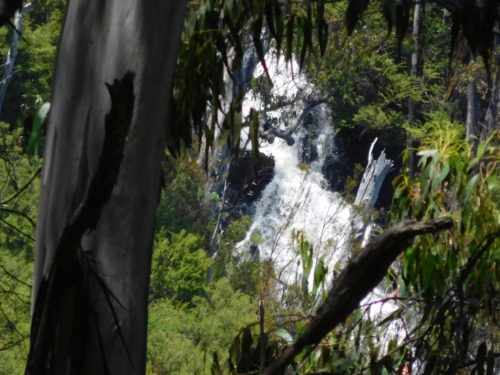
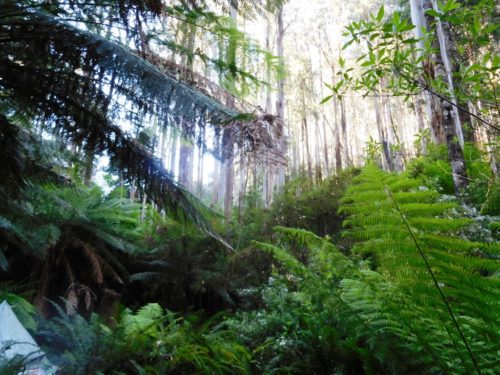
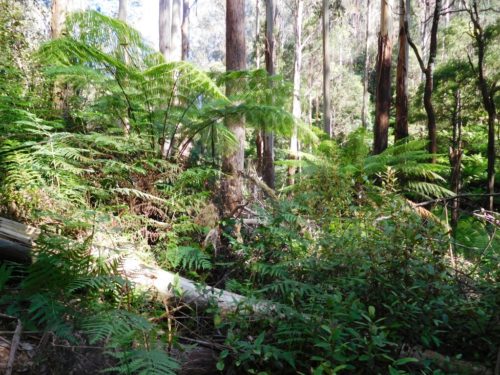
Yarra Falls 3:
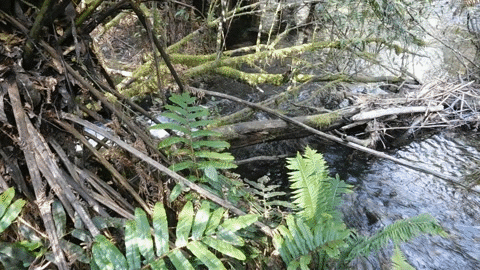
There
are some amazing wilderness areas in Victoria.
Some maybe only a half dozen living eyes have seen. Such as this. People have
been forbidden to venture here since c1955. This is the junction of Falls Creek
and the Yarra River forwarded to me by an anonymous
reader. Falls Creek is seen entering from the left.
S/he
writes: 'It is about 11,000 steps in from the main road to here, some very
short ones as the terrain is quite steep in places, particularly the last few
hundred metres. There is also some horizontal scrub to negotiate, very tricky
unless you are shown the way, or keep a careful look out. On the way in you
walk North across the head of a gully then follow the ridge (just north of
centre) sloping roughly NE for a couple of kilometers until you reach the top
of the first waterfall, one of six falling a total of over 250 metres, the
highest in Victoria. There is a very small spot you might pitch a tent about
fifty metres before the first fall. A hammock or two could be pitched at the
falls. There is no water for the next 9,000 steps till you reach the Yarra
confluence.
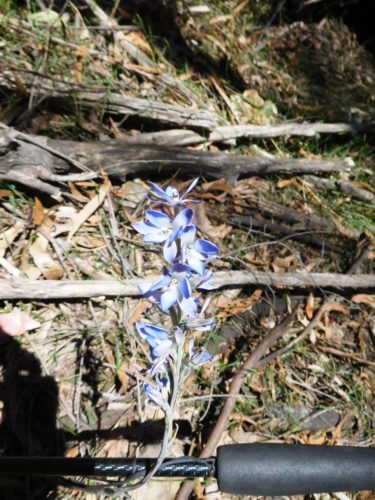
Some
beautiful wildflowers on the way.
You
cross above the top waterfall, climb diagonally onto the ridge to the West then
follow it all the way to the bottom, keeping exactly on the top. After about
2,000 steps there is a view of some of the falls seen poorly through the tall
timber. There is a clearish view of probably the second one, whilst others
below it, glimpsed only indistinctly give an impression of their immense
height. A side track needs to be contoured in from just downhill of this spot
to access a better view of these five falls. It used to be possible to climb
them on the Eastern (true right) side.
The
last couple of hundred metres of the ridge the path leads a little to the left
of its centre through some horizontal scrub bringing you out onto the Falls
Creek about 100 metres upstream from the confluence. There is a substantial
flat area downstream of the creek where several tents could be pitched.
You
can camp right on the Yarra here and catch a trout for your breakfast.
The
'Shelter Hut' was on that ridge above the tent. It would have had a superb
view.
Trout
are plentiful and easy to catch in this section of the infant Yarra. The old
Shelter House used to lie just up the ridge from the river flat on the
downstream side of the creek. There are a number of flattish areas where it
might have been, but no sign of the concrete chimney, so further investigation
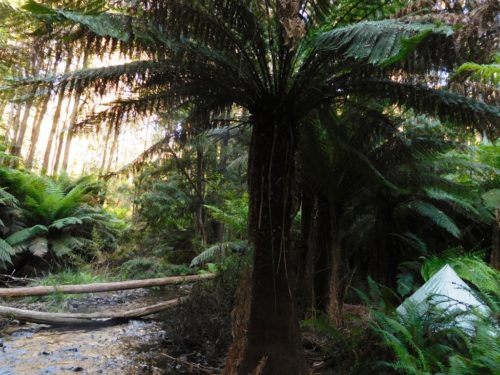
is needed. The vegetation here is quite thick.
It
is probably not too difficult to push your way from this campsite through the
vegetation up to the base of the Main
Falls which lie at least
a kilometre below the five falls. You would need the best part of a day to do
just that and return. I suspect.
Possibly
site of 'Shelter Hut'.
It
will take you a day to walk in to the confluence and a day to walk out. Or you
can walk in to the top of the first falls and out again in a day. Especially
along the ridge the forest litter is probably nearly a foot deep. Underlying it
there are many stones. Your feet are constantly rolling on the deep litter, and
as you crash through it you are often pitched in unexpected directions by the
stones etc. You will need hiking poles to minimise falls but they are quite
awkward to use in the densely vegetated sections.' It would be useful if you brought
a machete (such as this: https://www.theultralighthiker.com/the-worlds-greatest-machete/)
and some pink fluoro tape to improve the path for others.'
See
also:
http://www.theultralighthiker.com/yarra-falls/
http://www.theultralighthiker.com/yarra-falls-2/
http://www.theultralighthiker.com/yarra-falls-3/
http://www.theultralighthiker.com/upper-yarra-track-early-visits-to-yarra-falls/
http://archive.bigben.id.au/victoria/melb/yarra_falls.html
http://www.theultralighthiker.com/yarra-falls-1928/
http://www.theultralighthiker.com/upper-yarra-track-historic-photos/
http://www.theultralighthiker.com/1925-sketch-map-of-yarra-falls/
http://www.theultralighthiker.com/upper-yarra-track-heres-a-little-treasure/
http://www.theultralighthiker.com/upper-yarra-track-some-history/
http://www.theultralighthiker.com/upper-yarra-track/
Video of Main Falls
(2007): https://www.youtube.com/watch?v=dUZwDjiO-sk
20/12/2016:
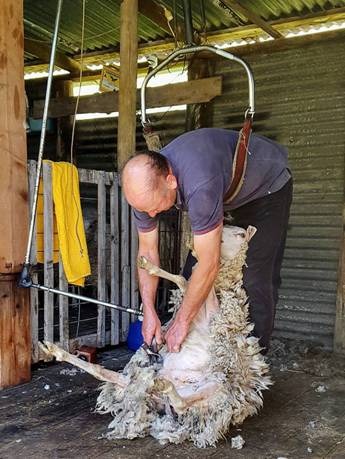
A Merry 'Shear-mas' to all! Della:
‘Yesterday was our 'Shear-mas Day'. Sing along with the words, and token
apologies to John Lennon whose lyrics were much more trite than mine!
"And so this is Shear-mas
A day in the sun
Another fleece over
A new one just begun.
A very merry Shear-mas
And a Happy New Year
We're all sleek and neat now
No dags on our rears!"
And
we celebrated the end of Shear-mas Day with a dinner of roast lamb and freshly
picked raspberries with lashings of cream and ice-cream. Almost makes up for
the tired muscles and excess sun-exposure!’
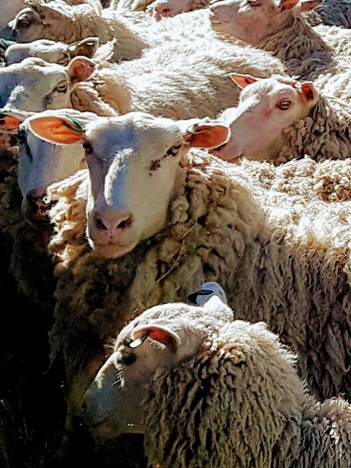
Lining
up.
Even
the lambs got a short back and sides.
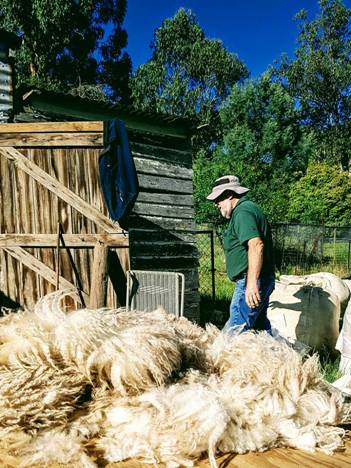
Steve
in fine fleece throwing form.
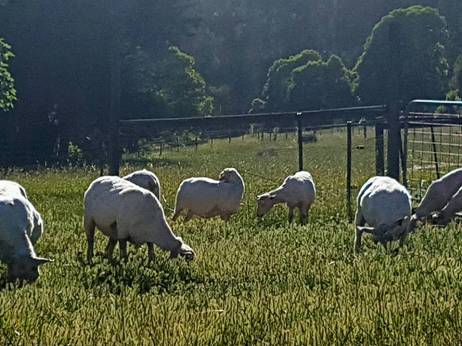
All
over and a fresh paddock to graze.
So
nice these days to finish the shearing in one day (early afternoon) instead of
at least five days of hard grind in the blazing heat. Retirement has its
blessings! We are proud though of having for nearly 40 years participated in
and contributed to what was once Australia’s greatest industry: the
Pastoral Industry. Just a hobby for us now though! See also: http://www.finnsheep.com/index.htm
19/12/2016:
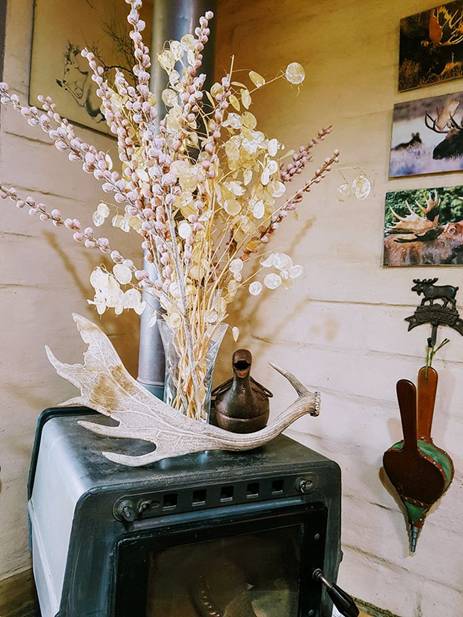
Golden Triangle Fallow: I visited
Dunolly in Central Victoria briefly last week
to see an old friend. Although the bush thereabouts looks like (and is
described by locals even as) ‘lizard country’ my friend showed me a grassy rise
as well as a couple of promising gullies thereabouts where he has seen good
fallow. In one such secret place he had picked up this enormous fallow antler
which Della has turned into a Xmas decoration as you can see - before its
eventual descent into knife handle, towel rail or etc…Gold is where you find
it! It looks more like a moose antler to me! Anyway. Merry Xmas!
19/12/2016:
Sambar Stalking #104: A lot can be
learned about deer by observing their behaviour; I have been a sheep farmer for
thirty years (longer now than I have worked at anything else – it looks odd on
my census return: Occupation: Sheephusband!): They are quite like sheep.
Particularly in their routines, the topography they prefer, their family
behaviour, their caution and nervousness, their ability to choose a pleasant
spot to be. They are also personally unsurprisingly docile and affectionate
towards each other. If you have ever tried to force sheep somewhere they
decided not to go you would not doubt their intelligence. It has been
established that sheep can identify over 1,000 plants from a single experience
of them; apparently this equates to an IQ over 60. A human being with that
level of intelligence would be considered below normal – but would have the
vote! We would not be able to shoot, kill and eat such a person, however.
NB:
This is a draft. I will be adding to it a little later on…but folks have been
asking me when I was going to post (yet) another deerhunting ‘story’ – so here
it is!
There
have been a number of studies of sambar deer (eg employing tracking collars)
which are quite instructive about the areas they chose to inhabit and the way
they travel them. I recommend you pay some attention to them rather than
opinion (eg that they migrate!) Had you looked at such studies you would not
doubt my opposition to trail cameras as unfair ‘hunting’ aids. Such studies
also indicate their preferred food (mast ie fruit, nuts etc, not blackberries,
for example). You can be paying attention to such things as you move through
the bush: eg the prevalence of coprosma fruits (both sweet and prickly),
lilly-pillys, etc: mast which is equally palatable to people, by the way! The
early settler adopted such fruits as desserts and preserves. It is worthwhile
knowing what can be eaten (by people too) in the bush and trying it out (even
beetle larvae and the hearts of tree ferns, etc) as you never know when you may
be lost and hungry!
Deer’s
fondness for such foods leaves no surprise that orchardists view deer in much
the same way as they view cockatoos and corellas. The main sign deer have
feasted well on prickly coprosma may just be the absence of the fruits from
suitable heighted branches as they run them through their mouths to suck off
the succulent fruit. I have observed this many times. Blackberries are more of
a desperation food for deer – as they are just so prickly. You will see them
browsing the fresh shots in late winter/early spring when less alternative
fodder is available. If it were their number one choice they would have
eradicated blackberries from all those otherwise choked riverbanks and gullies!
Some
folk ask whether they can be called – and indeed they can (odd times – I have).
But you will need to study hard to learn what sound it is might make them come.
By then you will likely have shot enough deer anyway! You will for a long while
(if you ever hear it) and think something else made THAT sound. In such a
situation likely two will come. You will also likely only hear such calls as
may attract them if you are in quite a remote place, rarely if ever frequented
by humans. Such calls as they do make are usually at the borders of two stags’
territories, though does and young make many small sounds each to each which
you will have to be very close to hear. Because of my deafness, I no longer
can. The voices of bats too, and many other sounds are lost to me. It is far
better though than going blind as my wife has been doing.
Not
unlike other herbivores one stag will often have several does (though he may
tolerate a spiker or two with them). This means there are other spots where
lone stags hang out or (quite often) where groups of stags hang out together,
as with many of the deer family – moose for example. My old late friend, the
‘legendary’ Arthur Meyers shot three such stags out of one small gully
(Poole‘s) in quick succession (I believe) in the Jordan catchment in 1962. I
have personally seen a group of five stags living placidly together in a very
small patch (about an acre) at the head of a gully in one of the many Stoney
Creeks. The dominant stag is not always the biggest stag. Often another
solitary stag is, one who was long ago beaten (perhaps because he tried too
early) and has given up trying.
Having
nothing else to do but grow, he might grow to an enormous size, as one Arthur’s
mate George shot off my great hound Harpoon in Red Jacket in the 1990s. Harpoon
and I had put this monster stag up from one of those small perched gullies high
up (this one surprisingly on the South side of the Bald Hill) where deer love
to shelter in wet weather (when you think they have all but disappeared from
the terrain). I guess there is a spring there which keeps some fresh food
alive; the vegetation is often thick (in this case all but impassable and
choked with ‘wait-a-while’ or ‘lawyer’ vines). It is sheltered, warmer and
drier than the surrounding bush – if you are ‘laying up’ anyway.
Harpoon
put him up mid-morning. Within I guess less than an hour the stag had commenced
a ‘walking bail’ where he would neither run nor stand. This is a tactic oft
employed by large stags and is enough to shake most hounds, but not Harpoon. He
stuck with him thus for many hours, until he cruised past George at the head of
a side gully of the Ross
Creek about 3:00 in the
afternoon. George managed to get only one shot off into him with his trusty
.308, as the stag immediately bolted over the ridge, George (and Harpoon) in
hot pursuit. The single shot was enough (it was a heart shot) but as is quite
normal the stag still ran for maybe half a kilometre on pure adrenaline until
he collapsed on the side of a gully, where George found him, limping up to him
with a twisted ankle.
He
had perforce to spend a very cold night with him, huddled over a miserly fire
with a couple of muesli bars for company. The radio communication there is
always very bad, and we could not find him though we combed the bush until
about 1:00am. Our search was made more difficult by an immigrant whom Arthur
had brought along who was tasked to merely ‘keep the home fires burning’. This
chap was of an excitable Italian disposition and had brought along a ready
supply of ‘grappa’. Every time we would let off a shot in an attempt to zero in
on George’s answering shot, ‘Giovani’ becoming increasingly inebriated would
let off a shot of his own (unbeknown to us) which completely threw off our
efforts to locate poor George.
He
was much easier to find the next morning when we ‘rescued him around 8:00am,
having driven into Woods Point to beg a loan of the gate key from the local
policeman, who kindly offered to come along and assist. As I previously
mentioned George was huddled against a giant log over a small smoky fire. He
quickly assured us he needed a swig of rum before a drink of water. Everyone
carried spirits in their hunting kit in those days. I was looking around for
the stag. It took me a while to realise that the ‘log’ was the stag. He was so
large he could not be rolled over (downhill) by one person. The head would not
fit in the back of a Nissan Patrol, so had to be strapped to the bonnet where
it over-reached both mudguards. There are monsters out there still!
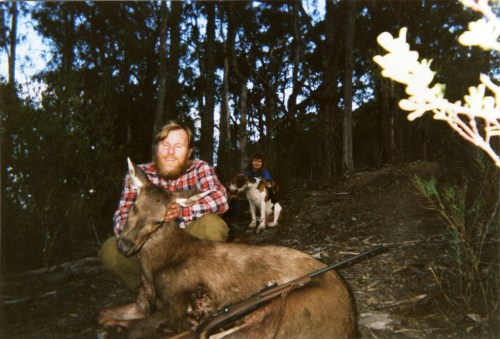
At
the top of this post you will see a snap of my first deer, taken off Alan
Green’s hounds near Brunton’s Bridge in, I guess 1984. In the background you
can see Alan’s lovely wife Carol and his faithful old hound Harry, father of my
‘Harpoon’. How young we were! 35mm photos are so eclipsed by the new digital
photography though, aren’t they? There were often nearly as many women on our
team as men. It would be good to see more women hunters today. I had been
hunting deer for nearly two years before I took this one, so you can see why I
think many potential hunters are too impatient today. We enjoyed many splendid
days in the bush (ethically) trying to bag a deer. Usually we came back with
lots of stories (and scratches) but not many deer. It was a great adventure
however, and I deeply cherish the memories of those wonderful friendly hunts!
PS:
Carol & Alan are now the proprietors of https://www.caoutdoors.com.au/
61 Tramway Rd,
Morwell. They sell all your hunting, fishing and camping needs. Also there
really is no-one who is more knowledgeable as them – especially regarding
hunting.
This
doe came out of ‘The Flourbag’. I was waiting for her just off the B2 track,
and had been for some time – with no sound of hounds or men. The old 27 meg CB
radios we used in those days (often only one channel) were little better than
two tin cans tied with a length of string! Mine was a 1 watt Tandy special. I
still have it somewhere. She had been bedded near the willows in the Flourbag.
She had gone up and down that stream a few times, then up the river getting
further and further ahead of the hounds all the time. She had then crossed the
Flourbag and come across into the Thomson where I waited with no sound of an
accompanying hound to warn me.
Having
heard nothing for hours (and it being a warm afternoon), I confess I had
sat down on a log and was having a smoke – and reading a book actually,
thinking the hunt was lost to me and had gone far upriver. I must have heard
the slightest sound as she crept past me, as when I looked up, there she was.
This was the only day in my long deer hunting career when I had forgotten my
gun! Fortunately Alan had an old ‘sporterised’ .303 exactly like mine which he
was able to lend me.
As
you can see, a .303 will make a deer quite satisfactorily dead if you hit it
squarely in the chest. This is the main thing. I have mentioned before that I
only ever use iron sights. It takes a bit more practice to hit a running target
with them, but once you are adept it is easier, as you never lose sight of your
target. It is also fairer on the deer. Also, if you drop the gun or fall over
with it as you are bound to do sometime, nothing will move those iron sights on
an SMLE or a Mauser – which is mostly what everyone had once. I still have
mine. Every so often they get a ‘run’ with some novice I am training.
I
was watching Attenborough’s Planet Earth 2 ‘Grasslands’ just last night and
noticed that the armed rangers in India’s National Parks still use them – and
that would be in case of a charging elephant or a tiger, perhaps. They used to
be touted as the quickest bolt action rifle in the world. In WW1, our soldiers
were supposed to be able to shoot a German or a Turk every second (or quicker)
and at 500 metres plus+. It would be good if our young were still trained to
that level of skill with firearms – as the world is no freer of dangers today
than it was in 1914 – and never will be! Col Townsend Whelen (after whom the
rifle round and tent are named) used to train US soldiers to shoot their .30-06
bolt action rifles. He could reliably put a round a second (or better) into a
target the size of a man’s chest at 200 yards every time. If you can do that,
you need no artificial aids to take sambar deer.
The
‘crew’ that day: Alan & Carol Green, Ray and Val Quinney.
I
shot from my seated position so as not to further alarm her – she was going
quite quickly enough. As sambar often do she just hunched down with the shot
and kept steaming along, so that (if you were someone else) you might think you
had missed her, but I had grown up busting bunnies on the run with a .22 in
Western NSW, so I knew she was hit in the boiler room and would soon be down.
Even so I first walked right by her even though she was leaving a quite
impressive blood trail. Sambar blend in impressively well to their
surroundings: I can’t imagine how those unsporting types who haul off and shoot
at deer at 1,000 metres ever manage to find them again. Judging by the heads I
have picked up in the bush over the years, they often don’t!
It
was celebrations all round. Our tradition was that it was the successful
hunter’s ‘shout’ – in the Erica pub of course! Hunting ethically you don’t take
anywhere near many deer as unethical folks are doing these days with their GPS
collars and computer assisted ‘culling’ systems. We even caped this doe out and
took the cape to the taxidermist – as I wanted my ‘first deer’ mounted. I cared
not a jot whether it was a stag or a hind. Unfortunately the taxidermist ‘lost’
the cape, so it was not to be. I have never had much interest in other trophies
since so I have not bothered. I used to give away heads if someone else wanted them
until my kids once asked why I never brought a stag’s head home, though I
brought the meat they grew tall on, so naturally I said I would bring the next
one I shot home and have it mounted – which I did.
Our
kids were quite chuffed by my first deer – and just as happy to eat it!
Curiously
enough it was also a deer I put up one weekday in the Flourbag though I had not
been there in years. At this time I had taken to hunting mostly weekdays, often
by myself or maybe (as on this occasion) with maybe one friend – to help with
the carry out! Not a particularly fine specimen of a stag, though perhaps a
descendant of my first deer. Nonetheless it is ‘on the wall’ somewhere in our
house. I have many better antlers now which I could swap on it, but it would
not be the same. It would not be the stag I shot off ‘Harpoon’ that day off
that track, long ago…
And
here he is!
Some
Other Hunting Related Posts (there are many more):
Adventures:
http://www.theultralighthiker.com/sambar-stalking-101/
http://www.theultralighthiker.com/sambar-deer-stalking-102/
http://www.theultralighthiker.com/sambar-deer-stalking-103/
http://www.theultralighthiker.com/does-spot-like-to-hunt-deer/
http://www.theultralighthiker.com/spots-hunting-adventures-1-mystery-river/
http://www.theultralighthiker.com/spots-adventures-mystery-river-2/
http://www.theultralighthiker.com/spots-hunting-adventures-mystery-river-3/
http://www.theultralighthiker.com/not-quite-alone-in-the-wilderness/
http://www.theultralighthiker.com/dusky-track-adventures-1/
http://www.theultralighthiker.com/dusky-track-canoeing-the-seaforth/
http://www.theultralighthiker.com/hunting-in-fiordland/
http://www.theultralighthiker.com/moose-hunting/
http://www.theultralighthiker.com/westies-hut/
http://www.theultralighthiker.com/hammock-hunting-till-dark/
http://www.theultralighthiker.com/a-gorilla-in-the-bush/
http://www.theultralighthiker.com/you-take-the-high-road-and-ill-take-the-low/
http://www.theultralighthiker.com/the-last-of-the-mountain-men/
http://www.theultralighthiker.com/a-soft-pillow-and-a-warm-bed-under-the-stars/
http://www.theultralighthiker.com/if-you-could-only-carry-two-things-in-the-bush-what-would-they-be/
http://www.theultralighthiker.com/the-importance-of-a-roof/
http://www.theultralighthiker.com/the-deer-hunters-tent/
19/12/2016:
More amazing facts
about pigeons: http://www.popsci.com.au/science/nature/pigeons-can-read-a-little-bit-new-research-shows,437745
& http://www.popsci.com.au/science/nature/pigeons-know-when-theyre-getting-bad-leadership-advice,437740
18/12/2016:
Lewis and Clark Weren't the Only
Explorers to Map the American Frontier: http://mentalfloss.com/article/86268/lewis-and-clark-werent-only-explorers-map-american-frontier
17/12/2016:
10 Things We All Did in School That Are
Banned for Kids Today: https://pjmedia.com/parenting/2016/11/10/10-things-we-all-did-in-school-that-are-banned-for-kids-today/
17/12/2016:
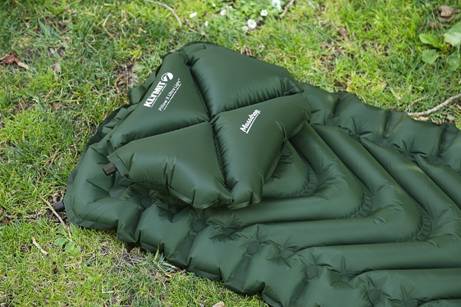
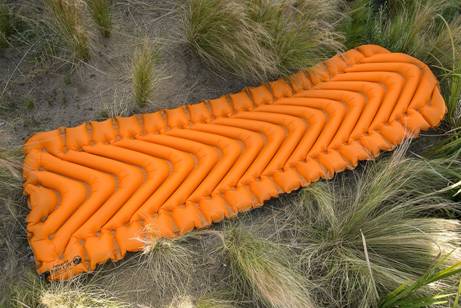
Klymit Insulated Static V Lite Sleeping
Pad: This pad is available on Massdrop (https://www.massdrop.com/buy/klymit-insulated-static-v-lite?referer=EJ89BQ)
for US$62.99 (so about A$100 delivered) just now. It has a very good R rating
and is 23” wide! Just what you need to keep those elbows warm! I do not need it
to be so long as this but can probably cut approx 6” (15 cm) off it and reseal
it with a hot iron (so bringing its weight down to 509 grams. Della would only
need 5’ (150 cm) of it, so hers would weigh 463 grams!) This is heavier than
my beloved Thermarest Neoair Women’s but
it is wider, has a slightly higher R rating (.7) and looks to be made of a
tougher material, so worth a try. ‘Lite has an R-value of 4.4 and weighs just
19.6 ounces (556 grams) . The body-mapped V shape and dynamic side rails reduce
air movement and hug your body as you sleep, while the Klymalite synthetic
insulation offers reliable thermal performance for all seasons—from summer
backpacking to winter ski tours. Made from tear- and abrasion-resistant 30d
polyester, this pad inflates easily in 10 to 15 breaths through the twist-pull
valve, and when you’re done, packs down to 5 by 8 inches in the included stuff
sack.’
PS:
I recently received a Klymit X Ultra Light Pillow (Weight 53 grams http://www.theultralighthiker.com/klymit-ultralight-pillow/).
I am most impressed with it. Though a few grams heavier than my Exped pillow,
it appears to be tougher. You can sit on it (it has a screw down valve instead
of a plug) , so it makes an excellent comfortable trail seat. The configuration
allows for a number of sleeping strategies but the 'X' in the middle will be
ideal for back sleepers. I slept on it last night and found it superbly
comfortable.
See
also:
http://www.theultralighthiker.com/ul-pillows/
http://www.theultralighthiker.com/exped-ultralight-pillow/
http://www.theultralighthiker.com/more-about-diy-pfds/
Specs
Sleeping Pad
Fabric:
30d polyester with antimicrobial laminate
Color:
Orange
Insulation:
Klymalite synthetic fibers
R-value:
4.4
Inflation:
10 – 15 breaths
Dimensions,
inflated: 72 x 23 x 2.5 in (183 x 59 x 7 cm)
Dimensions,
packed: 5 x 8 in (13 x 20 cm)
Weight,
pad: 19.6 oz (556 g)
Weight,
stuff sack: 0.5 oz (13 g)
Included
Stuff
sack
Patch
kit
Klymit’s
lifetime warranty
16/12/2016:
Blocked from Pirate Bay: Just as in
the Islamic and Stalinist dictatorships our great ex-Communications Minister,
Malcolm has just ‘made’ it so you can no longer ‘access’ your favourite torrent
site – well not unless you use a VPN (which Pirate Bay has been recommending
for nearly a decade themselves - for privacy reasons!) and as I recommended
here back in October 2015; http://www.theultralighthiker.com/ipvanish/
As you can read here this is the solution to all our Government’s interference
with your internet freedom: http://www.pcadvisor.co.uk/…/how-download-torrents-downloa…/
An update; I have been using IPVanish for over a year now and they are great!
16/12/2016:
Woman tricks husband into thinking she
'adopted' a coyote. This is very funny: www.someecards.com/life/digital-life/woman-adopts-photoshop-coyote-husband-freaks/
13/12/2016:
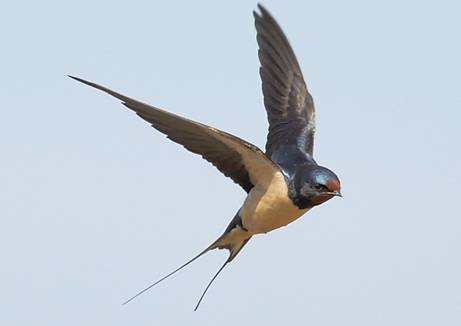
Swallow Update: The missing birds have at last
returned. They came in day before yesterday in a veritable
swarm. They all wanted to check out the garage (where many of them were born)
and I was standing in their way. They were swooping and diving only inches away
from me as they passed by. They must have experienced a period of low food somewhere
along their migratory path which delayed them until they were fat enough again
to fly. Really glad to seee them back though! Welcome home for the summer
little guys! See: http://www.theultralighthiker.com/welcome-swallows/
12/12/2016:The things they sell at the Yinnar General
Store:

11/12/2016:
Adler 7-Shot Ban: I have rarely seen
anything quite so silly. Or the extraordinary waste of all the ‘important’
meetings which preceded it! Two cartridges just cannot make a difference of two
categories. At the very best /worst a 7-Shot lever action should be category C,
as is a 7-shot pump action shotgun (indeed all pump action shotguns!) whereas a
5 shot pump action high calibre rifle is Category B! There needs to be some
rationality here.
The
Category system after all only applies to legal gun owners who are subject to
the most rigorous identity, suitability and storage requirements so that it
surely can’t make a whole lot of difference if one of us should perhaps squeeze
through the net and (using our two extra bullets) go on to commit some awful
offence (as has not happened since long before Port Arthur actually – whoever
was the perpetrator there was not a legal gun owner).
You
can purchase a 10-shot Category B .303 bolt action rifle (once touted as the
fastest bolt action in the world) capable of accurately delivering slightly
more rounds per minute (and with a range of more than 2 km) than an Adler lever
action with its miserable 5/7 shot magazine (with a range of approx 200 metres)
and which need to be reloaded one at a time, whereas the .303 magazine can be
reloaded or switched instantly! The .303 has been available now for well over a
century - as has the lever action shotgun actually. You would think with all
the hype you have read that the Adler is some startling innovation in firearms
technology.
I
shall probably go out an buy a 5-shot lever action in 12 gauge for myself and a
matching .410 gauge for Della, just because we can! Meanwhile, does anyone
actually care that deaths from heroin overdoses now exceeds gun deaths in the USA? http://www.ibtimes.com/heroin-overdose-epidemic-deaths-exceed-gun-homicides-first-time-us-report-2458116
11/12/2016:
Lamping rabbits with hawks in Sussex.
Meanwhile, enjoy this excellent video: https://www.youtube.com/watch?v=c6UMIkwQ8GI
10/12/2016:
Miniature Pens: Some of these would make an interesting stocking
filler. Whilst nowhere near as Ultralight as my own http://www.theultralighthiker.com/ultralight-pen/
some
of them are quite interesting. Being able to have a pen handy on your keychain
is a good idea, as is the pen which expands to full size when needed;
http://www.lamy.com/eng/b2b/pico
https://www.massdrop.com/buy/tec-accessories-picopen-keychain-pen?referer=EJ89BQ
http://www.thewritingpenstore.com/c-121-wallet-and-keychain-pens.aspx
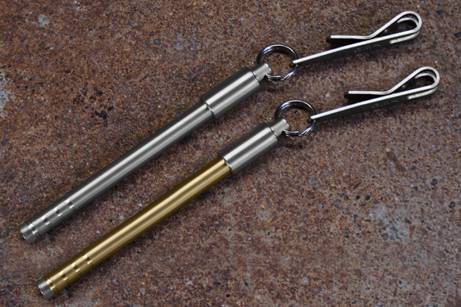
Pico Keychain Pen
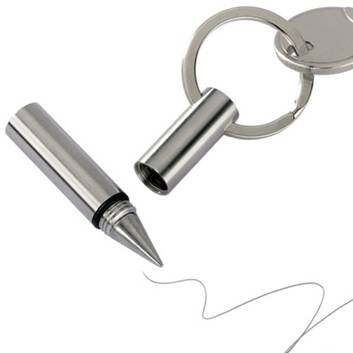
Beta
Inkless Keychain Pen
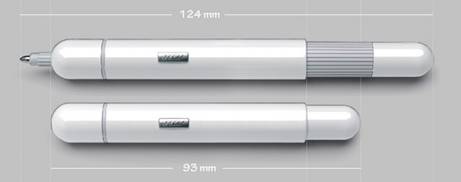
Lamy Pico Pen
See Also: http://www.theultralighthiker.com/waterproof-notepads/
09/12/2016:
You Take the High Road and I’ll Take the
Low: Canoe Hunting: A canoe (or better yet, a pack raft) can get you to
many spots which would be almost impossible with a 4WD or just on foot (even
just across a swollen river, or much further along a lake), and it can get you
(and your quarry) out again with a minimum of effort. Victoria possesses a wonderful network of
navigable rivers/lakes often linked to walking tracks or off-road vehicular
tracks which can provide an unsurpassed wilderness experience. See: http://www.theultralighthiker.com/gippsland-pack-rafting-routes/
What is Pack rafting?: I just realised
that many readers may not realise what pack rafting is, so I’ll try to explain.
A number of folk (eg Alpacka: http://www.alpackaraft.com/ ) have developed
these ultralight (but tough ie suitable Grade 3 rapids – and above!) inflatable
rafts/canoes which weigh approx. 2 kg (4lb) - or less. Coupled with a paddle of
800 grams (or less) and a life vest of 500 grams (or less), you can stow this
boat and what you need to ‘drive’ it safely in your hiking/hunting/fishing
backpack (which should itself weigh 500 grams or less empty!)
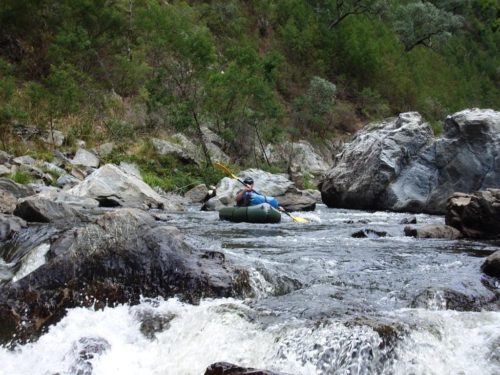
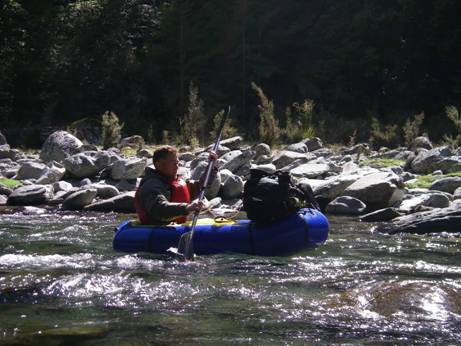
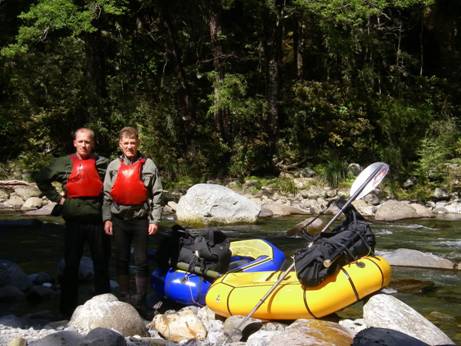
My
Fiord Explorer descending the 'Boulder Rapid' (Grade 3) on the Thomson River.
You
will need a reasonable waterproof liner, and I would recommend a second one
inside the first to contain your sleeping bag and change of clothes. Throw in
all your other ultralight hiking gear (and maybe some fishing gear) you’ll be
going where they’re biting obviously - and maybe a packable rifle, and you are
good to go for quite a different adventure. I use a ‘take-down’ (Browning) BLR
‘Lightning’ .308 myself in ‘take-down’ form, (meaning it ‘breaks’ into two and
can be stowed inside the waterproof pack liner) in my hunting pack. This is great
for keeping the rifle clean and dry. I also carry it stowed like this in my
pack on walks out when carrying a heavy load. I have two shortened hiking poles
(@100 grams ea – they also serve as my tent poles, selfie stick, tripod,
fishing rod, etc) which help enormously with a ‘carry out’ – at least at my
age! They transfer around 40% of the effort from your legs to your upper body,
and mean that you can maintain your balance with ease.
Now
you can walk and paddle to some really inaccessible spots. These are the places
where folks with only 4WDs or motorbikes can’t get. Often they can’t get to
them without several days’ walk (both in and out – or not at all), whereas you
will be getting in and out relatively easily. It might be that you will also
want to combine canoe hunting with a motorcycle carrier so that you can ‘do’
one long section of a river and recover your vehicle when you finish. Something
like this: http://www.theultralighthiker.com/motorbike-hitch-carrier/
but there are many potential ‘loops’ as well where all you will need is your
canoe and your feet.
Of
course I am assuming you already have a fair degree of canoeing skill and
experience. If you do not, I suggest you get it before heading off into the
bush on your own – or with a friend. The three golden rules used to be: don’t
get side on (particularly to a log), lean into rocks (this rule is reversed
with inflatables – as you will quickly find out - splash!), stay on the inside
of bends (avoid overhangs and logs). If there is likely to be a ‘stopper’ (eg a
waterfall), or just anything you are unsure of, get out and walk. This is one
of the beauties of pack rafts; they are so light and portable. An older style
Canadian canoe could easily weigh 35+ kg. Then you maybe put in it 50+kg of
gear. Portaging that becomes a serious problem sometimes. On the trip in you
will have perhaps 15 kg including the pack raft and gun! You may have
considerably more on the way out!
The
‘rule’ about side on/logs etc is because if your canoe fills with water with
you still in it (or you stuck downstream of it), the water can easily weigh
half a tonne – or more! You will not be able to lift yourself out of it, or it
off you – and you will drown, as so many have! If you must cross a lake, go all
the way round within 20 metres of shore. Lakes frequently have large standing
waves which form suddenly and can tip you out. Anyway, you might find yourself
in the lake water far from shore for one reason or another. It may be too far
to swim, or as is often the case lake water is frequently just above zero (from
shading, snow melt etc) just a few inches below the surface. Many folks have
died of hypothermia before they could swim to shore, only 100 metres or so!
‘You live and learn, or you don’t live long’! Lazarus Long, ‘Time Enough for
Love’, Robert Heinlein.
One
of the beauties of raft hunting is that you can move your camp easily, so that
you can check out much more territory. Access to cool water also makes keeping
meat fresh (and clean) easier. You can easily take more food with you as it
won’t be so much work carrying it, and you can catch some fresh fish/crays to
supplement your diet.
Another
advantage is that you can set up semi-permanent camps if you want. It is no big
deal to take a canoe drum in (each) when you go, and to leave it there - so
that some useful equipment is hidden away against future use. There is little
risk that nefarious folk ill find or interfere with it. You might want a larger
shelter, a saw, axe, some comfier folding furniture, some emergency supplies -
& booze!, a quantity of salt, a hammock or two, dynamo radio, etc, etc. A
good idea might be to write your contact details inside the drum lid so that if
anyone should need to use them in an emergency they can contact you to arrange
their replacement.
Happy
Hunting!
Whitewater Rivers of Victoria: A very useful
resource: (of course it is not an exhaustive list, but it might be a good
start): https://www.google.com/maps/d/edit?mid=1KquqzZygh-1toyLq3DTt_ItC-UM&ll=-37.852948477811616%2C146.85638701650396&z=14
See
Also:
http://www.theultralighthiker.com/gippsland-pack-rafting-routes/
http://www.theultralighthiker.com/more-about-diy-pfds/
http://www.theultralighthiker.com/ultralight-pack-rafting-life-vest/
http://www.theultralighthiker.com/dusky-track-canoeing-the-seaforth/
http://www.theultralighthiker.com/tanjil-river-canoe-trip/
http://www.theultralighthiker.com/canoeing-gippslands-rivers/
http://www.theultralighthiker.com/canoeing/
http://www.theultralighthiker.com/canoeing-the-thomson-river-gippsland-victoria/
http://www.theultralighthiker.com/videos/thomson-river-canoe-trip/
http://www.theultralighthiker.com/tanjil-river-canoe-trip/
http://www.theultralighthiker.com/tanjil-river-canoeing-update/
http://www.theultralighthiker.com/canoe-clearing/
http://www.theultralighthiker.com/canoeing-the-macalister/
http://www.theultralighthiker.com/tin-canoes/
http://www.theultralighthiker.com/canoeing-the-macalister-river/
http://www.theultralighthiker.com/canoeing-the-macalister-2/
http://www.theultralighthiker.com/canoeing-the-thompson-river/
http://www.theultralighthiker.com/hornet-lite-pack-raft/
http://www.theultralighthiker.com/klymit-packraft/
http://www.theultralighthiker.com/home-made-pack-raft/
http://www.theultralighthiker.com/faux-packraft-vs-alpacka-raft/
http://www.theultralighthiker.com/pack-raft-saves-the-day/
http://www.theultralighthiker.com/pack-rafts/
http://www.theultralighthiker.com/packraft-video/
http://www.theultralighthiker.com/a-gorilla-in-the-bush/
09/12/2016:
John Glenn who became the first man to
orbit the Earth on February 20, 1962, dies. I remember this like yesterday.
I even had the record once! What a man he was! Talk about ‘the right stuff’!
Hope America (and us) is still making heroes like him! http://www.usatoday.com/story/news/2016/12/08/publish-advance-glenn-obit/95110820/
09/12/2016:
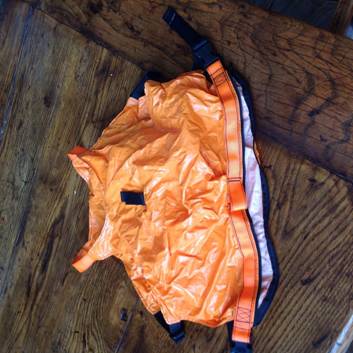
More about DIY PFDs 114 grams: You
can make a lighter non compliant PFD which you fill with other inflatable
items, eg Platypus bottles (I carry a 1 and 2 litre bottle, pillows (I carry
the Exped Ultralight), wine bladders (who doesn’t have a few of them lying
around?) and etc.
Here
is the link to Mountain Laurel Designs ‘Thing’ or ‘Mopacka’: https://web.archive.org/web/20100403230340/http://www.mountainlaureldesigns.com/shop/product_info.php?products_id=141
which weighed 4 oz (114 grams) not including its flotation ie the
Platypus bottles or inflatable pillows (eg Exped’s Ultralight pillow: http://www.theultralighthiker.com/exped-ultralight-pillow/)
but you carry them anyway!
Some
folk have made their own. See these two discussions (I have ‘borrowed’ their
photos for reference purposes – I hope they don’t mind. Thanks guys): http://packrafting.org/forums/viewtopic.php?t=880
Wine bladder PFD: http://bushwalk.com/forum/viewtopic.php?f=37&t=23122
MLD
'Thing'

MLD
‘Thing’
DIY
‘Thing’
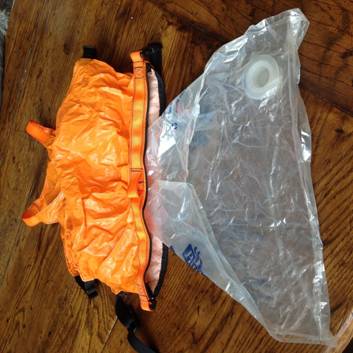
DIY
‘Thing’
DIY
‘Thing’
DIY
‘Thing’
NB:
There is a Facebook Packrafting group: https://www.facebook.com/groups/156445288089260/ as well as
an Australian Packrafting Association for folks who like to join things.
Myself, I am like Groucho Marx: ‘I wouldn’t join anything which would have me
as a member’!
09/12/2016:
The Do’s and Don’ts of Memory Cards:
Tips for Photographers: Some great tips here. Another you may not know. You
can recover ‘lost’ photos from a memory card. There are a number of programmes
which will do this. I have used (them) with success. Just Google ‘memory card
recover’: http://petapixel.com/2016/12/07/dos-donts-memory-cards-tips-photographers/

07/08/12/2016:
Ultralight Pack Rafting Life Vest: PFDs are often pretty
heavy. Alpacka have this one http://www.alpackaraft.com/product/astral-v-eight-pfd/
at
554 grams which is (I imagine) about as light as they get. I discovered that
inflatable PFDs you buy from boating supplies shops have an airline PFD inside
them. When I stripped one down it weighed 282 grams as shown and should be
adequate for the job.
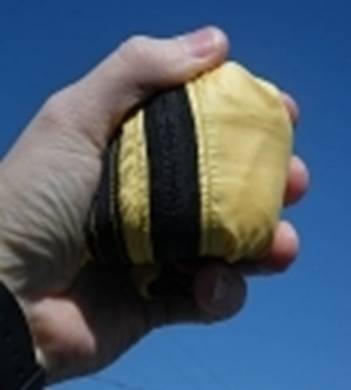
You can (though not
legally) go lighter. You can utilise an inflatable vest such as the Aerovest or
Xerovest (at about 60 grams) as I did on the Seaforth. They are a bit awkward
to let down again and are really not intended for the purpose.
As I have mentioned before
Erin McKittrick (in her ‘Long Trek Home’: http://www.groundtruthtrekking.org/Journeys/WildCoast.html)
used a converted Thermarest which she had cut a hole in for her head, and
fastened it with a belt. Given thet you will need a sleeping mat anyway, this
option means that your PFD maybe weighs next to nothing. You should explore
this option further if you want to save more weight. The prospect of cutting
down one of eg Klymit’s pads for the purpose but keeping it usable for sleeping
also appeals.
Mountain Laurel Designs
used to make a thing he called ‘The Thing’ which allowed you to utilise your
Platypus bottle as part of a PFD system.
I suspect Alpacka’s ‘Fiord
Explorer’ & etc seats could be
modifiedf slightly to make a light (non-compliant) PFD. They weigh 224 grams
without the straps and buckles which would be needed, so it might not be worth
the trouble compared with the first example.
Another option would be to
buy some of the waterproof nylon which Klymit etc use in their products which
sticks to itelf with a hot iron - and make your own.
See
Also:
http://www.theultralighthiker.com/gippsland-pack-rafting-routes/
http://www.theultralighthiker.com/dusky-track-canoeing-the-seaforth/
http://www.theultralighthiker.com/tanjil-river-canoe-trip/
http://www.theultralighthiker.com/canoeing-gippslands-rivers/
http://www.theultralighthiker.com/canoeing/
http://www.theultralighthiker.com/canoeing-the-thomson-river-gippsland-victoria/
http://www.theultralighthiker.com/videos/thomson-river-canoe-trip/
http://www.theultralighthiker.com/tanjil-river-canoe-trip/
http://www.theultralighthiker.com/tanjil-river-canoeing-update/
http://www.theultralighthiker.com/canoe-clearing/
http://www.theultralighthiker.com/canoeing-the-macalister/
http://www.theultralighthiker.com/tin-canoes/
http://www.theultralighthiker.com/canoeing-the-macalister-river/
http://www.theultralighthiker.com/canoeing-the-macalister-2/
http://www.theultralighthiker.com/canoeing-the-thompson-river/
http://www.theultralighthiker.com/hornet-lite-pack-raft/
http://www.theultralighthiker.com/klymit-packraft/
http://www.theultralighthiker.com/home-made-pack-raft/
http://www.theultralighthiker.com/faux-packraft-vs-alpacka-raft/
http://www.theultralighthiker.com/pack-raft-saves-the-day/
http://www.theultralighthiker.com/pack-rafts/
http://www.theultralighthiker.com/packraft-video/
http://www.theultralighthiker.com/a-gorilla-in-the-bush/
08/12/2016:
Do you need a good wind up watch: https://www.kickstarter.com/projects/2050848594/redefining-italian-luxury-watches-filippo-loreti?ref=ewr9sx&utm_source=facebook&utm_medium=desktop&utm_campaign=KS&utm_content=AU_Look4-6
07/12/2016:
Gippsland Pack Rafting Routes:
It’s
summer already, so time to get out and about and get wet all over. I want to
suggest some interesting pack rafting that you can do by public transport (eg
from Melbourne).
Some of the following you can mix and match a bit, but I hope they give you
some ideas. I need to add some more details, which I will fill in later on but
this will be a good start. I need to work out times (river/track) campsites,
water and resupply points.
- Obviously the easiest trip
is to begin with the Yarra. It is canoeable from MacMahon's Creek upstream
from Warburton (public transport, walking). It is almost 24 hours of
paddling before you arrive back at Flinders St, so this is likely to take
you at least 4 days! Or,
- You can catch public
transport to Warburton (or to Lilydale) then begin walking the Upper Yarra
Track (See: http://www.finnsheep.com/Track%20Instructions.htm)
You can continue on it until you reach Rawson (resupply - some supplies
also at Baw Baw Village) and the nearby Poverty Point Bridge, then canoe
the Thomson River until you reach the Cowwarr Weir. NB You will have to
walk around the Horseshoe Tunnel just below the Thomson River Road Bridge
(See: http://www.theultralighthiker.com/upper-yarra-track-sidetrip-horseshoe-tunnelcoopers-creek/)
You can carry on with the Thomson to Sale or you can walk back from
Cowwarr (resupply) till you are just out of Traralgon where you cross the
Latrobe River. Put in there and drift down via Rosedale (resupply) to Sale. Catch a train
back to Melbourne.
 Thomson River Horseshoe Tunnel.
- Catch a bus to Noojee
(weekdays - supplies), then canoe the Latrobe river all the way to Sale. (Supplies
Noojee, [Willow Grove], Yallourn North, Rosedale)
Catch a train back, or
- For a shorter trip, you
could canoe from Noojee to the Yallourn Power Station - exit the bridge
across the Eastern end of Halls Bay, Lake
Narracan or Sir John
Monash Reserve opposite the cooling towers. Walk back along the
Moe-Yallourn North Rail Trail (See 4). I suspect you can put in uptream of
Noojee (so that you could access the river via a shortcut from the Upper
Yarra Track not long after Starlings Gap - this requires exploration). The
section from the Noojee Road Bridge/Toorongo River confluence has been
checked: (though you should be able to put in at Noojee township); there
are a number of spots where you will have to get out. If canoeists bring
along some clearing tools (See: http://www.theultralighthiker.com/canoe-clearing/)
the trip/s will become easier for subsequent 'adventurers'. There are many
lovely spots where you can camp. Trout and spinyback crayfish abound - so
bring some tackle! I estimate 2-3 days Noojee-Yallourn Power Station.
Train Back from Moe, or
- You can catch a train to
Moe, walk out along the Yallourn North Rail Trail (http://www.theultralighthiker.com/upper-yarra-track-update-section-one-moe-yallourn-rail-trail/),
put in to the Latrobe near the Yallourn Power Station and canoe to Sale. There is a weir
to negotiate shortly after the Yallourn
North Road bridge. You can see it from the
road. Train return, or
- You can catch a train to
Moe, walk up the Upper Yarra Track sections (See 3) until you reach the
Thomson Bridge, (supplies Yallourn North, Erica, Cowwarr) canoe the
Thomson, walk back along the rail trail from Cowarrr to Traralgon. Catch a
train back.
 Tom's
Bridge Latrobe River.
Tom's
Bridge Latrobe River.
- Arriving at Noojee
(supplies) whether by public transport or on foot via the Upper Yarra
Track & etc, put in and canoe down the Latrobe River
to Camp Rd
near Hill End. Walk up Russell
Creek Rd &/or Rowley Hill Rd (or hitch to Costin’s
Rd). Canoe down some of the Tanjil River (eg to Old Tanjil Rd) then walk
up to the Western Tyers via Burns Rd & eg Wombat Rd & Tanjil Bren
Rd. You can put in at Christmas Creek or Growlers. Canoe down the Tyers to
Caringal. Walk across to the Thomson via Erica (supplies) as in 7 or
continue on to the Latrobe and Sale
(Resupply Tyers, Rosedale).
 Tanjil River downstream Rowleys Hill Road.
- Walk across from Noojee to
the Western Tyers via Tanjil Bren (See:
Upper Yarra Track winter route in Track Instructions above). You can
continue on the Tyers till you reach the Latrobe and follow it to Sale OR
- You can get out at Tyers
Junction (Caringal) and walk up the rail trail to Collins Siding and
thence to Erica. You can continue to follow the rail trail http://www.theultralighthiker.com/upper-yarra-track-section-five-erica-to-walhalla/
to the Thomson
Road Bridge,
then canoe the Thomson as in 1.
 Western Tyers River.
- Interrupt your voyage down
the Thomson at Deep Creek which you can walk up (see 9 following) or canoe
to the Weir, cross it North on the old wooden bridge, follow the road
North till you turn left at the intersection with the Stoney Creek Rd.
Walk up the Stoney Creek Rd.
When you get to the T10 track, no longer marked – it is opposite a fire
dam on the right hand (East) side of the road, you can either continue on
to Binns intersection with the McEvoys track (also called Springs Rd) or
- You can walk down the T10
till you reach Deep Creek and walk all the way up Deep Creek till it
splits in two. Just where it splits, if you walk up the left (West) fork
about twenty yards you will find you can walk up the ridge to your right.
You can follow this ridge (on an overgrown logging track after a while)
all the way to Binns. The walk up Deep Creek is extraordinarily beautiful.
It is quite a lot of bush bashing, but worth it. There are some flat camp
sites here and there at the end of ridges. After Binns you can carry on up
and over Mt Useful until you arrive in Licola (resupply) or
- Cross the Glenmaggie Creek
at (eg) Porters Track to the Black
Range Rd. Go up the Black Range Rd to Burgoynes Track,
follow it to the Macalister. Canoe down the Macalister till you get to Sale (resupply
Maffra).
 Macalister River
upstream Cheynes
Bridge.
Macalister River
upstream Cheynes
Bridge.
- If you continued on towards
Licola along South Road you can turn East and walk down to the
Barkly/Macalister (Primrose Gap - off the Jamieson Rd) at the Barkly
Bridge North of Glencairn then canoe down the Macalister to Licola where
you can continue on till you come to Sale , or
- You can get out at Licola
and walk up to the Wellington
as in 13
- Instead of continuing on
the Macalister, get out at Cheyne’s Bridge and hitch a ride past Licola
(resupply) to the Wellington
River. Walk up the Wellington past LakeTali Karng and continue till you come out on the Moroka
Rd. Turn west onto the Moroka
Rd. After a few km you can pick up the Moroka
Walking track which takes you down to the Moroka River
near Higgins yards. You can put in here and follow the Moroka to its
confluence with the Wonnangatta, or
 Moroka Falls
- You could walk to the Moroka Bridge near Horseyard Flat and
canoe the Moroka down to the Wonnagatta, thence to Bairnsdale. The huge
waterfalls and gorge in the Moroka are very dangerous!
- Instead of starting at the Tali Karng car park on the Wellington, you could hitch all
the way either to the Moroka Bridge near Horseyard Flat (12) then canoe
down the Moroka or
- You could hitch up the Howitt Rd to
near Guy’s Hut, then walk down the Dry Creek track to the Wonnangatta.
Carry on walking down the Wonnangatta till you come to the Humffray
Confluence whence you can canoe the river all the way to Bairnsdale as in
17.
 Wonnangatta River Mt Darling Creek.
- From the Wonnangatta
confluence you can continue all the way to Bairnsdale where you can catch
a train back to Melbourne.
Resupply Guy’s Caravan Park, (Waterford)
by arrangement & Lindenow (or hitch into Dargo and back.)
 Wonnangatta River.
- Alternatively you can walk
up the Wonnagatta from the Moroka to the Humffray Confluence following the
true right bank (there is an old pack track). Put in there and canoe down
to Bairnsdale.
 Mitchell/Wonnagatta
River downstream of Waterford
Mitchell/Wonnagatta
River downstream of Waterford
- PS; If you walk the Upper
Yarra Track (Warburton to Mt Whitelaw) then the Alp Track to near Woods
Point, you can pick up McMillans Walking Track which gives you access to
the head of the Macalister (downstream of Glencairn), the Moroka (near
Higgins Yards), the Wonnagatta (Moroka confluence).
- PS: Massdrop has the Klymit
Lightwater Pack raft (<1kg) on sale again for around $US100. With care
(and a little repair it will get you lots of places or you can go the
whole hog and buy an Alpacka here: http://www.alpackaraft.com/ Their lightest
raft is the ‘Ghost’ Scout at 600 grams! But you might be better with the
Alpacka at 2166 grams. I also have one of these. I have the Manta Ray
Carbon paddle at 840 grams. It is a very tough paddle You will find the
lightest paddles here: http://www.theultralighthiker.com/ultralight-paddle/
- Have fun and Happy
Paddling!
- PS: Don't forget to take
some fishing tackle. Some hand line is really all you need to catch
blackfish and trout (using set lines on whippy saplings if you like) You
can use the heads etc as bait for crays. A folding landing net would be an
asset (and some Alfoil!)
- I'm sure readers can help
me with some of extra information, as well as suggesting some
additional/alternative routes - I know you can get to Hotham and Omeo by
bus, for example This gives one walking access to the Mitta Mitta
(canoeable downstream from above the Glen Valley Bridge) Resupply
Dartmouth. Mitta Mitta. Train back from Albuty. You could walk up along
the Alps Track from Mt Whitelaw to reach Woods Point (supplies) which
might begin a journey for you down the Goulburn (public transport back
from Shepparton/Seymour) & etc Getting onto the Snowy would also be
good. I will think about that some more...
- The Snowy:
You may not know there is public transport to Bombala from
Melbourne/Canberra: https://www.ptv.vic.gov.au/timetables/linemain/1718
The Snowy is canoeable from Cambalong
Road 6km West of Bombala. (Ask: the bus
driver may let you off at the Cann
River turnoff saving
you a few miles walk). You will need plenty of food! It is almost two
weeks from here to Orbost…Also, note: The bus stops at the Bemm River turnoff. This means you can
walk ‘The Wilderness
Coast’ (19 days) using public
transport! A packraft ewould help with getting across some of the inlets
along the way!
- Top Photo; Latrobe River
near Noojee Road Bridge.
28. See Also:
http://www.theultralighthiker.com/dusky-track-canoeing-the-seaforth/
http://www.theultralighthiker.com/tanjil-river-canoe-trip/
http://www.theultralighthiker.com/canoeing-gippslands-rivers/
http://www.theultralighthiker.com/canoeing/
http://www.theultralighthiker.com/canoeing-the-thomson-river-gippsland-victoria/
http://www.theultralighthiker.com/videos/thomson-river-canoe-trip/
http://www.theultralighthiker.com/tanjil-river-canoe-trip/
http://www.theultralighthiker.com/tanjil-river-canoeing-update/
http://www.theultralighthiker.com/canoe-clearing/
http://www.theultralighthiker.com/canoeing-the-macalister/
http://www.theultralighthiker.com/tin-canoes/
http://www.theultralighthiker.com/canoeing-the-macalister-river/
http://www.theultralighthiker.com/canoeing-the-macalister-2/
http://www.theultralighthiker.com/canoeing-the-thompson-river/
http://www.theultralighthiker.com/hornet-lite-pack-raft/
http://www.theultralighthiker.com/klymit-packraft/
http://www.theultralighthiker.com/home-made-pack-raft/
http://www.theultralighthiker.com/faux-packraft-vs-alpacka-raft/
http://www.theultralighthiker.com/pack-raft-saves-the-day/
http://www.theultralighthiker.com/pack-rafts/
http://www.theultralighthiker.com/packraft-video/
http://www.theultralighthiker.com/a-gorilla-in-the-bush/
06/12/2016:
A Birthday Treat: Mirboo North Railtrail: As one of us was a
year older, we took the day off for a leisurely stroll on this lovely nearby
walking/riding track which stretches between the delightful Gippsland towns of
Boolarra and Mirboo North.
You
can park your car at the beginning of the trail between the Brewery and the
Recreation Reserve in Mirboo North or at Railway Park,
Boolarra opposite the Post Office and General Store. Beginning in Boolarra in
the morning (after a coffee) means you can stop for lunch in Mirboo North, then
walk back downhill refreshed. There are many food establishments in the main
street; the hotel also has excellent counter meals. You can finish the day with
a meal at one of several venues in Boolarra or at the excellent nearby Yinnar
Community hotel – the only community owned hotel in Victoria!
Plenty
of tucker:
There
are many other interesting shops in Mirboo North including this one, The Wren’s
Nest: 
We
are off!
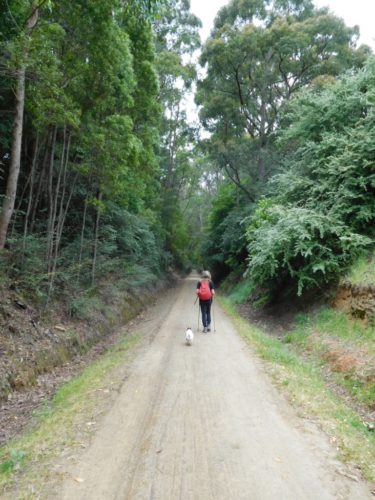
You
must:
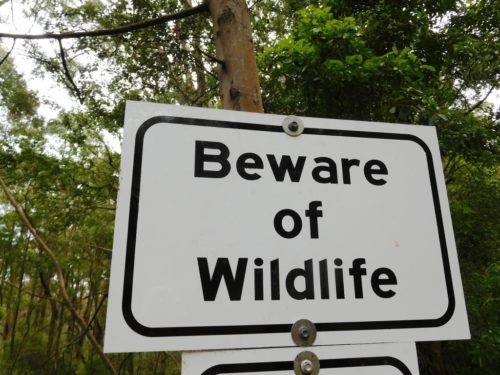
Plenty
of park benches and seats along the way for your dogs:
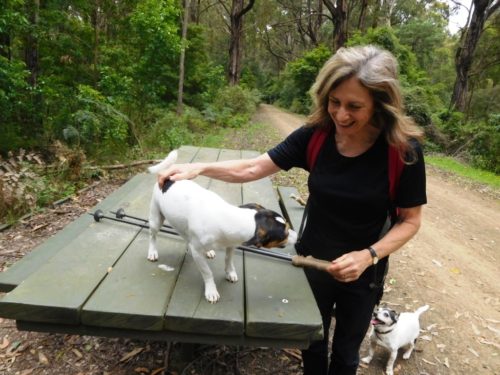
Lots
of lovely wildflowers;
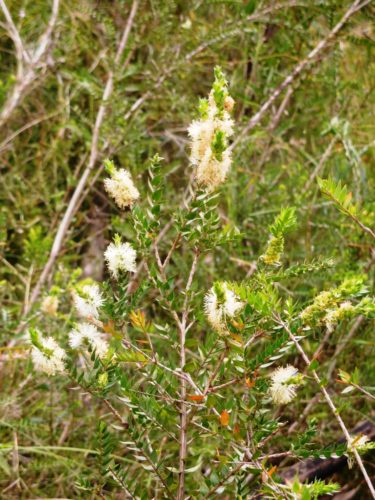
And
other interesting things. Amazing what you could make out of bricks. Note the
lovely fresh water approx 2 km from Mirboo North
: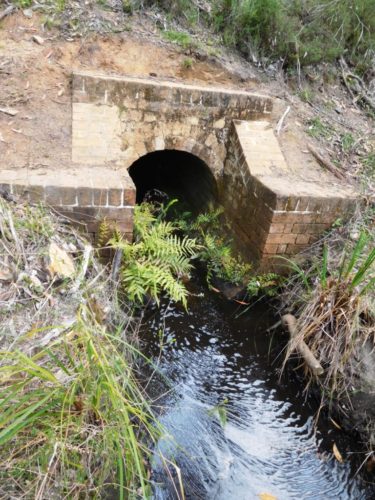
Interesting
(possibly luminous - some are) bracket fungi: 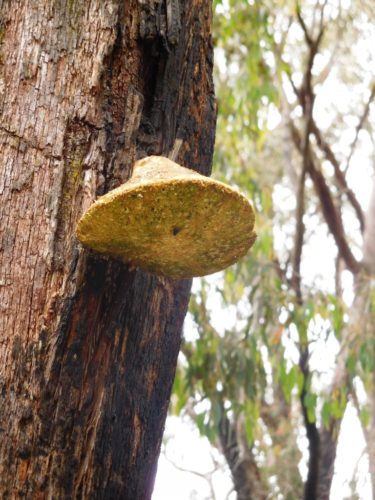
More
wildflowers:
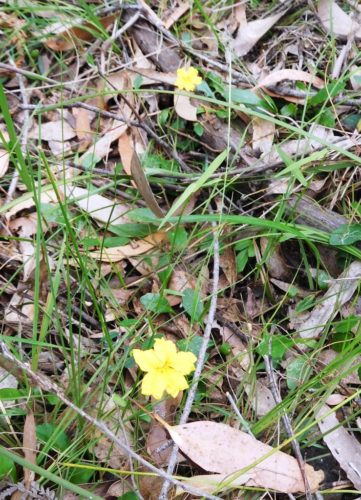
More
interesting brickwork. Tiny enjoying herself:
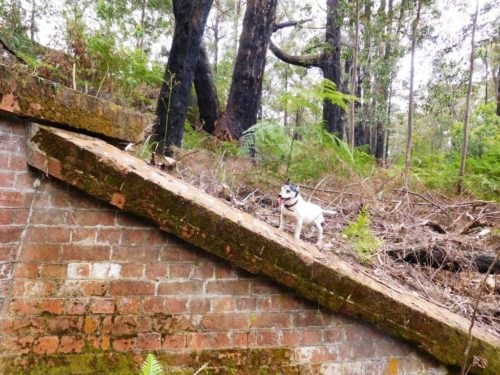
Della
and Spot exploring an underground tunnel:
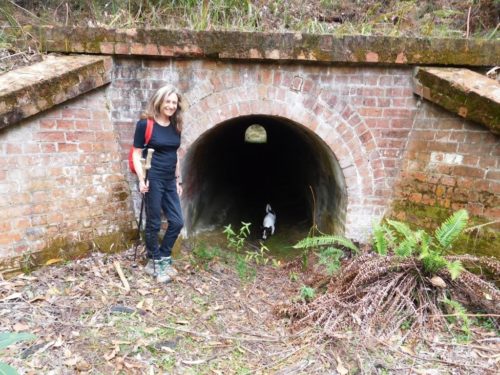
Tea
trees can put on a fine display:
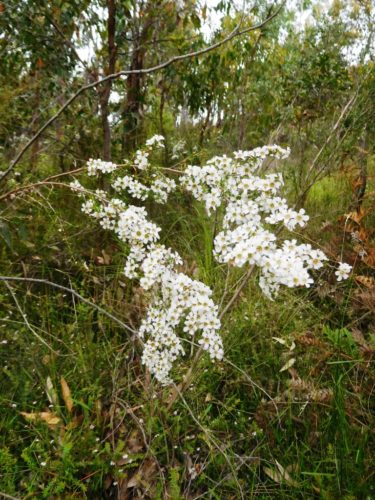
Spot
admired these lovely blue lilies:
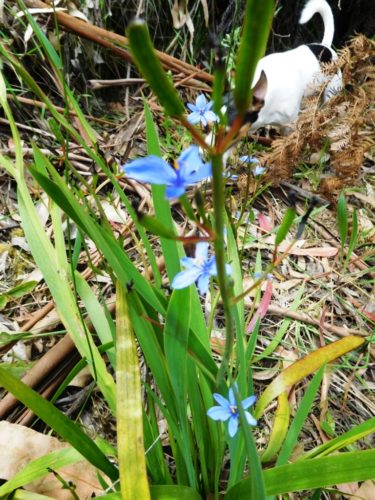
A
lovely trail:
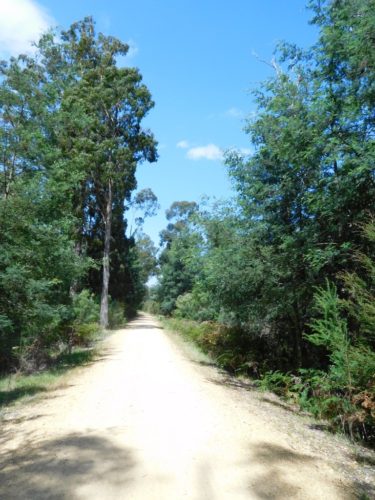
This
is the deadliest plant in Australia:
the Dogwood. So many people are allergic to these blooms. We used to call them
'wild sago' in NSW when I was a boy:

You
can rest a minute at lots of pleasant spots along the way. Spot doesn't want
to: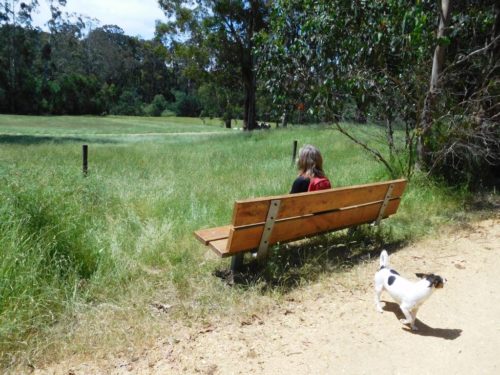
There
are two interesting bridges like this across clear flowing streams where you
could camp:
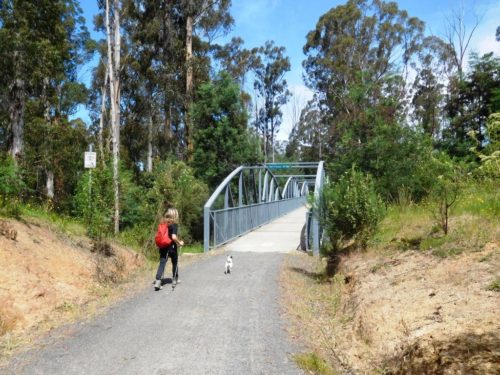
A
lovely campsite:
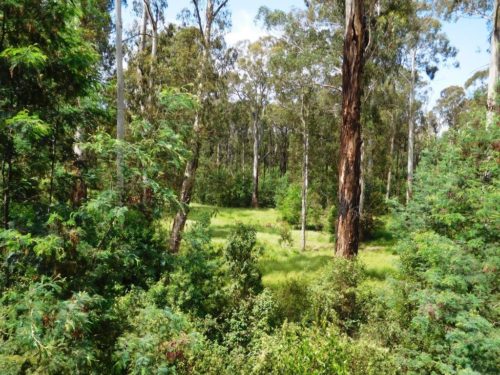
It
was a warm day. The dogs became thirsty:
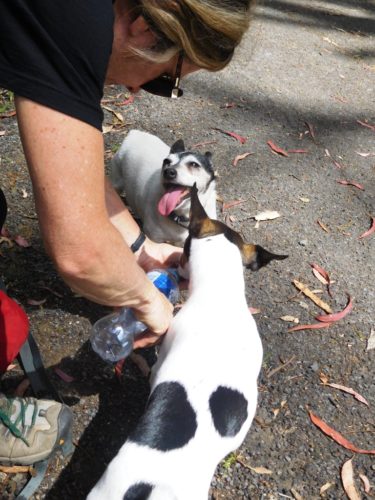
Some
fine timber;
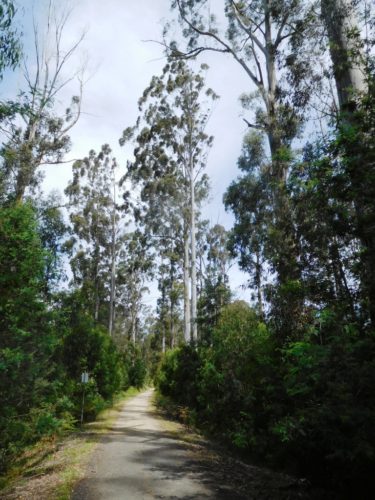
An
excellent stand:
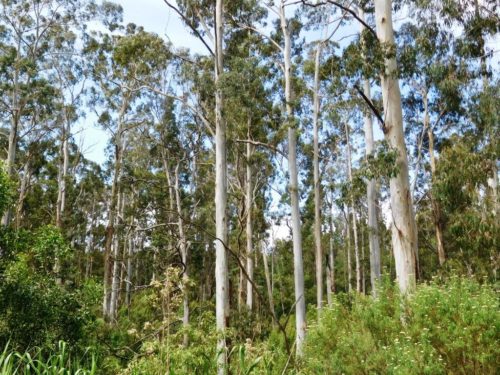
More
interesting brickwork:
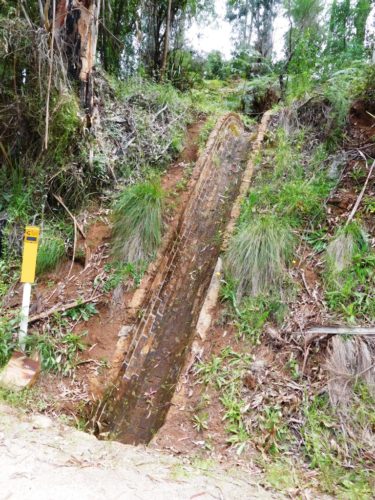
Coming
in to Boolarra (about 1 1/2 km out):
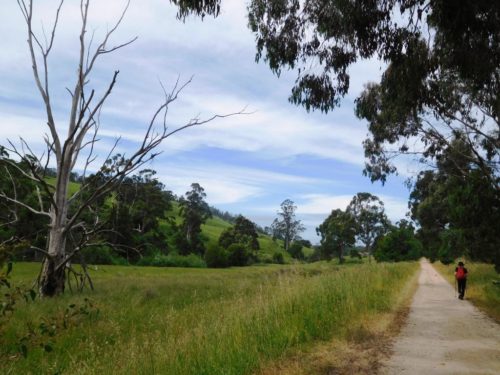
You
start and end each of the trail with a beautiful park: Railway Park
in Boolarra. And Baromi park in Mirboo North. Both are delightful spots to
stop, rest and refresh. Both have nearby food establishments: the Bollarra
General Store at one end and quite a number in Mirboo North including this
wonderful bakery and this café to name just two.
Along
the way every 3-4 km you can find good sources of fresh water and pleasant
campsites off the track a bit. Of course in Australia (as elsewhere) all that
is not compulsory is verboten; you should naturally ignore this. Maybe you are
considering adding this lovely trail to perhaps a walking tour of South
Gippsland including Mt Worth State park, the Grand Ridge Road (to Mirboo
North), the Mirboo North Rail trail, The River Road Boolarra, maybe parts of
the Grand Strzelecki Track, Tarra-Bulga National Parks, Great Southern Trail
and Tarra Trail, Bass Coast Rail Trail, Old Port Trail, Wilsons Prom, http://www.visitvictoria.com/Regions/Gippsland/Things-to-do/Outdoor-activities/Walking-and-hiking/South-Gippsland
, & etc...
The
trail is about 13km. It takes approx 2 ½-31/2 hours on foot, or as I said at
the beginning you can make a delightful day of it.
PS;
The photos show the trail beginning at Mirboo North and ending in Boolarra.
04/12/2016: Welcome Swallows: Something terrible happened to ‘our’ swallows
this year; though they arrive back like clockwork (as I have often observed:
See below) only less than half returned. I watched and waited for their
brethren but they were lost! Some calamity has befallen them. Naturally one
thinks first of human predation as there are so many folk (here) who resent the
mess they make on their walls, whilst dismissing all the good they do in their
gardens! However, I suspect some natural calamity is a more likely scenario.
The failure of an important food source due to seriously inclement weather is
much more likely. There has been a huge ‘cold blob’ formed in the Northern
Pacific (which many view as a presage of a return of ‘The Little ice Age’ – we
shall see) but it might well have affected the bloom of midges, mosquitoes, etc
which they would otherwise have gone North to feed and fatten on, so that many
may have starved…it is a simple, yet poignant tragedy. Hopefully they have just
not had the energy to make it all the way back and we shall see them again next
year. Thankfully (due to my hearing aids) I am delighting in their singing on
the verandah this morning. See eg: ‘17/08/2014: At last, the swallows are back
scything the air into long swift arcs as they herd the mayflies and mozzies
into their sharp beaks: there is nothing quite like a (mud-brick) verandah they
opine anywhere between here and Siberia to
build a messy nest. I used to hear their sharp shrill calls to each other as
they raced across the sky, but like the bats (to me at least) they have fallen
silent. Fortunately (at least) we both still have eyes to follow their
progress…’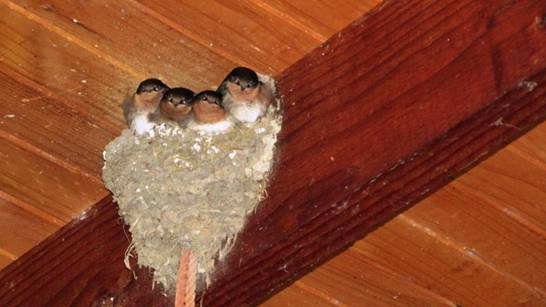
03/12/2016: That Endless Skyway: Everest Base Camp Trek
#7:
We had a programmed ‘acclimatisation
day’ at Namche and another at Dingboche. Tully had decided we would use these
days to climb up to the next 500 metre ‘step’ and then descend again to sleep.
This proved to be a good preventative for altitude sickness as was taking half
a Diamox twice a day starting on the morning you are to leave Kathmandu. An
acclimatisation day spent wandering the hills around Lukla is also a good idea.
Some views of the Namche ‘Skyway’:

Leaving Namche
Walking ‘across the top’ to the
‘Everest View’ Hotel:
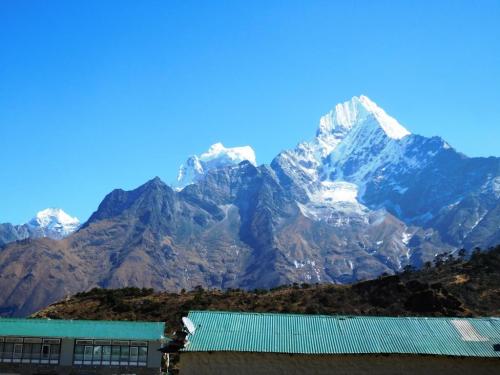
A number of trekkers told me that
the track up from Jiri to Lukla is the best and most beautiful part of the
trail and that there are very few people on it. What a bonus! I suspect this is
true. If I had my time again I would probably have walked from Jiri and flown
out from Lukla, but after fighting with this terrible lung infection for a
month now I doubt I will be eager to retrace my footsteps in Nepal!

Gazing up the valley towards Everest
(right of centre).

Everest View.
Thus we ascended from Namche to the
eponymous ‘Everest View’ Hotel, (a facsimile of Douglas Adams’ ‘The Hotel at
the End of the Universe’ – and peopled identically!), then circled back through
the prosperous potato towns of Khumjung and Kunde. ‘Green Towns’ a Sherpa told
me, presumably because of the ‘Colorbond’ rooves. In Khumjung we sampled our
first ‘Garlic Soup’ and found it good!
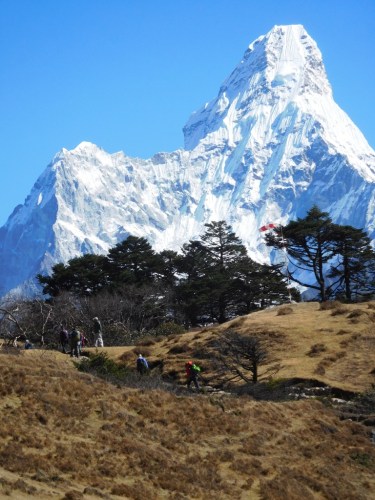
Another view ‘across the top’ to the
‘Everest View’ Hotel.

View up the valley from the ‘Everest
View’ Hotel. Tengboche is atop that green hill centre.
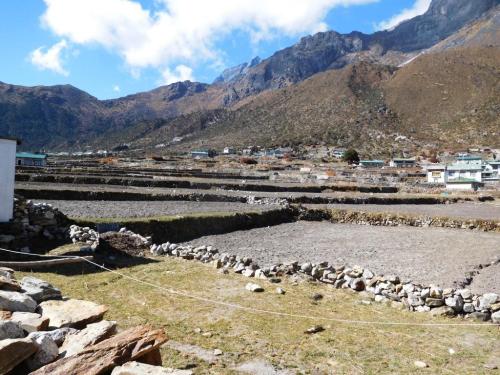
Khumjung – a ‘Green Town’.
Interesting stone building outside
the ‘Hilary School. Netball seems enormously
popular.
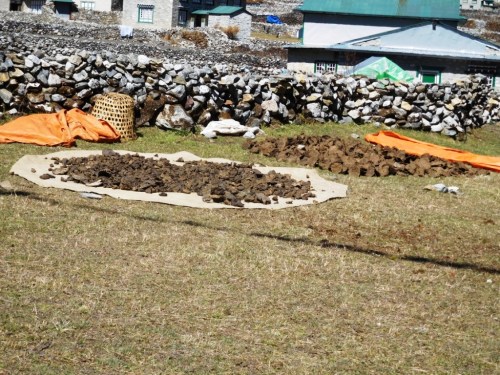
The practice of burning (yak) dung
must deplete the nutrients of their fields.
The eponymous ‘garlic Soup’,
Khumjung version. Cafe opposite the ‘Hilary
School’.
Someone (I will not mention who!)
took a wrong turn at Syanboche on the descent (the turn-off being temporarily
obscured by a camel, fit of coughing, lapse of intelligence, or etc) and ended
up nearly all the way to Thame before he found a cattle pad or game trail which
would allow him to descend into Namche just on dusk. A good thing he has
well-honed wilderness skills!
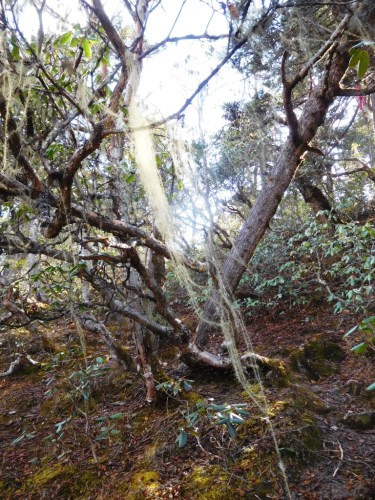
Coming down from Kunde there was
some attractive vegetation.
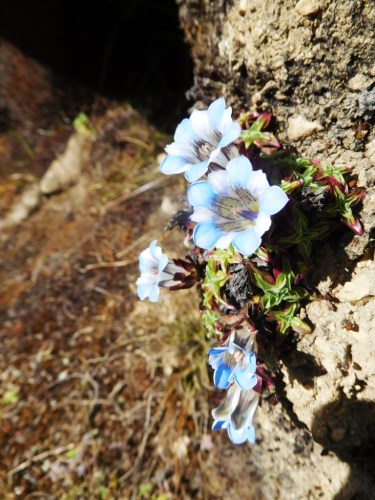
Even some pretty flowers.
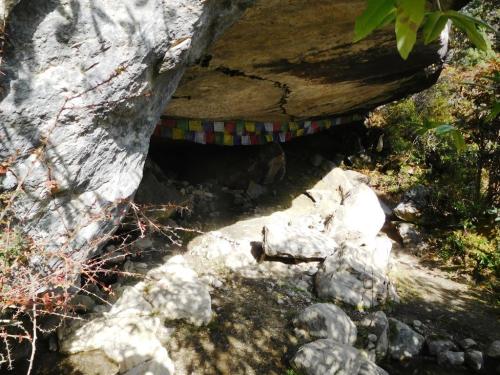
Porters have to bear some pretty
primitive accommodation – this cave on the road from Thame to Namche.
A guide or porter might help prevent
such mishaps, but I encountered many such with zero English language skills.
Too often they rushed ahead of their ‘guests’ forcing the pace dangerously in
the low oxygen environment. In my experience they were almost universally
completely unable to understand or answer any question in English, though I
asked many.
For example, I was curious (at the
higher altitudes) to learn when the Sherpa first ventured there – as there were
no abandoned ruins at higher points which might indicate they had colonised
them during the medieval warm period. None knew – or understood! Those who
forget their past are destined to repeat it! The answer is clearly that they
have only inhabited these regions relatively recently- ie the last 500 years or
so
On my ‘trail of tears’ pneumonic
return journey I staggered along with a middle aged Norwegian nurse (Lise) for
two days. She had been abandoned by her entire party, including her personal
guide and two porters. She was nearly as sick as I (or sicker) and also had
limited English skills, but we were thankfully able to help each other, despite
her being an avowed feminist (to which I replied, ‘How sad’) and my being, as
I’m sure you know, a shocking misogynist who would never help a woman!
However I grew up with the tradition
of the ‘Birkenhead’ to inspire me. There was
so much that was great about the old Empire. Nepal
(and Tibet)
must sorely regret they rejected it when they once had the opportunity to
welcome its blessings with open arms!
If you do not have years of
wilderness experience such as I do, you might be better to venture out with a
group, guides, porters etc. I prefer the dignity of carrying all my own gear –
and being self-sufficient no matter what happens to me. So, for example, I
carried my Delorme Inreach SE PLB http://www.theultralighthiker.com/the-poor-mans-satellite-phone/
whilst Tully carried my Sat Phone – in case of real emergencies, and if we were
separated. Sound practice – as it turned out! I had my Escape Bivy and My
Thermorest Neoair Women’s mat, my re-engineered sleeping bag (good to -30C http://www.theultralighthiker.com/adding-down-to-a-sleeping-bag/),
and lots of warm Montbell clothes (http://www.theultralighthiker.com/?s=montbell
in case I had accidentally to spend a night stuck high in the snowy passes.
I even had with me my trusty Vango
450 ml cup, a titanium windscreen and an 11 gram Esbit stove in case I wanted a
hot cup of Mocca on some icy mountaintop! I also had a second (and third)
tranche of antibiotics in case the first (Cipro) did no good – it got me back!
The second and third are yet doing battle with this dreadful lurgi. I still
have no idea whether I will survive it. Some days it has the upper hand, other
days I forge ahead of it. Five crises so far! Life is ever a race to the grave
which you one day lose.
I am a pessimist by preparation, not
by nature. I know that the larger parties were not nearly so well prepared,
which would mean only that people would die en masse (as they did on the
Annapurna circuit a couple of years back http://www.theultralighthiker.com/survival-shelter/)
rather than alone – or not at all.
It is akin to the spurious ’safety’
such folks feel in crowds – vowing eg that cities are safer than the
wilderness, imagining ‘Wolf Creek/Deliverance’ dangers lurking behind every
rock, whilst ignoring the nuclear missiles aimed squarely at their cherished
megapolises! Strangely though, such folks had porters to carry their gear,
nonetheless they all had day packs clearly weighing more than my pack – which
contained all my gear. Their sheer superfluity overwhelms my sense of wonder at
their vapidity
I was appalled at how some
(foreigners) treated their ‘servants’. Often I witnessed folks making what I
(having grown up in an egalitarian culture) considered outrageous demands of
them. For example, one person waited until his guide sat down to his own meal
before demanding a bottle of water (which was in his own reach in his pack
pocket). The Sherpa patiently rose and fetched it for him. When he was seated
once more, his ‘master’ then demanded that he open it! The Sherpa once more
patiently rose and did so. I fear one day the Sherpas may rise against such
treatment in greater earnest; some of them at least are Ghurkas, remember. They
appear to be the most pleasant and friendly people imaginable though.
We stayed in Namche for three days
altogether, two on the way up; one on the way back. We found the Shangri La
Lodge (just off to the East of the main street a block above the pharmacies)
quite pleasant and the food good. A lot of local people ate there – which is no
doubt a good sign!
The rooms were clean and comfy, a
toilet close by – and a welcome hot shower downstairs.
Warm dining room.
This business in Namche (there are
dozens of shops) was really good at fixing phones/photographic equipment etc,
else I would not have been able to contact my wife (to arrange my rescue for
example!).
After Namche you follow the river
high on its true right bank the first few hours past a monument to Tensing, one
of the first two men on top of Everest – at least if Mallory and Irvine’s
camera never emerges from the ice atop the mountain. (Interestingly the Sherpas
had not yet been enlisted into mountain climbing in the 1920s when Mallory
perhaps stood on Everest).
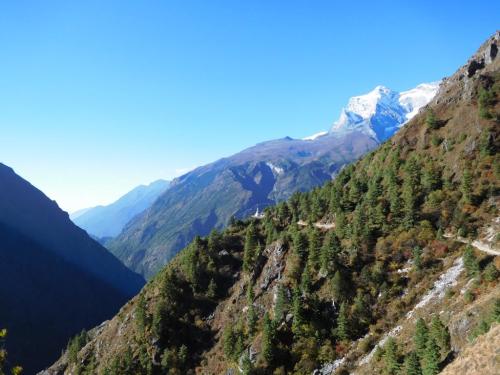
Looking back down the valley towards
Namche hidden behind Tensing’s chorten behind the hill (right)
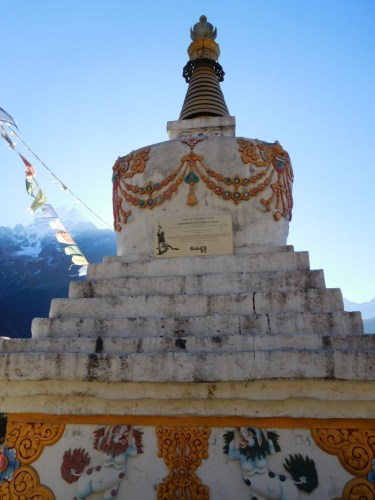
Tensing’s chorten.
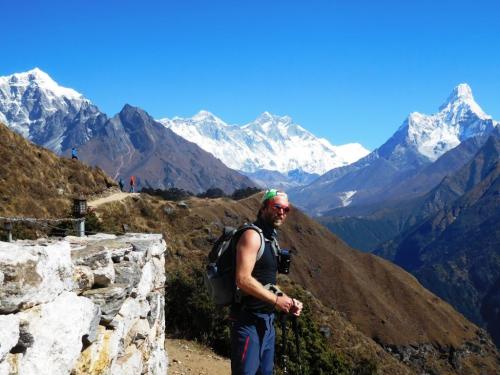
View up the river from Tensing’s
chorten. Tully posing.
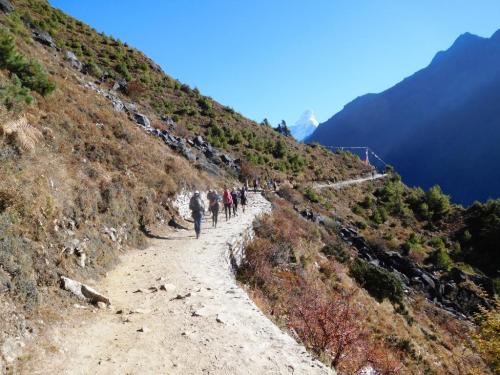
Crowds of folk flowing towards
Everest.
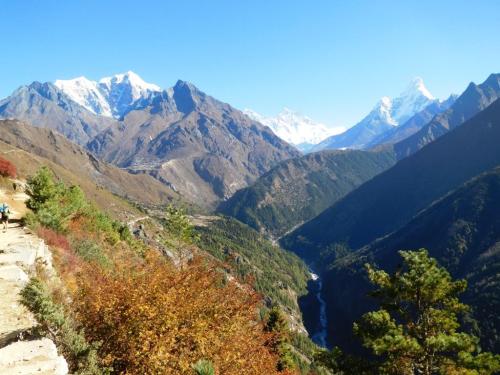
View up the river. Tengboche is atop
the green ‘hill’ centre.
The track goes along on the level
for quite a distance, this section well maintained by the collections of an old
man who has climbed Everest five times. You descend 300 metres to yet another
river crossing sheltering a pleasant little town complete with its ubiquitous
military outpost. (You soon get used to the level of fascism in Nepal – no
doubt so long as you are not a member of the Royal Family or such it should cause
no disquiet!) We enjoyed a pleasant lunch at a café just before the bridge.
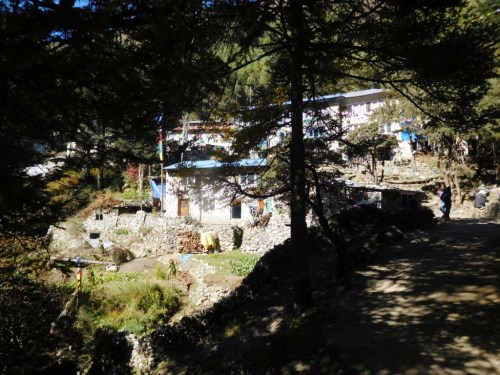
Some lovely villages along the way.
Each has its tea house/s and gift shops.
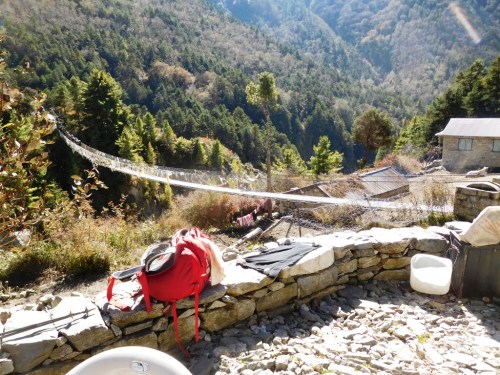
Lunch at the bridge.
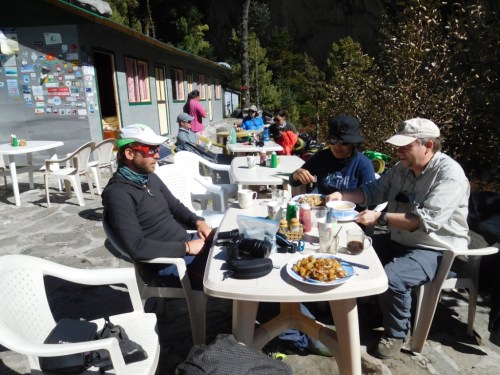
As you can see i am having the
‘Vegetable fried Potatoes’ We stuck to vegetarian food after Pangboche – no
fresh meat.
There follows a long (but pleasant)
climb up a beautifully wooded hill complete with delightful skyline views to
the monastic town of Tengboche – where you used to be able to fondle a Yeti’s
skull – till someone stole it! Tengboche has a tasty bakery where you can enjoy
a delightful lunch complete with views of frozen waterfalls on the surrounding
hills & etc. We had afternoon teas here: biscuits, doughnuts, buttered
sweet rolls, etc and of course the ubiquitous lemon tea.
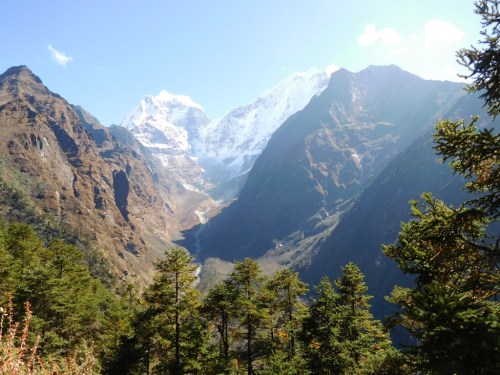
View to the east as you climb the
Tengboche hill.
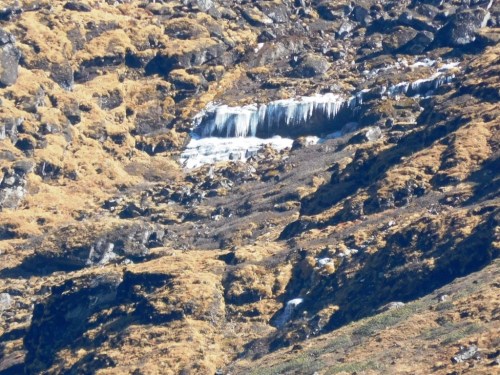
You can ogle frozen waterfalls as
you sip your latte and devour your croissants – who could ask for more?
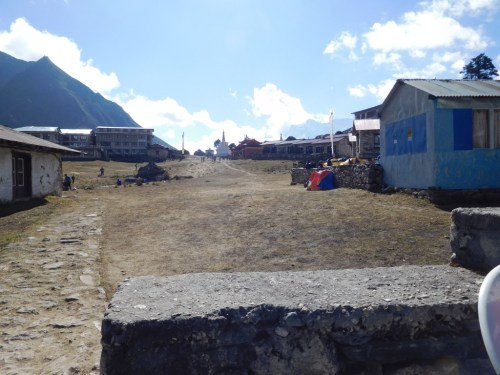
Main Street Tengboche.
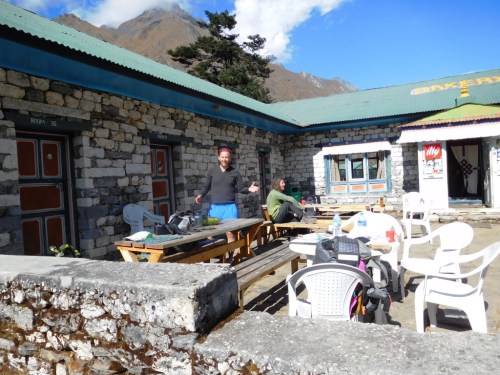
Bakery Tengboche.
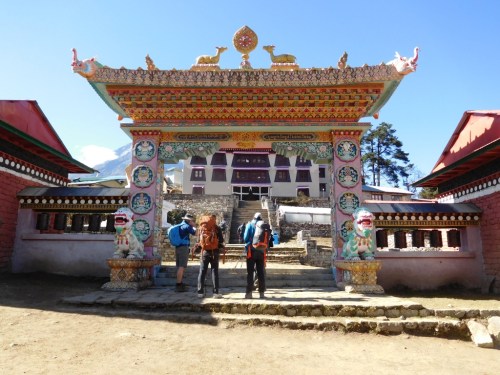
This religious gibberish is
ubiquitous in Nepal:
the Tengboche Monastery.
After Tengboche there follows
another reasonable descent again through some quite pretty forest to Duboche
(the bridge across the river there marks the end of the forest). In Duboche is
a pretty tea-house named ‘Rivendell’ framed by a beautiful view – somewhat
spoiled by the 3 metre high barbed wire fence around it. Just a little
repellent if it expects numerous customers – or perhaps you ought not want to
leave?

Descending through rhododendron
forests.
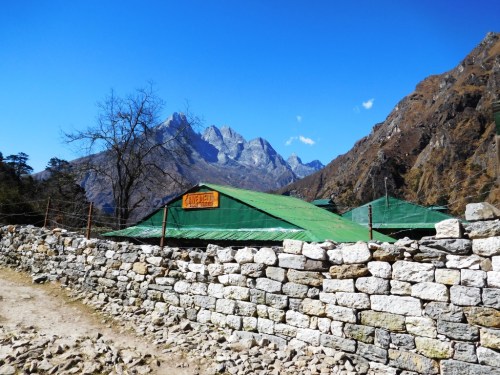
A forbidding ‘Rivendell’.
This bridge was well broken.
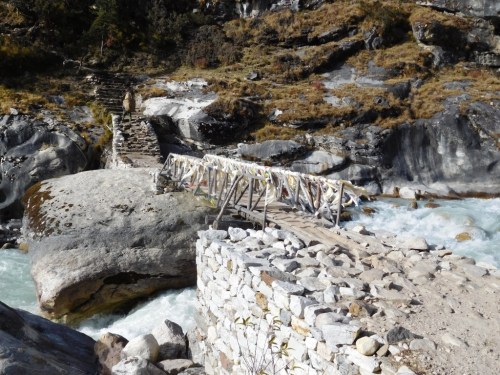
And its replacement somewhat
rickety.
View upriver from the bridge.
After Duboche the bridge had been
washed out and an interesting temporary bridge crafted to replace it. Because
there is a detour after the bridge you might lose your way and head back
downstream to where the old bridge crossed unless you remember that Pangboche
is upstream on the true right bank, so that all you need to do is scramble up
the yak tracks to the old path to continue your journey.
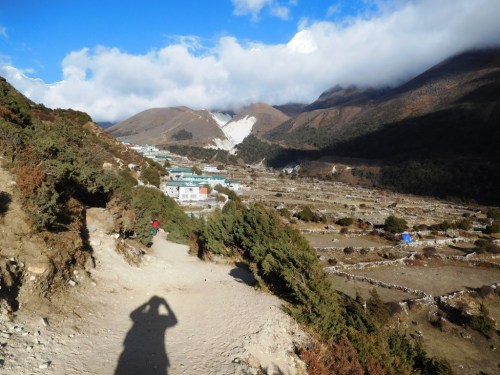
First view of Pangboche- a potato
town.
As soon as you cross the river you
are in quite a different type of low, straggly vegetation which I at first
thought marked the treeline until I spied a seedling pine/cypress just poking
above a patch of well-gnawed shrubbery. Clearly the yaks have been very busy on
the forests hereabouts; maybe also the banished goats.
An easy climb (and descent) brings
you to the potato town of Pangboche where we spent the night (on a guide’s
recommendation) at the Mountain Peace Lodge which actually charged nothing for
accommodation (the usual price is $US1-2 per night so long as you eat in), and
which had an excellent hot shower (which always cost more than the
accommodation – $US3-5). The host was a very friendly, entertaining chap with
whom we spent many hours yarning. His ‘wealth’ had been founded on his owning
an adjoining ¼ hectare potato ‘farm’ We tourists were clearly of immense
benefit to him.
That night there was a beautiful
sunset (and dawn) somewhat obscured by clouds/mist, though it had Tully
scrambling around in the dark and cold trying to get that perfect photograph.
The Young! The mountains surrounding the towns of Dingboche and Pangboche are
quite awesome.
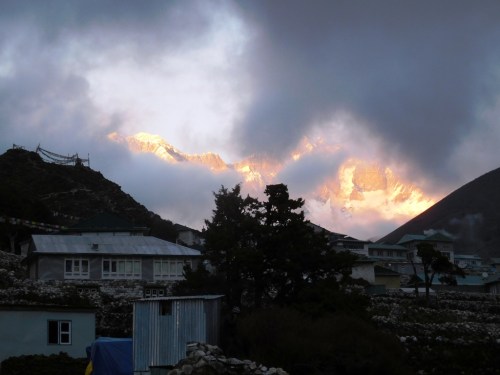
Quite startling – Everest is up
there somewhere!
See also:
http://www.theultralighthiker.com/to-the-roof-of-the-world/
http://www.theultralighthiker.com/i-followed-my-footsteps/
http://www.theultralighthiker.com/i-saw-below-me-that-golden-valley/
http://www.theultralighthiker.com/thatendlessskyway/
http://www.theultralighthiker.com/everest-base-camp-three-passes-trek/
http://www.theultralighthiker.com/cold-weather-face-masks/
http://www.theultralighthiker.com/my-life-was-wide-and-wild-and-who-can-know-my-heart/
01/12/2016: 800th Post: There is really a lot to read on
TheUltralightHiker, but maybe you didn’t realise there was quite this much.
(And there are now also over 1,000 pages here: http://finnsheep.com/HIKING.htm,
as well as more in the Archives section, & etc) ) What a lot of work it has
been (keeping me from my hiking, hunting and camping too much, perhaps!) and I
know I still have lots more to do. I have the next 50+ posts already worked
out, and I’m sure many more will occur to me before I have completed them.
I have been very sick of late (since
my trip to Everest – and have not fully recovered) which is why most of my
posts lately have not involved any new ‘adventures’, but soon I will be off
again, eg to complete my explorations of the Tanjil Bren-Noojee section of the http://www.finnsheep.com/THE%20UPPER%20YARRA%20WALKING%20TRACK.htm
including a loop which will allow you to view (via public transport/foot) the
three main waterfalls - and including a night camped at Mt Horsefall,
completion of the track clearing from Downeys to Newlands Rd allowing a loop of
the Baw Baw Plateau and Western Tyers, and of course completion of the
exploration of the ‘Mystery Falls’ (http://www.theultralighthiker.com/upper-yarra-track-mystery-falls/)
including maybe a (loop) route from the 18 Mile Road to the Forty Mile. I also
plan some walks on sections of and posts about the Alps Walking Track
(Victoria). Watch this space!
PS: Why not try a 'Search' using the
facility at the top of the page? For example, try typing the words 'deer', or
'tent' or 'canoe' then pressing 'Enter'. You may be surprised what you find!
Now might be a good time to 'Follow' The UltralightHiker (by clicking the
button at the top right of the page), or by 'liking' our Facebook page, here: (https://www.facebook.com/theultralighthiker/?ref=aymt_homepage_panel).
01/12/2016: Gravity Light: Our Renewable Energy
Future: Green folks are just nuts! Check out the Specs on this ‘innovation’ https://wattsupwiththat.com/2016/11/25/gravity-light-our-renewable-energy-future/
and see if it is any better than Coghlans ‘Eternal Head Torch’: http://www.theultralighthiker.com/the-eternal-headtorch/
30/11/2016: The Ultimate Guide to Hiking Boots: Acouple of interesting infographics. Sometimes it is the basics we are a little unclear on…
The Ultimate Guide To Hiking Boots
Over the past
decade, the variety of hiking boots and shoes has exploded, as designs become
increasingly specialised. Here’s a guide that outlines your choices and will
help you narrow down what you’ll need to find the perfect pair.
Anatomy of a
Hiking Boot
Knowing the
components of walking boots will help you choosing the perfect type of boot for
whatever activity you decide to do.
http://www.gooutdoors.co.uk/expert-advice/hill-walkingboots
1. Outsole
• The outsole is the first thing
everyone looks at when buying new walking boots.
• This is the strip of rubber or TPR
along the bottom of the boot which features the tread.
• Tread patterns will vary depending
on brand and boot, but all serve a purpose for a certain type of terrain.
• Chunkier patterns are better in
mud, while shallow tread is better suited for a rockier path.
• When it comes to the outsole, the
most popular and best known brand is 'Vibram'.
• A Vibram sole has long been
a sign of quality, but that isn't to say standard soles won't be suited to your
activity.
2. Midsole
• The midsole fits between the insole and the outsole.
• The job of a midsole is to
act as a shock absorber, helping to cushion and protect your feet as you walk.
3. Upper
• The upper is everything on the
outside of the boot above the midsole.
• Uppers are often made from
different materials such as sturdy and hard wearing leather, or synthetic
fabrics which make for lightweight boots.
4. Liner
• Some boots will feature a
waterproof liner such as GORE-TEX, whilst this makes the boot waterproof and
therefore ideal for wet weather walks, it can compromise breathability.
• For hot weather walking, it's
advised that you choose a boot with no liner to help your feet breathe.
5. Toe Bumpers
• The purpose of toe bumpers is to
protect your toes from knocks, which is particularly important on rocky
terrains.
• Toe bumpers also protect the boot
from damage so they last longer.
Best Walking
Boots For Your Activity
The activity
you have planned is one of the main factors of consideration when choosing
walking boots.
Trail Running
Shoes are best for:
• Trail running.
• Lightweight hiking and
backpacking.
• Short day hikes on easy terrain.
Hiking Shoes
are best for:
• Day hikes.
• Hiking.
• Moderate backpacking.
• Long distance lightweight hiking
and backpacking.
Hiking Boots
are best for:
• Day hiking (added ankle support).
• Backpacking with loads heavier
than 20-30 pounds
• Hiking in rough terrain or off-trail.
• Spring or summer hiking where snow
will be encountered.
Mountaineering
Boots are best for:
• High alpine travel.
• Winter hiking and climbing.
• General mountaineering.
Approach Shoes
are best for:
• Climbing approaches.
• Easy to moderate climbing.
• Peak bagging on 4th and 5th class
terrain.
You’ve Picked Out a Shoe—
But How’s the Fit?
Because you’re
going to be spending so much time in a hiking shoe or boot, fit is paramount.
Here are some things to look for:
• Your feet tend to swell over the
course of a day, try your shoes or boots on towards the end of the day or after
some activity.
• If you wear orthotics, bring them
along. They impact the fit of a boot.
• When you put them on, you should
feel plenty of space in the toe box.
• You should not feel squashed on
the sides of your forefoot but shouldn’t be too spacious.
• A good way to test the length of
the shoe is to stand upright in unlaced shoes, and then slide your foot forward
until it does touch the front.
• You should be able to comfortably
slip your index finger in between your heel and the heel of the shoe.
• Once you have your shoe laced, the
feel should be snug enough that, as you roll up onto your toe, you don’t feel
your foot sliding forward to touch the front of the boot.
• It shouldn’t be so snug that it
cuts off your circulation or causes hot spots.
• You should also not feel any heel
lift or slip as you walk around.
• A loose fit on the heal increases
the risk of painful blisters and could lead to injury on rough terrain if your
boot goes one way and your foot the other.
How To Care for
Your Walking Boots
Your walking
boots will last longer if you take care of them. Caring for your boots is
simple, and here are a few things to remember:
• Rapid drying, heater drying and
not nourishing the leather of the boots can all lead to a boot cracking and
eventually splitting.
• Clean your boots, thoroughly
removing all mud and debris.
• Boots need nourishing when they
look dry.
• Reproof little and often.
• Do not dry boots in a hot room or
near a heater, this can cause leather and material to shrink and crack.
• If stuffing with paper to help
dry, try not to overstuff and misshape the boot.
References
http://www.gooutdoors.co.uk/expert-advice/hill-walking-boots
http://www.outdoorgearlab.com/Hiking-Shoes-Womens-Reviews/Buying-Advice
http://www.mountainwarehouse.com/expert-advice/walking-boots-guide
http://www.backcountry.com/explore/how-to-choose-the-right-hiking-shoes-backpacking-boots
Coutesy of: https://www.walshbrothersshoes.ie/blogs/news/147312007-the-ultimate-guide-to-hiking-boots
See:
http://www.gooutdoors.co.uk/expert-advice/hill-walking-boots
https://www.fortheloveofoutdoors.com/guide-hiking-boots/
I must say I
am not fond of Vibram soles. The only two pairs of shoes I have owned I must say I
am not fond of Vibram soles. The only two pairs of
shoes I have owned with this type of sole would not grip in the wet (particularly
rocks, leaves, logs, twigs) so that I quickly ended up crashing down onto the
back of my neck (which is not pleasant). It may be that there are Vibram soles which are not like this. I also do not favor waterproof shoes. You are going to get wet feet. Don't be a
sissy. And don't muck around trying not to get wet feet. Shoes which are not
waterproof are lighter - and dry quicker! Carry a pair of ultralight camp shoes (such as these http://www.theultralighthiker.com/toughened-foam-flip-flop/ or these: http://www.theultralighthiker.com/no-sew-sandals /) so you
have something comfy to put on at the end of the day.
See also:
http://www.theultralighthiker.com/keen-shoes/
http://www.theultralighthiker.com/tight-shoes/
http://www.theultralighthiker.com/4wd-boots/
http://www.theultralighthiker.com/boot-chains/
http://www.theultralighthiker.com/foot-care/
http://www.theultralighthiker.com/shoe-laces/
http://www.theultralighthiker.com/survival-laces/
28/11/2016: Are You Beautiful in
the Buff: Sleeping
out in the mountains you often get a cold nose which is annoying. Obviously you
can’t tuck your nose and mouth (unlike the rest of your face) in your sleeping
bag otherwise it will become saturated from your breath and no longer keep you
as warm. Until now I just put up with it. Recently though I discovered this
wonderful product which when worn over your nose and mouth of a night warms the
air (and your nose) so giving you a much more pleasant night. The Buff: It can
also be worn in a bewildering array of other combinations. It weighs only 37.5
grams. Stow one in your pack. You will not regret it. It is made of 100% pure
merino wool. As you can see, it improves my appearance no end! This is a good
camo colour too! http://buffusa.com/
& https://www.buffwear.com/

27/11/2016: Pimping a Gorilla: You can readily shave around 300
grams off Gossamer Gear’s Gorilla (http://gossamergear.com/gorilla-ultralight-backpack-all-bundle.html
or Mariposa, etc) backpack by taking out the aluminium stay, removing the
hipbelt and replacing it with an ultralight webbing belt, and replacing the
Sitlight pad with an Airbeam pad. The pack will ride just about as well (well,
just as well when you are only carrying a few kgs) and transfer weight to your
hips, and you will have saved the weight of over half a day’s food!
If this is to be a permanent
alteration you can also cover over the holes where the stay went through the
body of the pack both sides with some Tenacious tape (http://www.theultralighthiker.com/gear-repairs-tape/)
to make the pack a little more watertight. You need a double buckle, some 1”
webbing and a piece of 1” Velcro and about five minutes on the sewing machine
to effect the change. As I have pointed out elsewhere (http://www.theultralighthiker.com/a-tardis-folding-space/),
you can make the pack carry a lot more than its rated 48 litres by utilising
Sea to Summit’s Ultrasil Compression Bags (or similar) and by adding some
tie-downs so you can carry another bag on top (http://www.theultralighthiker.com/attaching-tie-downs-to-your-pack/).
Completed belt ready for fitting.
Note piece of velcro sewn on reverse side in the middle for attaching to pack.
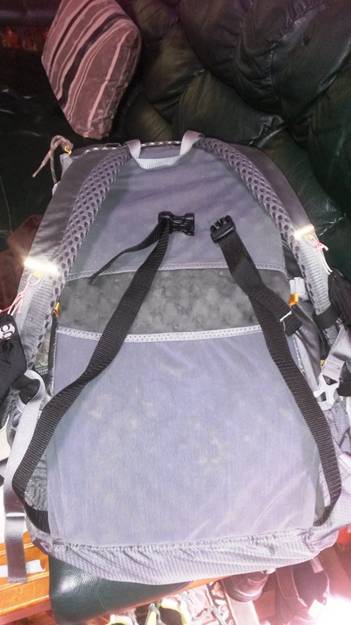
Standard hip belt removed and
ultralight belt fitted.
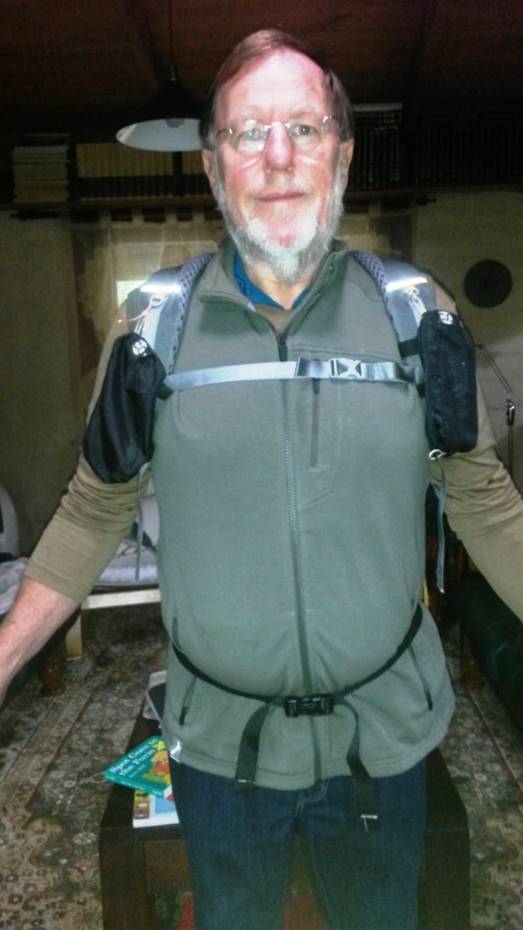
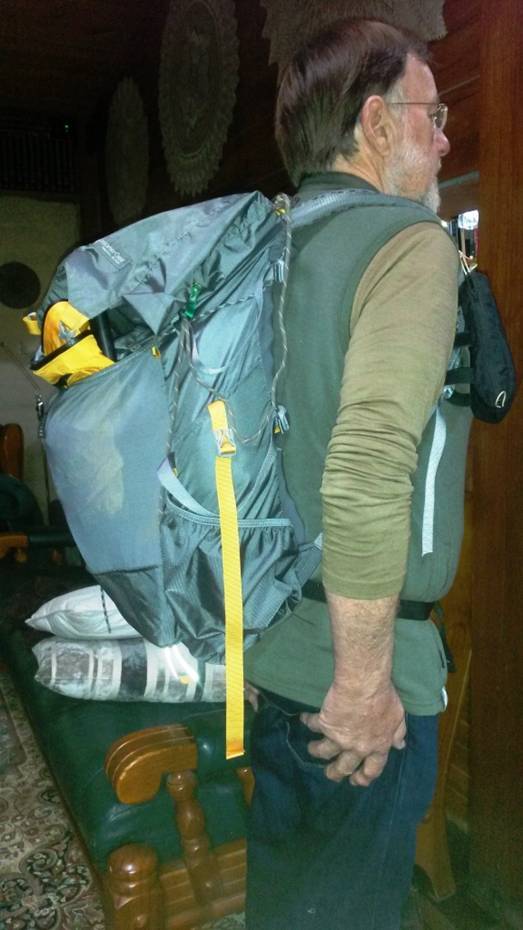
The final result; a very comfy pack
which weighs a third of a kilo less!
Weights (my scales):
Gorilla Belt: 275 grams.
Alum Stay: 88 grams.
Replacement Belt: 32.5 grams.
Weight saving: 330 grams.
Pockets: If you need hipbelt pockets, you can add these
eg here: http://gossamergear.com/hipbelt-pocket.html
38 grams and US$8.80ea
or here: http://www.zpacks.com/accessories/beltpouch.shtml
21 grams and $US22.50ea.
NB: Gossamer Gear may not have the Air Beam pads at the moment.Mountain Laurel Designs still
stock the Klymit (Air Beam) Pad in 11” x 25” size and US$35ea. You
can cut it down and reseal with a hot iron to 20” if needed. It will then weigh
approx 70 grams as compared with the Sitlight’s 50 grams: http://www.mountainlaureldesigns.com/shop/product_info.php?cPath=46&products_id=186
They also stock Pack Pockets (if needed) at US$19ea.
Conclusion: With my Cyclone Chair (http://www.theultralighthiker.com/cyclone-chair/) in behind
the Sitlight pad the Gorilla is more comfortable under load (for me) than it
was with its original stay and hip belt, yet significantly lighter. According
to the Specs it should weigh 624 grams in this configuration, (575 without the
Sitlight) not too bad for a very tough comfortable 48 litre pack. I
suspect that a narrow hip belt is normally better for folks who carry a bit of
weight around their midriff themselves – as I do!
See also:
http://www.theultralighthiker.com/a-gorilla-in-the-hand/
http://www.theultralighthiker.com/a-gorilla-in-the-bush/
http://www.theultralighthiker.com/the-best-laid-schemes/
http://www.theultralighthiker.com/pimping-a-gorilla/
http://www.theultralighthiker.com/linelok-pack-tie-down/
http://www.theultralighthiker.com/attaching-tie-downs-to-your-pack/
http://www.theultralighthiker.com/a-tardis-folding-space/
27/11/2016: Klymit Inertia O Zone Ultralight Exclusive
Sleeping Pad and Pillow combined: An
interesting idea: fits inside your sleeping bag for extra warmth. R = 1.3, from
US$51.99 11.9 oz (339 grams): http://www.klymit.com/inertia-ozone.html & now on Massdrop; https://www.massdrop.com/buy/klymit-inertia-o-zone-ultralight?referer=EJ89BQ
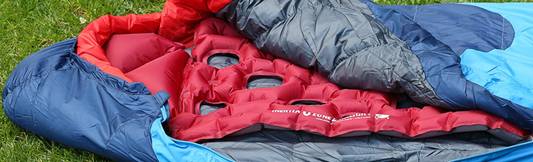
27/11/2016: The Eternal Headtorch: Coghlans Dynamo Flashlight: http://www.coghlans.com/products/dynamo-flashlihgt-1202
available eg Anaconda @ $10.99: Wind the handle for 1 minute to get up to 7
minutes of light. Features 2 bright LED lights, 10 Lumens. Positive feeling
ON/OFF switch. Convenient key chain clip. Configured as a headlamp as shown,
total weight 21 grams. This would make a good emergency torch. Will still work
after all your batteries fail. Bright enough to read a book at night, to cook
your dinner and do your camp shoes.
27/11/2016: Cool Brother is
watching you: Orbi
Prime: The First 360 Video Recording Eyewear: https://www.indiegogo.com/projects/orbi-prime-the-first-360-video-recording-eyewear-camera-travel#/

26/11/2016: Camo merino wool for
deer hunting. This
is the gear you need: https://gearjunkie.com/icebreaker-hunting-fishing-merino-apparel
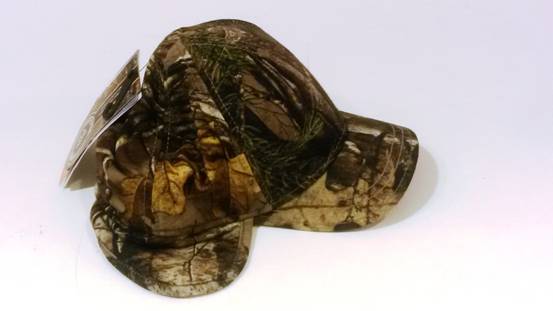
Snapped this one at Icebreaker’s Shop 9 403 Smith St Collingwood Factory
Outlet. Tell Jo I sent you; you may get a special deal – at least a warm
welcome!
I have this hat in black and I have a few more on my Xmas ‘wish list’. It
is the best hat I have ever owned. It keeps the sun off your face and out of
your eyes well (so you won’t miss that critical shot because of glare). It is
warm enough on a cold day, but can be paired with one of their UL merino
beanies yet on hot days it wicks wonderfully and dries so quickly you are never
aware it is wet.
More merino wool/icebreaker posts to come…
The raincoat made it into the Xmas basket.. I bought a beautiful
green hoodie and a lovely brown dress shirt. They were an incredible bargains!
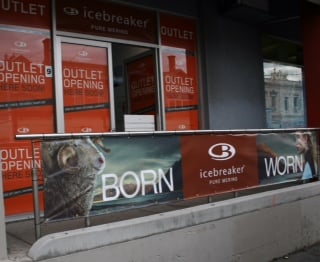

26/11/2016: Supernovae sport
Mickey Mouse ears:
Just why alien civilisations should blow up whole stars just to send us poor
quality pictures of Mickey Mouse, or why they are such admirers of the works of
Walt Disney at all remains a mystery: https://www.newscientist.com/article/mg23230992-300-mickey-mouse-ears-may-explain-universe-biggest-explosions/
24/11/2016: Backpacking Gear Advice: I wrote this in reply to a query
from a reader about what backpack, tent sleeping bag he should buy. As you can
see, I do not always recommend people buy.
Hi
(Reader) - and Thanks. As you can probably see from my light posting - and from
my post this morning (http://www.theultralighthiker.com/pneumonia/) , I haven't quite recovered
yet from my trip to Nepal.
Nonetheless I tried to respond to your post the other day, and had written a
couple of paragraphs when I lost the lot with a power outage! So, I will try
again:
I have had the old Mariposa (@600 grams) for years. For some
reason GG have blown the weight out to nearly 1,000 grams. Mostly this is in the
ridiculously heavy hip belt (See: http://www.theultralighthiker.com/a-gorilla-in-the-bush/
) In contrast, my Zpacks Zero (previously called: Blast) pack in Dyneema weighs 380 grams with pad
sleeve, rear and side pockets (one long for a tent), tie downs etc. Add @ 60
grams for the Air Beam pad. It carries about 54 litres inside. Della has sewn a
handy inside pocket in mine for stowing important things like passports etc in
a secure, easy reach manner).
If you use Sea to Summit Ultrasil Compression bags (http://www.theultralighthiker.com/a-tardis-folding-space/
) you can fit much more than this, and you can tie stuff on top as well (http://www.theultralighthiker.com/linelok-pack-tie-down/ or http://www.theultralighthiker.com/?s=tie+down
). Plenty big enough even for a trip of once month carrying all your own food
and even a pack raft for crossing rivers (http://www.theultralighthiker.com/klymit-packraft/
& http://www.theultralighthiker.com/ultralight-paddle/)!
Joe (says he) will not do the pad sleeve any more, but he has a shock cord pad
attachment which will work just as well (See: http://www.zpacks.com/backpacks/zero.shtml
Scroll down). This will provide plenty of load transfer and comfort for a pack
up to eg 15 kg - and you should try to keep under 10 (inc food) and say 6 for
your lady!
I think you would be hard put to find something lighter and warmer than Zpacks double sleeping bag (or
quilt). If you are used to a hood, you should buy (eg) two of these as well. they are also great for cold
nights/mornings: http://www.zpacks.com/accessories/goosehood.shtml
Others make a similar thing. The Triplex tent is very good for weight, but I
think my designs are better – and certainly cheaper. I have not yet completed
them (I know) and when I do I think I will offer them to the public as a
pattern to purchase – maybe as a kit Later
I may think about having them made in a low labour cost country – I am getting
ahead of myself here. However I will give you one/more for your own use, but I
have not quite finished the http://www.theultralighthiker.com/the-deer-hunters-tent/ yet (Soon - I will get better!), but in the
meantime I think you should have a go at this one (http://www.theultralighthiker.com/honey-i-shrank-the-tent/
) in Tyvek yourself – which I think the instructions are transparent enough for the
intelligent person to work out (with maybe a bit of prompting) See also: http://www.theultralighthiker.com/new-decagon-octagon-tyvek-igloo-tent-design/
).
When you are happy with it, you can order the silnylon from http://www.tiergear.com.au/11/online-shop/diy-gear
and make an even lighter one. I think you will be happier with it, have a tent
which goes up (and stays up) quicker than Joe's and which will cost you a
fraction of the price. You will find it quite easy to make (the roof), and once
you have that, you can play around with the floor to your heart's content – and
will get it right (eventually). The roof (in Tyvek) weighs 607 grams. In silnylon it will weigh 560 grams
with the poncho floor - a little more if
you want a sewn in floor with overlapping mosquito net door, but still not much
more than 600 grams plus pegs and guys (@100 grams). It will be much cheaper
than a cuben fibre tent - and you can now make field repairs to silnylon with http://www.theultralighthiker.com/gear-repairs-tape/ so that cuben is (almost) obsolete!
PS: Backpack Sizing: Some really good advice here: http://gossamergear.com/wp/how-to-size-and-fit-an-ultralight-backpack
& http://gossamergear.com/wp/which-gossamer-gear-backpack-is-right-for-you
. The advice applies equally well to other brands of backpack.
PPS: Your height/weight is not a reliable guide. NB: My opinion is that
hip belts do not work well for everyone. Some folks may be more comfortable and
walk more freely without them altogether. Fatter people (as I have been most of
my life) will probably do better with a simple webbing (3/4’ even) hip belt.
Thinner folks might benefit from a wider hip belt. They do not need to add much
weight. Zpacks hip belts - available separately for sewing on yourself (enquire) weigh approx 50
grams! (See ‘Padded Belt’ here; http://www.zpacks.com/backpacks/zero.shtml
Scroll down).
PPPS: Instead of buying a pack, you might think of making one. I
recommend Ray Jardine’s backpack Kit (http://www.rayjardine.com/ray-way/Backpack-Kit/index.htm).
As you will see, there are two options, one with a hip belt. Be careful which
you order, as the hip belt can’t be added later (according to Jenny). If you
are happy with it, you could always make a tougher one eg out of Dyneema at a later date. (Two
weights of Dyneema available eg. here: http://thru-hiker.com/materials/coated.php
You will notice they also have many other interesting projects – including a
backpack/s. One advantage of making your own is that you will know exactly how
to fix it in the field – should you ever need to!
PPPPS:
Please also read: http://www.theultralighthiker.com/ultralight-pack/ For example, I
really think you should consider Mountain Laurel Designs Exodus pack (though I
have not yet owned one – I will), Zpacks Arc Blast (which I am going to borrow
from my son-in law soon and review) and Gossamer Gear’s Gorilla backpack (which
I reviewed here: http://www.theultralighthiker.com/a-gorilla-in-the-bush/)
and which I will figure a way to put a lighter hip belt on (stay posted).
PPPPPS:
You can readily shave around 300 grams off Gossamer Gear’s Gorilla (or
Mariposa, etc) backpack by taking out the aluminium stay, removing the hipbelt
and replacing it with an ultralight webbing belt, and replacing the Sitlight
pad with an Airbeam pad. The pack will ride just about as well (well, just as
well when you are only carrying a few kgs) and transfer weight to your hips,
and you will have saved the weight of over half a day’s food! See: http://www.theultralighthiker.com/pimping-a-gorilla/
I
think if you utilise these: http://www.theultralighthiker.com/a-tardis-folding-space/ or their heavier completely waterproof
Event iterations or tie one on top as needed you can fit enough in a
Gorilla-sized pack which is a much more comfortable size on shorter journeys.
However, I reckon that I can carry all my gear and 30 days food in/on a 54
litre pack!
23/11/2016: Leonard Cohen:
Hallelujah: https://www.youtube.com/watch?list=RD4imJ7wWB9FU&v=YrLk4vdY28Q
23/11/2016: Pneumonia: Three weeks ago now since
I left Namche
Bazar for Everest with this awful life form growing in my chest like some incubus from
‘Alien’. Since then it and my body have waged an uncivil war back and forth
with my life for stakes. Sometimes one has the ascendancy, sometimes the other.
The medicos have been entirely unsuccessful in isolating it, and the three
types of antibiotic I have quaffed so far have only managed to hold the line –
if that. The outcome remains uncertain, though some days I do seem almost
myself. Others though I am back to being as weak as a kitten, even if (as
today) I have pumps to fix, or other jobs must be done.
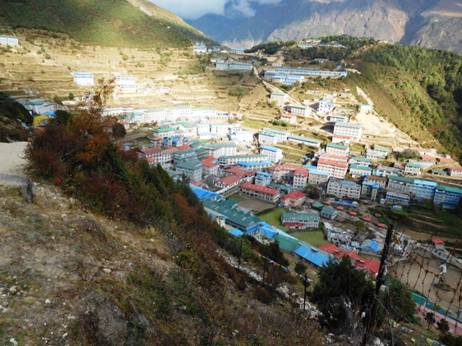
I have had I think five crises since it hit; once between antibiotics, I
was so weak I could not rise from my couch, and could not even call loudly
enough to alert Della , (whom I could actually see just in the next room) to
take me to hospital. Fortunately, instead of slipping away, the other
antibiotic kicked in after about an hour, and I was able to rise and resume my
conversation with the world.
Pneumonia is not particularly distressing: when you are at your weakest
you feel quite unconcerned that you are slipping away, though I must say I do
not particularly enjoy the not breathing! The most unpleasant it has been was
on my ‘trail of tears’: the 60+ km interminable two day journey (normally four
short!) staggering myself back from Dingboche to Lukla desperate that Della
would have a chance to save my life. (She still seemed to want to – habit is a
funny thing!) And she has, so far, succeeded! ‘It is the physician’s love heals
the patient’ was Ferenczi’s dictum.
Many people succumb to this dreaded ‘Khumbu Cough’ on the Everest
Base Camp Trek. The trail is suffused with the most awful dust during the dry
season as there are thousands of trekkers on the trail with their attendees of
yet more thousands of guides, porters, yaks, donkeys, horses, dogs…all of them defecating
, hacking
and spitting on the trail which is bleached dry by an eternal sun, so that the
dust ever whirls up, become a loathsome fug of bacterial stew which you means
must breath in. The air is too thin to breath through your nose so you are
eternally gulping in huge but unsatisfactory lungfuls though your mouth which
you make your best effort to keep covered with a neck warmer, buff , scarf or
balaclava (against the cold mostly) – but it is not enough to keep whatever
these bugs are out.
The excessively dry air probably aids its malevolence. The altitude,
exhaustion, poor diet & etc no doubt do not help, so that many people
become quite ill and may take long to recover – if at all. Some cough so much
they break ribs – thankfully not me! Pneumonia used to be such an infection: ‘the
‘old man’s Friend’ they once described it as – as it gently led him to his
end). If you survived, a long sea voyage of rest and recuperation for six
months was normally prescribed – for the well to do. The poor, no doubt simply
perished. It may be possible to wear a more serious dust mask to keep it out. I
would do some research on that if you are silly enough to be contemplating this
awful trek. I will have a subsequent post with recommendations. Watch out for
it!
For my own, I wish I had cleaved to my nearby haunts. I may not travel
overseas again – certainly not to the Third World,
or anywhere so crowded. I confess I have a passion to see the boreal Forests,
perhaps in Canada.
The Baw Baw Plateau has ten times the
delights of the chewed over, nutrient depleted or bare hills of Nepal. It is
also much less crowded and less than two hours drive from Melbourne – so that
you can be back in your own bed the same night (if you wish) after a delightful
day exploring such magical places as Kirchubel (http://www.theultralighthiker.com/kirchubel-if-you-go-nowhere-else-in-the-world-at-least-go-here/)
, Downey, (http://www.theultralighthiker.com/up-into-the-singing-mountains/
& http://www.theultralighthiker.com/upper-yarra-track-winter-route-downey-to-newlands/
) , Newlands Rd (http://www.theultralighthiker.com/upper-yarra-track-baw-baw-to-newlands-rd/)
, Toorongo (http://www.theultralighthiker.com/upper-yarra-walking-track/), Tanjil Bren (http://www.theultralighthiker.com/upper-yarra-track-winter-route-western-tyers-to-tanjil-bren/), Western Tyers (http://www.theultralighthiker.com/upper-yarra-track-winter-route-western-tyers-to-tanjil-bren/), Yarra Falls (http://www.theultralighthiker.com/upper-yarra-track-mystery-falls/)
, the Forty Mile Break Rd, the Ada Tree, Mt St Phillack Saddle(http://www.theultralighthiker.com/upper-yarra-track-sidetrip-baw-baw-to-mt-st-phillack/)
, Whitelaws Hut Site (http://www.theultralighthiker.com/upper-yarra-track-st-gwinear-track-junction-to-whitelaws-hut/)
, the Mushroom Rocks (http://www.theultralighthiker.com/upper-yarra-track-section-seven-mushroom-rocks-carpark-to-phillack-saddle/), & etc. Just so much nicer
too, really.
23/11/2016: The Not So Ultralight Hiker’s Tentpeg:
What a buy
these guys were at Aldi for my old mate Jock at $2 a pack of four! He reckons
on at least a dozen uses for them including as: markers for night-time fishing
set lines, toilet markers, guy line markers, camp lanterns, night lights…38
grams ea inc AAA battery. I know you could do the same thing in ultralight with
Clam Cleat Lineloks (http://www.theultralighthiker.com/the-perfect-guy-line-for-a-hiking-tenttarp/)
or with the Nitecore Tube Lights (http://www.theultralighthiker.com/11-gram-rechargeable-head-torch/)
and probably at much greater expense, but would they have the same panache or
style?
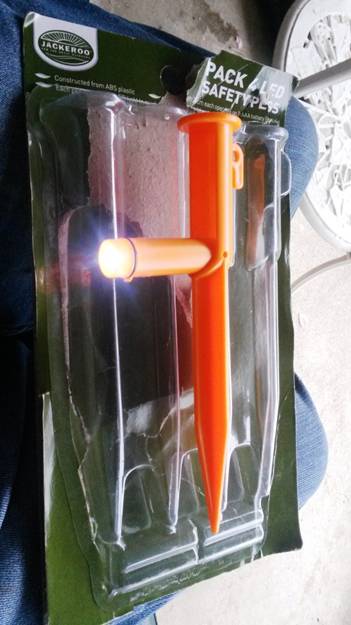
20/11/2016: Boys, and their toys: https://www.massdrop.com/buy/jl-lawson-spin-tray?referer=EJ89BQ
20/11/2016: The Sunset of the West:
Mind you, for every faltering,
penultimate step it takes it edges towards a dazzling apogee far greater than
any the world has ever seen… Secular humanism
I grew up in the long tradition of secular
humanism (as you just imagine ‘we’ all did). Yet when I
see a post from a friend who cleaves yet to ‘Christianity’ (or yet ‘Islam’
Judaism’, ‘Buddhism’ etc) it saddens me. It seems (to me) that they have had
just that same opportunity to liberate their minds from such shibboleths and
fetishes as the remainder of us did. The ‘humanism’ implicit in Christianity is
one thing, indeed a grand thing - the old fogey in the sky quite
another!
Such
‘humanism’ is a tradition stretching back to the Ancient Greeks (indeed also to
Judaism), though in many ways I ever prefer the bluff pragmatism of the
Romans. You can imagine someone suggesting to them that they build another
temple. ‘Or we could build an aqueduct or a mighty straight road will last
folks two thousand years’ they might reply. Engineering is so eloquent!
I know I made
a study for many years of Philosophy and the Western intellectual tradition in
general, through Literature, History, etc. Just last night I was half fevered
dreaming (with this dread pneumonia I carried back with me all the way from
Everest; see eg: http://www.theultralighthiker.com/i-saw-below-me-that-golden-valley/)
of my little 1970s upstairs room in the (Phil) corner of the ‘Quad’ at Sydney
Uni (a replica of C10th Oxford!) whose tiny lead-light window overlooked the
doppelganger of Bishop Berkeley’s famous tree, which I’m sure yet persists -
though neither I nor (the late) Prof David Armstrong is there to see it, though
I remember well how we watched the Transit of Venus seated on its lower
branches back in the days when the world (or I at least) was young. The lass
(Moira) who has ‘The Chair’ today I once knew as a pre-pubescent slip of a girl
- though she is no doubt an aged matriarch now. There but for fortune, go I. I passed on
that one and enjoyed another life, but I did not so doing forfeit the life
of the mind, as so many seem to do (even’ alas, some
Professors of Philosophy today! I know not if Moira is one of them – I would
hope not).
I recognise,
honour (indeed espouse) many of the moral teachings and precepts of the
Christian tradition, but even moreso the greater lessons of Socrates! Everyone
should read Jowett’s timeless translation of the
‘Socratic dialogues, ‘The Trial and Death of Socrates’ (http://www.bookdepository.com/The-Trial-and-Death-of-Socrates-Pla/9780486270661?ref=grid-view),
then read it again, and again. The New Testament is a poor creature besides.
You can read the first, ‘The Apology’ for free right now here in its entirety: http://classics.mit.edu/Plato/apology.html
The tradition
of western Civilisation encapsulates these – and much more. I used once
peripatetically to recommend to people Bertrand Russell’s timeless work, ‘A
History of Western Philsosophy’ (and I still
do) written when Nobel prizes were still given out for true greatness (Russell
won Three!) Not since Steinbeck won the Nobel (‘Grapes of Wrath’) has there
been anyone rewarded for true greatness of thought or expression, so far as I
can see. Dylan
notwithstanding. Jowett’s
work is still a stand-out as a great work of Western literature (along eg with
Freud’s ‘The Interpretation of Dreams’, Nikos Kazantzakis’ ‘Freedom and Death’, Dylan Thomas’ ‘Under Milk Wood’,
Aeschylus’ ‘Agamemnon’, Shakespeare’s ‘Macbeth’…thankfully the list goes on…It
is long since time we celebrated the West; it may not be the fount of all that
is good and noble on earth, but it comes awfully close!
Socrates used
(often) to espouse (that) ‘the unexamined life’ had no worth (often mis-translated
as ‘is not worth living’). If you re-read eg ‘The Gorgias’ carefully you will be stricken again and again that Socrates
is asking, ‘What makes a life enviable – or admirable’? It is not the life of
maximising one’s pleasures (or power) - as Gorgias
thought (even though his minions could put Socrates to death, yet fail to
silence him! And as so many in the West (and elsewhere) seem bent on
advocating today. Indeed such aims and goals are
frivolous and meaningless. The quest for truth ought (to be) paramount. As a
(near contemporary) Siddhartha is alleged to have observed: ‘if a man should
glimpse a truth from a solitary cave and (in) so doing die, the truth will not
die with him, but will emanate from his fastnesses and reverberate around the
world’.
The quest for
truth ought be the defining centre of our lives, not the quest for
ephemeral pleasures, nor fleeting fame. In such regard it ought also be emphasized that not only is it not so that ‘everyone
is entitled to his own opinions’ as so many demur. Indeed, the contrary is the
case. No-one is. (Leaving aside the implied theology of the word, ‘entitled’: ie: that to be ‘valued by God’, which is to be valued by nothing,
which is what ‘God’ is, equals to have no value at all!) ‘Opinions’ are not
axioms. They are not truths in themselves. Indeed there are no axioms,
reassuring as Euclid
was once to adolescents force to learn it. They are working hypotheses which if
they are not backed up by reasoned argument capable of robust truth testing are
totally worthless. No-one should have an ‘opinion’ at all! Certainly I never
have!
Many folk
(including me) re-posted this homily yesterday: ‘Cheers to all the people who
change their minds when presented with information which contradicts their
beliefs.’ I like the simplicity of the refrain, and its impressive wisdom! I
would see much more of what it advocates.
The key
tradition of humanism is the examined life. The robust questioning of all
received wisdom which is at the heart of the Western ‘scientific method’ (so
eloquently espoused by the great Karl
Popper eg in ‘The Open Society and Its Enemies’ (https://archive.org/stream/opensocietyandit033120mbp/opensocietyandit033120mbp_djvu.txt).
There is little hope of material or ethical progress unless we cleave utterly to rational discourse and the careful examination of all that
comes before us. Truth testing is ever the ultimate arbiter of worth. Nothing
(at all) has any value if it is not true. Nothing follows (logically) from a
false proposition. This is the first principle of (Symbolic) Logic and ought be graven in stone everywhere. Therefore, the single most
important quality of any proposition is, Is it true’. Nothing else matters!
Especially, it matters not a jot who you upset by
asking that very question about whatever ‘they’ say. They must either defend
themselves, or if they cannot do so, withdraw. QED.
19/11/2016: Google's New PhotoScan App Makes
it Easy to Digitize Old Prints: Is there anything at all you can no
longer do with your phone? https://www.engadget.com/2016/11/15/google-photos-photoscan-app-editing-tools/?utm_source=pocket&utm_medium=email&utm_campaign=pockethits
18/11/2016: The Rolls Royce of Backcountry Trowels. PS:
I used to think these doohickies were pretty silly when I had a pair of
heels would mostly do the same sort of thing, and had done for decades – then I
began thinking of digging for survival water sources, purifying the water found
& etc. I decided that it might well be 13 grams well spent: https://www.massdrop.com/buy/suluk-46-tark-trowel?referer=EJ89BQ
7 http://www.suluk46.com/
See also:
http://www.theultralighthiker.com/water-hiking-desalinator/
http://www.theultralighthiker.com/sawyer-water-filter/
http://www.theultralighthiker.com/dehydrated-water/
http://www.theultralighthiker.com/rivers-in-the-sky-never-die-of-thirst/
http://www.theultralighthiker.com/survival-still/
http://www.theultralighthiker.com/water-filter/
http://www.theultralighthiker.com/collecting-water/
http://www.theultralighthiker.com/the-egg-ring-ultralight-wood-burner-stove/
18/11/2016: Aloksak make really great waterproof to 200
metres snaplock bags. This one is even big enough to put your rifle in (great
for canoeing/boating/hunting trips. It is the only waterproof gun bag I know
of: http://www.survival-pax.com/aLOKSAK-Bags-Extra-Large.html
Of course the smaller ones are great for your phone, camera etc.

16/11/2016: The ‘Moon Illusion’: I knew I had done
posts about this intellectual ‘phenomenon’ long since, so I set off amid my old
posts (with the aid of Control + F) to find it/them. I had thought to just be
able to quote where I wrote that if you cut out a circle of cardboard that just
exactly covers the full moon at arm’s length that you would find that it always
does, whether the moon seems to swell like a balloon or shrink like a pin-head
in your mind’s eye. As well, I found this rich horde of moon lore which I
cannot restrain myself from sharing once more:
27/12/2012: What
a fascinating article; I HAVE noticed the 'terminator' wind, but I confess
regretfully I have not been outdoors enough on warm full-moon nights to notice
the moon wind: http://wattsupwiththat.com/2012/12/24/sailing-on-the-moon-wind/#more-76322
26/06/2013: We checked out the
‘super moon’ but it looked just like any ordinary moon to us, but this super
hurricane on Saturn IS really something out of the ordinary: http://arstechnica.com/science/2013/06/cassini-captures-gigantic-hurricane-on-saturn-in-exquisite-detail/
22/07/2013: APOLLO 11! Still thrills
me 44 years later. These WERE the rocket engines which took those three brave
men to the moon back when Detroit (and America) was
STILL great! (http://www.wired.com/wiredscience/2013/07/bezos-apollo-11/)
Watching the launch is still exciting: http://www.youtube.com/watch?v=XSLRMdYSA9M
24/07/2013: WHAT a STUNNING
photograph: our solar system is brilliant – and look how small all our concerns
really ARE (Earth & Moon arrowed): http://wattsupwiththat.files.wordpress.com/2013/07/saturn_earth_cassini.jpg?w=640&h=419
13/12/2014: Moonlight casts shadows;
sometimes you forget…most places there is so much ambient light, you see
nothing, know nothing. Last night during one of my elderly nightly sojourns to
the bathroom I glanced out the back window and was surprised to see several
small black creatures sitting on the new steps in the moonlight. I had to go
fetch my glasses to see what they were as I was curious as to what critters had
so early claimed this structure as their own. Alas, they were but moon shadows.
I did notice yesterday however whilst working on the steps that a colony of
ants had already claimed the vertical rails as a highway, so no doubt it won’t
be long before others follow! Nature has a way of seizing every opportunity as
its own.
05/11/2014: The FUTURE: what WILL it
be like? First of all we will (soon) have virtually free, virtually unlimited
energy from nuclear fusion with generators sized according to need: ones maybe
as big as a railway engine or two to power a fair sized city to ones the size
of a shoebox to power a homestead. With such abundant energy we will be able to
do and have anything we wish. We will not have to chase rich lodes of ore in
inaccessible places to harness the resources we need. Any piece of rock, earth
or water will be able to be broken down easily into its component elements to
provide whatever resource we need, whenever we need it. Such unlimited energy
will make growing food completely independent of seasons, indeed independent of
available light, water and nutrients as we will easily be able to provide all
these. There will be no shortage of food, and most of the land now used to
produce it will be returned to nature. Indeed, we will rework photosynthesis.
It is dependent on rubisco, the best that nature has evolved, but we will
re-engineer photosynthesis with more efficient processes so that plants will
yield many times what they are capable of now. Both these things will happen in
YOUR lifetime, possibly within a decade. Poverty and want will completely
vanish. And this is only the beginning: we WILL have habitats at the L5 points
and on the moon and Mars in the next twenty years. Life expectations will soon
soar by 20-50 years! The future will be MUCH better than the past…
29/06/2014: Ain’t it the truth: A plea from the new imperialists (the
Greens, etc): ‘Please give me the power. I promise to make everything
new and beautiful for you ignorant little people who do not understand what you
really want or what is best for you. Furthermore, I'll turn your slob husbands
into young studs, your wives into Miss Americas, your bank accounts into
mountains of gold, and I'll make the oceans recede by shipping water to the
moon (with apologies to those with waterfront property).’
12/06/2014: Quotable quote: Patrick Lion: ‘The ABC is massively
over-funded. Consider this: if the ABC received similar per capita funding in
the US as it does in Australia, its budget would be somewhere in the vicinity
of $16.6 billion. That’s pretty much equal to the entire annual budget of NASA,
yet the only person the ABC has ever put on the moon is Mr Squiggle.’
(I had forgotten I ever owned a
spaceship); 18/05/2014: So, my $100 helped: something
to look forward to on my birthday; if all goes well ‘the team’ will reboot
ISEE-3 and buzz the moon with it on 10 August @50km altitude! Thanks to our
donations the project is, ‘GO!’ http://www.rockethub.com/42228
16/05/2014: Vale: David Armstrong: A
VERY great TEACHER (of mine, and SO many others) and courageous man. I spent
many pleasant hours with him, in his rooms (or mine) and in the quad (under the
tree which remains even when no-one is there to see, & etc) at Sydney Uni
in the 1970s. I remember watching (with him) a peculiar 'transit' of Venus
which appeared to traverse the crescent of the moon under that tree, about
1973. It seems a long while ago now – and it IS. I AM sorry I did not live up to his estimation of me. We have only ONE life, and
I chose this one. I will MISS HIM, as I miss our mutual friend ‘Sandy’ Anderson
(son of John), with whom I spent many pleasant hours at Newcastle Uni in the
1960s; gone these many years now. Philosophy (& many other things) are much
poorer with their passing: http://quadrant.org.au/opinion/qed/2014/05/david-armstrong-great-philosopher-great-man/
(I was recalling about this again last night amid my pneumonia driven fevered
dreams when my life unrolled like a carpet before me instead of the rapid flash
of drowning)
15/03/2014: This poem, ‘Dover Beach’
by Matthew Arnold (1822-1888) was for many years my favourite. (I DO also
really like Dylan Thomas’ ‘Fern Hill’ though!) You may be surprised to learn
that I (as an atheist) particularly like the penultimate stanza. To be an
atheist does not mean that one is without the deeply felt beliefs or moral
principles without which a person is scarcely human. I too lament that so many
today grow up without having developed any consistent set of ethical values to
inform their lives…
The sea is calm to-night.
The tide is full, the moon lies fair
Upon the straits; on the French coast the light
Gleams and is gone; the cliffs of England stand;
Glimmering and vast, out in the tranquil bay.
Come to the window, sweet is the night-air!
Only, from the long line of spray
Where the sea meets the moon-blanched land,
Listen! you hear the grating roar
Of pebbles which the waves draw back, and fling,
At their return, up the high strand,
Begin, and cease, and then again begin,
With tremulous cadence slow, and bring
The eternal note of sadness in.
Sophocles long ago
Heard it on the Aegean, and it brought
Into his mind the turbid ebb and flow
Of human misery; we
Find also in the sound a thought,
Hearing it by this distant northern sea.
The Sea of Faith
Was once, too, at the full, and round earth's shore
Lay like the folds of a bright girdle furled.
But now I only hear
Its melancholy, long, withdrawing roar,
Retreating, to the breath
Of the night-wind, down the vast edges drear
And naked shingles of the world.
Ah, love, let us be true
To one another! for the world, which seems
To lie before us like a land of dreams,
So various, so beautiful, so new,
Hath really neither joy, nor love, nor light,
Nor certitude, nor peace, nor help for pain;
And we are here as on a darkling plain
Swept with confused alarms of struggle and flight,
Where ignorant armies clash by night.
23/02/2014: The small survey I
recently completed on the ‘moon illusion’ convinced me that rather more folks
here not only do not know the earth orbits the sun; they still believe the earth
is flat: http://news.discovery.com/space/astronomy/1-in-4-americans-dont-know-earth-orbits-the-sun-yes-really-140214.htm
12/02/2014: MORE on the ‘moon
illusion’: http://www.youtube.com/watch?v=RXkYjL_7jME#t=239
09/02/2014: I asked several people
today whether they thought the moon was bigger when it first appears on the
horizon or whether it was an optical illusion. Without wanting to spoil the
answer for you, I should like to report that a number of people were sure that
it WAS closer when it was near the horizon. These flat-earth advocates no doubt
also eat organic food because it contains no chemicals and totally eschew
di-hydrogen monoxide!
30/09/2015: This
from my post Not Quite Alone in the Wilderness: (http://www.theultralighthiker.com/not-quite-alone-in-the-wilderness/)
I had 'picked' a poor time for a hunt (though a good time for a walk). The Spring growth, the
warm weather, the full moon all meant that the deer were very seldom down along
the river during daylight hours (much moreso in winter
when feed is scarcer). Of course they can see excellently in moonlight. Every
night they visited us in our camps, honking constantly to keep us wake. I could
have shot a number of fine stags by torchlight. http://www.theultralighthiker.com/mini-super-torch-a-weeks-light-weighs-50-grams/
I'm sure others would have. Who, but for conscience is to
know?
25/10/2016: The wildlife seems to get wilder everyday: … ’ When I was a kid folk used to ‘spotlight’ critters like this
(mainly possums – everything was tucker back then) by walking the full moon
along the branches of a tree, then plinking them down with the help of the old
Lithgow .22 single shot. PS. We usually see one or more of these little guys
too. There must be plenty of ants around. There are also almost innumerable
swamp wallabies and grey kangaroos.
07/08/2016: Bill Leak and PJ
O’Rourke: …Bill: When Neil Armstrong walked on the moon July 20, 1969, the
whole world was inspired. On August 15 the same year 400,000 hippies rolled in
the mud at Woodstock
and no one’s been inspired by human ingenuity since. What the hell happened
during the three weeks between?’
02/08/2016: Her Craft or Sullen Art:
‘In my craft or sullen art
Exercised in the still night
When only the moon rages
And the lovers lie abed
With all their griefs in their arms,
I labour by singing light
Not for ambition or bread
Or the strut and trade of charms
On the ivory stages
But for the common wages
Of their most secret heart.
Not for the proud man apart
From the raging moon I write
On these spindrift pages
Nor for the towering dead
With their nightingales and psalms
But for the lovers, their arms
Round the griefs of the ages,
Who pay no praise or wages
Nor heed my craft or art.’
15/11/2016: Supermoon: I got up in the middle of the night
and looked at this phenomenon; if anything the moon looked smaller than usual
to me. But I have spent years of my life sleeping on the ground, camped under
the stars gazing up at the night sky. Clearly folks will believe anything!
14/11/2016: I Saw Below Me That Golden Valley:

Soon you will see no more playful
goats as they are banned from the National Park.
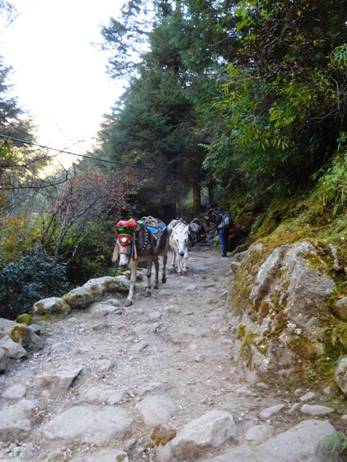
Pretty and well cared for donkeys
along the way.
It is a pleasant and easy couple of
km descent through a pretty forest from Lukla to the prosperous looking agricultural town of
Chheplung (though it is much harder struggling back up the other way on the
return journey with a chest full of pneumonia!)
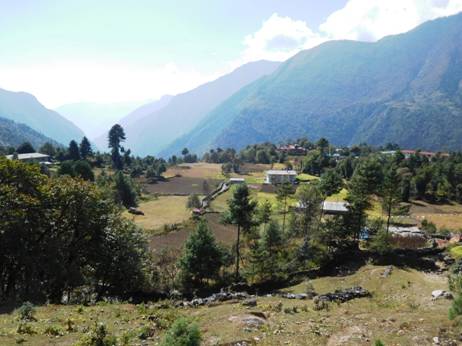
Chheplung is a well laid out and
prosperous looking agricultural area.
From there you follow the Dudh Khosi
River upstream with only
slight rises and falls of the path until you ascend sharply 7-800 metres into
Namche Bazar after a walk of approx 8 hours. Most complete this section over
two days.
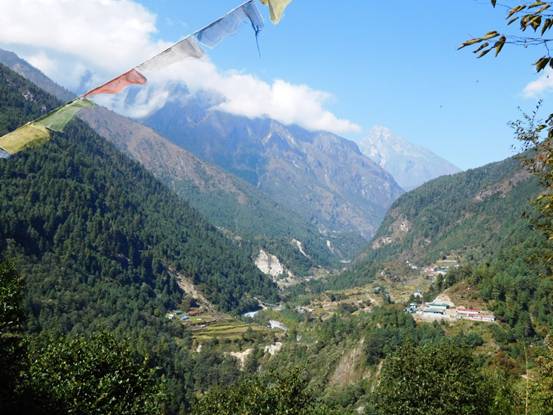
MThere are many small villages.
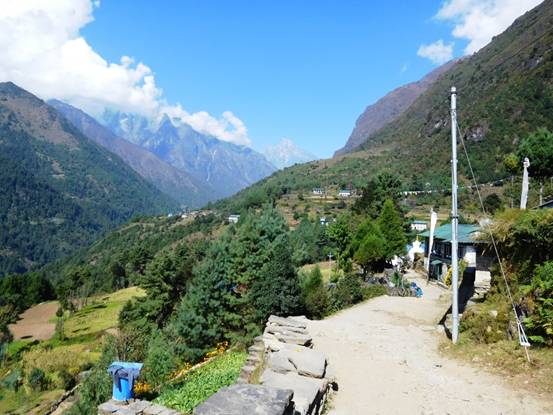
And places to take a break.
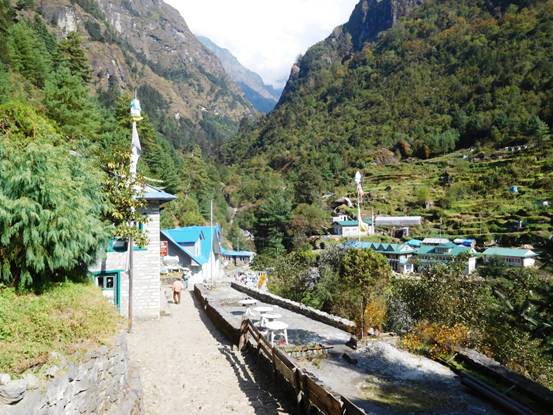
Some more salubrious than others: Of
course along the well-travelled section of the EBC most everything is dressed
up to its best. In smaller rural villages you often find rougher accommodation.
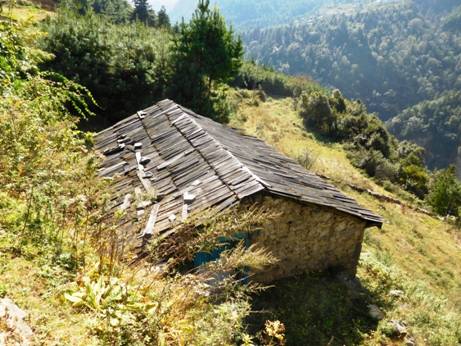
There are lots of big and little
villages to stop along the way to enjoy a cup of coffee (or something
stronger), a snack or a meal. We planned to stop at Monjo (because of its
altitude rather than its being half way), but we spent a little too long
‘catching up’ before we set off, so that we ended up staying at the Himalayan
Guest House (nice), Bengkar instead. Most folk stay at Phakding (quite a big
town) which is about half way to Namche, but there is no need; every tiny
hamlet has its tea houses for food and accommodation.
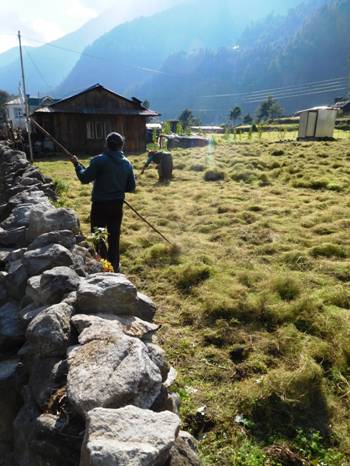
Quaint agricultural practices: this
hay is being 'raked' with a stick. I saw it cut with a kitchen knife!
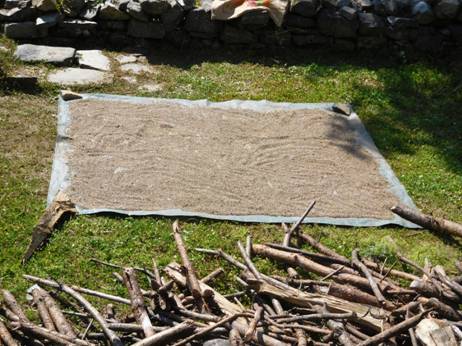
Sun drying barley, I guess.
Strangely in the tea houses everyone eats Dahl Bat (Rice) even though no rice
could grow here.
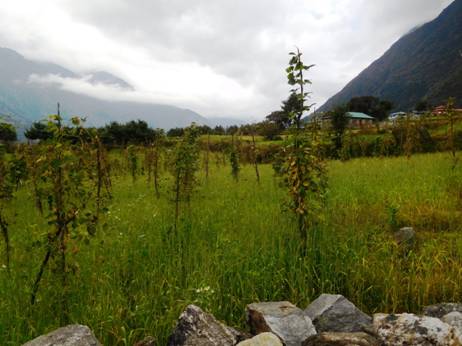
I found the intercropping
interesting; beans and grain grown together.
Everywhere the mountains tower over
the valley:
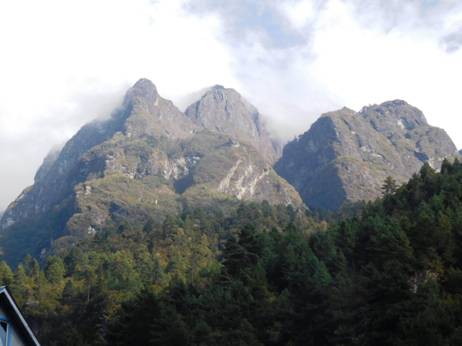
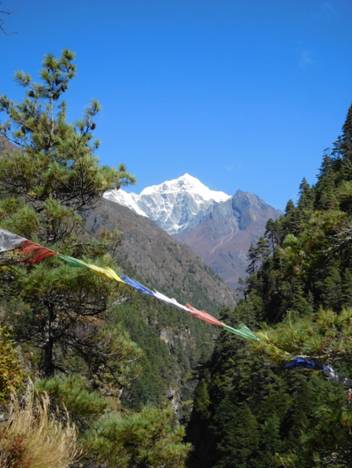
And the river churns in its bed:
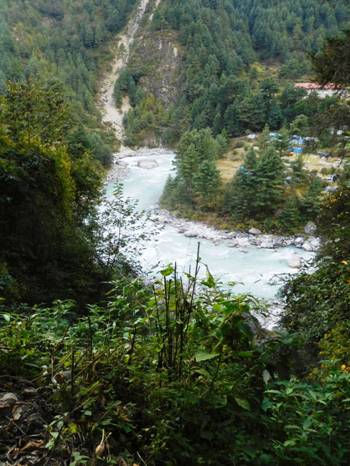
All along the route telephone and/or
internet reception is mixed/patchy, but usually available – though it may
surprise you that there is any at all. Often there is wifi eg in guest houses,
etc. Sometimes it is free; at others it might cost eg US$5 for 200 megs. It is
lovely though to be able to use ‘Whats App’, ‘Facebook Messenger’ or etc to
conduct telephone or video calls with your loved ones on the other side of the
world! (I know I did.)
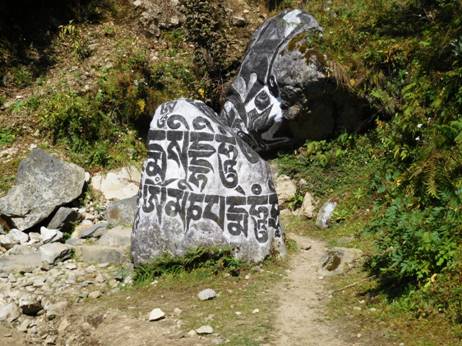
Endless religious gibberish pollutes
the scenery.
Everywhere in Nepal (as in
many such places) bullshit religious iconography is ubiquitous. Such a country
is enormously held back by such religious and (leftist) political primitivism.
Of course it does not help you much if your Maoist Government somehow still
pathetically claims that the entire royal family just shot itself (perhaps this
is what happened to the Romanovs too?) I am minded of a similar bizarre
(unsolved murder?) case in Vic where the victim managed to shoot herself twice
in the head with a bolt action rifle! Meanwhile they inflict punitive taxes eg
on antisocial things like autos (250%!) and stow the purloined cash into their
vast bureaucratic coffers to later be used (at personal need) for their own
Apparatchik purchases (dachas/limos – surely you know the story by now?)
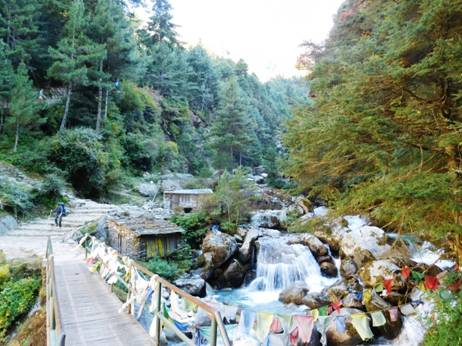
Of course religion can be beautiful
too. I was particularly impressed by these automated 'prayer mills'. This must
save some time grovelling in the dust muttering incantations!
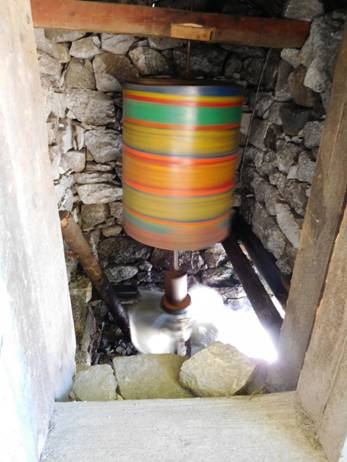
A 'Prayer-o-matic'!
Any damned fool (from Cecil Rhodes
on, (with his Cape to Cairo Railway) though he was not one – what an amazing
man; the only person in history to have not one, but two whole countries named
after him!) can see that Nepal must have a modern conduit to the sea, else the
efficient transport of goods/services and all the wealth that trade brings will
never emerge. The Maoists will not even build roads. These (hiking) tracks we
stumble along are funded entirely by the donations of kind passers by.
Freeway construction Nepali style.
An old man whose sign indicated he
had summitted Everest five times was collecting for just such track repairs
just out of Namche – and the track was being repaired right there with the
proceeds. You scarce ever see that sort of thing from any government! Once they
get hold of your money, it’s gone!
Meanwhile folk stagger by carrying
loads on their backs which small lorries would not be ashamed of. We often saw
young teenagers (girls and boys) carrying 15 slabs of canned booze up huge
mountains for the later delectation of rich foreignors. PS: Is ‘Everest’ so
named because of the likelihood that if you climb it you will ‘ever rest’ there
- as some hundreds (starting with Mallory), do?
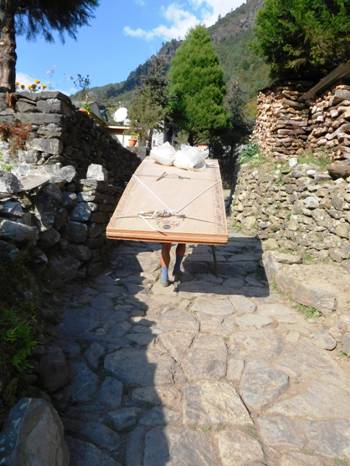
No 'Worksafe' here.
This poor guy staggered along under
the weight of over half a cubic metre of plywood. Some other poor devil had
hauled in on their backs the huge steel stoves used to heat the lodges, weights
of 150 kg, I’d guess! You just know that in many of the huts you pass by there
must be just such dreadfully broken human beings weeping and praying to Buddha,
just as other poor beggars call out uselessly to Allah or Christ elsewhere.

Santa Claus has lost his reindeer.
I saw one poor man staggering along
under a monstrous load, a huge swelling on the side of his face where a tooth
was abscessed or etc. He clutched at it tenderly and shuffled on, tears in his
eyes – you know it will be ever so, until his death. Dental problems are yet
the world’s single biggest killer. There is not a lot really romantic about
living in those mountains even if they might seem pretty to us – which is why
the seething millions hanker for the smogs and overcrowding of Kathmandu, etc.
Of course the UN and other such
Leftist ‘aid’ organisations hold lots of meetings there to discuss what ‘small
is beautiful’ world solutions might help, then find (mysteriously) at meeting’s
end that all the funding has been spent on the meetings! The population is left
to pull itself up by its own bootstraps - which it will, but much more slowly
than it might if it got just a little help up. A road here and there, for
example.

Bridge at Phakding. Keep and eye out
for the turnoff here on the way back.
There is a very long bridge across
the river at Phakding which you would be well served to give the yaks first
turn at, and maybe count how many others are aboard before you venture forth
your feet. It is not near so high as the highest ‘double bridge’ just as you
begin the climb up the mountain towards Namche. ‘Tully’ reckoned it to be 150
metres down to your death on the sharp teeth of the river far below. I did not
demur - being too fearful to look down!
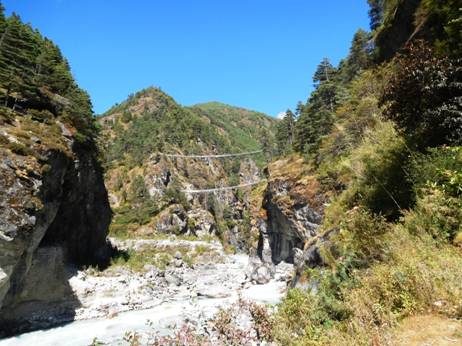
Old and new bridge.
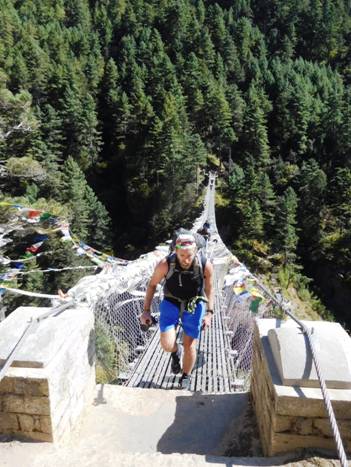
Tully surges off the high bridge.
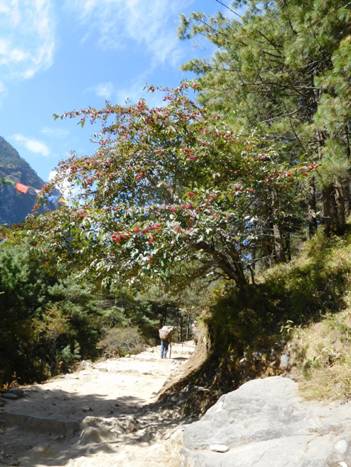
On the slopes climbing up to Namche
(and elsewhere) there are some interesting plants – many extensively gnawed by
yaks or hacked by folk for kindling. Others appear sacred to man and beast
alike. I noticed a beautiful blackberry with pure white canes, for example.

Whiteberries.
Coming up the rise in to Namche: 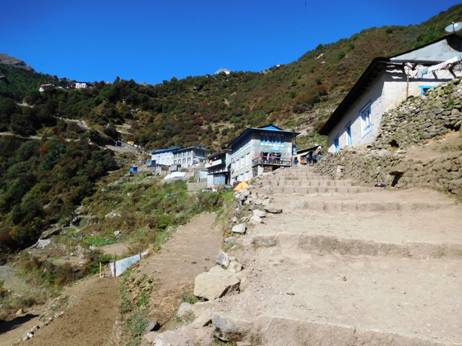
See also:
http://www.theultralighthiker.com/i-saw-below-me-that-golden-valley/
http://www.theultralighthiker.com/to-the-roof-of-the-world/
http://www.theultralighthiker.com/everest-base-camp-three-passes-trek/
http://www.theultralighthiker.com/cold-weather-face-masks/
http://www.theultralighthiker.com/my-life-was-wide-and-wild-and-who-can-know-my-heart/
11/11/2016: I followed my
footsteps: I creep
into Kathmandu in the small hours when only
giant mountain dogs and stray donkeys roam the streets. After two nights at the
wondrous Himalayan Traveller’s Inn, Thamel (http://www.himalayantravellersinn.com/),
I creep out again in the dawn to fly to Lukla. It is the best of times. The
twin-prop alights like a butterfly on a rhododendron blossom on the steeply
sloping runway at this, the ‘most dangerous airport in the world’. Of a sudden
you are in a Middle Ages overlain with 1950’s holiday camp. It is simply
awesome, as are the dizzying vistas. This is clearly not the First
World. If you are not proofed against Rabies, Hepatitis, Cholera,
Encephalitis, Meningitis, Typhoid…the juxtaposition of the First and Third World, stay home.
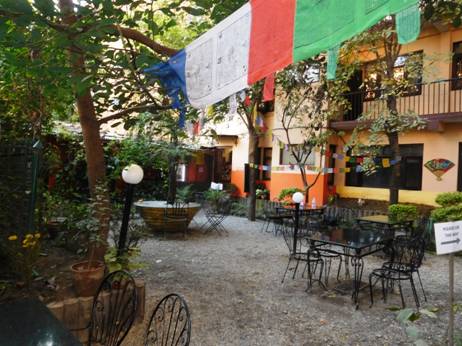
Garden Restaurant, Himalayan
Travellers Inn, Thamel, Kathmandu.
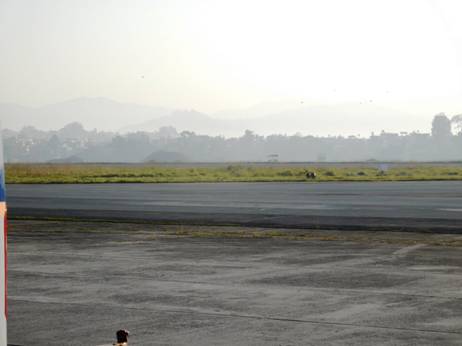
Early morning at Kathmandu airport:
the smog completely obliterates the vast Himalayas
which otherwise tower over this 5 million + city.
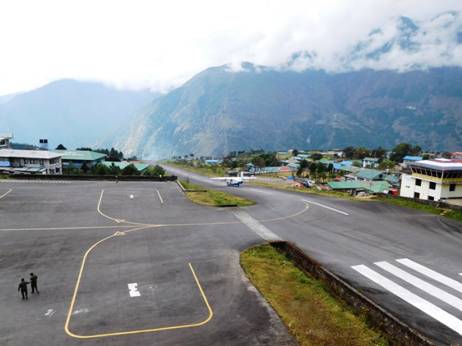
Our plane abandoning us in Lukla,
falls off the mountainside.
I have a day waiting for my friend
Steve (Tully) Hutcheson to arrive. I leave Lukla for a walk, first towards Bom,
delightfully pronounced ‘bum’. If I had my druthers I would exclusively walk
such backcountry trails and eschew the EBC altogether. There is so much peace
and quiet, and no doubt the ‘real’ Nepal. Just outside Lukla these
Himalayan dogs are clearly worshipping the Buddha in the westering light as
they await further reincarnations. Further on I encounter another reality of
the Third World in the raw. Two beautiful
pre-teen girls were just returning to their makeshift mud floored home with
teetering baskets of firewood twigs to unchill their leaky abode. Their goats
always happy with this life played on the roof. A tricky power cable snakes
through the thatch. They were also connected to satellite, their feet in the
dust and their heads in the stars.
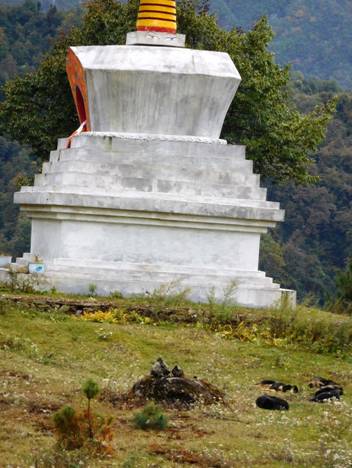
Dogs awaiting reincarnation
contemplate the Buddha.
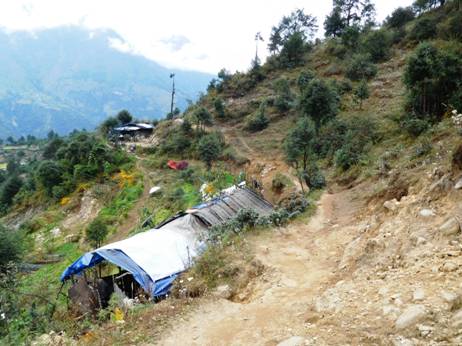
Quaint accommodation perhaps, but I
am glad of our own modest home at Jeeralang Junction built also from the local
earth and entirely with our own hands.

Close up. To underline that culture
is humanity’s primary 'need', NB that a woman’s flowers bloom in pride of place
even amidst this humble dwelling. The clothes are washed; the children clean.
Further down the valley I visit the
local power station and the power station worker’s abode. Clearly no militant
trade unions here! In Lukla I stay at the Lama Lodge in the main street http://www.booking.com/hotel/np/lama-lodge-and-restaurant-lukla.html.
It has the virtue that you can book online and safely leave a bag for your
return, which I did. The food is also excellent and the owners cheerful and
delightful. Net it is as cheap as anywhere.
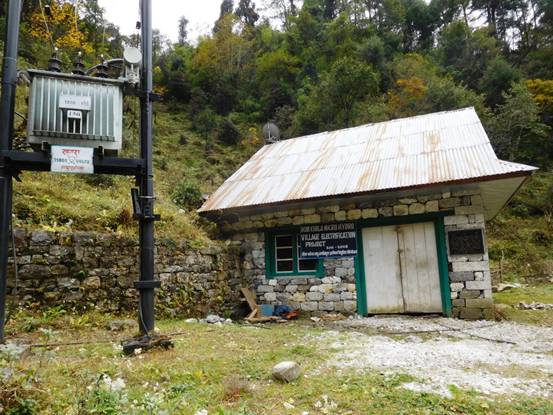
The immense physical effort of
creating and linking these micro-hydro projects all over Nepal with
sheer muscle power is astonishing.
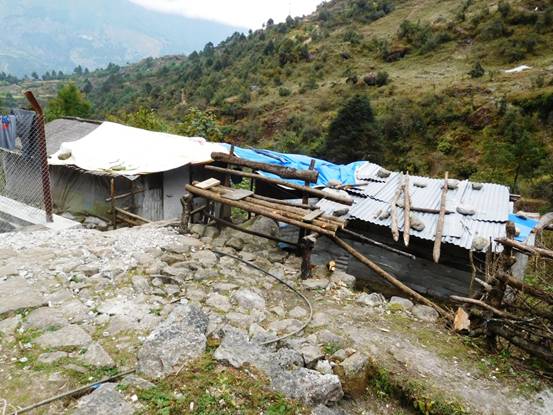
Our CFMEU (union) would have the
workers 'out' if forced to live and work in such accommodation...they do have
power and satellite however!
My cosy room at the Lama Lodge.
In the afternoon I climb the hill
behind the town into the rhododendron forests to gain some extra altitude
acclimatisation. This is our strategy here: ‘Climb high, sleep low’, climb
higher. You must also add in a ‘rest’ day where you sleep at the same altitude
twice every 500 metres’ increase in elevation. I added ½ tab of Diamox twice
daily to this regime (on my doctor’s advice) to prevent altitude sickness. All
are excellent stratagems.

View from the tarmac (Lukla).
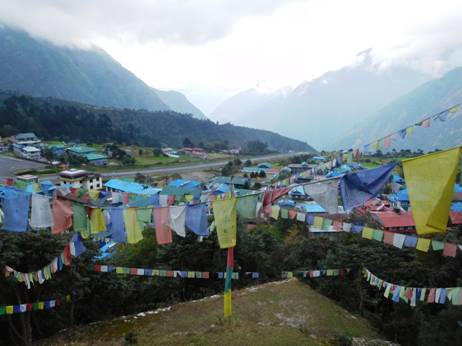
Climb up into the rhododendron
forests above and you can see the town laid out below you.
Lukla is a pretty town perched high
on a flattish space on the side of a mountain at 2800 metres. It has a modern high
school accommodating 400 students. The Nepalis are busily pulling themselves up
by their own bootlaces. There are many shops selling practically everything
imaginable. NB: If you arrived here to start the EBC in just your shorts and
thongs, providing you had a wallet full of money you could purchase all you
need along the way. It would no doubt be even chaper than purchasing your
supplies elsewhere. Right here in the main street a seamstress crafts perfect
copies of North Face, Columbia
& etc. Each town and village you pass is cluttered with goods and folks
eager to sell them to you.
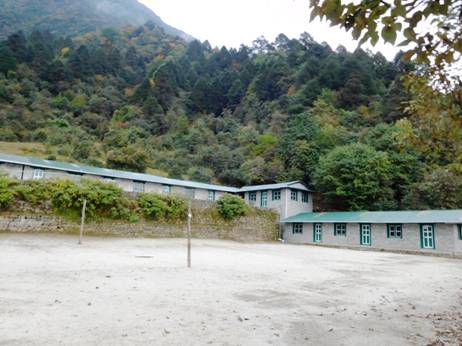
The High School nestled below the
forest.

Part of the main street. The shops
stretch this for hundreds of metres.
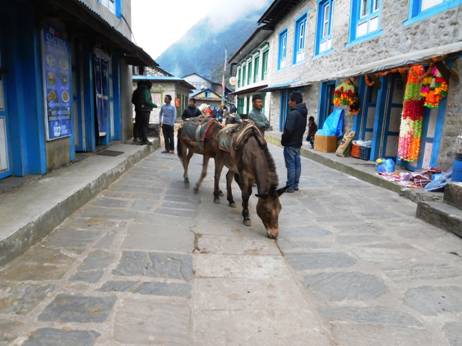
Donkeys and oxen are everywhere.

Next morning I meet Steve at the
airport. We ‘do’ a quick tour of the town (Lukla), have some breakfast then are
away on our EBC hike. Right at the edge of town the path begins. Throughout it
is ‘constructed’ of irregular broken stone, requiring a peripatetic step-up,
step down, step carefully…avoid the dizzying abysses. Cleave to the inside
edge. Give way to yaks and porters wielding heavy loads…
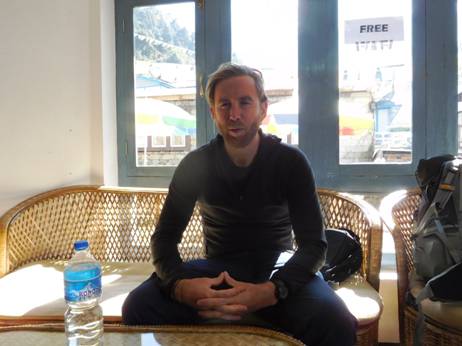
Steve arrives and begins immediately
to get into the spirit of things, contemplating his navel, etc.
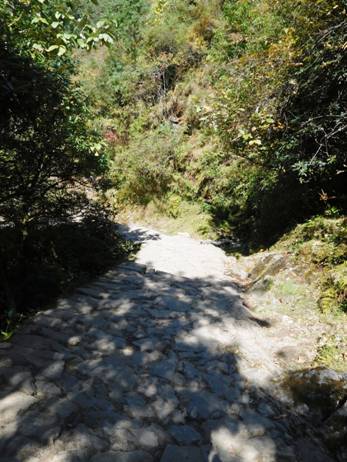
The path goes ever on and on... To
be continued.
See also:
http://www.theultralighthiker.com/to-the-roof-of-the-world/
http://www.theultralighthiker.com/everest-base-camp-three-passes-trek/
http://www.theultralighthiker.com/cold-weather-face-masks/
http://www.theultralighthiker.com/my-life-was-wide-and-wild-and-who-can-know-my-heart/
11/11/2016: To the Roof of the World: I have just
limped back from a visit to Everest - if you wonder why I have been so quiet
this last fortnight. I will be posting about this at greater length in the next
few days. I developed an awful chest infection and am still very weak, so you
will have to be satisfied for now with just this teaser. I will survive, I
hope.

Everest View: I console myself with
the thought that only a tiny fraction of humankind has seen this view.
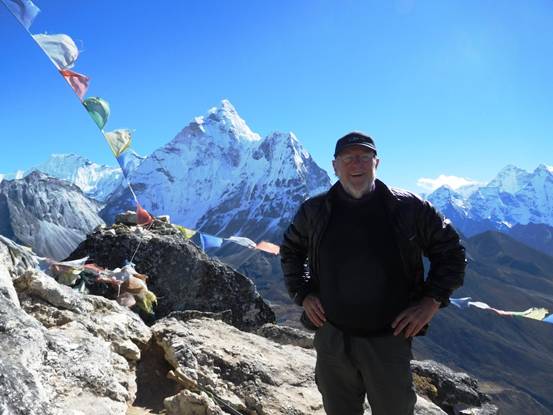
Summit of Nangartschang hill, Dingboche, Nepal
@ 5100 metres (16,700 feet).
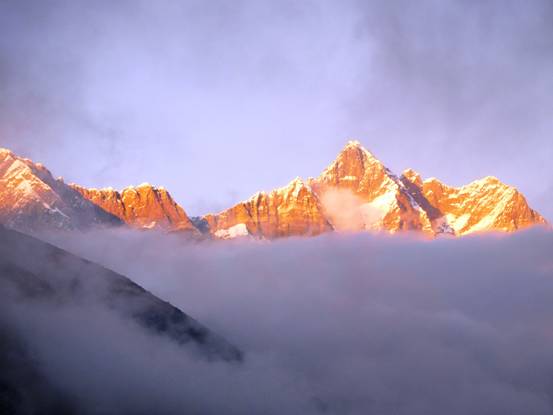 Himalayan
Sunset.
Himalayan
Sunset.
10/11/2016: Home safe from the EBC after 32 hours sitting up and 36
hours awake. Thanks to Bryn and Della for coming to pick me up from the
airport. More later - after a nap!
09/11/2016: Checking in at
Khatmandu. On my
way home at last:
09/11/2016: My memories show that four years ago exactly I was sharing another adventure with Steve Tully
Hutcheson. May there be many more hopefully not so arduous for either of us
as the current one.
08/11/2016: In Kathmandu
I went to the zoo.
To the beautiful botanic gardens too. When I woke this morning and this was the
view from my window I just knew I was not home in Jeeralang Junction! Thanks to
Ram K Pyakurel manager
of the Himalayan Travellers Inn for his thoughtfulness and for a very pleasant
day.
Clearly the world needs old men's
erections much more than it needs weird critters like that!
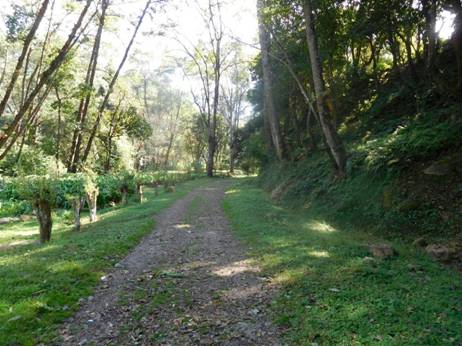
08/11/2016: Breakfast in the
delightful back garden at the Himalayan Travellers Inn Thamel Kathmandu. Feeling a lot
better today.
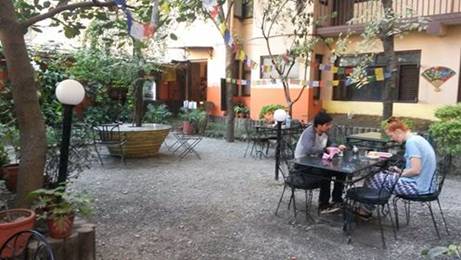
07/11/2016: Sadly I have had to
pull out of the EBC trip as the morning after climbing to 5100 metres my lungs betrayed me. I
have something like pneumonia. I have managed to drag myself painfully back to
Khatmandu over three horrific days two of them walking over ten hours each from
where Della Jones has arranged for my safe repatriation on
Wednesday. There was a lot of time yesterday when I thought I would not make it
but here I am still. No more adventures for a little while. I would like to point
out that this was an unsupported hike - no porters or guides, carrying all my
own gear etc. I just checked my walk logger.It says I walked 27 km yesterday
and 29 the day before!
04/11/2016: Today we climbed this
big hill just outside Dingboche. 750 metres straight up starting above the elevation of Mt Cook. This
feather was the only sign of life I saw apart from innumerable crows and
tourists.
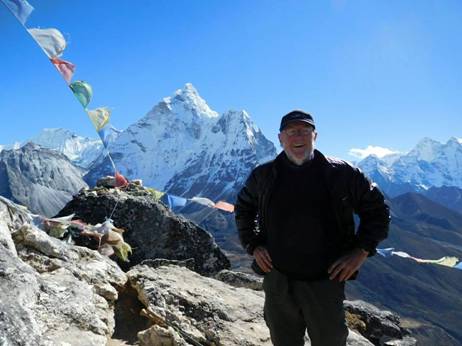
03/11/2016:
Steve Tully Hutcheson: ‘Believe it or
not, that is Steve Jones down below.’ Near Namche Bazar.
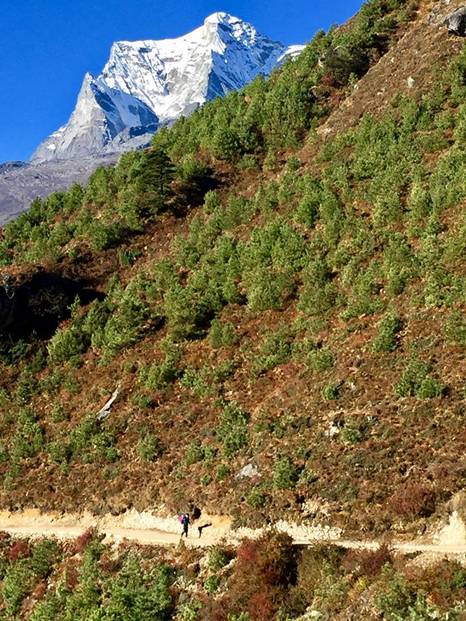
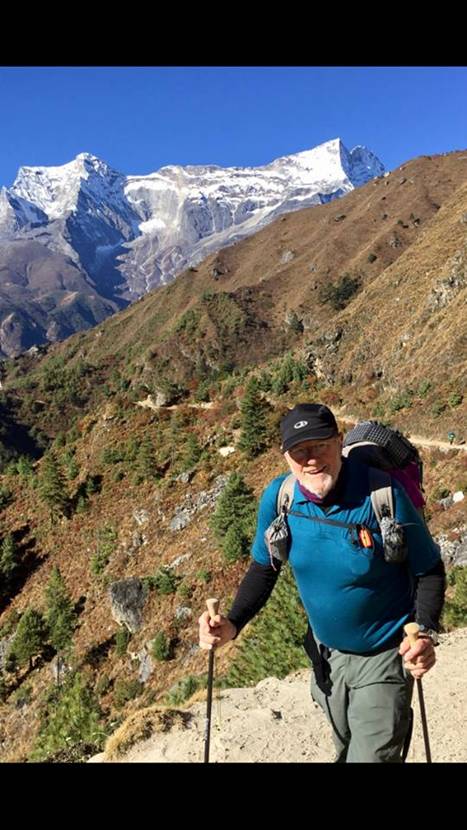

Famous quotes of our time (Steve
Jones): ‘Everything is bullshit’!
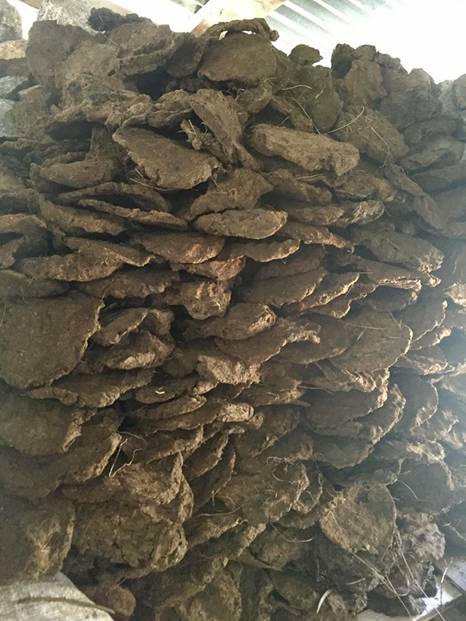
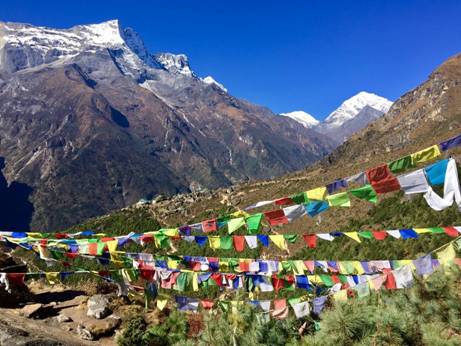
01/11/2016: First view of Everest. These lovely blue flowers were
everywhere. Garlic soup for lunch and dinner. With Steve Tully Hutcheson.

01/11/2016: A very hard 800 metres uphill today to Namche. Some great views
along the way. With Steve Tully Hutcheson.


29/10/2016: How the other half live. Rural Nepal is stunningly beautiful and
the people who lived in this humble house appear delightfully happy.
25/10/2016: The wildlife seems to get wilder everyday: Yesterday afternoon on
our walk two four legged critters crossed the track at speed and at a
considerable distance such that I could not quite work out what they were. The
only giveaway was the white spot I noticed on the rump of the second one. When
I arrived at the place they had crossed the ground was too hard for tracking.
Then I began to hear their infernal growling which indicated a war was in
progress between two of these guys. (Apologies for the poor quality shot – I
only had my phone with me).
They do say that once you start to
see them there are already too many koalas and that they are beginning to
destroy the forest. Anyway there are probably enough to begin harvesting them
for their beautiful coats. This one had a particularly luxuriant growth. They
would be easy enough to drop out of a tree eg with a .22 short, or a sling, or a
spear.
When I was a kid folk used to ‘spotlight’ critters like this
(mainly possums – everything was tucker back then) by walking the full moon
along the branches of a tree, then plinking them down with the help of the old
Lithgow .22 single shot. PS. We usually see one or more of these little guys
too. There must be plenty of ants around. There are also almost innumerable
swamp wallabies and grey kangaroos.
24/10/2016: Cold Weather Hut Booties: I made two pairs of these (one also for
my friend Steve Hutcheson who I am going with) for my upcoming Everest Base
Camp and Three Passes Nepal Walk. They weigh 78 grams per pair (as you can
see). They are a bit rough as I was in a hurry and they are prototypes really,
but I’m sure they will work. (PS; They weighed 36 grams each next day after the
glue dried)
I wanted something with plenty of
insulation (3/4” of closed cell foam) as the unheated floors up there are bound
to be pretty cold. I used this toughened closed cell foam intended for making
workshop floors more comfortable. I reasoned that if it is up to a bit of wear
and tear from walking on it should work well upside down on the bottom of a
pair of shoes too.
I figure this pair will last many
camping trips, and they cost next to nothing to make. I already had the 2 oz
ripstop, the foam mat, the Velcro, the glue, the sewing machine…When I work out
a slightly better pattern I will post it. I just cut this one by standing on
the material (wedged between the two soles) and trimming it. They work OK.
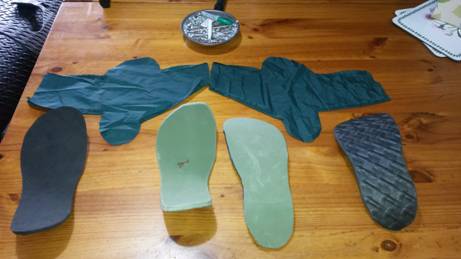
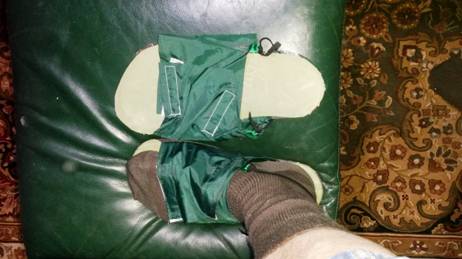
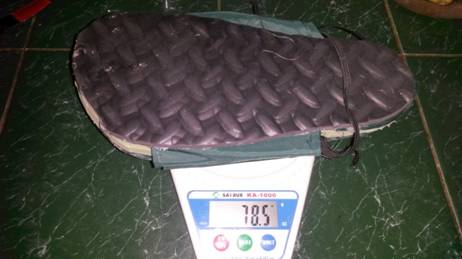
24/10/2016: Must Take a Gun With Us on our afternoon walks. This afternoon, a
fine fallow stag had just crossed the track in front of us and had dropped this
excellent antler. When I have time I will have a look around his rub lines (and
he must have a wallow in the gully nearby) to see if I can find its mate. As I
have mentioned before the game around here (Jeeralang and Yinnar is really
building up. Probably if I went out with a spotlight of a night I would see
something interesting betimes on our top flat! In the picture I am trying to
teach Spot what the stag looked like. He seems quite non-plussed!
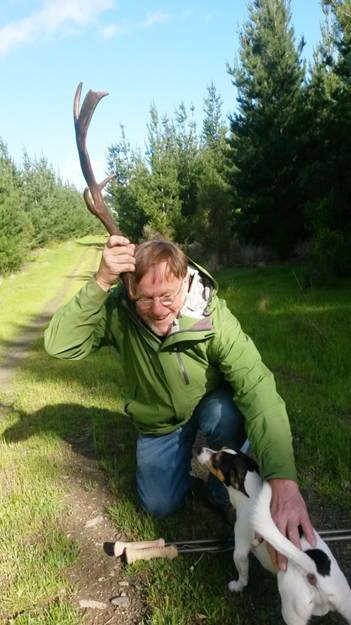
24/10/2016: No Sew Sandals: I made this pair as an experiment as I know there
are lots of folk who don’t sew. This pair can be made with a pair of scissors,
some blue hiking mat foam, a car inner tube, some Velcro and some contact
adhesive (eg Selley’s Gel Grip) Should take you less than half an hour. They
weigh 80 grams each in US
size 9.5 , but could be trimmed a little. They would make excellent hut booties
or for river crossings - or you could walk a long way in them if your shoes
gave out.
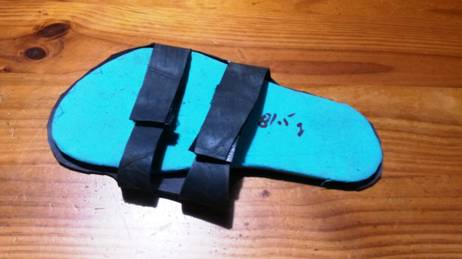
24/10/2016: Toughened Foam Flip Flop: This foam which is toughened on one side
making it suitable for quieting and insulating concrete workshop floors makes a
more durable foam flip-flop which also has some grip.
You can cut it out in a minute with
a pair of scissors. All you need is a little contact adhesive and some Velcro
to finish the job. The result is a camp shoe which should last many trips which
weighs just 30 grams (each)
23/10/2016: Everything you never wanted to know about mice. Bet you didn’t know
they originated in India:
https://en.wikipedia.org/wiki/House_mouse
21/10/2016: Progress: it always seems more than it really is. The good news: I
did eventually finish that fence; http://www.theultralighthiker.com/fencegarden/
and today I managed to plant a couple of dozen new fruit trees in the new
orchard area…and the photos prove I am only half the man I once was! The new
area is not quite finished I admit. The fence is not yet quite JR proof. There
are still some half dozen or so trees to add, but it will look great next
Spring. Hopefully by then the supports for the garden seat will be something
other than plastic pots – though they seem to work very well!
Merrin, Milo
and Della enjoy it anyway - and it has Spot's seal of approval!
Spot has been such a big help. I
would like to tell you he dug all these holes himself!
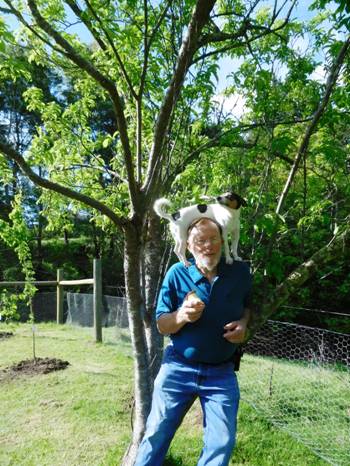
Spot relaxing in the Santa Rosa plum at the
end of a long hard day while I enjoy a well earned apple.
19/10/2016: Lever Action Shotguns (and rifles) have been available legally since
the late C19th (along with bolt actions). Most folk go with a double
barrels (most side-by-side but some under-and-over) because they are lighter,
yet you can still get that second shot off quickly (or simultaneously) if
needed. Most folks (traditionally) used shotguns to hunt small game, especially
birds where more than two shots without reloading was less likely and had to be
weighed against the additional weight often lugged through cloying swamps and
other treacherous ground. All along
however some folks had a need for multiple shots or hunted larger (sometimes
dangerous game) where a multi-shot shotgun firing ‘buckshot’ (.30 gauge
pellets) or solids were needed. Nothing has changed. Only the law. There has
been no increase in firearms offending by law-abiding gun owners. Practically
all firearms offences are perpetrated by unlicenced users with illegal firearms.
A further restriction on legal firearms owners does not make the public safer.
The contrary is the case. Rather than outlawing the Adler shotgun (and all
other lever action shotguns - I favour a Winchester
.410 lever action for Della for example), law-abiding folks ought to be allowed
to carry handguns for self-protection. Neither the law nor the police protect
you. At best they make you less safe and/or mop up the pieces (and apportion
blame) afterwards. A ban on lever action shotguns will also only lead to a call
to outlaw lever action rifles (like the ones you see on Western movies for
example). I admit I mostly use nothing but lever action rifles. It is not so
much their quick second-shot capability which attracts me to them but their
quick first-shot capacity from unloaded – a configuration which I always prefer
over relying on ‘safety catches’ which are arguably the cause of more
unintentional gun incidents than anything else!
20/10/2016: An 8 cm long metal tube approx 2 cm in diameter is what separates
the two sides in the ‘Lever Action Shotgun Debate’. This is nearly of the level
of nicety as the ‘Little Endians and Big Endians of Gulliver’s Travels or the
two sides who tore each other to pieces centuries ago in what Gibbon described
as the war of the Significant Dipthong’ when two words (now unspellable with a
Qwerty keyboard) between the ‘Homoousians’ and the ‘Homoiousians’
all but destroyed Christendom. Was Jesus of the same kind or of the same
substance as God? Somewhat therein as I recall swung the bitter dispute (At
last settled by the Nicaean Creed you may have been taught at Sunday School).
Five shot Adler lever actions (with a tubular magazine holding four shot-shells
are permitted, but a very like tube holding seven shots is the scourge of the
ages and a source of indescribable peril from which the public must be
protected at all costs (whilst the venerable .303 Enfield which saw sterling service
for us in two World Wars with its 10 shot magazine (in its heyday, and arguably
still the ‘fastest bolt action rifle in the world’) is freely available…Ah, the
sanity of it all!
18/10/2016: Powerfilm USB +AA Solar Charger:
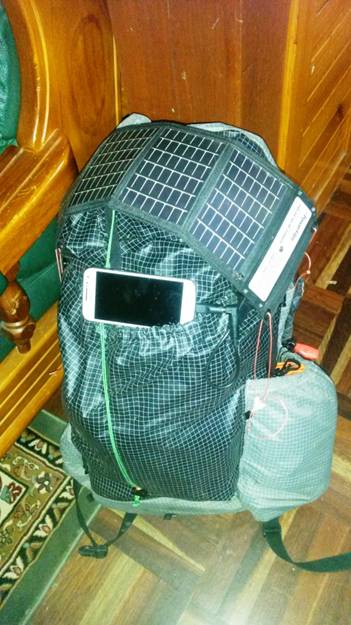
I fixed the broken wire I had in
this unit yesterday. You should never allow a solar charger to flap
uncontrollably in a heavy wind! I can see that a lot of reviewers of such units
have had them fail. I suspect excessive flexing is the cause. I have mounted it
to my Zpacks Blast (Zero) pack with some Lineloks and Dyneema. This is a very
light option but will prove too inconvenient in practice, so I will be
switching them for plastic buckles and 1 cm webbing today. Then I will quickly
be able to move it out of the way when I want something out of my pack.
With the batteries straight out of
the storage drawer (so not quite charged) it happily charged my Samsung galaxy
4 Mini (1900 mAh battery) in this configuration at 1% a minute in dappled
sunlight (cloudy Spring 20C day) yesterday.
As configured the unit weighs 176
grams including batteries (ie minus the ‘tail’). My Bushnell Mini Solarwrap
weighs 116 grams including the AA/AAA battery charger, so an increase of 60
grams. For that 60 grams you get more storage (and you can always have a couple
of extra charged AAs for additional storage - at 30 grams each). Bushnell do
not quote their storage capacity but I suspect somewhere between 1500 and 2000
mAhs. The Powerfilm unit also has 50% more solar cells and they are clearly
much more efficient. The Bushnell unit says it will take 10 hours of sunlight
to charge its internal battery. The Powerfilm unit says it will take about 4
hours to charge the two 2000 MAh batteries it comes with, so it has2 ½ times
more muscle. Well worth the 60 grams.
Many reviewers of such units clearly
have no understanding whatsoever of how such a unit works. Many return them
saying they will not charge their iphones & etc. Now electricity (like
water) will not run ‘uphill’. If you have a larger battery to charge and it is
already filled to over the capacity of the charging unit it will not charge at
all.
Another delusion is that the unit
should fully charge the appliance to be charged. If you view the two connected
batteries as a full water tank connected (on the level) to an empty water tank
you will understand that the water will only flow until they are both half
full. It is the same with batteries. A full 2400 charge in the charging unit
will (in the absence of sunlight) charge
the appliance’s 2400 mAh battery to 1200 mAhs ie 50%. When the phone etc has
run down some more, it will charge it some more, eg to 40%...and so on.
Notwithstanding the above, in the Powerfilm
unit, if the two AA batteries are fully charged and the unit is in full sun it
has a capacity above the 2000 or 24000 mAhs the batteries supply so it will
charge a battery which is larger (eg 3500 mAhs).
I swapped out the standard 2,000 mAh
batteries http://www.theultralighthiker.com/eneloops-rechargeable-batteries/
for the Eneloops Pro 2400mAh versions http://www.theultralighthiker.com/eneloop-pro-aaa-battery/
to give the unit a little more muscle. I also cut off the unnecessary ‘tail’
the unit (photo below) comes with saving 10.5 grams. A new unit may weigh even
less than this one.
You can charge AAA batteries if you
carry a couple of AA to AA A converters.
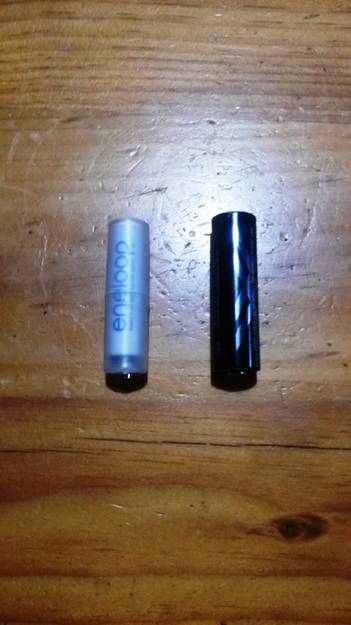
17/10/2016: Everest Base Camp & Three Passes Trek:

I am busy getting ready for this
(and trying to finish some jobs around the farm so posts have been rather light
of late. I am a guest on this trip, so this is mostly Steve Hutcheson’s
itinerary for the trip. I will be editing/adding to it over time, so come back
and check. I am posting it now so you can check where I am if I happen to eg
post a photo on Facebook or etc. If the going gets too rough for me and I have
to drop the passes (I am more than twice Steve’s age), I will just go up (and
down) from Lobuche to Gorek Shep - but I have been training for this (and I
suspect it is relatively much easier than much of what I have done in my life),
so I’m hoping for the best. We will carry all our own stuff but we might hire a
porter/guide for the passes as the way can be harder to find there and you
can’t afford to be wasting time on such long days. Keep you posted:
Day Minus 1: Fly to Kathmandu
Options for Kathmandu
(stay relatively close to airport - Thamel):
Elbrus Home – LINK (#2 of 101
specialty lodging) - $14 per night, 1 room (2 adults) **
Hotel Osho Home – LINK (#6 of 175 hotels
in Kathmandu) - $29 per night, 1 room (2
adults)
Backyard Hotel – LINK (#14 of 175
hotels in Kathmandu) - $15 per night, 1 room
(2 adults)
** Pilgrim’s Guest House – LINK (#10 of 424
B&Bs in Kathmandu) - $12 per night, 1 rm
(2 adults)
Recommended by this guy on
Backpacking Light.
Himalayan Travellers Inn. Good
Reviews $11 per night.
Day 0 - Flight to Lukla: Acclimatisation day Lukla
Stay at Lama Lodge and restaurant
A$13/night twin room with ensuite.
A bag can be left here. Booked for
return trip.
Better to get on first flight in
morning due to fog.
Get a window seat on the LEFT (port)
side for views of Everest.
Airport sits at 9,300 feet, 12%
grade and drops over a 2,000 foot valley.
Labeled the most dangerous airport
in the world.
FLIGHT: BOOK FLIGHT FROM KATHMANDU
TO LUKLA TARA AIR:
Depart Kathmandu
at 6:15 AM
Arrive Lukla at 6:45 AM
Simrik (Andrei flew this), Tara Air
The reason why Tara Air isn’t as
popular (crash in 2016).
Tara Air – (10 kg permitted, $147
USD, refundable)
Kathmandu (6:15 AM) to Lukla (6:45 AM)**
Kathmandu (8:30 AM) to Lukla (9:00 AM)
Kathmandu (7:45 AM) to Lukla (8:15 AM)
Simrik Air – Oct 30 (10 kg
permitted, $160.22 USD, refundable)
Kathmandu (8:45 AM) to Lukla (9:10 AM)**
Kathmandu (10:00 AM) to Lukla (10:25 AM)
Day 1: Lukla (2800 meters, 9186 feet) to Monjo (2835 meters, 9301 feet)
Time: 4 hours
STAY: Monjo Guesthouse (Stingy Nomads
recommendation)
Freshly squeezed juices, hot shower (200 NPR, $2), TEMS permit (NPR
3000, $30).
LONELY PLANET TIMES:
Lukla to Cheplung (1:15 hours)
Cheplung to Phakding (1:45 hours)
Phakding to Benkar (1:30 hours)
Benkar to Monjo (1:00 hour)
TOTAL: 5 hours, 30 minutes
Day 2 - Monjo (2835 meters, 9301 feet) to Namche Bazaar (3440 meters, 11286 feet)
Time: 2 hours, 40 min. Short, hard, steep climb.
Bakery: Everest Bakery (chocolate
cake)
STAY: Thamsecko Lodge (pay permit on
way – NPR 2000 ($20 USD).
LONELY PLANET TIMES:
Monjo to Namche Bazaar (3:00 hours)
TOTAL: 3 hours
Day 3 - Namche (3440 meters, 11286 feet) to Khunde/Khumjung (3970 meters, 13025 feet) to
Namche. Acclimatisation day.
DAY HIKE: Acclimatization Day
LONELY PLANET TIMES:
Namche Bazaar to Khumjung (1:00
hour)
TOTAL: 3 hours
Day 4 - Namche (3440 meters, 11286 feet) to Pangboche (3985 meters, 13074 feet)
LONG DAY
Time: 10 hours
STAY: Buddha Lodge (water now $2 for
1.5L).
En route to Pangboche, stop at
Tengboche to see famed Buddhist monastery.
Just in case, Pheriche: Stay at
Shangri La Lodge (owner is Tashi Dunder Sherpa); very helpful and
knowledgeable.
LONELY PLANET TIMES:
Namche Bazaar to Sanasa (1:00 hour)
Sanasa to Phunki Thenga (1:30 hours)
Phunki Thenga to Tengboche (1:30
hours)
Tengboche to Pangboche (1:15 hours)
TOTAL: 5 hours, 15 minutes
Day 5 - Pangboche (3985 meters, 13074 feet) to Dingboche (4410 meters, 14470 feet)
Time: 3 hours
LONELY PLANET TIMES:
Pangboche to Orsho (1:15 hours)
Orsho to Dingboche (1:00 hour)
TOTAL: 2 hours, 15 minutes
Day 6 - Dingboche (4410 meters, 14470 feet) to Nangartschang Hill (5085 meters, 16700 feet) to
Dingboche. Acclimatisation Day.
DAY HIKE: Nangartschang Hill is
close to Dingboche and has great views of Ama Dablam
LONELY PLANET TIMES:
Dingboche to Nangartschang Hill
(one-way, 1:30 hours)
TOTAL: 2 hours, 30 minutes
Day 7 - Dingboche (4410 meters, 14470 feet) to Chhukung (4700 meters, 15420 feet)
Time: 5 hours, 4730 meters.
Head to Chhukung Ri. Good to acclimatize. “Climb high, sleep low”.
Details: Can be difficult finding
trail at times, especially in a little bit of snow.
There are two peaks at the top. The saddle b/t them is filled with many cairns.
Smaller summit is 17,700 feet.
LONELY PLANET TIMES:
Dingboche to Chhukung (2:30 hours)
Chhukung to Chukkung Ri
(one-way, 3 hours)
TOTAL: 7 hours
Day 8 - Chhukung (4700 meters, 15420 feet) to Kongma La (5535 meters, 18160 feet) to
Lobuche (4940 meters, 16210 feet)
LONELY PLANET TIMES:
Chhukung to Kongma La (3:30 hours)
Kongma La to Lobuche (3:00 hours)
TOTAL: 6 hours, 30 minutes
Note: Lobuche is known to have the worst
accommodation.
PASS AND LONG DAY: Kongma La Pass
Time: 9 hours
Start at 4-5 am.
If recent snow, it may be too
difficult to go over pass. Go around to
Lobuche.
Details: Lots of climbing and then
flat sections. Pass waterfalls and lakes
en route.
Final climb is rather steep.
Best view of the three passes.
The way down can be difficult. Many huge boulders.
At bottom of pass, large
moraine.
Follow meandering path on the
glacier (marked by cairns).
Head down moraine on opposite side
to Lobuche.
Day 9 - Lobuche (4940 meters, 16210 feet) to Gorak Shep (5164 meters, 16942 feet)
Time: 3 hours
Details: Short trek.
LONELY PLANET TIMES:
Lobuche to Gorak Shep (2:30 hours)
Gorak Shep to Kala Pattar (one-way,
2:00 hours; return, 3:00 hours)
(for sunset if it is clear,
unlikely)
TOTAL: 5 hours, 30 minutes
Day 10 - Gorak Shep (5164 meters, 16942 feet) to Everest Base Camp (5364 meters, 17598 feet)
LONELY PLANET TIMES:
Gorak Shep to EBC (one-way, 2:30
hours; return 5:00 hours)
Gorak Shep to Kala Pattar (one-way,
2:00 hours, return, 3:00 hours)
** Do Kala Pattar in the EARLY
morning.
TOTAL: 8 hours
DAY HIKE: EBC.
Time: 3 hours up, 1.5 hours back
(4.5 hours total)
Tip: Start at 6 am to avoid hiking
with HUGE groups!
EXTRA DAY HIKE: Kala Pattar (5643 meters,
18513 feet) for sunset
Time: 1.5-2 hours up. Take it
slow.
These are the best views of Everest
that you can get from anywhere (as a trekker).
Make sure that it is a beautiful day.
However, in the evenings, you risk
low clouds/no view.
The entire base camp is located on
the Khumbu Glacier.
Day 11 - Gorak Shep (5164 meters, 16942 feet) to Dzongla (4800 meters, 15748 feet)
Time: 5-6 hours
Suluk: Stay at Himalayan Lodge.
360-degree view of Himalayan Mountains
** Most beautiful mountain town on
the hike (right next to large lake).
LONELY PLANET TIMES:
Gorak Shep to Lobuche (2:00 hours)
Lobuche to Dzonglha (3:00 hours)
TOTAL: 5 hours
Day 12 - Dzongla (4800 meters, 15748 feet) to Cho La Pass (5420 meters, 17782 feet) to Gokyo
(4750 meters, 15584 feet)
LONELY PLANET TIMES:
Dzonglha to Cho La (3:00 hours)
Cho La to Gokyo (5:00 hours)
TOTAL: 8 hours
PASS DAY: Cho La Pass
Time: 5.5 hours + 1.5 hours for
lunch
Suluk: Stay at Namaste Lodge (ALSO
RECOMMENDED BY ‘LIVING IF’ blog).
Favorite place.
**NOTE: Most lodges can arrange porters,
guides, or porter-guides for the relevant day. **
CROSSING CHO LA PASS:
http://www.escapeartistes.com/2013/01/04/crossing-the-cho-la-pass/
Details: Favorite pass (in terms of
climb, not review).
There is a huge boulder field en
route to pass.
Near the top of pass, there is a
glacier, which can be very slippery.
Trekking poles are essential for this section, and microspikes are
recommended (need to do a cost-benefit analysis to see if the micropsikes are worth
carrying).
For the last 20 feet, there is a big
scramble where you have to use your hands.
Descent: Cross another glacier
(Ngozumba Glacier), but it is just a wasteland of rocks.
The path across the glacier is
further north than the map shows.
Head north out of Dragnag and you’ll
find the path.
There is green paint on many rocks
indicating the way.
Day 13 - Gokyo (4750 meters, 15584 feet) to Gokyo Ri (5357 meters, 17575 feet) to Gokyo
(4750 meters, 15584 feet)
LONELY PLANET TIMES:
Gokyo to Gokyo Ri
(one-way, 2:30 hours)
TOTAL: 4 hours
Gokyo to Gokyo Ri
(1.5 hours up, confirmed)
BEST VIEWS OF EVEREST.
2000 feet straight up.
Stunning view of Cho
Oyu (6th highest mtn in world) and Ngozumba Glacier
Ask Andrei if he went up for sunrise
or sunset?
DAY HIKE/CLIMB: Gokyo Ri has
great views of the mountain range.
Back in Gokyo, should have great
views of Cho Oyu.
Sunrise or sunrise.
Sacred Lakes of Gokyo!
Beautiful lake (Gokyo Lake)
Details: Gokyo is a big village in
the Khumbu.
Has several teahouses (a few on
higher end), a bakery, and small shops.
Gokyo Lake shines brilliantly blue.
Day 14 - Gokyo (4750 meters, 15584 feet) to Renjo La Pass (5360 meters,
17585 feet) to Lungdhen (4300 meters, 14107 feet)
LONELY PLANET TIMES:
Gokyo to Renjo La (3:00 hours)
Renjo La to Lumde (Lungdhen) (3:00
hours)
TOTAL: 6 hours
PASS DAY: Renjo La Pass
Time: 7 hours
Details: First hour is pretty
gradual and easy.
Many snowcocks across path
(hilarious Himalayan birds).
Second hour is very steep until it
opens up near the top of pass into a huge bowl.
Difficult to find path this
day. Wind is ferocious and kept changing
directions (b/c of being in a bowl).
The pass has gorgeous views of
Everest and Lohtse.
The descent has a long set of rock
steps. Easiest descent. Wind dies down once down below.
Ends up in a grassy valley with huge
mountains on one end.
That valley joins up with another
valley that is full of sand (frozen lakes, boulders, mountains).
Tons of potato farms.
Made it to Thame (town hit very
badly by earthquake).
If fit, consider going to Thame
(longer day, but lower elevation).
Day 15 - Lungdhen (4300 meters, 14107 feet) to Namche Bazar (3440 meters, 11286 feet)
LONELY PLANET TIMES:
Lumde (Lungdhen) to Thame (2:00-3:00
hours)
Thame to Namche Bazaar (3:00 hours)
TOTAL: 6 hours
LONG DAY: Long day in terms of
distance, but all downhill
Time: 7-8 hours
Day 16 - Namche (3440 meters, 11286 feet) to Lukla (2800 meters, 9186 feet)
LONG DAY: Another long day in terms
of distance, but all downhill.
Time: 8 hours
Stay: North Face Resort
LONELY PLANET TIMES:
Namche Bazaar to Monjo (3:00 hours)
Monjo to Benkar (1:00 hour)
Benkar to Phakding (1:30 hours)
Phakding to Cheplung (1:15 hours)
Cheplung to Lukla (1:15 hours)
TOTAL: 8 hours
Day 17 – Return to Kathmandu/Buffer Day #1.
Rest day in Lukla (if too foggy)
Simrik Airlines – (10 kg permitted,
$160.22 USD, refundable)
Lukla (6:50 AM) to Kathmandu
(8:10 AM)
Lukla (8:10 AM) to Kathmandu
(8:35 AM)
Lukla (9:20 AM) to Kathmandu
(9:45 AM)
Lukla (10:35 AM) to Kathmandu (11:00 AM)
Tara Airlines – (10 kg permitted, $147
USD, refundable)
Lukla (8:30 AM) to Kathmandu
(9:00 AM)
Lukla (7:00 AM) to Kathmandu
(7:30 AM)
Day 18 - Buffer Day #2
*** FLIGHT: BOOK FLIGHT BACK FROM
LUKLA TO KATHMANDU
Simrik Airlines
Depart Lukla at 6:50 AM.
Arrive Kathmandu
at 7:15 AM.
Lukla to Kathmandu
Fly earlier.
Book an open ticket. Talk with representatives. Contact them in Lukla.
Get a seat on the RIGHT (starboard)
side for views of Everest.
16/10/2016: Adding Down to a Sleeping Bag: I have a Montbell Super Spiral Down
Hugger #3 (http://www.theultralighthiker.com/montbell/)
which will take me comfortably just below freezing (-1C) but on my upcoming
Everest Base Camp and Three Passes hike it is likely to get down to maybe -14C
(at Gorek Shep) so I need a little more warmth. I will be adding approximately
3 ounces of 900 fill power down to the bag. I also have a Montbell Superior
Down vest, coat and trousers which I can wear (plus a down balaclava and down
socks!) so I will be cosy enough.
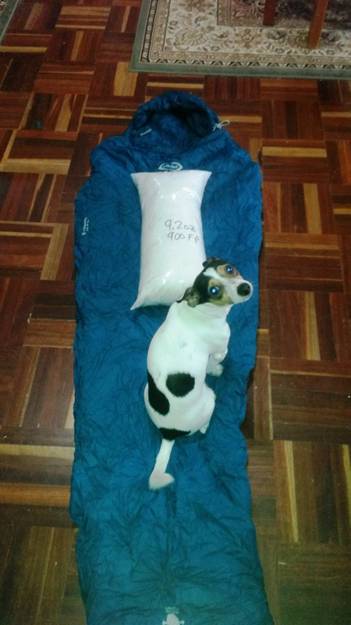
Spot would like to come too, as you
can see.
If you turn the bag inside out you
can see where the baffles have been closed. It is a relatively easy task to
push all the existing down to the bottoms of the baffle tubes, carefully rip
the stitching which closes the baffles, then push handfuls of extra down into
the tubes until you are satisfied they are full enough, then sew them up again.
You can buy 3 ounces (90 grams) of 900 fill power down for US$39.95 here: http://thru-hiker.com/materials/insulation.php
or 800 fill power dry down here: http://www.tiergear.com.au/11/online-shop/duck-down-insulation-425g-15oz
for A$30.80 This should drop the (comfort) temperature rating of your bag by
approx 7C degrees.
Some additional useful instructions
here: http://www.doityourself.com/stry/how-to-replace-feathers-in-a-down-sleeping-bag
See videos here: https://www.youtube.com/watch?v=ZRMJUZFTnHM
& here: https://www.youtube.com/watch?v=sCJp2C4EFjU
16/10/2016: That’s 2,000,000,000,000 galaxies! There will sure be some
interesting things amongst them: http://www.newsmax.com/Newsfront/2-trillion-galaxies-astrophysics/2016/10/13/id/753275/
12/10/2016: Ultralight Paddle: If you have an ultralight packraft you will need
an ultralight paddle. Our lightest weighs 409.5grams. It was an Alpacka
ultralight model, now alas discontinued. They also used to sell ‘Ninja paddles’
which fitted on your hiking poles. (Perhaps check the Wayback Machine: http://archive.org/web/)
– they may still be available elsewhere; A comparable one is still made by
these folks: 406 grams: https://supaiadventuregear.com/shop/paddle/
Here are some others: 670 grams: http://www.advancedelements.com/accessories/paddles/;
822 grams : http://www.king-cart.com/cgi-bin/cart.cgi?store=pacificdesigns&product=Paddles&exact_match=exact
(I believe used to make our14 ounce 409.5 gram models; maybe ask); 826 grams: http://www.alpackaraft.com/product/sawyer/;
840 grams: http://www.alpackaraft.com/product/manta-ray-carbon/
We have the Sawyer and Manta Ray
paddles as well. They are excellent whitewater paddles. I guess it works like
this: If you are using a packraft for mostly flat water and river crossings you
will want to go with the lightest raft (possibly a Klymit: http://www.theultralighthiker.com/klymit-packraft/)
and the lightest paddles. If you are exploring more technical water you will
want to go with a tougher raft such as an Alpacka (http://www.theultralighthiker.com/dusky-track-canoeing-the-seaforth/)
and a tougher paddle. ‘Horses for courses’, as they say.
I am contemplating walking from Macquarie Harbour
(Strachan Tasmania) to Bathurst Harbour
(Melaleuca) which will take a month and involve crossing several rivers and
other bodies of water. As I will have to carry a month’s food, the choice of
watercraft is also crucial.
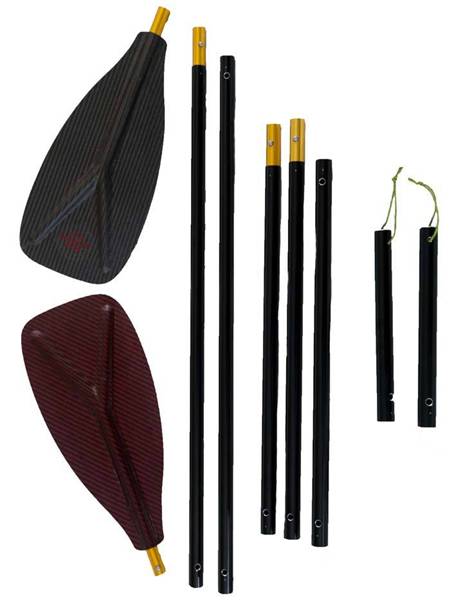
Pictured; Subai Ultralight paddle
(NB: The four pieces on the left are the paddle; the other bits are extraneous)
11/10/2016: 11/10/2016: Foam Kayak: An enchanting DIY tale, a work of pure genius:
http://www.instructables.com/id/Seafoam-Kayak-the-Unsinkable-Foam-Kayak-Anyone-Can/
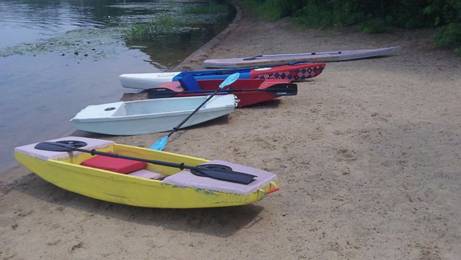
10/10/2016: Collecting Water: This is a great tip from JJMathes: ‘Have you ever
needed to fill your water container only to find there wasn’t enough clearance
for you to get the opening of your container under the flow? When water levels are low the flow doesn’t
always shoot out far enough to catch the water, it rolls around the contour of
the rock making it nearly impossible to fill a bottle or bladder. Altering the
flow is an easy fix by using the windscreen from your cook kit to form a spout;
or anything flat that won’t absorb water will work, even a broad leaf.’ http://gossamergear.com/wp/ever-have-trouble-collecting-water
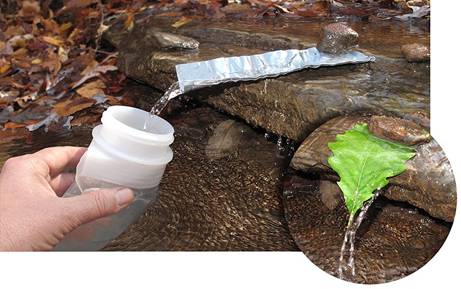
Sometimes you find water oozing down
a vertical rock face. If there is a tiny crack in it you can drive a sharpened
twig or matchstick in the crack to bring the water out to your drink bottle as
in the photo above.
09/10/2016: Self-Threading Needles: You will notice that there are (amazingly) several kinds
of self-threading needle you can use for repairs. I know the Calyxeye fits in a
floss container as I have had mine there for over twenty years (and effected
many repairs with it!). It was the type Lincraft (where I bought mine) sold, so
I make no special claim. It works. If you are a fumble fingers (like me) or
need reading glasses (same) you need a self-threading needle. Also good in poor
light!
You can see Della
repairing my backpack on our recent South Coast (NZ) Track walk here: http://www.theultralighthiker.com/backpack-repairs/ A needle, some thread and a small square of
ripstop nylon can fix many things which have let you down in the backcountry.
(I usually carry a handkerchief size piece of 1.3 oz silnylon myself as it
makes for a dry seat on an otherwise wet day). The thread I now carry is here: http://www.theultralighthiker.com/four-gram-fishing-handlines/
I was particularly
proud of a rip I repaired in a pair of hiking trousers a few years back: I had
slid down a steep bank on my derriere and whilst doing so caught the pants in a
tree root which tore them all the way from the calf to the crotch. Luckily it
was not me! I have since thrown them out else I would post a photo of my
handiwork.
I also once performed
a particularly neat repair on a dinner plate sized rip on one of my hounds (he
had from a recalcitrant stag, soon deceased). I admit ‘Harpoon’ did not much
enjoy the surgery (he thought quite seriously about biting me) but he demurred,
healed up without so much as a mark and went on to hunt many another day, at
least until he was stolen by some lowlife off the Cowwarr Rd many years ago
now. He would have been dead of old age last century (and hound hunting has
quit me altogether now), yet still it galls.

Easy needle
Calyxeye Needle
Spiral Eye Needle
08/10/2016: Cold Weather Face Masks: A life saver: I ordered one of these for
my upcoming Everest Base Camp trek. It will keep my nose (& face) warm, a
plus as this is one of the things that most bothers me about camping out in
winter. More importantly though is that it warms incoming air by more than 20C
and keeps it humid. This really protects the sinuses and linings of the lungs.
The air up there is so really dry you
need to drink at least 4 litres of fluid a day to keep up with moisture loss
from your lungs, so it is no surprise if your lungs take a punishing. At Gorek
Shep (EBC) it will be -14C! In the Everest region it is not all that uncommon
to succumb to ‘Khumbu Cough’ which can be so racking that you can break ribs! Definitely
don’t want that. Worse though is that it reduces lung function. This Cold
Avenger face mask has been independently tested to show that it improves lung
function by very significant amounts eg particularly in asthmatics who would
suffer more in winter conditions such as I am planning for. I am thinking that
some of the effects of altitude sickness are no doubt brought on by reduced
lung function which could be prevented with one of these. These little gadgets
weigh less than 100 grams (4 ounces) and cost around US$60: http://coldavenger.com/
I am thinking that the face mask will get lots of future use sleeping out
during winter deer hunting expeditions in Victoria. I will also be carrying one of
these: http://www.theultralighthiker.com/survival-shelter/
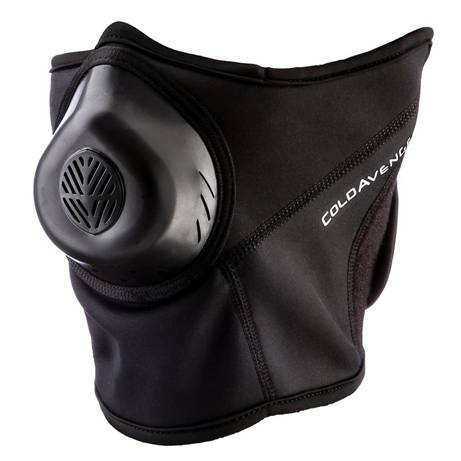
See also: http://www.theultralighthiker.com/my-life-was-wide-and-wild-and-who-can-know-my-heart/
Below is a map of our intended
route. We plan to do the ‘Three Passes’ walk in conjunction with the Everest
Base Camp walk which will get us away from the crowds. We are carrying all our
own gear. We are walking anti-clockwise. I fly into Lukla from Kathmandu and begin walking after an ‘acclimatisation
day’. It is important that you add in these extra days every 500 metres of
altitude so that you don’t succumb to altitude sickness. We will be at Everest
Base Camp 9 days later and back to Lukla on the evening of the 6th
day after that. I have a few days in reserve. More details to follow.
04/10/2016: And, just to show that
venery is not yet dead: Hunting rabbits
with hawks in Sussex:
https://www.youtube.com/watch?v=p_eQv2qt6iI
01/10/2016: Dog Waits on Ice Cream Truck: http://imgur.com/dcPUBcN?r
30/09/2016: The Frogs: The Sequel. Every dam and waterhole around here is now
fringed with frog spawn such as Tiny is investigating here. The frogs are still
singing their musical choruses and charmingly I thought each is guarding
his/her own patch of spawn. It is going to be ‘the year of the frog’ around
Yinnar this year. Listen to them sing here: http://www.theultralighthiker.com/videos/frogs/
No doubt there will also be a plague of snakes etc to eat them!
29/09/2016: Repurposing Camping Gear: The rushes which prospered astonishingly
during the drought I made quite satisfactorily dead a few weeks’ back.
Yesterday seemed like a good day to wipe the hill of them for good. Since Milo and Merrin were visiting everyone got in on the act
Merrin starts the conflagration off.
Those clumps really go up. It shows
how terrifying a grass fire can be. Of course the sheep ensure that our greass
never gets that long.
Spot and Milo
in a supervisory role.

Lighting the clumps is simplicity
itself.
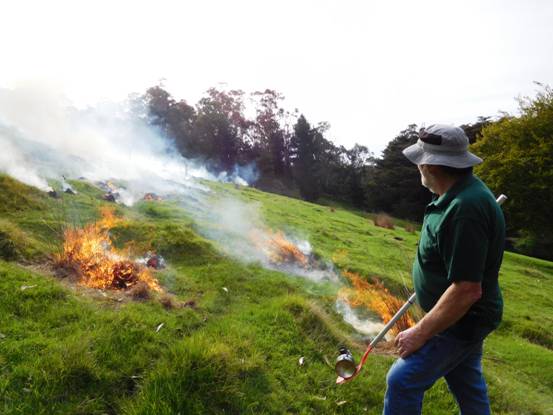
Such a satisfying feeling watching
them burn.
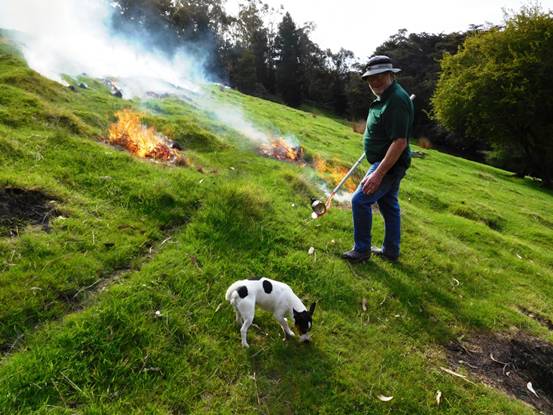
Spot as usual was a big help.
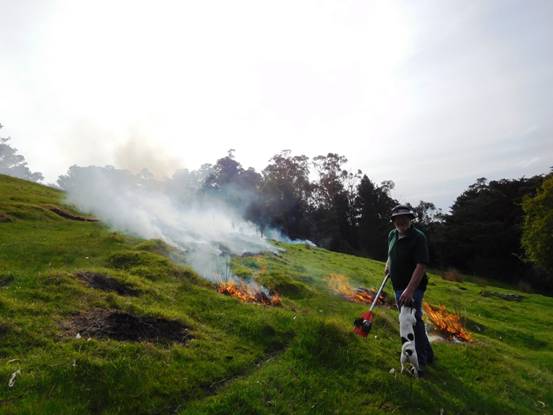
Time for a cuddle now Boss?
Detail of the impromptu rush burner.
There is a story to everything. The children’s paddle I found washed up in some
river rack many years ago. The Coleman burner cooked many frypan’s worth of
sausages over the years after our hound hunting trips as we yarned around the
campfire or waited for hounds to trickle in from the day’s hunt. Putting them
together with a couple of cable ties was the work of a moment. And ‘Voila!’ Yet
‘they say’ we don’t need ‘all that junk’ we have mouldering in our sheds!
29/09/2016: 11 More venery: http://www.arkinspace.com/2010/12/collective-nouns-alphabet-of-animals.html
28/09/2016: 11 Gram Rechargeable Head Torch: Two O-rings, a micro cord lock and
a short length of 1mm Dyneema transforms this 9 gram wonder into an 11 gram
wonder. At 45 lumens for 1 hour or 1 lumen for 48 hours (or anywhere else in
between) this Nitecore Tube Light is a wonderful torch. The 1 lumen setting is
quite adequate for reading of a night (if you still use books) or for finding
your way around in the dark once your eyes are adjusted.
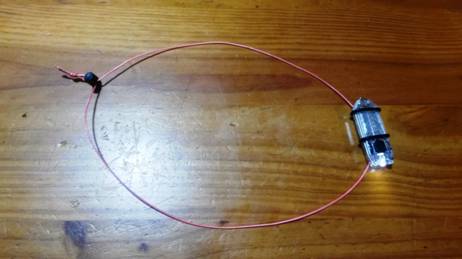
These little guys weigh less than
the AA battery used to power most ultralight torches (such as this excellent
example: http://www.theultralighthiker.com/mini-super-torch-a-weeks-light-weighs-50-grams/)
so it is well worth carrying a couple in your pack especially if you have the
means of recharging them (such as this: http://www.theultralighthiker.com/charging/)
See also:
http://www.theultralighthiker.com/smallest-rechargeable-flashlight/
http://www.theultralighthiker.com/diy-head-torches/

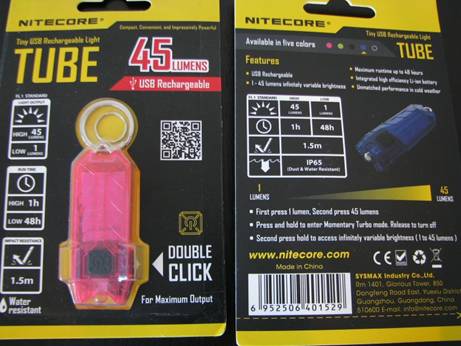
28/09/2016: Another thought about
the Plebiscite: there is no guarantee that Labor members would not vote in
Parliament to bring in so-called ‘marriage equality’ (even if as seems likely
the plebiscite showed Australians were overwhelmingly opposed to it) given that
their party position is that it should be enacted by the Parliament and that
Labor members who would vote against such a proposal (according to their
consciences) would be expelled from the party! This is a divisive issue
concerning really only a tiny minority of Australians, less than 1% which could
more appropriately be dealt with by a separate form of marriage rather than
changing the definition of marriage for everyone else…I can see why Statists might favour it though as it
supports a move to tax (by stealth) ‘couples’ who cohabit as married or de
facto (or adjust their welfare benefits to more accurately reflect their real
status). Some really big budget savings there!
28/09/2016: Spare a thought for the gharial: http://www.arkinspace.com/2012/10/gharial.html
27/09/2016: Gear Repairs: Tenacious Tape: Many folks have long carried some
duct tape for this purpose. I have carried cuben tape for many years http://www.theultralighthiker.com/wp-admin/post.php?post=1797&action=edit
. I can attest that it successfully repaired a Neoair pad which had been
relentlessly chewed by a certain puppy, and that the repair has held now for 3+
years! One of the virtues of this ‘new’ tape (apart from that it sticks to
practically everything) is that it comes in rolls up to 3” (75mm) wide, Such a
roll weighs 21 grams. It could easily be cut in half: https://www.mcnett.com/gearaid/tenacious-tape#10691
Additional Information
Length 500mm
Weight 21 grams
Color Clear, various
Width 75mm
26/09/2016: Sleeping Pad Reinvented: Big Agnes Q-Core SLX: Big Agnes has been
redesigning some of its great pads. For example, their Big Agnes Q-Core SLX
Petite Pad: 15 oz (427 grams) and rated to 15F (-9.5C ie R = 4.5) and
4.25” (10.5cm) thick! Reputed to be superbly comfortable and dramatically
robust. The square ends also make the Q-Core an excellent hammock pad,
particularly if you chose one of the wider models. RRT US$139.95 https://gearjunkie.com/big-agnes-q-core-slx-sleeping-pad
‘Offset I-beams, ‘micro’ air-pressure adjustment, and aviation-grade TPU
lamination… sleeping pads can be deceptively high-tech. But what does it all
mean?
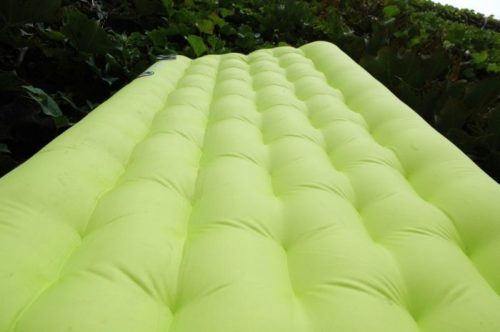
Stability = Comfort It’s all about the I-beams… on the
contours of the sleep surface…making the pad surface more even would increase
the comfort of the pad…the offset quilted pattern replaces standard parallel
I-beam construction, preventing you from sliding on the pad...the outermost
I-beams on both sides are slightly larger, which creates a cradle that holds
you near the center of the pad.
‘Ultimate Durability’…this pad is 25 percent more durable
than its Q-Core SL predecessor. We’ve improved materials and construction with
new double rip-stop and aviation grade TPU lamination technology…‘Superlight,’
Micro Adjustment Total weight for this pad falls between 15-22
ounces, (ie from 427 grams) depending on the model size (66-78 inches long, and
20- or 25-inch widths).
Its micro air adjustment’ is a tiny
ball that sits in the center of the inflate valve. You can press it to allow a
little air to escape, reducing the pad’s stiffness. It works just like a presta
valve on a bike tire.’ https://www.bigagnes.com/Products/Detail/Pad/qcoreslx
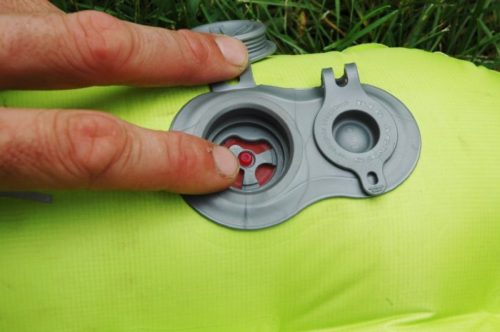
We have owned their Insulated Air
Core pads for many years. When we bought them they were the only pads which had
anywhere near that thickness (3.25”) and R rating 4.5 (ie good down to 15F or
-10C) - and cheap. They have proved incredibly durable and comfortable pads.
For example their Insulated Air Core starts off at US$84 for a full-length pad
and is under 600 grams, yet over 3.25” thick. We have two, their regular 6’ pad
and their Petite Mummy 5’ pad (not currently available) which is around 500
grams and actually long enough for each of us (I am 5’7”, Della 5'). Most folks
will really not need a pad longer than 66” (1.675m). It doesn’t matter if your
feet overhang. I am a side sleeper anyway, so they don’t. Your feet won’t
touch the ground so your sleeping bag will keep them warm as it is not
compressed by your weight.
26/09/2016: Jumping without a parachute…Amazing: http://surprise.ly/v/?PK0Hl0kWELE:0:0:0:100
24/09/2016: There’s no stopping a Jack Russell; the king of beasts: https://www.youtube.com/watch?v=eccJ9vRHKgo
23/09/2016: How Green Is My Valley: We are so fortunate to live in this
beautiful part of the world. Everywhere you point a camera it is something like
this. Just snapped this view of Yinnar and the Morwell River
valley on the way back from our walk yesterday afternoon. Why travel elsewhere?
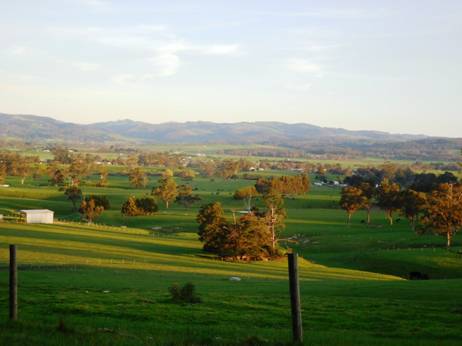
22/09/2016: Planting Della: There is no worse fate to contemplate than burying
your beloved…but in this case it can be a joyful occasion. Imagine someone
having named this lovely cultivar thus - and in my Della’s favourite colour
too. Now to see whether it likes the very clayey soil of the native garden on
the back slope behind the house where the honeyeater war is a daily occurrence.
22/09/2016: Fifteen Gram Blue Foam Flip-Flop Camp Shoe:
A work of pure genius. Can there be a better camp shoe than this? Chris Morgan
writes: ‘The Walmart foamy option is fairly durable (about 20 nights of heavy
use, but a pad will make about a dozen pairs), very stable, ridiculously cheap
and ultra comfortable. About 1oz for the pair:
Step 1: Buy a $4 Walmart blue foamy
sleeping pad.
Step 2: Trace your foot and add
little less than a cm all around (you can trim to fit later, though I find a
little extra is kind of nice and you don't trip over it), and add wings so that
when folded up together it looks like an Adidas shower sandal.
Step 3: Cut foam.
Step 4: Apply 1 piece of duct tape
across the top – you may have to shorten the wings after trying on to get a
tight fit.
Voila:
Thanks to Chris Morgan at
backpacking light forum: https://backpackinglight.com/forums/topic/46709/
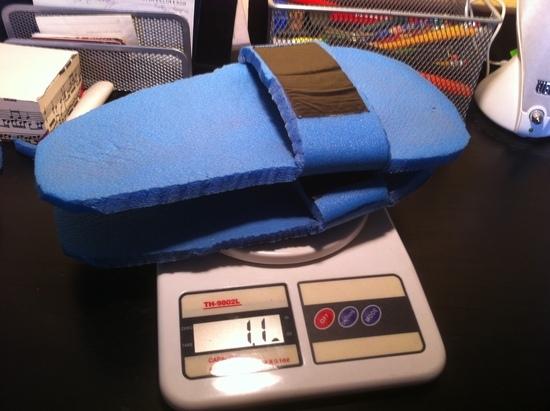
QED.’ Indeed!
21/09/2016: Montbell make some
awesome Ultralight gear. Mostly I like their sleeping bags and insulated
clothing. For many years I have used the UL Super Spiral Down Hugger #3 now
called Down Hugger 800 #3 & available at Larry Adler Australia for A$329).
Mine was 624 grams and rated -1C. Montbell have even improved this bag by
moving to 1 oz more (and) of 900 fill power down. This is the Down Hugger 900
#2 at 690 grams and -5C, which is just awesome! This ‘spiral stretch’
construction means that they are the roomiest sleeping bags you have ever used.
You can even cross your legs and sit up in them.
In Australia you will almost never
encounter conditions where you will need a warmer bag than this. If you do (and
as I do) you carry a down jacket and vest, you can put the jacket on and pull
the vest over your lower body. This will provide at least another 5C worth of
warmth.
Speaking of jackets and vests: I am
particularly impressed by the warmth and lightness of their ‘Superior Down’ range. The coat weighs just
over 200 grams and the vest a bit over 150. Their Clo (insulation) rating (eg
measured here: https://backpackinglight.com/forums/topic/18950/)
indicate that the two garments together should take you well below 0C. Think
-10C. Larry Adler have them on sale at the moment for A$140 and $105
respectively, which is a bargain: https://www.larryadler.com/ Larry does not have
the complete range. For that look here: http://www.montbell.us/ To purchase from the US
you will need (eg) a Shipito account and a virtual US credit card - available from Shipito.

20/09/2016: ‘My life was wide and wild, and who can know my heart? There in that
golden jungle I walk alone.’ Judith Wright, The Sisters. This might as well
be TheUltralightHikers’ motto as we march forward into the evenings of our
lives, ‘bowed but unbroken’. A young friend (http://www.theultralighthiker.com/a-friend-i-met-on-the-dusky-track-fiordland-nz/)
has invited me to come along with him on his (extended) Everest Base Camp hike
in early November in Nepal.
This may seem like an insane thing for a man 2/3s of a century plus to be
doing. I admit I had my druthers, but Della piped up perfunctorily with this
epithet, ‘You only live once’. Remember that.

And this: People are crap at
understanding risks/stats.You have to figure risk against probable loss. When
you are young you have the probable loss of your entire life to lose (a large
proportion), so you ought be more careful. When you are old like me, you have
much less life to lose, so you can afford to take more risks! I know, you may
think that the morsel of life left is nonetheless more precious because it is
all you have left, (but whatever is all you have) and it would not be much of a
life if you spent it propped in a wheelchair at some Old Peoples’ Home mumbling
inanities and pooping yourself. The high passes, whatever their risks gleam
much brighter than that prospect.
It is also like this. Yet another
friend’s widow was last week condemned to just such a fate as I hinted above,
having been diagnosed with Alzheimer’s, her husband having dropped like a stone
from a cardiac a couple of years ago. ‘Live & learn or you don’t live long’
as the old saw goes.
‘Give Your Heart to the Hawks’ the
old mountain men used to say. There is a solitary rapture about gazing up at
the seam where sky and mountain meld which makes one’s heart exalt! The peaks
that loom everywhere along the Dudhkoshi
River are more than
awesome.
19/09/2016: Hornet-Lite Pack Raft: I see there is a new alternative pack raft
on the market: ‘The Hornet-Lite is the lightest packraft in Kokopelli's fleet
weighing in at 4.9 pounds (2223 grams) including the seat. Kokopelli has
designed the Hornet-lite packraft to be functional while reducing weight and
maximizing compactness. This packraft is ideal for crossing rivers, high alpine
lake fishing and wide calm rivers’ so says their description: http://www.kokopellipackraft.com/adventure-series/hornet-lite
It is a bit cheaper at US$525 than (most of) the Alpackas (http://www.alpackaraft.com/)
but may not have the same durability as comparably priced models there. Another
cheaper still choice for flatter water is Klymit’s offering: http://www.theultralighthiker.com/klymit-packraft/
Cheaper still is my Faux Pack Raft: http://www.theultralighthiker.com/home-made-pack-raft/
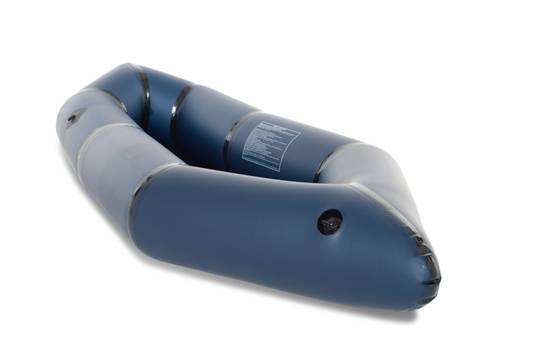
Pack Raft Links:
http://www.theultralighthiker.com/alpacka-pack-raft/
http://www.theultralighthiker.com/home-made-pack-raft/
http://www.theultralighthiker.com/solo-pack-rafting-with-a-motorbike/
http://www.theultralighthiker.com/pack-raft-saves-the-day/
http://www.theultralighthiker.com/pack-rafts/
http://www.theultralighthiker.com/klymit-packraft/
http://www.theultralighthiker.com/lightweight-packrafts/
http://www.theultralighthiker.com/alpacka-rafts/
http://www.theultralighthiker.com/faux-packraft-vs-alpacka-raft/
http://www.theultralighthiker.com/packraft-video/
http://www.theultralighthiker.com/dusky-track-canoeing-the-seaforth/
18/09/2016: Vapor Barrier: Whether in hot wet or cold weather humidity is one
of the biggest problems. For example, you must never breathe inside your
sleeping bag (or sweat). You are filling it with water which must be
evaporated, so you are making it colder. There is a solution. The following
information is from Stephenson’s Warmlite page. They also sell VB clothing: http://warmlite.com/vapor-barrier-clothing/
Stephenson's VB Sox
‘Ice, solid water, has very low
energy. To melt ice to liquid water you must add 144 BTUs per lb. (BTU =
British Thermal Units = heat energy needed to warm 1 lb. of water 1°F.) It
takes 1080 BTUs to evaporate 1 lb. of water to water vapor. The amount of water
vapor in the air is called humidity, expressed either as absolute lbs. of water
per lb. of air, or as relative, % of the maximum that could be there at that
temperature and pressure. It is common to refer to water vapor as humidity.
(Steve: I BTU is roughly ¼ of
a calorie, so you need approx 18 calories (2.5 ml of meths) to melt 250 ml (1
cup full) of ice and 135 calories (19 mls meths) to evaporate it). If you think
of that in terms of the amount of food you would need to eat to do the same
work you will understand that handling humidity requires a serious expenditure
of energy).
SWEAT is the liquid water your
skin exudes from sweat glands in your skin to COOL you when you are overheated.
Unfortunately, that sweat also contains oils and SALT! Salt and soluble oils
are moisture absorbents: depending on concentration and type of salt and oil,
it can take up to 3 times the heat energy to evaporate water from such
absorbents, and all that excess energy goes into chemical change. You have noticed
that initial sweat seems to cool you much better than later sweat: dried salt
and oil resist evaporation, and release heat to your skin from contact with new
sweat (see SUMMIT
Oct.’59). A fresh water rinse cools you and restores the cooling of initial sweat.
NOTE that the PURPOSE of sweat is ONLY to COOL you. Obviously then, at first
sign of sweat wetness you MUST remove any excess insulation (or ventilate to
carry off excess HEAT.) If conditions are cool enough that you need ANY
clothing, then you want to immediately STOP any sweat loss and use convection,
conduction, and radiation to get rid of excess heat. Any moisture lost thru
sweat MUST be replaced soon (which may be difficult or impossible at the time,
so it’s best to STOP the loss when it starts!)
Humans have a problem which we
are told other animals don’t have: the moisture IN our skin evaporates in dry
air, thus losing heat and water. That moisture loss is called “insensible
sweat”, which term, like “military intelligence” is an oxymoron (ie, self
contradiction). That “insensible sweat” is NOT sweat, and IS sensible: you FEEL
it cooling you (but don’t feel it as wetness, thus the “insensible”). Water
vapor from evaporation IN your skin, with it’s high energy, diffuses rapidly
thru to outer clothes where heat is lost. Usually in cold weather the outside
relative humidity is near 100% so outside air can’t accept more humidity, and
thus most of that moisture condenses to cold water, soaks your clothes,
disables your insulation, lowers humidity again, so more chilling evaporation
occurs IN your skin, repeating the cycle of chilling and soaking your clothes.
Even if outer fabric is completely porous the vapor WILL condense where
temperature reaches dew point in the clothes. The outer layer (“breathable” or
not) keeps water IN, out of sight, so you don’t realize you’re losing
insulation until later, when miserably COLD. Evaporative cooling and water loss
depends only on the relative humidity of the air next to your skin, so you have
no control over it. Or do you? (think for a while).
Heat production and loss is
not uniformly distributed over our bodies. We can sweat under our arms while
being too cool elsewhere. We detect changes in temperature only on our skin,
but can’t determine absolute temperature of our body by what we feel on skin:
get cold enough to shiver, then get into a hot tub and you’ll feel too hot
while actually being too cold. As you warm, your skin gets accustomed to the
warmth so you don’t feel as hot! Get out of the hot tub when sweating from
overheat and you immediately feel cold! Dry off and you feel warm. We rely ONLY
on wetness of sweat to warn us of overheat.
If your heat loss equals
production you’re comfortable. If activity then increases, overheat causes
sweat, for evaporative cooling. WHEN (or IF) you notice wetness from sweat,
you’ll vent or remove extra clothes, get cooling of evaporative or convective
heat loss, stop sweating and you’re soon dry. Wickable underwear moves sweat
from overheat away from your skin so you won’t notice it and it won’t annoy
you, (which is fine for comfort indoors or for short periods). That wicking
prevents cooling when and where you need it, and wets outer clothes so they
won’t be warm LATER. Please note that it’s wickable and moisture absorbing fabric
that aids comfort then, not just porous or so called “breathable” junk. Non
wicking polyester, acrylic, Goretex and similar won’t provide any comfort, so
YOU have to constantly adjust insulation or venting in response to wetness from
overheat, (which can be an advantage IF you’re observant and intelligent enough
to do proper adjusting). Heat stroke or heat exhaustion is caused by not being
aware of and correcting for overheat. Wicking clothing makes you unaware of
sweating, so can be dangerous. Instead of sweat cooling you when needed, it
soaks your clothes, reduces insulation and chills you later when you need the
warmth! You won’t notice overheat until soaked, so delay your normal reaction
of venting or removing excess clothing, until too late. When you tire, slow
down or stop, and need your insulation, you find it is wet and useless. Instead
of the sweat which wicks out evaporating, humidity from within condenses,
making outer clothes even wetter. That’s controlled by the temperature in outer
layer(s), not whether they are porous or sealed. Before you die of hypothermia
from believing false ads claiming their insulation is warm when wet, I suggest
you soak your jacket, shake it out and wear it. Experience just how cold, wet
insulation really is! False advertising won’t keep you warm.
Part of the idea of using
wickable underwear for warmth is the insane idea that your skin continuously
LEAKS, so they want to move leaked moisture away from your skin before it
evaporates and cools you. Any kid old enough to talk can tell you your skin
stays dry UNTIL you sweat from OVERHEAT, and then you WANT evaporative cooling
AT your skin. NOTE: Just to confuse you more, several companies say their
materials “wick moisture vapor”, but you know that wicking only applies to
LIQUID, not vapor!
Most of this isn’t a problem
if you’re going outside for short periods with steady activity and not
overdressed. But for someone jogging, skiing, hiking, or mountaineering it can
be a very serious matter.
Obviously wicking underwear
can’t stop chill of moisture evaporating from within your skin (misnamed
insensible “sweat”), since that moisture is not on the surface where it can be
wicked away. The ONLY way to reduce that evaporative chilling is to raise
humidity next to your skin by raising humidity in surrounding air (limited to
dew point in that air), or by retaining humidity with vapor barrier (VB) next
to the skin. A VB that blocks 95% of evaporative heat and water loss is
excellent. (Goretex will block 97%. They call that 3% loss “breathable”).
If humidity next to your skin
reaches 100% (meaning it can’t hold any more water vapor), evaporation stops,
chilling stops, and “insensible sweat” stops. That’s why a humid day feels
warmer than a drying day. (Note that it’s common to call low humidity dry when
the correct term is drying, which low humidity causes.) A wet rainy day feels
colder because the rain acts as a condenser, removing humidity from the air,
leading to drying condition. Often a “dry” sunny day feels extra hot due to the
high humidity the sun has caused by evaporating water that fell as rain before.
When skin moisturizing can’t keep up
with rapid drying, your skin gets dry, chapped, and is more likely to suffer
frostbite. Evaporative chilling makes 32°F feel like 12°F.
It’s reported that you lose up to
four pounds of water each night thru evaporation of “insensible sweat”, when
sleeping in a porous “breathable” sleeping bag. Weighing of such bags in the
morning shows 2 to 4 lbs. increase, confirming that statement, and also showing
that sweat and vapor don’t make it out of those bags: sweat wicks in, and vapor
condenses in the insulation, leaving the bag wet. The 4320 BTU of heat stolen
from you to evaporate 4 lbs. of sweat is lost at outer surface of your bag, as
that sweat condensed to soak your insulation. It takes 144 BTU to melt one
pound of ice. Thus the heat to evaporate four pounds of sweat is enough to melt
30 pounds of ice! (4 x 1080/144 = 30). Would you take 30 pounds of ICE to bed
with you? That’s the effect you get by not using vapor barrier interior in your
sleeping bag.
If you lose 4 pounds of water
during 8 hours of sleep you can expect to lose much more during 16 hours you’re
awake and active. That dehydration can lead to serious impairment of
circulation due to thickened blood, increasing risk of frostbite (thus the good
advice to drink LOTS of fluids in cold dry weather). You can create a warm
humid condition around your body all day with VAPOR BARRIER (VB) clothing, and
thus reduce dehydration.
During World War II US cold
weather troops used Vapor Barrier (VB) socks to totally cure frostbite and
trench foot. Those led to the vapor barrier “Korean Bunny Boots”, still the
standard for cold weather use. We started promoting use of VB socks (baggies,
bread bags, etc) in 1957, then gloves, shirts, and in sleeping bags since 1967.
Others have sold VB clothes and bag liners on and off, but the bad response to
uncomfortable coated fabrics, poor education, and problems with tie in bag
liners, led most to drop VB. Manufacturers and retailers want to sell what is
EASY, and avoid anything that requires educating customers. Heavy promotion of
“breathable” materials makes some retailers unwilling to risk big markup sales
by telling customers the whole truth. Often they won’t tell you anything about
things they don’t sell. The most common excuse we hear from manufacturers and
sales persons for not selling VB lined bags and VB clothing is they can’t take
the time to explain it to their customers. Mighty inconsiderate! If you want an
honest evaluation of VB, get it from someone who uses it. If you want to avoid
it, ask someone who hasn’t used it, or sells only “breathable” gear, thus
avoiding getting confused by the facts!
VB in a sleeping bag gives no added
warmth when vented but always protects the insulation from condensation and
sweat soaking, thus it’s advisable to have VB in your bag for ALL seasons. The
surface wickability of Stephensons FUZZY STUFF makes it especially desirable
for summer use when you’re sure to overheat, (even if nude.)
A common argument against VB
is actually excess praise FOR VB: they say VB will ALWAYS overheat you!
Wouldn’t it be nice if we could get ALL needed warmth simply by controlling
humidity! Physics limits us to maximum of 20° added warmth from VB. It’s the
overheat DETECTION SERVICE that VB provides (by making you immediately aware of
sweat when it starts) which “they” think is overheat caused by VB: don’t blame
the messenger for the message!
Will Steger used “breathable”
Quallofil sleeping bags for his much advertised dog sled trip to the north
pole: those 17 lb. bags (almost as thick as our 4 1/2 lb Goose Down bags) were
carried loose on top of sleds “for best drying”, yet weighed over 52 lbs. in a
few weeks from sweat condensing to ice. Luckily they were flown out from the
pole. Meanwhile a Canadian – Soviet team cross country skied across the pole,
using WARMLITE bags they had purchased, which stayed dry and warm for the whole
trip. Will Steger bought FUZZY STUFF Vapor Barrier liners from us for his
Quallofil (read, $500,000 support from Dupont!) bags for the much longer south
pole trip and thus kept the bags dry and warm the whole trip.
VB clothing that doesn’t wick
sweat over it’s surface is likely to be uncomfortable and lead us to frequent
insulation changes, or sadly mislead some into rejecting VB and the benefits it
can give them. Proper comfortable use of VB requires more intelligence and
awareness than some people have, but is made a lot easier with modern VB
material having wicking inner surface, such as FUZZY STUFF.
With VB keeping water vapor and wet
sweat out of your sleeping bag and clothes, you can use ANY fabric, ANY
insulation without concern for wickability, and can use ANY exterior wind
breaker without concern for “breathability”.
How do users of VB react?
Generally with orders for more VB clothing and sleeping bags, and
recommendations to their friends. From 1967 to 1998 we sold about 9500 VB lined
sleeping bags, and only about 1/2% of customers objected to having to consciously
adjust insulation. But even they agree that VB is good for extra warmth and
insulation protection, and most of those became best promoters of VB! We’ve
found many of those people have low metabolism, need more insulation to stay
warm, and thus NEED VB the most! No matter what one’s metabolism is, the extra
heat produced from activity is the same, and thus the person who wears thicker
clothes for warmth when inactive will sweat more when active due to those extra
clothes. To stay dry they must adjust clothes more. VB underwear helps them
notice the need to adjust, and keeps all outer clothes dry even if they fail to
control sweating.
When you are awake and active it is
easy to adjust insulation to avoid overheat without venting VB clothing. When
asleep the normal reaction to overheat is to push covers away, reducing the
extra warmth, while VB still protects the bag from condensation and sweat.
Sleeping bags rarely get wet from outside. Bags without VB ALWAYS get wet from
INSIDE condensation and sweat!
Most of you are aware that
wind can chill you. If nude, wind reduces the insulating air boundary layer on
your skin, increasing conductive heat loss thru that layer. Stop the wind, or
block it with wind tight fabric, or get inside a structure, and that chilling
stops. Then as you all know, adding ANY layer of even the most porous clothing
makes you warmer. At some point any additional layer overheats you, which you
notice only when you start to sweat and feel wet. Do a test: In a wind blocking
shelter when it’s cool enough to need a warm jacket, replace the jacket with
two thick bulky knit sweaters (as open a knit and thick as you can find). Soon
you’ll start sweating from the overheat (note that it is only the sweat that
tells you that you’re overheated!) Mere porosity or “breathability” clearly
can’t keep you cool. Replace the thick sweaters with a light raincoat (after
you cool down). Soon you will feel too cool, clearly proving that a simple
waterproof coating is not enough to keep you warm or overheat you, but it can
help. Assuming condition cold enough so you are wearing an undershirt, 1 or 2
insulating shirts, and the warm jacket: replace just the innermost shirt with a
vapor barrier shirt (lacking a proper one, use a plastic bag with holes cut for
head and arms). Soon you will notice sweat from overheat and will need to
remove the jacket to stop overheat (if smart you’ll speed up the test by not
putting the jacket back on after changing to VB shirt, and will then notice you
are as warm as before and not sweating.) The VB shirt reduces loss of humidity
and thus reduces evaporative cooling at your skin, much like a humid day in
summer.
In each case if you carry test
to point of overheat, notice that it is the wet feel of sweat that told you
“you are overheated”. Our bodies are very poor at telling us how warm or cold
we are, and skin senses changes more than absolutes.
VB clothing has many other
benefits:
Elimination of condensation in
your tent. People who regularly over dress and rely on wickable clothing to
carry away sweat, add much more humidity to a tent.
If you must change your shirt in
less than 3 days due to sweat odors you will also likely cause excessive
condensation in any tent you use. Wearing VB helps you recognize and correct
overheat and unnecessary sweating.
Elimination of sweat odors on
clothing and yourself. It’s obvious how outer clothing is protected. Apparently
quick sensing and thus avoidance of sweating, plus blocking of air circulation
that causes sweat to turn rancid, reduces or eliminates sweat odors on you and
the VB clothing as well.
(Polypropylene underwear is
infamous for terrible sweat odors: apparently it passes sweat so well that
people sweat excessively with it without realizing it. BUT it absorbs all the
oils in the sweat, and those oils turn rancid, stink, and stick to the
polypro.)
Reduces dehydration and amount
of water you must obtain and drink. Dehydration is a major contributor to
frostbite, hypothermia and altitude sickness. It thickens your blood, impairs
circulation (thus decreases proper heat and oxygen distribution), and reduces
oxygen intake. It’s especially difficult to drink enough fluids when not
wearing VB clothes and ALL your water most come from melting snow! In several
days the weight of fuel saved due to use of VB can greatly exceed the weight of
the VB clothing.
With 1st layer VB you can then
wear any kind of material for outer layers, no matter how uncomfortable or
impractical that material might be otherwise, since you’ll have no concern with
it getting wet. Your outer windbreak layer can be any coated or laminated
fabric, preferably NOT “breathable” so you don’t have to be concerned with dirt
causing it to leak. When weight is a consideration, chose your layers for the
most thickness per pound. Use coated Nylon rain wear windbreaker.
Avoiding winter “colds”: most
medical writers say a “cold” is only a “cold virus infection”, (typically with
symptoms of irritated nose and throat and clear fluid from your nose), which
your body self cures in 3 to 7 days. But, your nasal and throat passages
usually have lots of all kinds of infectious bacteria in them, which are
harmless to you as long as they can’t get past mucus surfaces. Virus infection,
or bad allergy attack, or dry irritated nasal passages due to excessively dry
air, can ALL let those bacteria attack, resulting in what we usually know as a
“cold” with greenish yellow nasal discharge, sore throat, cough. Untreated that
can last a whole winter, or be stopped in 3 days with antibiotic. Wearing VB clothes
at home allows you to keep air temperature about 10° cooler resulting in less
drying and irritation of throat and nasal passages.
For some of us with poor
circulation to hands and feet, VB gloves and socks are essential to keep hands
and feet warm enough to function (other common solution is to move to warm
climate!)’
17/09/2016: Listen to the oldest melody in the world — 3400 years old. ‘The
hymn was discovered on a clay tablet in Ugarit, now part of modern-day Syria,
and is dedicated the Hurrians’ goddess of the orchards Nikkal...The clay tablet
text, which was discovered alongside around 30 other tablet fragments,
specifies 9 lyre strings and the intervals between those strings – kind of like
an ancient guitar tab..... The notation here is essentially a set of
instructions for intervals and tuning based around a heptatonic diatonic
scale’: https://www.youtube.com/watch?v=Tx6v0t5I5SM
15/09/2016: Unsung Genius: Stephenson’s Warmlite: Jack Stephenson invented the
inflatable insulated mattress way back in 1958. Their Down Air mattress
(DAM http://warmlite.com/down-air-mattress-alone/) is
now available in a stand alone for US$140 in a variety of sizes. One of the
things most to like about it is its width – it comes in from 22” (56cm) through
to 28” (71cm) & in a variety of lengths. People our size would be fine with
their smallest models (from 65” (163cm) by 22” (56 cm) and 20 oz (570 grams).
Lots of people probably find like I do that their elbows fall off the edge of
‘standard’ 20” (50cm) hiking mats. Probably I would opt for their Model 60 at
70” (178 cm) by 24” (61cm) by 22 oz (627 grams). It is a stretch up from my
current Thermarest Neoair Xlite Womens at 20” (50 cm) by 66” 168 cm) and 340 grams and 12 oz (340 grams) and R 3.9
I know, but may be worth it for the comfort!
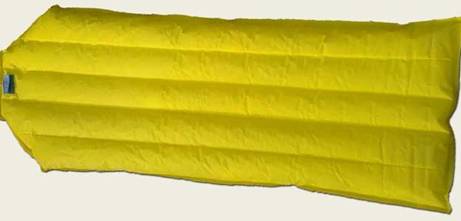
List of key ultralight innovations
introduced by Stephenson’s Warmlite*
— Leader in use of ultralight
700-800 fill power down. Jack Stephenson (Our
Founder) worked hard on perfecting down sleeping bags between 1955-1957,
after a miserable trip to Rocky Mountain National Park
with his new wife in 1955 had been saved by a personal visit to Alice and Roy Holubar,
and purchase of Holubar’s down bags. After these few years of development work,
Stephenson’s fluffy wonder bags covered with ultra-light nylon were introduced
to the public in 1958, chiefly in Dick Kelty’s store in Glendale, California
— Warmlite was a real Leader
in use of ultralight nylon materials derived
from the sailing industry to replace heavy cotton and polyester cotton
materials then in use in all tents, packs and clothing. For decades, since
about 1956, we have used 1.1 oz. ripstop nylon for our bags and
clothing, eschewing the heavier 1.9 oz. which became the standard when Eddie
Bauer began using it during this same time period.
— Leader in use of a variety
of exotic aerospace-derived materials for superlight, superstrong
packs, sleeping bags and tents— products which still rival or
surpass the lightest of the most modern ultralight gear. Examples include “gold
mylar” tent material and aluminized fabrics for heat retention and heat
rejection (eg. on tent canopies).
— Leader in the use and
modern application of Vapor Barriers in outdoor clothing
and sleeping bags. We experimented with various vapor
barrier materials (VB) finally perfecting a “warm fuzzy” material that went a
long way toward making the VB more comfortable to the wearer.– Hip-Carry
Packs with true padded waistbelts. Out “Jack Pack” was
being sold with a fully-padded, hip-carry suspension system in 1963, a full ten
years before Kelty packs began to use padded hip belts!
— Creator of a major new
tent design which has become one of the two or three major new tent designs of
the Twenty-first Century. The Warmlite design (the Elliptical Arc)
threw out the heavy A-frame design tents used everywhere during the first half
of the Twentieth-first Century, replacing it with an extremely strong,
lightweight, 4-season hoop design constructed with high-tech materials and
requiring only 3-4 tent stakes even in severe weather. After 40 years, Stephenson
tents are still lighter/stronger than nearly anything else
available. Please note that within the modern ultralight hiking
movement, one must take care to compare truly comparable products, eg. in the
tent category, one should not confuse 10 or 12 oz. ultralight shelters (most
with no floors and requiring 6-12 stakes) with the Warmlite tent, which is a
true 4-season tent with a full floor and the strength to withstand any possible
extreme weather combination of rain, wind, and snow.
— Creator of the DAM We
created an air mattress filled with ultra-high quality down, held in place by
baffled channels (DAM = “down-filled air-mattress”)…Our 20 oz. creation was
inflated by use of a large stuff-sack, which kept damaging body moisture out of
its interior. We had experimented with prototypes of it as early as 1958, but
it was not officially added to theWarmlite product line until 1973-74. In very
recent years, the new Ultralight backpacking movement has encouaged a new
interest in this product.
12/09/2016: Ultralight Glasses Case: If you have got to my age (or had other
bad luck) you no doubt need glasses. I now wear progressive frameless titanium
glasses (14 grams) all the time, but I also need a spare pair in case I lose or
break them. The quite lighteweight case they came in from Zenni weighs 47
grams. I knew I could do better.
This is 350 ml (12 oz) PET drink
bottle I cut down with a craft knife (I should have left a tiny bit more of the
neck) and some bubble wrap = 12 grams, a saving over over an ounce ie more than
the weight of a muesli bar on the trail, or more than enough weight of fuel
(metho) to cook a meal. Every little bit of weight saved helps lighten the load
and means you can go a little bit further, easier.
Indeed switching to these frameless
glasses (two pairs) also saved me over an ounce (28.5 grams)! I have simply
rolled the glasses up in the bubble wrap and squeezed them through the neck.
These flexible titanium frames are quite difficult to break anyway: you can
just about stand on them, so they will be fine in the ‘possibles’ bag in my
pack.
See also:
http://www.theultralighthiker.com/ultralight-spare-glasses/
http://www.theultralighthiker.com/zenni-the-hearing-company/
http://www.theultralighthiker.com/securing-hearing-aids/
11/09/2016: Linelok Pack Tie Down: For those who don’t sew – or who don’t need
to sew: You can use these wonderful little Clam Cleat Lineloks and some eg 2mm
Spectra/Dyneema to lash your excess gear to your pack. I always use these
lineloks on my tents and tarps: http://www.theultralighthiker.com/the-perfect-guy-line-for-a-hiking-tenttarp/
Here is my Klymit pack raft (http://www.theultralighthiker.com/klymit-packraft/)
attached to my Zpacks Blast (Zero http://www.zpacks.com/backpacks/zero.shtml)
@ 200 gram pack:
Here’s how to rig them:
Clam Cleats are available here in eg
packs of 100 http://www.cleats.co.uk/browse-by-product/line-lok-guy-runners/cl266-mini-line-lokr-for-1-3mm-lines.html
Also available locally (Oz - and quickly) here: http://www.tiergear.com.au/11/online-shop/clamcleat-cl266-mini-line-loks
I find the Glow-in-the-Dark best. I always use the reflective line for guys etc
too, eg: http://www.tiergear.com.au/11/online-shop/reflective-glowire-15metres
The Clam Cleats are made by these folk: http://www.clamcleat.com/products/cleats-for-1-6mm-rope/cleats-rigged-on-a-rope-24.html
who have some other interesting stuff.
See also: http://www.theultralighthiker.com/attaching-tie-downs-to-your-pack/
10/09/2016: A Thrush Passes: We have lived in this house now for over 25
years. For all that time (and who knows how much time before?) we have shared
our home with a female grey thrush. For many years she was without a mate, then
one miraculously arrived. She nested three times that first year – always in a
hole in our mud brick wall where we have yet to lay the last brick. We cannot:
it is the thrush’s home too. She raised eight chicks that first year. Each year
since she raised at least two clutches.
During this winter I spotted some
grey feathers in the garden and was concerned that a cat or fox had taken her.
Today a thrush was singing in the nest once more, but it was not she. One of
her daughters almost certainly, but a voice has been stilled here at Jeeralang
Junction. She may be no more, but the valley rings to the songs of her many
descendants yet.
She was ever a cheerful and friendly
bird, with her clear call of, ‘Cho, Cho Wee!’ I would whistle an answer and she
would come to say, ‘Hello’ and practice a medley of birdsong with me. Never
quite in arm’s reach but ever so near; she would sit on a twig or perhaps the
back of a verandah chair close by. We would sing a round or three. Her
daughter’s call is more like, ‘Cho wee, Cho wee, wee’. I answer her with her
mother’s song. She cranes her head to the side and gazes at me quizzically. We
have a sort of understanding perhaps.
PS: News of her death may be
premature. Just as I was posting this right now, a thrush landed just outside
the window, not 3′ away. The familiar ‘Cho, Cho, Wee’ seemed to ring out
loud and clear. I can hear her yet moving around the garden. She has just
answered me thrice! She is back for one more year then. How long do song
thrushes live I wonder?
Here she is on 27 September 2014 in
her favourite spot in the unfinished wall working on another clutch of her many
descendants. I shall miss her.
9/09/2016: Modifying/Shortening Hiking Mats: Sometimes hiking mats just come
in the wrong length or width. For example, I would like a wider pad but they
only come very much longer. Is it possible to cut a bit off them and reseal
them? Yes it is. Here are some links on how to do just that:
How to Cut and Reseal a Neoair - On
The Trail - Episode #1: https://www.youtube.com/watch?v=kumSl-cbLlY
Shorten Neoair: https://backpackinglight.com/forums/topic/73403/#625778
How to shorten a full length
self-inflatable mattress: https://www.youtube.com/watch?v=AoRTAeKcA0w
Resizing a Therm-a-rest Evolite
Sleeping Pad: https://hikelighter.com/2016/08/16/resizing-a-therm-a-rest-evolite-sleeping-pad/
Resizing the Massdrop x Klymit
Static V Ultralight Sleeping Pad: https://hikelighter.com/2016/08/09/resizing-the-massdrop-x-klymit-static-v-ultralight-sleeping-pad/
Below are two mats I would consider
cutting down to produce a mat which has more width comfort:
Thermarest XLite Large: 25” (63 cm)
by 77” (196cm) by 16 oz (460 grams) R 3.2 If I cut this down to the same
dimensions as my XLite Womens it would weigh 394 grams. Only 54 grams for that
much increase in comfort!
Thermarest Neo Air All Seasons Large
25” (63 cm) by 77” (196cm) by 25 oz (710 grams) R 4.9 2 If I cut this down to
the same dimensions as my XLite Womens it would weigh 608 grams.
I could cut an unnecessary 6” off
Della’s XLite Women’s saving her 10% of its weight (or 34 grams)!
You might also want to trim a mat to
make it more mummy shaped – and to save weight.
Other modifications: Erin McKittrick
and her husband Hig during their ‘ A Long Trek Home’ (http://www.groundtruthtrekking.org/Book/)
cut down their Thermarest self inflators by cutting a hole (roughly) in the
middle of them through which they could push their head. They then passed a
string/belt around themselves and the mattress creating a makeshift life
jacket!
9/09/2016: Bushbuddy Stove: The original wood burning double walled secondary
combustion wood gasifier stove. We have owned the ‘Ultra’ (145 gram) model of
this stove for many years and have used it innumerable times. Apart from some
expected blackening it shows no sign of wear and still works perfectly. We use
the stove on longer trips (to save fuel) and where open fires are prohibited
such as some National Parks. As you can see from the picture the stove will not
generate enough heat at the bottom to scorch the ground or ignite anything
there. I was given the lighter Suluk alternative as a present, so I usually
carry it now. Even in relatively treeless areas (or very wet areas) you can
usually find enough dry twigs to light such as stove and boil the billy.
Of course my egg Ring stove http://www.theultralighthiker.com/the-egg-ring-ultralight-wood-burner-stove/
is much lighter, but it will scorch the ground. I personally do not see this as
a problem: over the years I have observed that there are many plants which have
clearly evolved to grow after such small fires (not surprising when one
considers the long prehistory of human habitation of the Australian continent.
Indeed I have observed that there are plants which rapidly colonise an old
campfire site which grown nowhere else!
The Bushbuddy was originally
invented by Fritz Handel of http://bushbuddy.ca/indexs.html & now made
by his apprentice Jeff Tinker (sic!) of: http://www.nomadicstovecompany.com/#!/our-story/ A Titanium
version (86 grams) is manufactured by: http://www.suluk46.com/products%20%20-%20P14%20TDW%20Stove.html
‘About the BUSHBUDDY
Like the Bushbuddy Ultra, this stove was designed to provide the cooking needs
of one or two people, but can also serve the needs of a family or small group
if two stoves are carried.
It weighs just 5 1/2 oz, and makes a compact package 4 1/4" in diameter
and 3 3/4" high when nested (the same size as the Bushbuddy Ultra), which
will fit inside the Snow Peak Trek 900 titanium pot, and many other pots of
similar or larger capacity. It's compact size and light weight make it ideally
suited to the needs of the backpacker, cyclist, and other outdoor travelers.
Because it burns wood, it is a very economical stove to use.
There is also no need to carry your fuel with you wherever wood is available
(it does not need batteries), making it useful for long trips, or when
traveling in remote areas of the world where liquid fuels may not be available.
It is aircraft friendly too.
Under good conditions (protected from wind and rain and with a lid on the pot)
the BUSHBUDDY can boil one quart of water in about 8-10 minutes. It is a very
efficient stove, consuming only about 14 oz. of wood per hour at maximum heat,
less at lower heat.
Because of its unique design which uses a double wall around the firebox to
preheat secondary combustion air, you will find that you can burn wood as
cleanly as a candle.
Just be sure to use dry wood only, and add it at regular intervals to
maintain an open flame.
The BUSHBUDDY is made of high quality 18% chrome 8% nickel stainless steel for
many years of trouble free use. The grate is made of nichrome wire, as in the
Bushbuddy Ultra, for the longest possible life.
THE BUSHBUDDY ULTRA NOW AVAILABLE
First custom made for Ryan Jordan of
Backpackinglight magazine, for his Arctic 1000 trek in June of 2006, this stove
features the same efficient combustion design as the regular Bushbuddy, but in
a lighter weight (5 ounces, instead of 6.5 ounces for the regular model). The
two stoves are identical in size.
Specs are:
Can boil 1 liter of water in 8-10 minutes
(will take
longer under adverse conditions)
Weight 5.1
ounces
Size 4
1/4" diameter by 3 3/4" high
For compact storage, this stove is designed to nest
inside the Snow Peak Trek 900 (.9L)
titanium pot, but will also fit inside many other pots of similar or larger capacity. (Because of the
light weight construction of this stove, it is essential to protect it by
storing it in your cookpot.).
To assemble : Place the stove on
the ground with the ring of holes at ground level; remove
the upper section of the stove from within the firebox, invert it and
place
it on top of the stove.
Where to set up : The stove will not perform well in windy
conditions. It is very important to set the stove up in a sheltered area or to
create a windbreak. Any time spent in searching for or creating shelter will be
more than repaid in time saved waiting for water to boil.
The BUSHBUDDY can be safely placed directly on a wooden surface such as an
outdoor picnic table, and it will not scorch it in normal use. If you set up
the stove on the ground, clear the surrounding area of flammable materials like
grass or leaves, because the fire sometimes tosses out sparks. The stove can be
picked up and moved to a new location while burning if you are careful to hold
only the lower base section. (In hot weather you may need to use gloves or pot
holders.)
Do not use the stove indoors unless you have a means of venting the exhaust
gases to the outdoors, such as a teepee with a vent at the top.
To start a fire : Use only dry wood. When other fire starting
materials are not available, make three or four short fuzz sticks with your
knife. Also collect a handful of small dry twigs or split some fine kindling.
Light one of the fuzz sticks and place it in the firebox so the flames will climb
up the shavings. Add a second fuzz stick, and as the fire grows, some of the
fine kindling. If the fire begins to die down, add a third fuzz stick, and then
some more kindling. Once the fire is burning well, you can begin adding bigger
pieces of wood. The chief cause of difficulty in starting a fire is using wood
that is not really dry; in particular avoid using stuff found lying on the
ground to start a fire, even if it seems dry.?
Although the stove can be fed with nothing more than twigs broken up by hand,
bigger solid pieces of wood will be found much more satisfactory, burning
longer with less feeding of the fire. An easy way to cut the short pieces of
wood needed is to place the wood over a log and nick each side with an ax, then
hit the end with the poll of the ax to break it off. Or, a small saw such as
the on a Leatherman tool or Swiss Army Knife can be used to nick each side of
the wood lightly, so that it can be easily broken to length. This saves the
effort of sawing right through. With an ax, however, larger diameter pieces of
wood (such as a small dead tree) can be utilized too, by first splitting and
then breaking into shorter pieces. (Lean any leftover wood against a tree to
keep it dry for future use by yourself or others.) Twigs, chips, roots, bark,
and pine cones all make good fuel once the fire is going well, if they are
reasonably dry. Under rainy conditions anything lying on the ground is sure to
be too damp. The driest wood available is often the lower dead branches of
living trees, particularly conifers such as spruce which shelter their lower
branches. If in doubt about the availability of good dry wood at the campsite,
collect some along the trail when the opportunity arises, and take it with you.
Cooking : A frying pan or pot can be placed directly on the
stove, and wood can be fed to the fire through the opening in the upper section
without removing the pot. With a little experience, the heat can be controlled
to some extent by regulating the amount of fuel added to the fire. For example,
to simmer a pot of rice once it has boiled, add only one medium sized piece of
wood at a time and then only just when the flames are about to go out. (If the
flames do go out, add a small chip of wood only, and wait for the flames to
re-ignite and raise the firebox temperature, before adding more wood.)
For longer or more gentle simmering, it is better to suspend the pot a little
above the stove. One of the simplest ways to do this is by using the
traditional dingle stick (a stick jammed into the ground at an angle, with a
rock or log placed in the angle formed with the ground). The pot is hung on the
end of the stick, and can be raised or lowered by adjusting the position of the
supporting rock or log. Suspending the pot has other advantages too, among them
a reduced likelihood of accidentally spilling it, (especially if the ground is
not firm), and a cleaner burning fire with easier feeding. If you have a very
large pot or bucket to heat, two stoves can be placed under a suspended pot.
To sterilize water : If you are unsure of the safety of
your water supply, bringing it to a rolling boil will kill any
microorganisms--no need for prolonged boiling. Boiling will not protect you
from chemical contamination.
Using the BUSHBUDDY as a campfire : In moderate weather,
the stove makes a great alternative to an open campfire, providing light,
warmth and cheer while conserving firewood.
Safety : Use the stove where open campfires are permitted.
The stove can toss out sparks (due to tiny steam explosions of slightly damp
wood), something that a liquid fueled stove does not do. Set the stove up in an
area cleared of combustible materials like leaves and grass, and watch for any
sparks tossed out. Before leaving your campsite, dump any remaining charcoal on
bare earth and thoroughly drench it with water.’
6/09/2016: How to Magnetise a
Screwdriver: If you
have a mobile phone which looks something like this you are going to be
unscrewing some very tiny screw before you can fix it. They are almost
impossible to pick up (at least with my ancient arthritic fingers, and likewise
to find when you (certainly) drop them – so you need to know how to do this.
And it is just as simple as the picture shows. Wrap a length of insulated wire
around the screwdriver then touch the ends a couple of times to opposite poles
of a 12 volt battery (possibly not one installed in pone of these modern
computerised cars which may not like it). You just have to run a current
through the coil for a little while and the metal tip of the screwdriver will
become magnetised and will remains so – often for a very long time depending on
the steel alloy it is made from. That done you are ready to tackle those tiny
screws.
I had not attempted a mobile phone
repair before – I only graduated to a smart phone a bit over a year ago when I
discovered its wonderful mapping/GPS functions – but I will have a go at petty
much anything, and I succeeded first time in replacing the LCD & screen.
Next time I will have a go at ungluing the glass screen with a heat gun and
replacing it (very carefully). The screens only cost about $2 on the net so it
is a knack worth mastering.
PS: A tempered glass screen
protector will apparently prevent many such screen mishaps. They too are only
about $2 on eBay!
6/09/2016: Mozzie Nets: Lots of folks eschew tarps for
tents because they fear they will be invaded by vast swarms of biting and
stinging beasties of various ilks, but mostly I find the weight and (usually)
the inconvenience/unreliability of zippers is not worth the relatively rare
times that need arises.

I admit there are some spots where
the hordes of sandflies or mozzies can be quite daunting (and March flies here
in Oz are sometimes quite dreadful) but most things can’t sting or bite through
well chosen clothing (or your sleeping bag), the critters arrive in great
numbers every time you leave or enter your shelter anyway, and all you needed
to carry really was a head net (which can also deter flies from bothering you
and works while you are walking) and such a head net need only weigh 11 grams
(!) as in this iteration from Sea to Summit: http://www.seatosummit.com.au/products/bug-protection/nano-mosquito-headnets/?ref=outdoor so I misdoubt the desirability of lugging
around up to a kilogram of netting inside which you will always be killing
sandflies, mozzies etc anyway.
That being said, I am working
on Nano Noseeum mesh doors for my http://www.theultralighthiker.com/the-deer-hunters-tent/
which I will close without zippers and which (at .7 oz/yd2) will weigh only
about an ounce or 30 grams (the mesh is available here: http://www.tiergear.com.au/11/online-shop/no-see-um-mesh)
for such rare occasions as I find myself camped out in sandfly heaven, eg at
the Grant Burn on the South Coast track Fiordland NZ: http://www.theultralighthiker.com/south-coast-track-fiordland-nz-waitutu-to-westies/) You can slowly eliminate the
sandflies/mozzies which invade your (netted) tent by clapping your hands
together to kill them as they circle below your suspended lantern of a night (http://www.theultralighthiker.com/mini-super-torch-a-weeks-light-weighs-50-grams/)
– or you can carry a mini atomiser bottle of insect spray.
5/09/2016: The Twelve Woodlores:
Ray Mears. Some
excellent advice from the introduction of Ray’s excellent ‘The Survival
Manual’. If you have not caught up yet with Ray, you should. He is the original
of these poor copies such as bear Grylls having trained the SAS and others for
years in survival skills. You can get a taste of his style here: https://www.youtube.com/user/RayMearsBushcraft
or purchase his books and DVDs here: https://www.raymears.com/
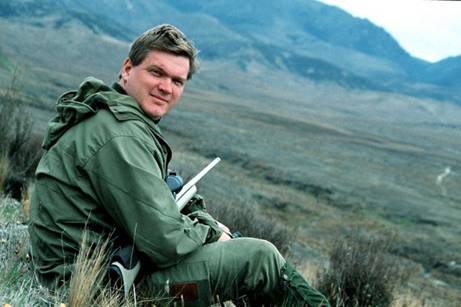
1. ‘Don't challenge Nature,
challenge yourself: Occasionally you will hear people talking about beating the
elements by conquering a mountain or crossing an ice cap or some such brave
deed. The truth is that the challenge is internal. Have you the skill? Can you
overcome your fear? No one can beat the elements; all those who fail to heed
the warning signs or have the stupidity to press ahead regardless, die. Instead
of taking unnecessary risks challenge yourself to know when to turn back; learn
to be more skilful; above all challenge yourself to better understand the way
nature works.
2. If you're roughing it, you're
doing something wrong: Any fool can be uncomfortable, you gain no points for
carrying a heavy backpack, or for any deeds of self-imposed endurance. While
you may train for an expedition by roughing it, if there is a way of making
yourself more comfortable, without the effort becoming a disadvantage, do so.
In emergency situations in particular, just a small amount of hardship can
prove to be fatal once your level of morale has dropped.
3. Always give z00% effort the first
time: Whether shelter building, firelighting, or whatever, if you don't set
about it in the right way the first time you are wasting your energy and will
simply have to start from scratch again..
4. Aim to achieve maximum efficiency
for the minimum effort: To work you need energy; for energy you need food. In
the outdoors finding food is work. When you gather your firewood for your fire
do you carry large armfuls to the log pile or do you only fill your hands?
5. Never pass by an opportunity:
This is very important. As you travel along, should you find suitable water,
food or firelighting materials, gather them as you pass since you may not have
the opportunity later when they are needed. This is particularly true of fire
building materials where by the end of a day's travel it may be raining or have
rained earlier soaking the available tinder. Many of my old shirts and jackets
have birch bark pieces in the pockets that I gathered some years ago now.
6. As far as you can, adapt your
expectations to a level which you can meet given the circumstances: If you
cannot build a large comfortable shelter, be satisfied with a small shelter. If
there is not a wide variety of wild foods available to you, be grateful for the
one type you can eat. Make your psychology work for you. Be realistic—make
yourself comfortable but do not overwork yourself to achieve this: it's no use
building a palatial shelter if you then collapse with exhaustion inside it. But
also do not underestimate what you can achieve.
7. Only eat that which you have
positively identified as edible: Do not trust taste tests or in any way
experiment with unfamiliar plants or other materials for use as food. The only
real way to eat in safety and confidence is to learn what can be eaten and just
how to prepare the food before you set out. If this seems like hard work you
should not be eating wild foods.
8. Suspect all water as being
infected: Even the cleanest, coolest most alluring water may well be
contaminated; you cannot tell at a glance. Boil or purify all water—check in
particular for signs of chemical pollution, this may be concentrated by
boiling!
9. The state of your fire is
directly proportionate to your level of morale: Whatever your level of morale,
if you can light a fire it will be raised, but if you fail it will plummet like
a stone. If you are not confident of your ability to light a fire in the rain
it may well be better to wait until the rain stops before trying.
10. Whenever gathering your
resources use natural selection as your guide, this is the `way' of nature:
Leave the strong, harvest the weak; when gathering food you should always leave
a proportion of healthy plants, shellfish or whatever to continue the line. By
this lore stronger healthy creatures will have the best chances for survival
and thereby proliferate in the future.
11. Take only memories leave only
footprints: Wherever possible minimise your impact upon the natural
environment, and always aim to leave a campsite in a better state than you
found it.
12. Be fit, able to swim and do not
give in: Every single skill or technique which follows is easier to learn and
master if you are fit. The outdoors is filled with risks and the danger of
unpredictable circumstances. Your fitness may well be your last line of defence
in such circumstances.
These lores are the guide to successful
backwoodsmanship, but in writing them I have assumed that you are able to carry
out basic first aid. If you cannot you should attend a course run by an
organised body such as the Red Cross. Almost invariably every outdoors man or
woman will have recourse to such knowledge at some time or another. One aspect
of first aid of particular relevance in the outdoors is an understanding of how
hot and cold environments affect your body, these are problems you will face on
a regular basis.’
04/09/2016: Hammock Hunting Till Dark: The best hunting strategy is to
be about where the deer are in the dawn and dusk. The
easiest way to achieve this is to hammock camp so that you stop hunting when it
gets dark, sling your hammock and tarp between two trees and start again at
first light. If you have to knock off your hunt so you’re not stumbling around
in the dark getting out, you are missing the best time of day to hunt. Walking
in the dark is also fraught with dangers best avoided – this is the voice of
experience speaking!
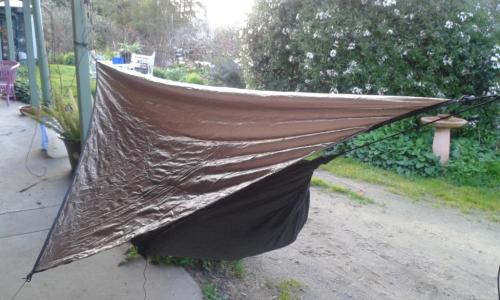
Many
hunters either travel too light, or too heavy. The first can be overconfidence
or youth, but once you get caught out overnight you may change your mind. At
least do this: http://www.theultralighthiker.com/if-you-could-only-carry-two-things-in-the-bush-what-would-they-be/ Better yet though is to work out a
lightweight kit so you plan to stay out overnight normally. Here are my
thoughts about that from some years ago:http://www.theultralighthiker.com/hunting
-daypack/
I
think I would definitely opt for the Dyneema pack now, with the ability to tie
some extra gear to the outside, eg: http://www.theultralighthiker.com/attaching-tie-downs-to-your-pack/
This
post however is about planning to stay out overnight as your normal hunting
procedure in order to optimise your crepuscular (love that word = twilight)
success. A hammock and tarp can always be pitched between two trees no matter
how steep the terrain, or how rough or wet the ground. This is worth
remembering. I always carry a hammock in Fiordland for just this reason. I have
slept dry and warm in my hammock with 6” (15cm) of water running underneath me
and torrential rain streaming down (eg on Mt Baw Baw).
You
can even pitch two hammocks under one tarp (to save weight). You have to boost
the upper person in. Della and I have done this. You can guess who sleeps on
top! You can also pitch it as a ground camp if you want to and when the ground
is flat. You can use a couple of sticks or hiking poles instead of trees. You
will need a few more stakes and guys if you plan to do this where you use the
hammock as a ground sheet.
You
do not need to buy an expensive hammock or tarp. My first foray into hammock
camping was many years ago when we were much more pressed for loose change than
we are now. I purchased some 2oz/yd2 waterproof ripstop nylon from Spotlight
(for about $7 a yard/metre) and away we went: We made a 7’ x 7’ (210 x
210 cm) tarp with gross grain tie outs at the four corners and half way down
each side. We needed a few yards of (approx 2mm) Spectra cord so we could tie
it to a tree and peg the other corners (and half way points – if needed) to the
ground – so also some stakes (http://www.theultralighthiker.com/?s=stakes)
To
construct the hammock we cut a 7’6” (225cm) length of the ripstop (a hammock
needs to be approx 2’ or 60 cm longer than you are), single hemmed the edges
and double hemmed the ends (ie with an extra line of stitching or two just
in case). We used a pretty heavy duty polyester thread for this. Then all
we needed was some approx 500 kg breaking strain Dyneema or Spectra cord for
the suspension ropes. You want a fair length of this (say 10-12’ (3-3.6 metres)
at each end so you can reach trees which are wider apart and get round thicker
trees. Ideally you are looking for two trees approx 6” (15 cm) in diameter (or
thicker) and 10-12’ (3-3.6 metres) apart.
There
is a special way of tying the hammock to trees so that you can get the knot
undone again! Be very attentive about this! As in the picture below you pass
the cord around the tree, then under or over itself, back around the tree, then
under or over itself again. Three times is enough. Then tie it off with a bow
or whatever. Friction will ensure it won’t come undone. If you are worried
about damaging the bark of the tree (this can be a problem) a few short lengths
of stick pushed underneath the suspension rope will prevent this.
I
slept out in this homemade hammock and tarp lots of times without any grief
whatsoever. One night I was camped in the bush near Dargo, Vic with a couple of
hunting mates who had a dome tent. It came in to rain. Then it came in to rain
lots. After the first spell of rain my mates erected a tarp over their dome
tent as it was leaking from the top. After the second lot of rain it was also
leaking/flooding from the bottom. All their bedding became soaked. They
‘enjoyed’ a miserable night. Even with only a 7’ x 7’ tarp (and a lot of rain
and wind!) I was completely dry and comfortable. That night I was just using a
¾ length self inflating Thermarest. It was a little short and my shoulders and
arms were a little cold from where they compressed my sleeping bag’s
insulation. Live and learn:
I
tried a number of solutions to this. First I moved up to an inflatable pad. My
first was Big Agnes Ultralight ROM Insulated pad, still a wonderful (cheap)
comfortable pad – highly recommended to anyone on a budget. Later I graduated
to the lighter (but dearer) Thermarest Neoair range. Of course I now usually
use mummy pads (for lightness) but a rectangular pad is much more suitable for
hammock camping as the square ends help keep the hammock from compressing your
sleeping bag at the shoulders and arms. You can also shove some closed cell
foam in either side to reduce this negative.
I
graduated to an Exped ‘Scout’ hammock (it was weight rated) which I reckon I
slept in well over 200 times. It is starting to show some sign of wear and tear
now but I was very heavy then (100kg) so it should last you a fair while. I
also ‘graduated to a slightly larger and lighter tarp : an 8’ x 8’ (240 x 240
cm) cuben tarp made from .5oz/yd2 material which weighed less than 150 grams.
Eventually I sewed a couple of ‘wings’ on it so it better suited ground camping
(or when heavy weather was really pushing in low from one direction). This
pushed its weight out to around 200 grams. I have used it dozens and dozens of
times without any sign of wear and tear. It is a quite delicate fabric, so you
have to be careful with it. Joe Valesko from Zpacks made it for me. You can see
it on his web page here:http://www.zpacks.com/shelter/tarps.shtml
and
on mine here: http://www.theultralighthiker.com/hammocks/
The
key to comfort sleeping in a hammock is to place your (inflatable) pillow
underneath your knees. An empty wine cask would suffice.
Della
and I both tried the Hennessy Hammocks which I admit are very comfortable.
Probably no-one has done so much design work to improve the hammock as Tom
Hennessy. Their products are also very well constructed and will give good
service. We had two of the bottom entry hammocks (which are a neat idea). Della
had no trouble entering through the bottom and positioning herself on her
Thermarest Neoair pad for a wonderful night’s sleep. I found it much more
difficult but I admit that was before my back operation and before I lost so
much weight, so I will have to try again. (PS: And I did & it is now easy!)
View
from inside a Hennessy Hyperlite
If
I was starting out now (and cashed up) I might buy an http://hennessyhammock.com/products/hyperlite-asym-zipwhich
weighs 793 grams, but the botom entry employs no zips and is so simple and
elegant. You can use the optional Underpad: http://hennessyhammock.com/products/replacement-underpad-1-classic-expedition-backpacker-and-hyperlite 284 grams & Undercover http://hennessyhammock.com/products/replacement-zip-undercover-1 164 grams = 448 grams T = 1241
grams. I would probably just use my Thermarest Neoair Xlite Women’s pad http://www.cascadedesigns.com/therm-a-rest/mattresses/fast-and-light/womens-neoair-xlite/product @ 340 grams T = 1133 grams
though a Regular rectangular Neoair pad will work better in a hammock.
The
problem you have with cold shoulders in hammocks applies much less so with
Hennessy’s because you lie much flatter and the material doesn’t compress your
sleeping bag so much at the sides. I will try to get hold of one of his new
‘zip’ top loaders to review. Ours are both entered from below.
We
both really like the wonderfully safe enclosed feel of their hammocks
completely surrounded first by insect netting then by a cosy roof. You really
feel that after you have gone to bed there is nothing to worry about until
morning. Forget all those things which might slither or bite, or whether the
rain do rain or the wind do blow! There are handy stowage points for your pocket
gear along the fixed centre line – a Hennessy innovation which is what makes
their hammocks so superbly comfortable. (You can add this to your home made
hammocks though it is a Hennessy patent). The Hennessys also have some pretty
neat ideas for stowing your hammock, for keeping it properly tensioned – even
water collection using the covering tarp. It’s all very well thought out and
neat! Their ‘Snakeskins’ quick storage solution makes set up a breeze, though
it adds a little to the weight and is an optional extra.
The
key to quick and accurate setup of any hammock is to get the two suspension
ropes of equal length and correct tension. First lay the hammock out on the
ground so that one end of the hammock just touches one of the trees. Take the
suspension rope out till it just touches the other tree, then halve the rope
(ie the distance from the tree to the hammock). This point will be just where
the knot goes up against the tree. Tie the rope off to the tree. Then go to the
second tree and tie off the second rope to the correct tension. This is much
easier with a Hennessy hammock or if you have a fixed centre line as the rope
will be quite taut. Without the fixed centre line you need a certain amount of
‘hang’. Aficionados recommend approx 30 degrees. No doubt this is a matter of
taste, but once you have worked out just the amount of ’hang’ you prefer you will
be able to tie the hammock off in one go using this method.
The
Hennessy hammock tarp just hooks on to the suspension rope with two Prussic
knots (which is a great idea for easy tensioning of the tarp). If you are using
some other tarp a loop of elastic at each end of the tarp will help to keep it
tensioned during the night. The tarp needs to start out a little tauter than
you might expect (likewise the hammock) as the two trees will bend in slightly
when you enter the hammock. A catenary cut tarp will stay tensioned better than
a diamond tarp.
The
lightest hammock I have found is the Grand Trunk Nano hammock https://www.grandtrunk.com/products/nano-7-hammock which is claimed to carry 300lb
(or 136 kg)! I reduced the weight of this hammock further by substituting
dyneema suspension ropes so that it weighs 165 grams including the ropes. If
you add a cuben tarp to this (136 grams) you have a hammock/shelter setup which
weighs just 300 grams! These two items would also just about fit in your two
back trouser pockets! I would use a ¾ length Neoair pad (260 grams) plus my
Airbeam pad from my daypack to that to complete my shelter and mattress system.
Of course (never satisfied) I plan to lighten this even further by making my
tarp double as my raincoat. (See: http://www.theultralighthiker.com/hole-less-ponchoshelter/)
One
of the best features of a hammock is what a great seat it makes. When you have
mastered the setup it will only take you 1-2 minutes till you have a really
comfy dry seat out of the rain to eat your lunch. I have really appreciated
this sometimes in Fiordland. Two can usually sit happily side by side (but
don’t exceed the load limit!) and you can even boil the billy on an alcohol or
bushbuddy type wood burner stove at your feet while you eat. It would also make
a great platform for glassing a distant hillside or as a hunting stand where
you await your chosen prey. You can even rug up warm and dry in your sleeping
bag while you wait.
You
can warm your hammock with a fire (if you are careful). Either light the fire to
the lee side of one of the suspension trees, or (utilising a stick) lift up one
side of the tarp so that you can sit in your hammock in front of the fire. Two
guys on that side will obviate this. I would keep the fire at least 6’
(1.8metres) away from the hammock.
If
you have a bad back a hammock is definitely for you. Before my successful back
operation (neurosurgery – never let an orthopaedic surgeon near your back!) I
hung in our lounge room in my hammock for months so I could get a comfy and
relatively pain free night’s sleep.
Here
are a couple of hammock tarp manufacturers:
http://www.zpacks.com/shelter/hammock_tarps.shtml (start at 136 grams!)
http://www.outdoorequipmentsupplier.com/maccat_tarps.php (inventor of the cat cut
tarp)
And
a couple of hammock manufacturers:
Hennessy: http://hennessyhammock.com
Speer: http://www.tttrailgear.com/brands/Speer-Hammocks.html (Ed’s book is worth a read)
Jacks: http://www.jacksrbetter.com
Exped: http://www.exped.com/international/en/product-category/hammocks/scout-hammock
An
Aussie outfit: Tier Gear: http://www.tiergear.com.au
Happy
Hammock Hunting!
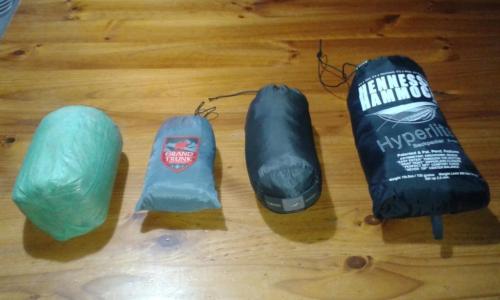
Left
to Right: Zpacks 8′ x 8′ tarp (150 grams); Nano Hammock (165 grams)
; Exped Scout hammock (320 grams) ; Hennessy Hyperlite hammock – includes tarp
(750 grams)
3/09/2016: Statistician Deer Hunters: Three
statistician hunters see a deer. First one shoots, 3 yards to the left. Second
one shoots, 3 yards to the right. Third one exclaims "We got him!"
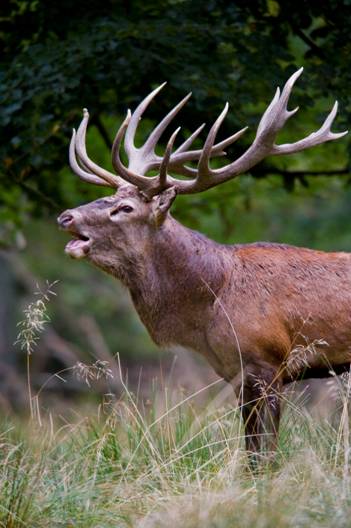
1/09/2016: Attaching Tie Downs to Your pack:
First
you need to get some ½” gross grain ribbon from you local sewing supplies store
- such as Spotlight here in Oz. Then you will need some of the Linelocks you
see I have sewn the gross grain to: You can buy these little guys right here in Oz, eg: http://www.tiergear.com.au/11/online-shop/cord-tension-lock
@ A$0.40ea, or in the USA from eg: http://www.questoutfitters.com/Fasteners_%20Misc_Fasteners.htm#LINELOC_3_
US$0.45ea.
You
sew a loop at each end of the gross grain ribbon (as shown – perhaps more
neatly than this. I blame arthritis. My wife says my sewing will be plenty
strong enough anyway which is the main thing!) Then you pass the end loop
through the tie out loop on the pack then the Linelock back through the loop.
Tie a boot lace on the other loop and pass it through the two holes on the
Linelock and you have an adjustable tie down which can be used eg to lash your
Alpacka raft to the top of your pack. See below:

The
Gorilla has a pair of these orange loops sewn into the pack on each side at
front and back. Here I have used three tie downs, the middle one crossing over
through the haul loop. Works well. You could also lash a sea to Summit Ultrasil
Compression Sack (http://www.theultralighthiker.com/a-tardis-folding-space/)
here to carry extra food for a long hike, or etc.
1/09/2016: Wilderness is just not working out for the
critters and things that live there, like so many other Left/Green myths. I
should know: I spend a great deal of my life there too: https://quadrant.org.au/opinion/doomed-planet/2016/08/wilderness-myth/
31/08/2016:
A Gorilla in the Bush: So, finally I
gave myself a couple of days off to go try out my new Gossamer Gear (GG)
Gorilla backpack, and the hunting spot I have been wanting to access via
packraft. Here is the pack already loaded up in our garden with our necessities
and ready to roll. (See: http://gossamergear.com/gorilla-ultralight-backpack-all-bundle.html)
As you can see Spot, our JR is eager to be off too. Readers who came in late
should read:
http://www.theultralighthiker.com/the-best-laid-schemes/
&
http://www.theultralighthiker.com/a-gorilla-in-the-hand/
It
is a 3-4 hour drive to where we were going.
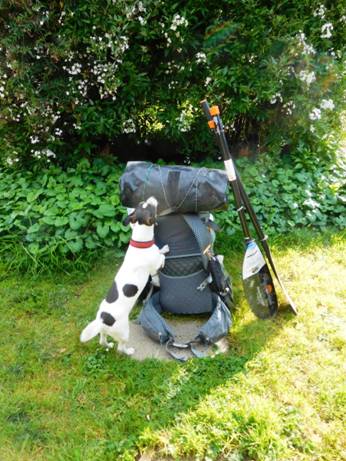
My
Alpacka Fiord Explorer raft ready to sail with my Gorilla and the faithful
Spot, ‘Come on Boss’
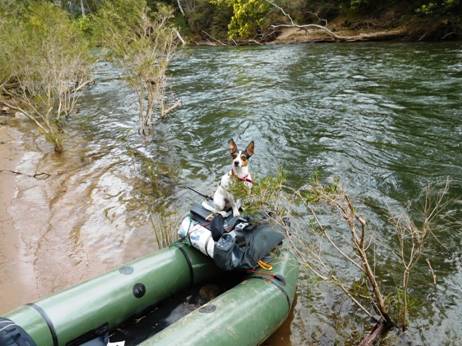
Safely
across the mighty river we sought out a pleasant flat with access to water and
with lots of firewood. It is still winter here, so nights can drop below zero
(Celsius), and did. Spot decided it was time for a snooze. I collected a heap
of firewood. As you can see from the westering shadows it is already afternoon,
but time enough for a ‘look-see’.
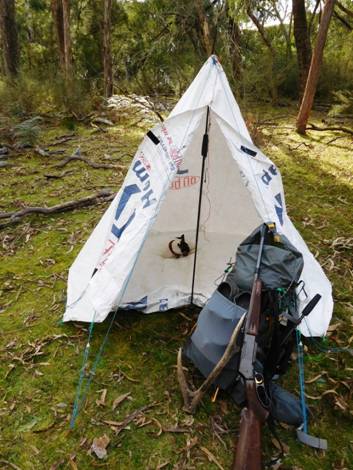
And
look what we found. By the looks a couple of years back a very old stag had
died right by his favourite wallow. I found every part of him except his second
antler which I guess has been pressed into the soft earth by many deer’s feet.
There were also innumerable cast branches on the ground pretending to be the
other antler. This one was only barely visible. His massive leg bones indicate
he was a monster, but the size of his antler shows he was going back. His teeth
were also well worn down. ‘Broken-mouthed’ we would describe him if he were one
of our old sheep. Maybe I will find the other antler another time.
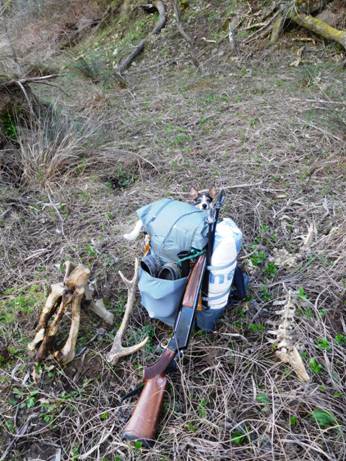
Here
is his favourite wallow – and what a beauty it is, more a swimming pool really.
The deer love to have a mud bath (perhaps it has to do with insects, or scent
marking?) They liberally paint the trunks of trees for nearly 100 metres
roundabout using them as towels when they’re ready to dry off.
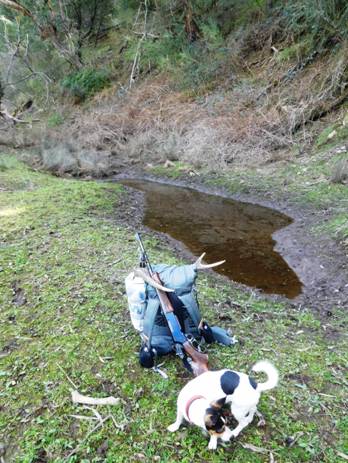
Back
at camp with the fire roaring out the front of http://www.theultralighthiker.com/the-deer-hunters-tent/
It is a charming scene.
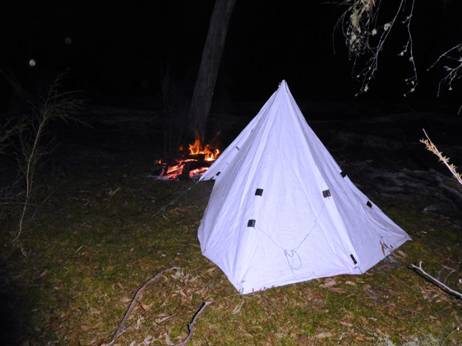
After
tea inside the tent Spot nestles on my sleeping bag whilst I read a book on my
phone and enjoy a hot cup of chocolate..
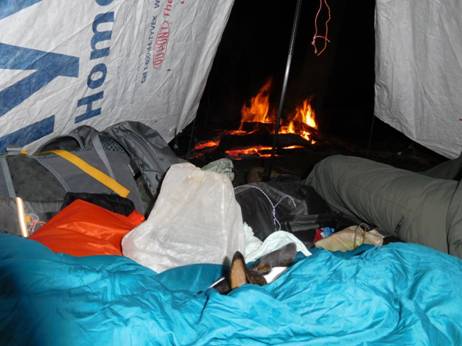
When
I reclaim my bed, Spot’s is all made up on the Gorilla utilising it and the GG
Sitlight pad as his mattress. He is comfy inside there: you can just make out
his tail poking out the end of his sleeping bag. When I climb into bed I will
also throw my coat over him.
Next
morning and we are off. You can tell what kind of plants nothing likes to eat
by the way they are not browsed at all. Most everything edible in this area is
heavily browsed. I thing the deer may even manage to eradicate the
blackberries. The patches are full of dead canes and well trodden down.
We
want to have a look at the big valley about two km downstream around that
ridge. It look like it will be a bit of a climb around that stone outcropping
on the bend. The river is really steaming here.
And
this is the stream we are looking for. I will call it ‘Wombat Creek’.
And
here’s why: ‘Wally’ wombat out for a morning stroll. Quite undisturbed by us. A
promising sign.
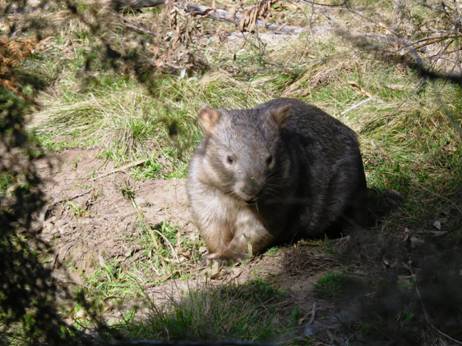
There
are many lovely grassy clearings for kilometres along Wombat Creek. I may move
my camp further up it another time.
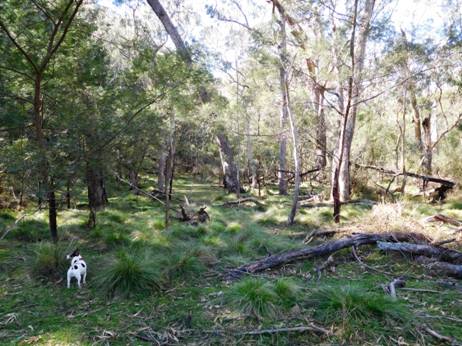
A
fresh rub. Another good sign.
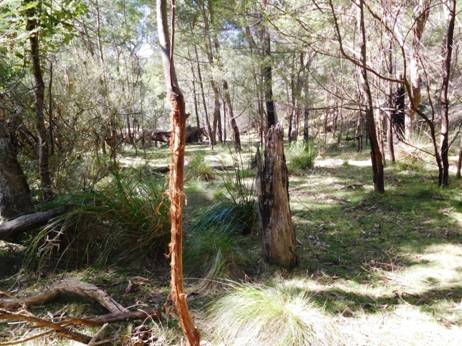
And
a preaching tree. There is lots of stag sign around here.
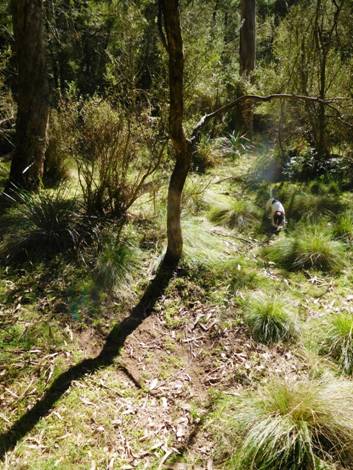
Our
lunch spot. A lovely warm stop even though it is still winter. I sit on the
Sitlight pad on a nice flat rock and enjoy some cheese and salami on Vita Weat
biscuits. Spot has some of that as well as his Smackos. http://www.theultralighthiker.com/lunch-on-the-trail/
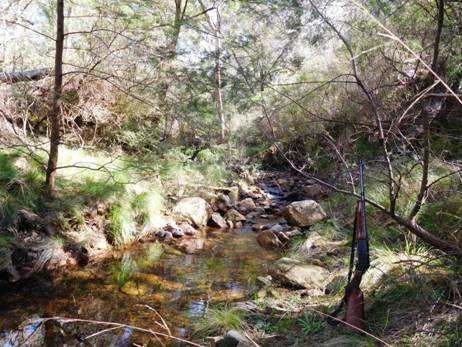
A
little further up the valley we come upon this tragedy. An old doe must have
been swept off her feet by this flash flood and trapped under this log. As I
said elsewhere: http://www.theultralighthiker.com/you-never-know-when-your-numbers-up/
You can see her skull (upside down) centre right, and her body on the other
side of the log in the centre.
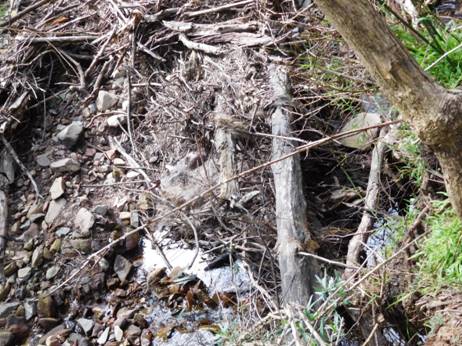
A
little further on we come upon this promising wallow. It must be nearly 6’
deep, probably utilising an old collapsed wombat city. It pays to scrape the
bottom of wallows such as this for cast antlers. Eventually you may have enough
of them to make something like this: http://www.theultralighthiker.com/uses-for-antlers/

Another
fine preaching tree with some stag scent still lingering according to Spot. The
stags clearly stand on their hind legs and rub some scent gland on their noses
as high up on the tree as they can reach (over 6’). Like rub lines it is a kind
of territorial behaviour.
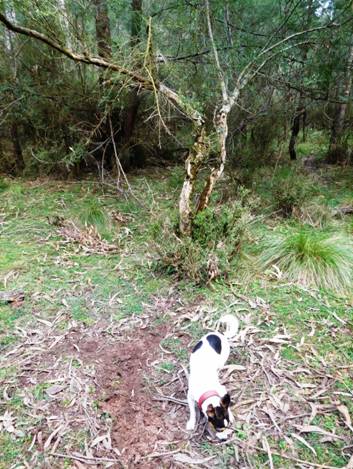
The
deer have really been eating this valley over. Here the apple hazel and prickly
coprosma have been well chewed down.
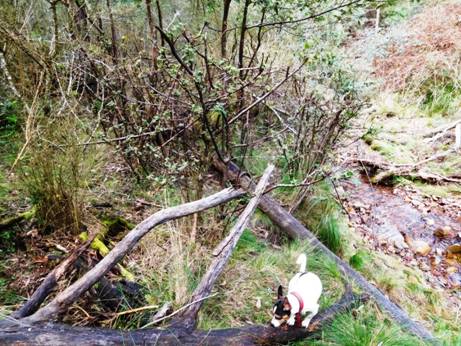
Another
of life’s tiny tragedies. (Near Spot’s nose) a yellow breasted robin has
succumbed to the winter chill and short rations (as most birds do each year).
Its tiny body is bobbing in the stream, adding a sad flash of colour as we pass
by.
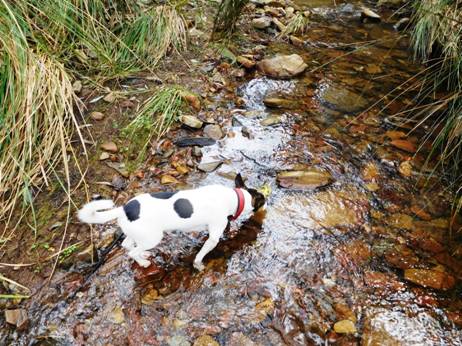
We
come to a really beautiful series of cascades.

And
a truly gargantuan wombat burrow. This one was over 6’ deep. This wombat must
have been Pharaoh Cheops in a past life!
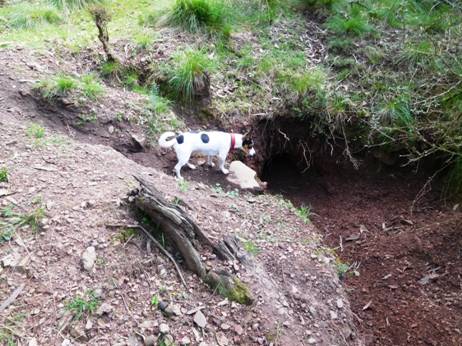
Now
a fine looking rub line. Notice how you can see the line of (three) fresh rubs
leading up the hill through the wattles and gums. This line marks the limit of
his territory (and his neighbours!) Sometimes you will hear (usually of a
night) two stags howling mournfully at each other in just such a spot.
Following
the line we decide to go up through the prickly wattle. Showing his disdain for
it a stag has thoroughly thrashed this one.
After
a little while we are wishing he had thrashed about a billion more! We headed
up the ridge through this stuff intending to follow the top of the ridge down
towards camp and come at the camped deer from above on their lee side. This is
the best strategy. Unfortunately, like so many plans, this one was doomed. The
fire regrowth on the ridge was awesome. We expected it to be relatively clear:
the usual sort of thing: gums a few dogwoods, easy walking. We were hours
pushing through the dreadful stuff and arrived (thankfully) back at camp well
after dark where we enjoyed a cold supper. We left plenty of deer to harvest
for another day. You are probably wondering why I did not just camp up on the
ridge once it became dark (or it was clear I was not going to make camp). A
fair point. It had been a 19C day and i was down to <500 ml of water and
going to be very thirsty so I pushed on, something I certainly wouldn't have
done in an area fraught with mine shafts! I do have a lot of experience walking
in the dark.
Next
morning we packed up and paddled out, Spot resuming his coxswain’s position,
‘Paddle right Boss.’
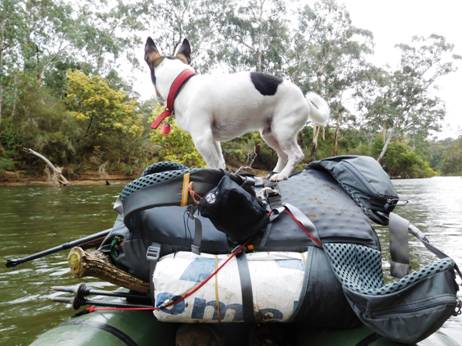
All
packed back into the trusty Gorilla. If I shoot a deer here (as I have done
before many years ago when I swam the river in winter – we were all young once.
It is a wonder some of us survived to be any other), I can come back to the
river for the boat. I can pack all the contents of my pack into a compression
sack and tie that onto the top of the pack, so that I will fit the first 15 or
so kg of meat in the pack (in large plastic handle tie bags which I always
carry). I will take that load back to the car, then go back for the second,
larger load. Might take me three trips say.
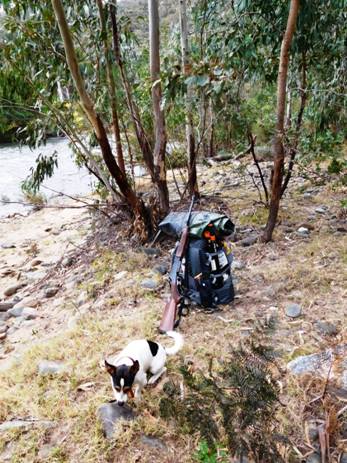
Being
August the bush was alive with wattle blossoms, particularly on the West facing
slopes which are warmer, and where the deer are more likely to be found sunning
themselves on a day like this.
Here
and there an Erica our Victorian floral emblem lit the forest floor up with its
beautiful pink bells.

We
always called this purple beauty ‘Traveller’s Joy’ a name which still suits me
best. I also like the name ‘Happy Wanderer’ – after those Hardenbergia sounds
pretty flat.
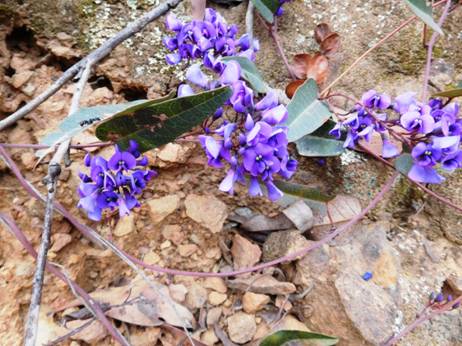
You
have been wondering whether we saw any deer. We saw heaps of them (at least
their orange eyes at night walking out), and of course we had the usual
visitations around our camp to disturb our sleep. And we camera glassed these
guys probably 500 yards away grazing in a clearing, whilst we were way up on
the hill much more than a km’s walk away. And it was well dark before we could
have arrived anywhere near them. I know some folk would take a shot at deer at
extreme distance like this with their telescopic sights. I always use iron
sights, and only shoot deer who can see me too. Having a gun gives you
advantage enough; you should leave the deer the use of his senses to escape
you. He has a right to live too.
To
tell you the truth deer hunting has always been a good excuse just to get out
and enjoy the sights and sounds of our beautiful Australian bush, so whether i
shoot a deer is more than somewhat immaterial. I actually prefer lamb anyway,
and we have always been sheep farmers after all. BTW: My pedometer tells me I
did 25 km yesterday through rough going, thick bush and up and down 500 metres
plus. A further 13 km on the afternoon before. Not bad for a gent who is not
far off beginning his eighth decade of life!
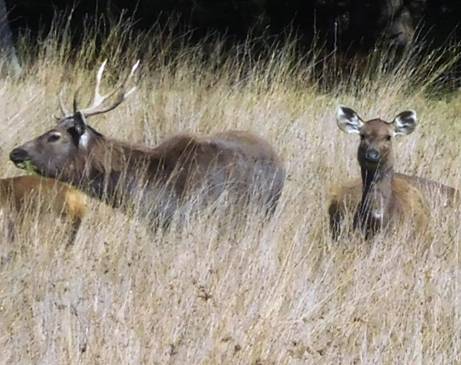
Oh,
you have been wondering how did the Gorilla stand up? I had been hoping that a
fog would come in whilst I was away so I could entitle this piece ‘A Gorilla in
the Mist’ but the weather remained deliciously clear, so it remains just a
companion piece to my previous post, ‘A Gorilla in the Hand’. The pack is
beautifully comfortable and easily handles the not inconsiderable quantity and
weight of stuff I imposed on it. The Robic nylon may not be bulletproof, but it
stood up to a few hours of pushing through horrible prickly wattle without so
much as a blemish, more than I can say for myself. It has lashing spots on the
top so you can tie things to it (as shown with my packraft). I will show you
how in another post soon.
It
might be a good idea to have lashing spots on the bottom so you could do the
same there. It would not be hard to add them – the material is plenty strong
enough to take another compression bag below as well as the one above. I guess
the manufacturers of this excellent piece of gear are more figuring on
ultralight hikers and a weekend pack, which is why they have trimmed the volume
of the pack down from their much larger Mariposa, a pack which I have owned for
many years. Mine is in a lighter less durable material than this Robic they are
now using though still going strong, but if you really want volume, the
Mariposa is something like 68 litres including the extension collar. It also
has this improved suspension system which will handle with ease a much bigger
carry than the Specs indicate. That sort of volume should get you a month’s
hike without resupply. Some wild adventures there. Happy hiking or happy
hunting.
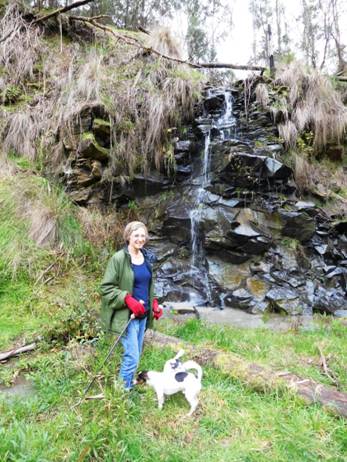
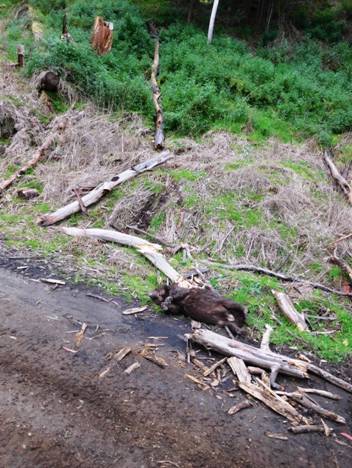
On
this one, I was using light plastic raffia type string to hold some of it together
(surprising how strong it was) – and much heavier cord at the top than I would
ever carry now (I am going to try dyneema thread/cord next time), but it gives
the idea. We usually have no trouble finding wood around camp, to make this set
up – sometimes I pinch wood that my husband has already innocently gathered for
the fire, not realising it’s just what I want; and other times we have to look
a bit further afield. If the lower cross piece of wood is put at the right
height, and enough slack is allowed, it can be very comfortable to lay back in
of an evening in front of the fire.
I
am thinking the Robic nylon fabric and dyneema thread ties could do the job for
around the 50gm mark (give or take)…
For
the knots for the chair, I’ve been working with a system of coming from the
back with loops, instead of pulling the full length of cord around – and
retrieving the cord without tangle, at pack down time, has usually been OK (I
find that four loops on each intersection with the lower cross bar give a
reasonable hold – then I go at least a couple more to be sure…. I wrap around
the top while all 3 pieces are on the ground) – It is all done ‘girl style’
(slightly different every time) and finished off with some kind of knot that
just needs a pull at the end in order for it to come loose when time comes to
undo it.’
They
look like a great idea. Thanks Jenny . think you could make it even more
comfortable by adding your inflatable mat. You can see that the chair is
moveable, so you can take it inside your shelter when it rains.
Jenny’s
chair, details:
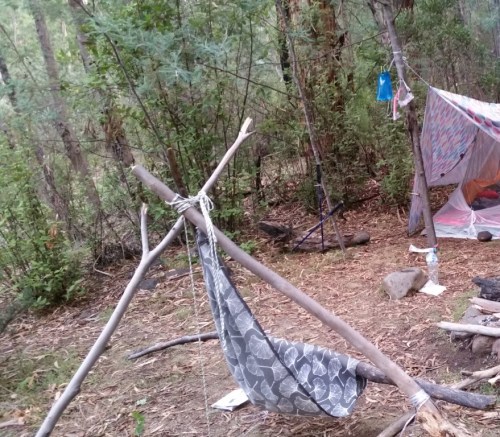
Sitting
back relaxing on the track to Tali Karng. Looks
comfy.
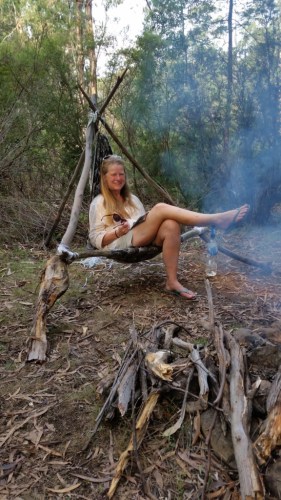
Possibly
the original. This chair was spied by Ron Edwards ‘Australian Traditional Bush
Crafts’ at Dick Rimmings Hut at Kooboora 145 km west of Cairns many years
ago. As you can see it has made use of a forked stick and a hessian bag.
Very minimalist.
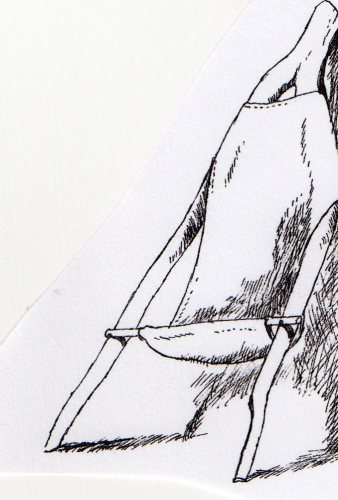
27/08/2016:
We should scrap
National Parks and Departments of Conservation, allow much more
hunting - and employ some gamekeepers instead. Read the article to see why.
This is how nature really works: http://www.rationaloptimist.com/blog/grouse-and-lions/
26/08/2016:
The Not-So-Poor Man’s Sat Phone:
Thuraya’s Sat Sleeve: Pricewise this offering from sits about half way between
Delorme’s InReach SE (http://www.theultralighthiker.com/the-poor-mans-satellite-phone/)
and the Rolls Royce model, Iridium’s Extreme (https://www.iridium.com/products/details/iridiumextreme) It is also substantially lighter than both
(178 grams inc battery) but has to be paired with your phone – which means of
course both devices have to work http://www.thuraya.com/SatSleeve
though you can make an emergency call with it in stand-alone mode. However
unlike the other two it does not have tracking or a SOS (PLB) function and
there are areas of the globe where it does not work (New Zealand for example).
Most places though, if you want a cheaper, lighter Sat Phone for most purposes
it could be a good choice. See also: http://www.theultralighthiker.com/the-poor-mans-satellite-phone/

24/08/2016:
Klymit Ultralight Pillow. I have not
tried this pillow. I have been using the Exped UL for some time and find it
great. It is a lot pricier than Klymit’s offering though, which is available
for <US$20 just now on Massdrop if you are on a budget. It weighs just 48
grams. Certainly looks comfy. The ‘X’ should cradle your nhead nicely. I have
been using Klymit’s Air Beam Pad and their pack raft, or Light Water Dinghy.
They are fine products. https://www.massdrop.com/buy/massdrop-x-klymit-pillow?mode=guest_open
See:
http://www.theultralighthiker.com/klymit-packraft/
http://www.theultralighthiker.com/klymit-air-beam-inflatable-pack-frame-update/
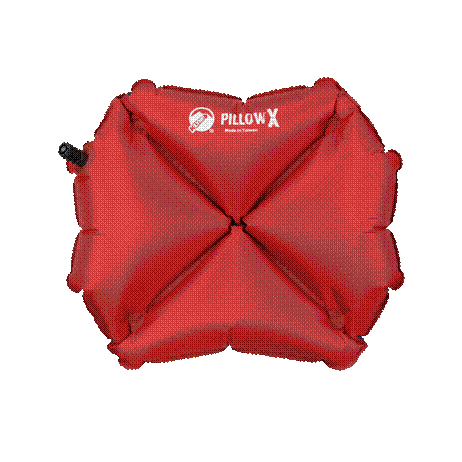
23/08/2016:
A Tardis, Folding Space: How to Fit More
in Your Pack: ‘Ultralight’ is not just about weight. It can also be about
how to do more with less. In this case I am thinking eg of using a 13 litre Sea
to Summit compression sack to compress my clothes to 1/3 of their previous
volume, thus saving 8.7 litres of space at a weight penalty of <50 grams. http://www.seatosummit.com.au/products/storage-bags/ultrasil-compression-sacks/?ref=
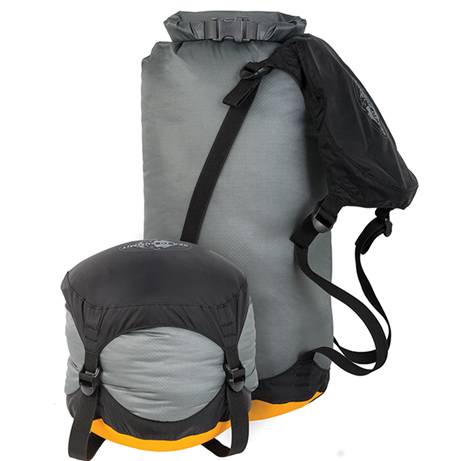
If
I do the same thing with my sleeping bag, eg compressing it from 6 litres to 2
litres I save another 4 litres. Now the 12 litres saved (at a weight expense of
approx 75 grams) will allow me to carry perhaps 6 kilograms of extra food – or
enough for a journey of an additional 12 days in the same volume pack. If I go
to the same trouble with my food - though it may only compress (carefully) in
half, I think I would be able to carry all my gear plus perhaps a month’s food
in an approx 50 litre pack.
The
addition of a ‘pack lid’ attachment such as this one from Zpacks http://www.zpacks.com/accessories/backpack_lid.shtml will add a further 3.5 litres of food storage
as well as providing a bum bag for excursions from camp along the way at a
further weight penalty of from 47 grams. This addition will certainly mean that
I can carry a month of food in a smallish backpack such as the Gossamer Gear
Gorilla with its excellent suspension system, Zpacks Arc or Blast, or Mountain
Laurel Designs Exodus. See http://www.theultralighthiker.com/ultralight-pack/
& http://www.theultralighthiker.com/a-gorilla-in-the-hand/
Details:
This
valve-free dry sack uses a breathable base made of waterproof eVent® fabric,
which allows air to be pushed out, but keeps water from entering. Waterproof
seams are double stitched and fully taped for excellent durability and
resistance to moisture A roll-top Hypalon® closure with lid and 3 straps evenly
compresses and maintains compressed size. The Sea to Summit Ultra-Sil
Compression Dry Sack is roughly half the weight of the original Sea to Summit
eVent Compression Dry Sack.
Closure
: Drawcord
Compression
straps: Yes
Waterproof:
Yes
Material(s):
EVent/Cordura nylon
Dimensions
6
litre = 6 x 14 inches - 2.3 ounces/65 grams
10
litre = 7 x 16 inches - 2.6 ounces/74 grams
14
litre = 8 x 18 inches - 3.2 ounces/91 grams
20
litre = 9 x 20 inches - 3.4 ounces/97 grams
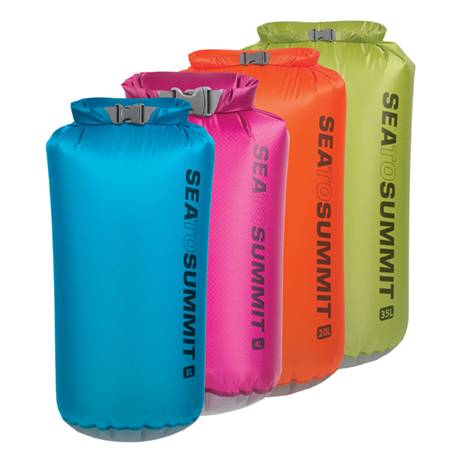
Sea
to Summits UltraSil Dry Sacks Specs for comparison:
Base
x Height Volume Weight
11
x 24cm 1L 20g
13
x 29cm 2L 23g
15
x 33cm 4L 26g
17
x 46cm 8L 30g
22
x 53cm 13L 40g
25
x 61cm 20L 50g
30
x 70cm 35L 65g
23/08/2016:
Ultralight Collapsible Coffee Cup:
My lightest cup is 30 grams when these guys are around 20, though they don’t
have a handle and are collapsible which has both pluses and minuses. Their
advantage for us though is that both would fit inside our Vango 450 ml Titanium
cup so that I could just take it and our Toaks 1100 ml pot with frypan handle.
All three fit inside the Suluk wood stove and the Brasslite Turbo 1D and
measure fit snugly inside that. http://www.theultralighthiker.com/cookset-woes/ We need just throw in a collapsible plate
such as this https://www.traildesigns.com/fozzil-bowlz and we have a (shared) mess kit which will
cut out some of Della’s pack weight.
![[object Object]](Hiking%202016_files/image343.jpg)
‘The
UltrAspire Cup 7oz. greatly reduces the amount of waste generation and
environmental impact of a paper cup. Designed to reduce the amount of waste
created by disposable paper cups at races, the UltrAspire C2 cup is reusable,
collapsible, and at just 0.7 ounces, easy to bring wherever you go. Keep it in
the pocket of your running shorts or racing vest, and take it out for fast
filling at aid stations. Made from FDA-approved silicone, the cup pops up to a
standing height of 3.5 inches and folds back down when you’re done. Great for
cup-free or bring-your-own-cup events, it also comes in handy for travelling,
car camping, and backpacking with kids.’ Approx US$8ea plus shipping costs.
![[object Object]](Hiking%202016_files/image344.jpg)
Additional
Information
Weight 0.04 lbs
Dimensions 3.5 x 2.87 x 2.87 in
Color Luminous Blue
See:
https://vimeo.com/160288205
& http://ultraspire.com/product/ultraspire-c2-cup/
& https://www.massdrop.com/buy/ultraspire-c2-cup?mode=guest_open
![[object Object]](Hiking%202016_files/image345.jpg)
22/08/2016:
Smallest Rechargeable Flashlight:
Nitecore Tube. What a tiny delight this little guy is & at only 9.6 grams
(less than a AAA battery and only 2 grams heavier than a Photon http://www.theultralighthiker.com/photon-torch/).
I have a Bushnell Solarwrap Mini (http://www.theultralighthiker.com/charging/)
I can plug one of these little guys into anytime it gets a little lazy. Two of
them should be enough for most lighting needs. It ought also to be quite easy
to create a head torch attachment for one (http://www.theultralighthiker.com/diy-head-torches/).
Two
of them at 19.2 grams would save me the weight of several AAAs @ 10 grams ea
& the weight of 1-2 mini torches at 16 grams ea & 1-2 Photons @ 7 grams
ea - a saving of 109 grams! I always like to have plenty of lighting options.
Probably what I will do at the outset is swap out the Photons plus their spare
batteries and reduce the numbers of my AAA batteries and see how I go. It is
always handy to have a spare torch (or two) for when they fail (much less
frequently nowadays it’s true) or for when you need to lend one to someone who
has lost theirs (still quite a frequent occurrence!) See: http://flashlight.nitecore.com/product/tube
They have a special deal on them at Massdrop right now!
Specs:
![[object Object]](Hiking%202016_files/image346.jpg)
21/08/2016:
A Gorilla in the Hand: I have been
giving my new Gossamer Gear Gorilla Backpack a test run (http://gossamergear.com/gorilla-ultralight-backpack-all-bundle.html
- NB: they have a special price on them right now).
All
the gear and food for a couple of days for myself and my dog do fit in the
smaller (40 + 8 litre pack) – as you can see. Shrinking your kit (from 52
litres) like this exercises a profitable degree of discipline which it is worth
emulating. I omitted nearly 1.5 kg I didn’t need for a short-ish trip. Some are
things I might need (say) on a ten day trip in colder weather without resupply
and where help is far from hand. A few are things I can probably permanently do
without. Even so I have food aplenty for myself and Spot (the JR) as well as
his bed, and room to lash the pack raft on the top if I wanted to. The other
side of the pack can easily hold a water bottle, hiking poles and the paddle,
even my gun in take down mode. If I was going away just by myself with this
pack I reckon I could squeeze a 5-7 day expedition into it and still lash the
packraft on top! Spot’s bed and food alone take up space that could otherwise
be occupied by at least three days of my food. On this occasion I am also
carrying a pair of crocs for the river crossing, & etc…I am working on
smaller/lighter dry shoes.

The
pack (as configured) has four handy pouches for odds and ends one might need on
the trail: two on the hip-belt and two Gossamer Gear shoulder pouches I bought
for my G4 long ago. (http://gossamergear.com/shoulder-strap-pocket.html)
I am using the (supplied & easily removable) waist belt and aluminium stay
both designed for serious load transfer. I might sometimes omit both to save
weight, as the shoulder straps are very soft, wide & comfortable so that I
might not need load transfer for such a small (40 litre) pack. Or I might swap
the hip belt for a simple home made webbing one and substitute the ‘Sitlight’
pad the pack came with for an Air Beam pad which will do much of that work at a
lesser weight penalty, a saving of say 250 grams. (See http://www.theultralighthiker.com/air-beam-pad/
& http://www.theultralighthiker.com/klymit-air-beam-inflatable-pack-frame-update/)
The
Gorilla is made from Gossamer Gear’s new ‘Robic Nylon’ material which is even
tougher than the 4.8 oz/yd2 Dyneema material we are used to seeing in such
heavy duty packs. It would take some extreme effort to puncture it, and I very
much doubt you could rip it without a very heavy, sharp knife! Not something
which is going to happen with any normal bush or trail wear and tear anyway. As
such the pack will make an excellent hunting daypack being well able to hold up
to heavy use in thick scrub, blackberries etc, at the same time having the load
carrying capacity to pack out a heavy load of meat should the occasion arise.
The muted grey colour suits this purpose well as does its expandability. It can
be shrunk down to comfortably contain less than 20 litres with those compression
straps on the side and top, and the heavy duty elastic mesh in the rear pocket
– but it quickly transforms into a heavy haulage 48 litre pack when eg you have
a monster to lug out of some deep gully in a remote hunting spot. There are
lots of other loops to tie extra gear on should you need to plus ice axe and
hiking pole fittings. Inside you will find a hydration sleeve and drinking tube
keeper loops to both shoulder straps. With the two shoulder pouches I have
added there are seven external pockets plus two compartments inside (counting
the hydration pocket).
Below
is a breakdown of what I managed to fit on/in this excellent pack. Here it is
on the chair with the packraft strapped to the top. You will note the two
reflective strips glowing at you from the shoulder straps. That’s a good safety
feature as you can often find yourself walking out in the dark. It has
reflective strips on the back too.
NB:
It’s a lot of individual items isn’t it? I carry pretty much the same kit for a
weekend as for a week. I admit I have still a few double-ups (3 head torches
and multiple lighters for example) and a small number of things which might be
dispensed with, but everything here has been needed and used, though obviously
I don’t always carry a canoe, machete, hunting equipment or a pair of Crocs.
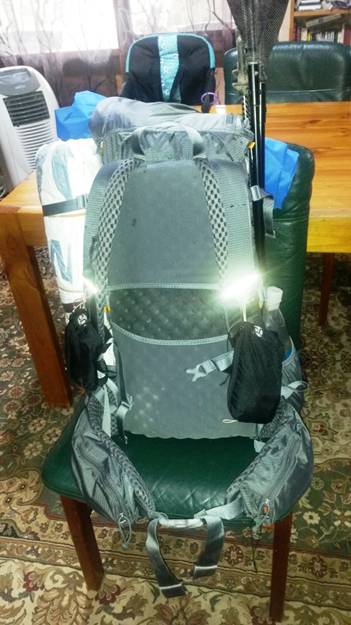
Here
are the contents of the external pockets (I could easily fit more). Left to
Right, Bottom to Top: Rutalocura (shortened) hiking poles, UL paddles (they do
break down further); orange Gossamer Gear Trowel; Mountain Laurel Designs UL
gaiters, Crocs; 2 litre Platypus, 2 dog bowls, 1 litre Platypus; Klymit
Packraft plus inflation bag (attached); Gerber Brush Thinner Machete; home made
Tyvek Deer Hunter’s Tent (http://www.theultralighthiker.com/the-deer-hunters-tent/);
Snaplock bag with glasses cleaner; self winding watch and compass; on green
cuben stuff sack: Fenix head torch with homemade elastic headband,
Gossamer Gear Stickpic, Minibic; on blue
cuben stuff sack: Maratac torch/lantern attached to some Dyneema to suspend it,
Leatherman Micra, Photon torch and headband/string, Minibic, Eze-lap sharpener;
Spare blades and Razorblaze knife, 308 shells plus magazine, 2 Handletie meat
bags, length of embryo wire for cutting bone, white cuben stuff sack; snaploc
bag with hearing aid securing device; Dehydrated water ie lollies and chewie; on
white cuben stuff sack: Samsung Galaxy S4 Mini phone & waterproof case.
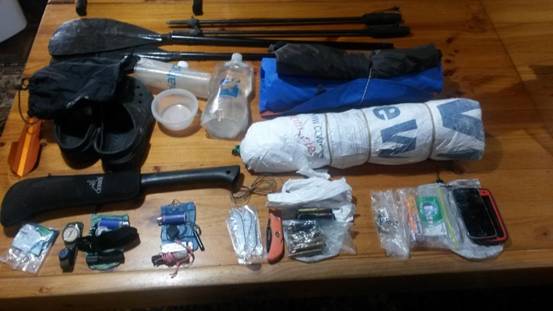
Contents
inside pack: two (grey and white) cuben food bags = 2 days food for self + dog;
grey cuben rain kilt; yellow Event rain coat; on blue sea to Summit pack liner:
white cuben ‘Possibles’ bag, Cyclone chair, in white cuben bag = JR dog
sleeping bag, red S to S clothes bag, S to S grey waterproof daypack; front:
blue S to S bag containing sleeping bag, bed; green cuben bag containing
cookset.
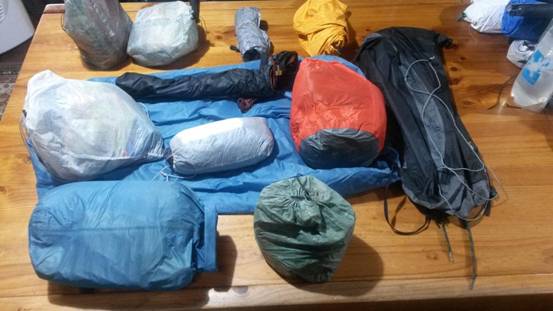
Sleeping
kit: Montbell UL super spiral #3 down bag in grey stuff sack, Thermarest Neoair
Womens sleeping pad, Exped UL pillow, S to S ultrasil bag.
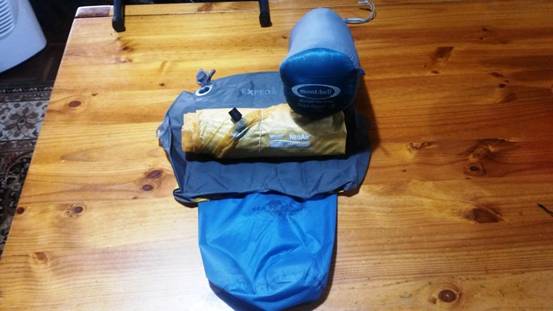
Cookset:
Toaks 1110 ml pot with frypan lid on green cuben bag, Toaks titanium
windscrren, Suluk TDW stove on white cuben bag, S to S Spork, 500ml Platypus
for meths, in snap;loc bag, spices, shower cap, bicycle inner tube and esbit
fire lighters, Minibic; measure; Vargo 450 ml titanium mug; scourer in snaploc;
can lid and Brasslite Stove Turbo 1d.
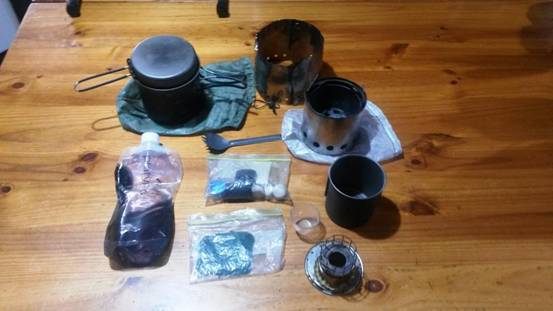
Spare
clothes: on red S to S Ultrasil drybag: Montbell Therma wrap vest, Goosefeet
down socks, Montbell Ex Light down jacket – also inside bag Ray Jardine
‘bomber’ hat; Mountain Laurel Designs Event rain mitts, Hadrina wool singlet;
Mountain Hardware wind shirt; Holeproof Heroes wool socks; ½ fibre towel; Montbell Dynamo wind trousers.
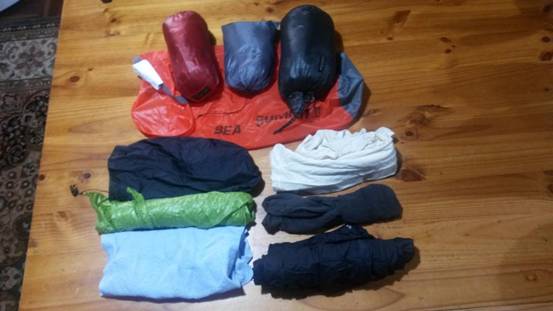
‘Possibles’
bag contents: on green cuben bag: ulralight fishing kit, 2 handlines containing
hooks, sinkers, bait, self threading needle (repairs), two springers, 4
polystyrene balls, alum foil for cooking fish; on green S to S bag, Iridium Sat
Phone; on white cuben bag: spare glasses in plastic case, Kabar knife,
Adventure Medical Kits space blanket bag (emergency day pack & ground
sheet); snaploc with glasses cleaner; Bushnell mini solarwrap charger; on white
cuben bag: cuben bag with charging connectors AAA to AA battery converters, in
blue bag spare batteries = 6 Enerloop AAA, 2 camera, 2 phone, 2 Photon, 2
hearing aia; USB AA/AAA battery charger; first aid kit: Antisan (bites)
ointment, Mylanta (indigestion), earbuds in snaploc, Leucotape on cuben bag
containing variety of plasters and blister pads, triangular bandage (sling)
below: elastic bandage, cuben bag with variety of tablets eg pain,
inflammation, diarrhoea, allergy etc; Toiletries on white cuben bag: wet
tissues, 2 pocket Kleenex (enough for a week!); below on small green cuben bag
S to S ultralight head net (mozzies – sleep) and microdripper of insect
repellent (Deet); magnifier on mirror; square of silnylon for repairs with 2
stickon tie outs on top; spare trekking pole basket; clip on glasses cleaner;
bottom row: on snaplocc bag length Dyneema, glasses repair kit, various bits
and pieces: 2 safety pins, 3 line locs, 2 tarp tie outs, I carabiner, I mitten
hook, 1 cord loc, 1 spare mini compass; on cuben bag, cuben tape (repairs)
rubber band, spare bottle cap; on white cuben bag: 2 lightload towels, comb,
Aloksack (for camera); on blue cuben bag: microdripper bottles containing:
handcream, suncream, deodorant, iodine, wash, anti fungal cream, tube anti
inflammatory cream, tub toothpaste, tub heel balm; anti allergy cream.
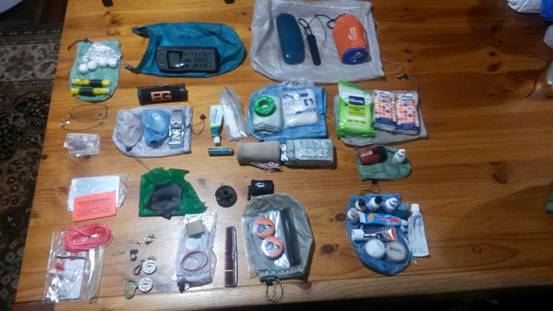
See
also:
http://www.theultralighthiker.com/the-best-laid-schemes/
http://www.theultralighthiker.com/wp-admin/post.php?post=1812&action=edit
Posts
about items mentioned in my pack contents (in the order mentioned) You will work it out. There
are gaps. I can see some more posts I need to make!
http://www.theultralighthiker.com/hiking-poles/
http://www.theultralighthiker.com/ultralight-personal-hygiene/
http://www.theultralighthiker.com/ultralight-mitts-and-gaiters/
http://www.theultralighthiker.com/the-worlds-greatest-machete/
http://www.theultralighthiker.com/the-best-laid-schemes/
http://www.theultralighthiker.com/the-deer-hunters-tent/
http://www.theultralighthiker.com/watch-bands-for-hikingbushwalking/
http://www.theultralighthiker.com/diy-head-torches/
http://www.theultralighthiker.com/stick-pic/
http://www.theultralighthiker.com/mini-super-torch-a-weeks-light-weighs-50-grams/
http://www.theultralighthiker.com/leatherman-micra-multitool/
http://www.theultralighthiker.com/photon-torch/
http://www.theultralighthiker.com/if-you-could-only-carry-two-things-in-the-bush-what-would-they-be/
http://www.theultralighthiker.com/?s=sharpener
http://www.theultralighthiker.com/never-have-to-sharpen-your-knife-again/
http://www.theultralighthiker.com/308s/
http://www.theultralighthiker.com/securing-hearing-aids/
http://www.theultralighthiker.com/dehydrated-water/
http://www.theultralighthiker.com/rain-skirt/
http://www.theultralighthiker.com/dry-bags-sea-to-summit-ultra-sil-nano/
http://www.theultralighthiker.com/cyclone-chair/
http://www.theultralighthiker.com/hunting-daypack/
http://www.theultralighthiker.com/a-soft-pillow-and-a-warm-bed-under-the-stars/
http://www.theultralighthiker.com/ul-pillows/
http://www.theultralighthiker.com/ultralight-cook-pots/
http://www.theultralighthiker.com/suluk-stove/
http://www.theultralighthiker.com/bathtime-on-the-trail-the-one-gram-platypus-shower/
http://www.theultralighthiker.com/how-to-light-a-fire-in-the-wet/
http://www.theultralighthiker.com/the-egg-ring-ultralight-wood-burner-stove/
http://www.theultralighthiker.com/alcohol-simmer-stoves/
http://www.theultralighthiker.com/socks/
http://www.theultralighthiker.com/hiking-pants/
http://www.theultralighthiker.com/four-gram-fishing-handlines/
http://www.theultralighthiker.com/bcb-fishing-kit/
http://www.theultralighthiker.com/worlds-lightest-tarp-clip/
http://www.theultralighthiker.com/carry-a-knife/
http://www.theultralighthiker.com/charging/
http://www.theultralighthiker.com/eneloop-pro-aaa-battery/
http://www.theultralighthiker.com/photon-torch/
http://www.theultralighthiker.com/insects-can-ruin-a-camping-trip/
http://www.theultralighthiker.com/dettol-hand-sanitising-wipes/
http://www.theultralighthiker.com/rope-dont-leave-home-without-it/
http://www.theultralighthiker.com/the-perfect-guy-line-for-a-hiking-tenttarp/
http://www.theultralighthiker.com/best-tarp-clips-link/
http://www.theultralighthiker.com/cuben-tape/
20/08/2016:
Venery: When I was a child who used
to (illegally) trap and sell finches for pocket money, I never suspected what
wonders the ‘zebbies’ were (though they did fetch the highest price). Evidently
they sing to their embryos! Of
course, some people will believe anything. Such as that they are warning them
about ‘climate change’. You got it! Back c1955-1960 I used to get 1/- for a
pair of red- heads but 2/6 for zebbies and L1 per foot for a snake! I once
caught a carpet snake which netted me close to L30! Back then that was between
1-2 week’s wages for a labouring man. I feel no sense of guilt or shame about
this, though it no doubt carries a custodial penalty today! I also used to hunt
rabbits with ferrets, kill rats with terriers, use hold-down dogs on wild pigs
and even enjoy cock fights! Off to the
re-education camp! On the other hand, if you enjoy reading about such things,
can I recommend books by D Brian Plummer? (Such as https://www.amazon.com/Adventures-Artisan-Hunter-David-Plummer/dp/0953364860 Tip: You can often pick his books up more
cheaply on eBay). See: https://wattsupwiththat.com/2016/08/18/claim-zebra-finch-call-prepares-their-eggs-for-climate-change/

18/08/2016:
Lighting a Fire on the Snow:
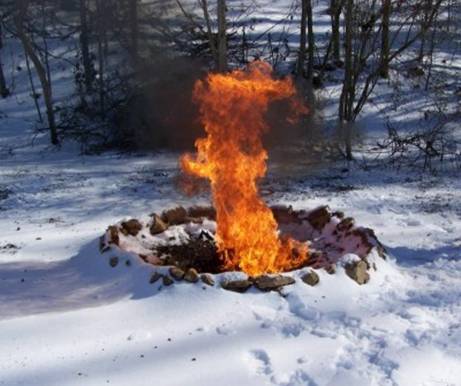
Obviously
you can light a fire on the snow but it will quickly melt the snow, sink into
it and go out. And this is just when you most need a fire, so what to do? Find
somewhere clear of snow is the easiest choice: often there is little or no snow
under trees. It is anyway easier to clear a space down to the ground there,
being sure to shake down snow from overhead branches as well. As you pile up
snow to the outside it may also be possible to create a tipi-like (windward)
shelter with a dry floor out of branches laid against the trunk to enhance the
warmth of the fire (but be sure not to suffocate yourself).
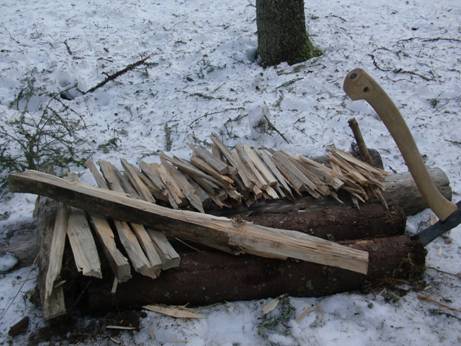
If
the snow is very deep you will need some kind of platform for the fire to rest
on. Lots of folks suggest stones - but they are likely a long way down in this
circumstance, and you are likely cold and in a hurry. A raft of wet wood is the
best idea, the thicker the better, then you proceed to light the fire in the
normal way starting with tinder and the smallest driest pieces and working your
way upwards. Have all your fire materials ready assembled before you strike the
first spark: you definitely may only get one chance at this – and it may well
be your last! Follow the instructions here: http://www.theultralighthiker.com/how-to-light-a-fire-in-the-wet/
and here: http://www.instructables.com/id/Building-Campfires-the-Right-Way-without-Fire-Star/?ALLSTEPS
See also: http://www.outdoorlife.com/blogs/survivalist/2013/03/survival-skills-how-build-fire-snow
& http://www.offthegridnews.com/extreme-survival/the-simple-way-to-start-a-fire-in-the-snow/
& etc…
PS:
'Fire on the Snow' was the title of a great radio play by the (late) Australian
poet Douglas Stewart about the ill-fated 1912 Scott expedition. You can listen
to it here: http://trove.nla.gov.au/work/11851529
17/08/2016:
The Best Laid Schemes (as Robbie
Burns opined) “o' Mice an' Men. Gang aft agley, An' lea'e us
nought but grief an' pain” (‘To a Mouse’: https://www.poetryfoundation.org/poems-and-poets/poems/detail/43816).
The photo of Spot and I testing out the new Klymit packraft (http://www.theultralighthiker.com/klymit-packraft/)
on the farm dam give no hint of this. I need to inflate it some more I think.
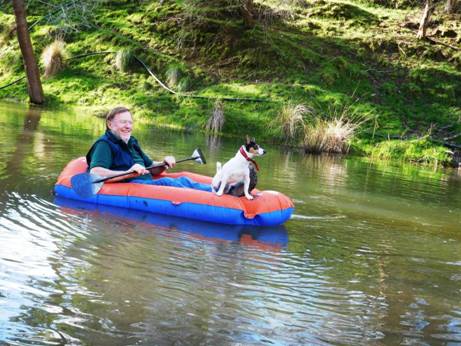
I
spent the morning sorting gear so we could fit into my new Gossamer Gear
Gorilla backback (http://gossamergear.com/gorilla-ultralight-backpack-all-bundle.html
- they have a special price on them right now. More about that later). I
envisioned we could essay an expedition I had long contemplated…
There
is a spot along one of our fine rivers in Victoria (I will not say which one)
where it is almost impossible to access the opposite shore to hunt the very
many sambar deer which inhabit it, in any case in the winter months as the
river is too wide, deep and fast flowing. I had considered that there were a
couple of spots where one might climb down to the river from the road (which
runs along one side) and that it ought to be possible to float across to the
other side (and back), set up camp for a couple of days on one of the many
beautiful flats I can see from high up, then spend a pleasant couple of days
stalking some monsters which clearly must inhabit them.
All
our gear and food for a couple of days do fit in the smaller (40 + 8 litre
pack) – as you can see. Shrinking your kit (from 52 litres) like this exercises
a profitable degree of discipline which it is worth emulating. I omitted nearly
1.5 kg I didn’t need for a short-ish trip. Some are things I might need (say)
on a ten day trip without resupply and where help is far from hand. Some are
things I can probably permanently do without. Even so I have food aplenty for
myself and Spot (the JR) as well as his bed and room to lash the pack raft on
the top if I wanted to. The other side of the pack can easily hold a water
bottle, hiking poles and the paddle. If I was going away just by myself with
this pack I reckon I could squeeze a 5-7 day expedition into it! Spot’s bed and
food alone take up space that could otherwise be occupied by at least three
days of my food. I am carrying a pair of crocs for the river crossing, &
etc… The pack is incredibly tough.
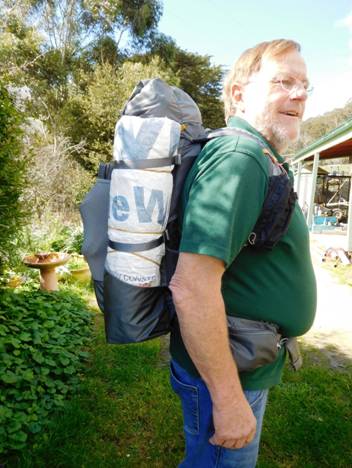
We
took forever to get away yesterday morning (as usual) and didn’t manage to
leave home until nearly midday. I should have put the trip off another day and
left first thing in the morning. Hindsight is a wonderful thing! I thought I
should (just) have enough time to drive there (3 hours), get across the river
and make camp before dark. I had not counted on the delay caused by finding a
sign which read ‘Aerial Baiting’ which cost me over an hour to check out (not till
October apparently). Then I found that both the first two possible crossing
spots I checked out were unsuitable. Just on dark I found a third possible
crossing but it was by then too late. Rather than make a cold camp without a
fire and wait till the next day I decided to try again on another day.
The
river height gauge for this section of river has never been reliable at all. It
is surprising that it has never been fixed given that it is the source of major
hydrological data! I have complained about it a number of times. I have
travelled to this river anticipating a pleasurable canoe trip on a number of
occasions only to find that the river height was up or down by as much as a
metre compared with the gauge height! On this occasion I knew that there was
going to be much more water than I would normally canoe this section of river.
As I planned only to cross it in a relatively deep straight section without
rapids, that did not concern me overmuch.
Still
there were three or four factors I needed to take into consideration: I needed
to be able to get back as well as across. I could have made my way across at
the second spot, but needed to find a second crossing, which I think I found
just on dark. This second crossing would make a better way across, and the
first would make a better way back. Unfortunately the way back is above the way
across, so that if one does not make it one cannot pull out and cross back.
Also, there was much more very fast moving water than I had anticipated. I need
to go (much earlier) on another day to work this out. On this occasion I was
too replete with youthful enthusiasm for my own good! I was so keen to try out
my new backpack and packraft.
Also,
I needed to better take into account the difficulty of getting across with a
dog, a gun and a pack in a new (smaller) raft. I will try again on another day
with my Alpacka Fiord Explorer, an inflatable life jacket (I forgot), a
waterproof bag for my gun and tie-downs for my pack - and lots more room for
the dog (this particular Alpacka is a two person boat). The main reason I did
not take it in the first place is that I was loath to be leaving a $1,000 boat
somewhere someone else might find and remove it - extremely unlikely I know,
but I have been ‘up the creek without a paddle’ so to speak on other occasions!
I
will spend a few days getting some work done at home, get all my gear ready so
I can leave first thing one morning, then head out on another occasion in the
not too distant future. I am pretty sure I can get across and back safely now,
but it needs a bit more careful checking out. Placement of a couple of
floating, trailing ropes to catch hold of to ensure I am not swept past my
landing spot might be a good idea too.
Once
I have perfected it I will have a really excellent hunting spot where I can be
pretty sure I will have uninterrupted access to a goodly supply of deer in the
winter months. I know there are some beautiful sheltered camping spots with
ample firewood and ready access to water on the flats on the other side of the
river too - I have canoed it many times in the summer months.
Fortunately
on this occasion i avoided the 'grief and pain'!
16/08/2016:
Scanning 110 Negatives: If you are
my age you likely have this problem too. Tidying the shed the other day I
discovered yet more photos from the ‘70s in this (discontinued) format.
Remember how once we thought it so wonderful: Ah, ‘the Pocket Camera’! What a
novelty and convenience it once was. We even had an SLR version! What a beauty
it was! My Epson Perfection has no way to scan the negatives though – and
apparently nothing exists commercially. This person has come up with a useful
DIY alternative which however may help you out when you come to archive all
your memorabilia: http://www.instructables.com/id/Make-a-Scanner-Mask-for-110-Film/
![Picture of Make a Scanner Mask for 110 And/Or APS Film [Updated]](Hiking%202016_files/image360.jpg)
15/08/2016:
New cookset: One of the pleasant surprises my birthday
brought this year was this wonderful Toaks 1350 ml pot and frypan lid from
Trail Designs (https://www.traildesigns.com/cookware/toaks-1350-ml-ultralight-titanium-pot)
Though only 9 grams heavier then my Toaks 1100 ml pot it holds 250ml more, so
it is big enough for the biggest meals for two people on the trail (or for
heating enough water for a shower: http://www.theultralighthiker.com/bathtime-on-the-trail-the-one-gram-platypus-shower/) – and the frypan (at over 6” – 155mm) is big
enough to do some serious cooking with (eg: http://www.theultralighthiker.com/he-hiked-with-a-falafel-in-his-hand/).
I found that my ‘egg ring’ stove makes an excellent stand for it (http://www.theultralighthiker.com/the-egg-ring-ultralight-wood-burner-stove/)
The Toaks windscreen works well with it (http://toaksoutdoor.com/windscreen.aspx
& http://www.theultralighthiker.com/windscreens/)
and Trail Designs 12-10 alcohol stove (https://www.traildesigns.com/stoves/12-10-stove)
with simmer ring/s (https://www.traildesigns.com/simmer-ring)
cooks my hiking meals to perfection.
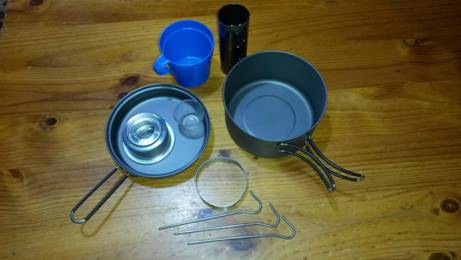
Weights:
Pot
101
grams
Frypan
Lid 62 grams
Egg
Ring 8 grams
3
x Vargo pegs 21 grams
Toaks
Windscreen 17 grams
Inc.
paperclips 1.5 grams
12-10
Stove 16 grams
Simmer
Rings 3 grams
Plastic
cup 29 grams
.5l
Platypus bottle 35 grams
Measure: 1.5 grams
Total:
295
grams
14/08/2016:
Hiking in the Rain: This is a very
useful article. The author (http://gossamergear.com/wp/rain-guide-to-backpacking)
is certainly right that after a while you are bound to get soaked to the skin.
This may mean you have to camp early to get yourself under a roof and warm up
(See: http://www.theultralighthiker.com/the-importance-of-a-roof/)
or it can be avoided by using an umbrella or (I have found) a poncho. If the
poncho can double as a shelter See: (http://www.theultralighthiker.com/pitching-the-poncho-warning-this-may-save-your-life/)
or a ground sheet (see: (http://www.theultralighthiker.com/the-deer-hunters-tent/
or http://www.theultralighthiker.com/zpacks-hexamid-solo-plus-tent/)
this will cut some of the weight penalty of carrying it (though at only 165
grams (for the Montbell) it might be worthwhile anyway).
Gossamer
Gear Lifelex Umbrella 240 grams
See:
http://gossamergear.com/chrome-umbrella.html
http://www.helinox.com.au/umbrellas
http://www.thehikinglife.com/2016/01/review-montbell-ul-trekking-umbrella/
11/08/2016: There is Simply Nothing Like an Old Port
Walking Trail: Yesterday we decided to have a day off and enjoy a peaceful
walk along this beautiful Gippsland trail. Because we are replete with
serendipity we happened to be there at low tide (Do!) This way you can walk one
way along the shore and return along the bridle path, or vice versa.
You
can turn right at the caravan park sign on your right after the turn to Port
Albert, go to the end of the road and start the walk there. Going this way you
can avail yourself of really beautiful fish and chips (and mayhap a cold lager)
at the grill and bar where the old (fire ravaged) hotel used to be (turn left
at the Rocket Hut near the jetty – 50 metres on left). Highly recommended.
You
can dawdle along and take about two hours each way, skipping stones, poking
periwinkles, admiring the many gorgeous birds, snapping splendid sunsets, etc.
If you wish (or have time) you can walk a further couple of hours along the
foreshore towards Tarraville and Robertsons Beach.
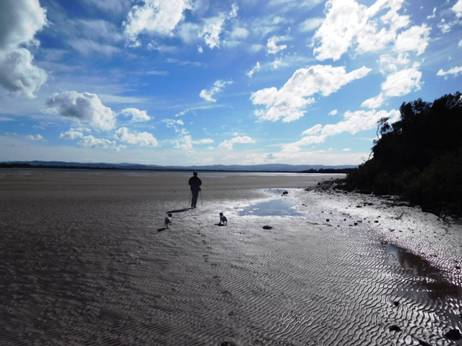
Della
and the dogs enjoyed the view.
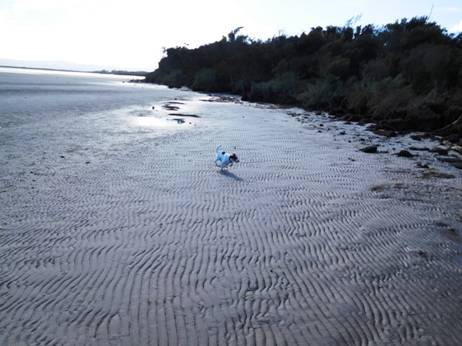
Spot
loves to race across the sand.
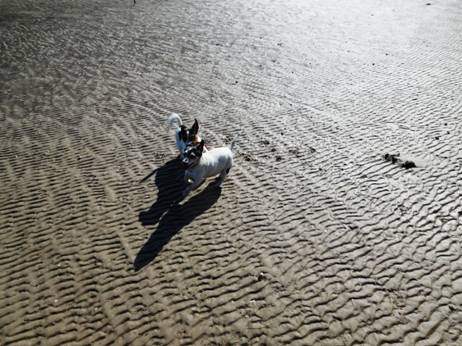
Glorious
stippled patterns on the sand draw the dogs together,
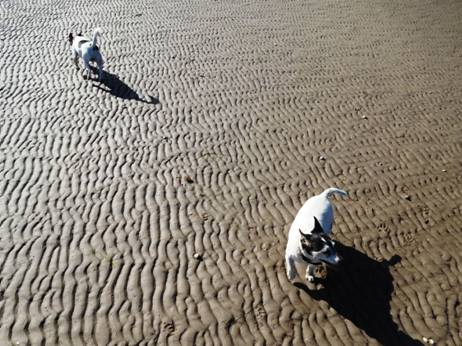
Then
launch them apart.
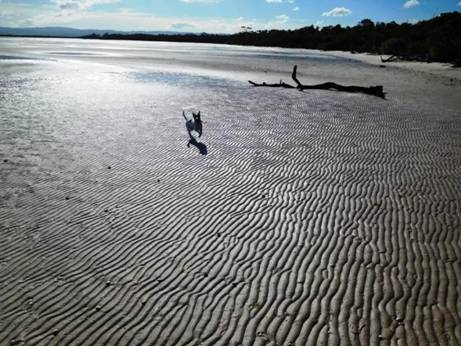
Spot
bouncing on rays of stippled sunlight.
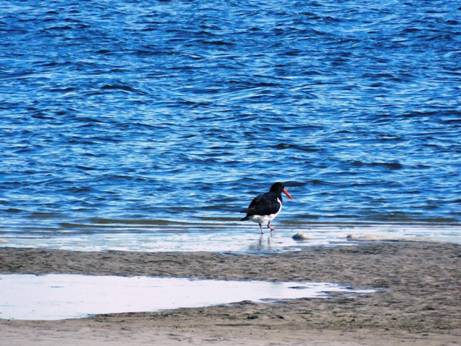
Past
a red-billed shearwater.

A royal spoonbill takes off.
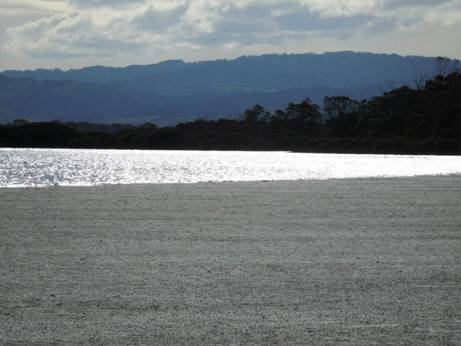
Just
a hint of the Srzelecki Hills
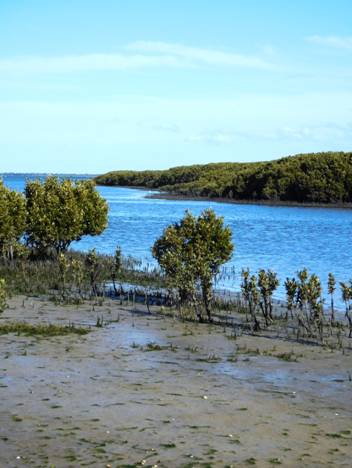
Some
beautiful mangroves.
And
banksias.
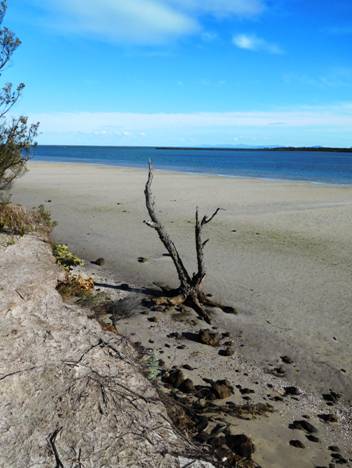
A
blue haze of Wilsons Prom in the background.
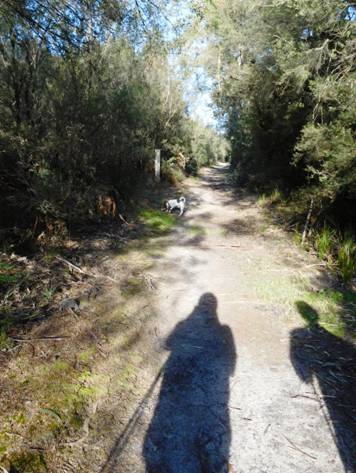
You
can walk back along the bridle path.
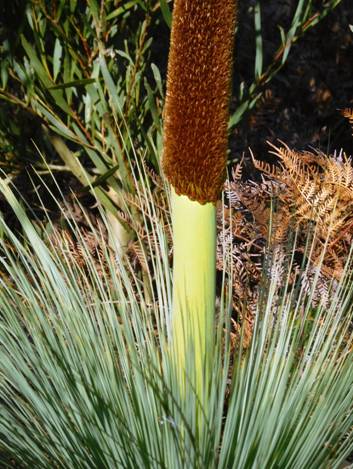
Past
grass trees flowering.
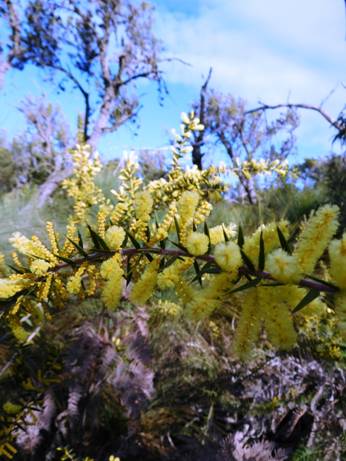
Ubiquitous
flowering wattles.
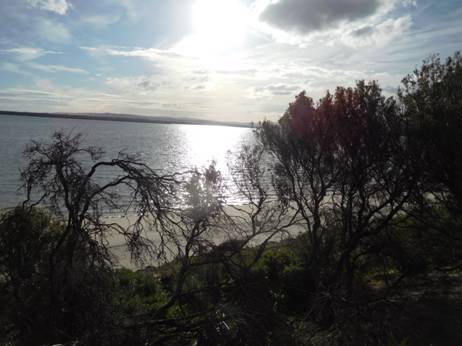
Finally
a sunset over Corner Inlet.
10/08/2016: 4 Gram String Tripod: Now that you can
buy pocket cameras with 30X zoom such as the Sony HX80 (18.2 megapixels, 30X
zoom, 245 grams http://www.sony.com/electronics/cyber-shot-compact-cameras/dsc-hx80)
you may think you need a tripod for those really long shots you can now take
(in good light). If you use hiking poles you can make/buy a gadget which
attaches to your pole so it can function as a tripod. You can do the same thing
with a gun (See: http://www.theultralighthiker.com/camera-glassing/)
If
neither of these are going to be handy, you can tie an approx 6’ (1.8m) length
of string to a small bolt the size which fits in the tripod socket of your
camera (almost always 1/4”-20 UNC) then screw it in to the camera. If you stand
on the string with one foot and pull the string taut so that your eye is level
with the viewfinder/screen you will be able to hold the camera almost perfectly
still just as if you were using a 5’6” (160cm) tripod! Neat, aye? You can
instead tie a loop in the end of the string to hold it down with your toes. This
same trick would also work if you want to hold your gun steady eg for a long
shot without a rest.
10/08/2016: Not Such a Dam Nuisance: We were
moving the (floating) foot valve on the pump inlet line this afternoon. Needed
to get out one of the old Australis Bass canoes to do the job. This one has had
some adventures including being trapped in ‘The Chute’ on the Thomson River
(See: http://www.theultralighthiker.com/canoeing-the-thomson-river-gippsland-victoria/
& http://www.theultralighthiker.com/videos/thomson-river-canoe-trip-2006-complete/)
and bent completely in half. Polyethylene is tough!
All
the kids learned to paddle in these and Perception Minnows. A quarter century
ago and more. We canoed most of the major rivers in Gippsland. Cheap, healthy
summer fun. Try it! I will be scanning my old 35mm snaps of some of those
adventures and including them in later ‘memory lane’ posts.
Della
took some lovely snaps of Spot and me, daughter Merrin and grandson Milo. The
dam is now officially named, ‘Lake Milo’. You can probably see why we are
fighting to save it (http://www.theultralighthiker.com/a-dam-nuisance/) – quite apart from the water we will
need in summer for our garden!
Spot
says, 'Come back Steve!'
Milo
is now officially a biped. No stopping him now.
Spot
wants a ride.
Spot
demands a ride.
Spot
gets a ride. Now Milo's turn...
PS:
For all you worry worts: in this shot the canoe is actually safely on the bank!
Milo can’t quite swim yet, but at seven months he is not so far off walking!
10/08/2016: Recharge Needs: Kodak 5200 mAh
Powerbank: $15 at Safeway/Woolworths 150 grams (139 minus cord). This is cheap
enough you could just use it once (instead of 500X!) then throw it away!
Doesn’t the world just keep getting better and better?
Of
course there are lighter (if not cheaper) options. For example, I usually carry
a spare battery for my mobile phone (about 30 grams). I also have a Bruntons Solarwrap Mini Solar Charger which weighs 85
grams and contains a 2200mAh battery.
See
also:
http://www.theultralighthiker.com/charging/
http://www.bushnell.com/hunting/outdoor-technology/powersync/solarwrap-mini
http://www.theultralighthiker.com/power-from-heat/
http://www.theultralighthiker.com/mobile-phone-battery-life/
http://www.theultralighthiker.com/clear-pvc-backpack-lid-for-solar-charger/
http://www.theultralighthiker.com/supercharging-led-torches/
http://www.theultralighthiker.com/eneloops-rechargeable-batteries/
http://www.theultralighthiker.com/eneloop-pro-aaa-battery/
09/08/2016: Weed Spraying is a great preparation for
backpacking. Carrying a 20kg knapsack around the Gippsland hills in pursuit
of thistles, rushes, ragwort, blackberries, etc really makes you fit. More folk
ought have a farm or volunteer their efforts to someone who does. There are
plenty of more weeds out there on other people’s land – I can see them out my
window! After a few days carrying it up and down and back and forth on our
steep hills I am definitely ready for my next backpacking trip when I will
barely notice a pack weight less than half it. It (ie the 20kg knapsack) does
make me realise that I could attempt some much longer journeys.
For
example, the 19 day ‘Wilderness Coast’ Walk in East Gippsland or the West Coast
walk - from Strahan to Bathurst Harbour (Melaleuca) in Tasmania takes approx
one month. If one wanted to avoid the prohibitive expense (not to mention risk)
of organising a helicopter or sea plane
drop/s of supplies then you would have to carry enough food for a month (which
is approx 15kg of rations) equating to a pack weight of about 20 kg at the
outset, but getting better with every step you take! Of course on such a
coastal walk you should be able to supplement your supplies with fish and
shellfish (to say the least) caught/collected on the way.
We
may try a shorter training ‘run’ (eg five days out and five days back to/from
Strahan) to test/prove the concept first. So many adventures to be had. And so
many jobs around the farm to preclude them!
Just
to whet your appetite:
http://www.john.chapman.name/tas-wc.html
http://mwatton.customer.netspace.net.au/westcoastwalk.html
http://bushwalk.com/forum/viewtopic.php?f=3&t=8536
http://www.chrisbray.net/tassie_wilderness_expedition_site/photographs.html
08/08/2016: I felt quite rich when I found my knife,
flint and steel in my shot pouch: Hugh Glass (‘TheRevenant’,
‘Man
in the Wilderness’):
‘Although I had lost my rifle and all my plunder I felt quite rich when
I found my knife, flint and steel in my shot pouch. These little fixens make a
man feel righ peart when he is three or four hundred miles from any body or any
place – all alone among the painters and wild varmints’ http://hughglass.org/sources/
- http://hughglass.org/wpcontent/uploads/2015/09/1825-Hugh-Glass-article.pdf
(See also: https://myfavoritewesterns.com/tag/hugh-glass/)
What
are the essentials for survival? Clearly, the ability to light a fire and a
tool such as a knife would be great. As would some sort of shelter &/or
protective clothing – but ultimately it is what you carry in your head which is
most important. Without what you need there your life won’t ‘be worth a hill of
beans’! It is well worthwhile reading carefully something like Ray Mears book
‘Survival’ https://www.raymears.com/Bushcraft_Product/489-Ray-Mears-Bushcraft-Survival-Signed-Copy/
Ray is an internationally recognised expert on survival having taught the SAS
for many years. His previous book ‘Survival’ is arguably better and should be
sought – it is I think out of print.
See
also: http://www.theultralighthiker.com/if-you-could-only-carry-two-things-in-the-bush-what-would-they-be/
07/08/2016: How To Make A Fire With A Gum Wrapper
And A Battery, a very useful
Instructable by Captain
MacTavish but I think I would stick with the
method suggested here: http://www.theultralighthiker.com/if-you-could-only-carry-two-things-in-the-bush-what-would-they-be/
& here: http://www.theultralighthiker.com/how-to-light-a-fire-in-the-wet/
What
you will need is a gum wrapper and a "AA" or a "AAA"
battery
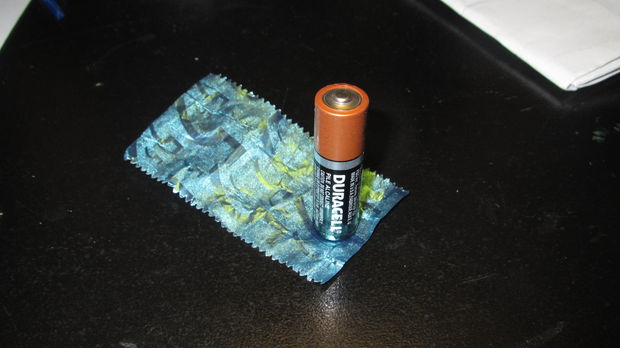
Place
the negative part of the battery on the metallic part of the wrapper.
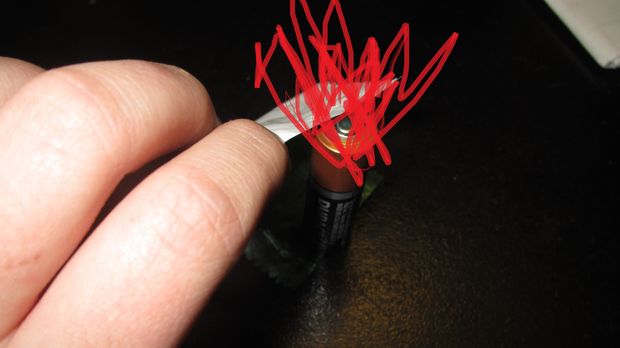
Cover
the top part of the battery and hold it there with something other than your
hand! You will burn yourself, The FIRE!
Handy
hint: ‘If you have no gum just get some steel wool [pot scrubber] and put some
tinder on top of it,then get a 9 volt battery and touch on the steel wool
and"hey presto" you have a fire!!’
See
also How To Make a Fire with AA Battery and Gum: https://www.youtube.com/watch?v=-63ZsOEzsVg
05/08/2016: All you ever needed to know about
butterflies: http://www.butterfliesandmoths.org/faq/how-long-do-butterflies-and-moths-live
03/08/2016:
10 Days in Fiordland
Back
from our 10 days mainly in Fiordland NZ
marred somewhat by Della dislocating her shoulder in a fall from a rock. This
led to the best helicopter ride ever, not enjoyed as much as it might have been
however. Originally published 24 April 2011. Revised 4 August 2016.
We
encountered this rock face about a quarter hour up the track from Supper Cove
towards Loch Marie just after you cross the Hilda Burn:
This
was the rock: marked ( in 2012) ‘Della’s Rock’.
It
involved a steep (@8′) climb up and then a couple of steps along to the
right.
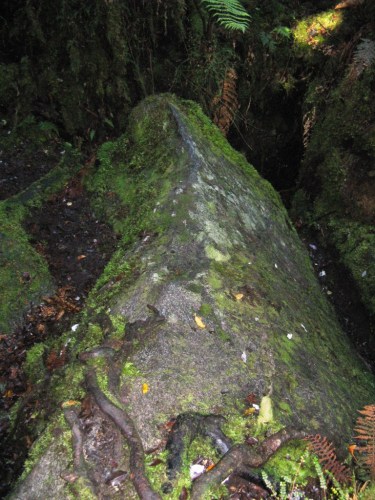
When
you got to the top, you had to balance along the top.
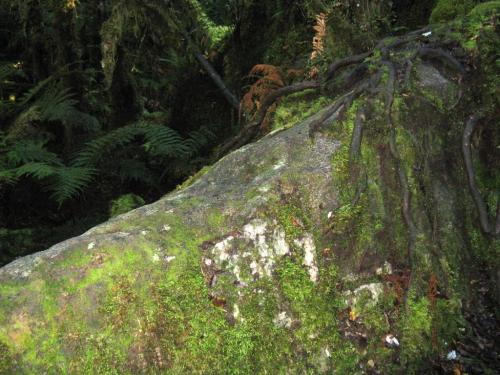
I
was standing at the other side with my hand held out to steady her. She took
one step forward and slipped, just missing my hand. Down she went.

She
slipped and fell back down catching her hiking pole which was attached to her
wrist in the tree roots effectively hanging herself and dislocating her
shoulder. Very nasty.
The
reason she slipped (I later discovered) was that she had a twig caught up in
the tread of the sole of her boot so that it acted like an ice skate.
I
had been carrying an elastic bandage and a sling (neither of which had I ever
used) as well as anti-inflammatories and Panadeine Forte. I used all of these
pretty quickly that day. I imagined she had a broken arm. if i could I wanted
to get her back to the helipad which was about a kilometre back on a relatively
flat path with (unfortunately) one stream crossing for which she would not be
able to use the walkwire. We were (fortunately) able to wade it downstream
(which I knew we could).
After
only a couple of hours at Supper Cove we were flying out on the helicopter
again!
The
track has now been diverted around this rock obstacle. Still there are many
spots where you can come to grief if you are not careful – or if you are
unlucky.
During
those few minutes at Supper Cove she did manage to take some beautiful photos:
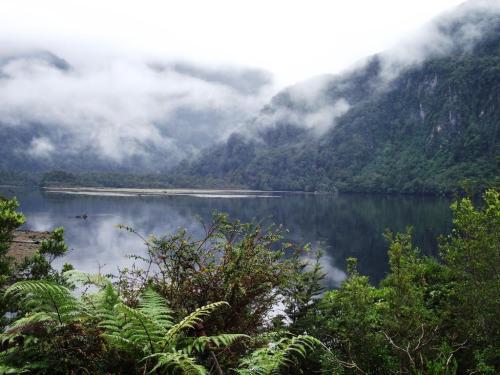
View
from the verandah of the Supper Cove Hut. Note moose browse on fuschia left in
2009.
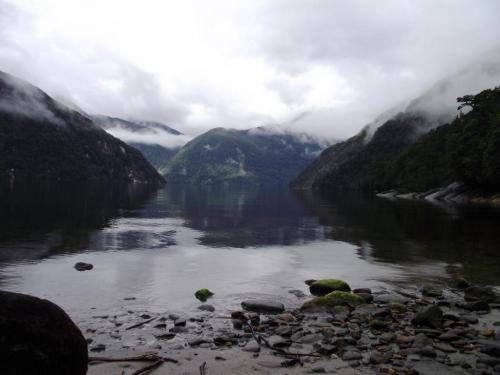
Looking
down the fiord from the boat shed.

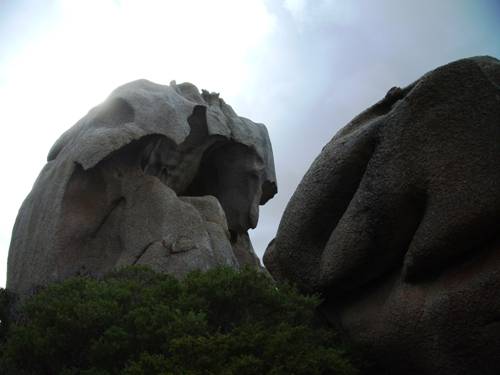 style='box-sizing: border-box; orphans:
auto;text-align:start;widows: 1;-webkit-text-stroke-width: 0px;
word-spacing:0px' alt="DSCF4125 comp" class="alignnone
size-medium wp-image-4853"
srcset="http://i2.wp.com/www.theultralighthiker.com/wp-content/uploads/2011/04/DSCF4125-comp.jpg?resize=500%2C375
500w,
http://i2.wp.com/www.theultralighthiker.com/wp-content/uploads/2011/04/DSCF4125-comp.jpg?w=1024
1024w" sizes="(max-width: 500px) 100vw, 500px"
v:shapes="_x0000_i1655">
style='box-sizing: border-box; orphans:
auto;text-align:start;widows: 1;-webkit-text-stroke-width: 0px;
word-spacing:0px' alt="DSCF4125 comp" class="alignnone
size-medium wp-image-4853"
srcset="http://i2.wp.com/www.theultralighthiker.com/wp-content/uploads/2011/04/DSCF4125-comp.jpg?resize=500%2C375
500w,
http://i2.wp.com/www.theultralighthiker.com/wp-content/uploads/2011/04/DSCF4125-comp.jpg?w=1024
1024w" sizes="(max-width: 500px) 100vw, 500px"
v:shapes="_x0000_i1655">
Looking
up the fiord across the Seaforth mouth.
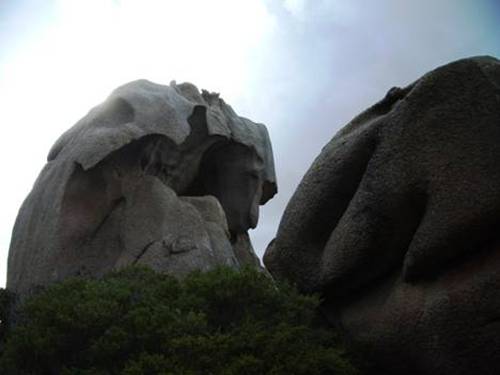
 '
alt="DSCF4114 comp" class="alignnone size-medium
wp-image-4857" srcset="http://i1.wp.com/www.theultralighthiker.com/wp-content/uploads/2011/04/DSCF4114-comp-1.jpg?resize=500%2C375
500w,
http://i1.wp.com/www.theultralighthiker.com/wp-content/uploads/2011/04/DSCF4114-comp-1.jpg?w=1024
1024w" sizes="(max-width: 500px) 100vw, 500px"
v:shapes="_x0000_i1656">
'
alt="DSCF4114 comp" class="alignnone size-medium
wp-image-4857" srcset="http://i1.wp.com/www.theultralighthiker.com/wp-content/uploads/2011/04/DSCF4114-comp-1.jpg?resize=500%2C375
500w,
http://i1.wp.com/www.theultralighthiker.com/wp-content/uploads/2011/04/DSCF4114-comp-1.jpg?w=1024
1024w" sizes="(max-width: 500px) 100vw, 500px"
v:shapes="_x0000_i1656">
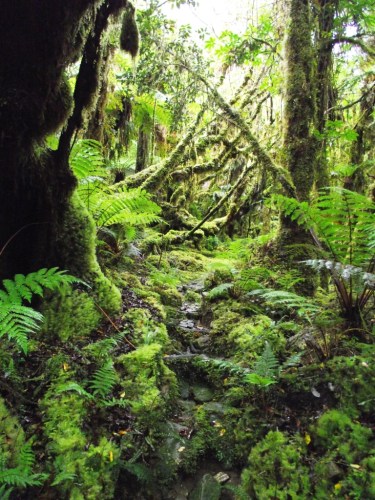
The
Dusky Track begins…
 style='box-sizing:
border-box; orphans: auto;text-align:start;widows: 1;-webkit-text-stroke-width:
0px; word-spacing:0px' alt="DSCF4133 comp" class="alignnone
size-medium wp-image-4864"
srcset="http://i2.wp.com/www.theultralighthiker.com/wp-content/uploads/2011/04/DSCF4133-comp-3.jpg?resize=500%2C375
500w, http://i2.wp.com/www.theultralighthiker.com/wp-content/uploads/2011/04/DSCF4133-comp-3.jpg?w=1024
1024w" sizes="(max-width: 500px) 100vw, 500px"
v:shapes="_x0000_i1658">
style='box-sizing:
border-box; orphans: auto;text-align:start;widows: 1;-webkit-text-stroke-width:
0px; word-spacing:0px' alt="DSCF4133 comp" class="alignnone
size-medium wp-image-4864"
srcset="http://i2.wp.com/www.theultralighthiker.com/wp-content/uploads/2011/04/DSCF4133-comp-3.jpg?resize=500%2C375
500w, http://i2.wp.com/www.theultralighthiker.com/wp-content/uploads/2011/04/DSCF4133-comp-3.jpg?w=1024
1024w" sizes="(max-width: 500px) 100vw, 500px"
v:shapes="_x0000_i1658">
So
much beauty.
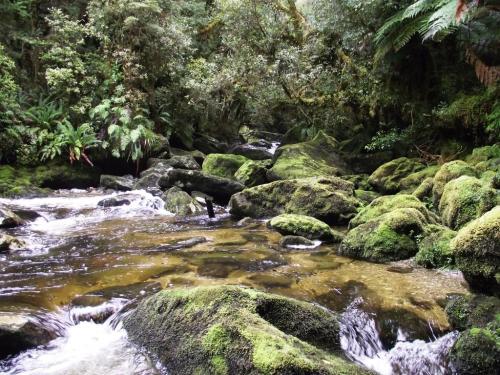
The
Hilda Burn.
I
plan to take her back one day, hopefully to walk at least one half of the track
– perhaps the section Supper Cove – Hauroko.
See
also:
http://www.theultralighthiker.com/insects-can-ruin-a-camping-trip/
http://www.theultralighthiker.com/dusky-track-canoeing-the-seaforth/
http://www.theultralighthiker.com/dusky-track-adventures-1/
http://www.theultralighthiker.com/eddie-herrick-moose-hunting-at-dusky-sound/
http://www.theultralighthiker.com/eddie-herrick-moose-hunting-at-dusky-sound/
http://www.theultralighthiker.com/a-friend-i-met-on-the-dusky-track-fiordland-nz/
http://www.theultralighthiker.com/dusky-south-coast-tracks/
http://www.theultralighthiker.com/dreaming-of-the-dusky-track/
http://www.theultralighthiker.com/the-dusky/
http://www.theultralighthiker.com/moose-hunting/
http://www.theultralighthiker.com/fiordland-moose/
http://www.theultralighthiker.com/fiordland-moose-2/
http://www.theultralighthiker.com/hunting-in-fiordland/
http://www.theultralighthiker.com/off-to-fiordland/
http://www.theultralighthiker.com/shadowland-fiordland-video/
http://www.theultralighthiker.com/the-best-toilet-view-in-the-world/
http://www.theultralighthiker.com/10-days-in-fiordland/
http://www.theultralighthiker.com/fiordland-2009/
http://www.theultralighthiker.com/fiordland-nz-with-bryn/
http://www.theultralighthiker.com/fiordland-april-2007/
http://www.theultralighthiker.com/weather-for-fiordland/
03/08/2016: Rubber Band Selfie Stick: Sick of
those out of focus selfies with the end of an arm at the bottom? All you need
is a large rubber band or a hair tie and a forked stick you pick up in the
bush. Loop one end around one end of the camera then around the stick (as
shown) then around the other end of the camera - and away you go!

(Revised 2016): 22/12/2014: ‘I
was feeling a little down (due to some internet bullying), then a young
friend rang to wish us ‘Seasons Greetings’ from Washington, which really
brightened up my day! He is Steve Hutcheson a
young American (29) I met on the Dusky Track, Fiordland NZ in 2012. At the time
I had such a bad back I really did not think I could walk a step of the track,
but wanted to re-visit Supper Cove one (last?) time. We spent a several days
there fishing, talking, exploring; learning from each other. Then I walked out
the 50 km with him. Lots of Panadeine Forte; also lots of good company.
Steve
Hutcheson on the verandah of the Supper Cove Hut 2012.
He
later visited us here (twice) and we have been in contact many times since. I
hope to do more hiking with him in the future: perhaps the Pacific Crest Trail?
Who knows? I have since had a back operation which has returned some of my
functionality. And I have been back to Dusky again (in April), and also walked
the South Coast Track there.
It
is GREAT to be able to make new friendships and renew old ones. I write these
comments to recall my (small) adventures, offer (I hope) useful practical
advice, and stimulate thought and discussion. I thank you ALL for your support.
I never have expected others to think as I think, just as I do not think as
others do. That is all part of the great adventure of life – as is long
distance hiking in the wild places of the world…I have a few adventures in mind
yet, if I am able, such as the Upper Yarra Track which I have been discussing
lately. Any who want to join me are welcome.
I
also met a young Israeli on the 2012 Dusky walk. He also visited us twice, and
I keep in touch with him. Neither of these people is on Facebook for one reason
or another. It may surprise you that much of my discussion with the Israeli
chap during the several days of our walk was an attempt to convince him of the
essential goodness of human beings, and that this applied just as much to
Moslems. It may surprise you more that I have had, and still have Moslem
friends – who read my posts.
Replies
to comments: I intend many of my posts to be absurd – life often is. Jesus
was a much nicer man than Mohammed but not half such a good man as
Socrates in my opinion, (or Buddha for that matter). Still, I do not respect
religion and would rather see it gone from the earth. Thank you also X, Y Z,
etc for your comments and others for your support. I know that there are others
who have been reading this without comment too who are with me in my
endeavours. I will try to continue to post interesting, thoughtful things. Hope
you continue to enjoy them’.
POST
SCRIPT (August 2016):
I
have been reviewing my Dusky posts (and will be adding some more soon). I saw
that this one needed some more fleshing out. So, I have added some pictures. I
have been back to the Dusky (in 2013) but still have not taken Della on this
wonderful track. Maybe next year.
Bucket
full of ‘Spotties’ = bait.
Seven-gilled
shark. We caught this guy but were not able to haul him in with my handline.
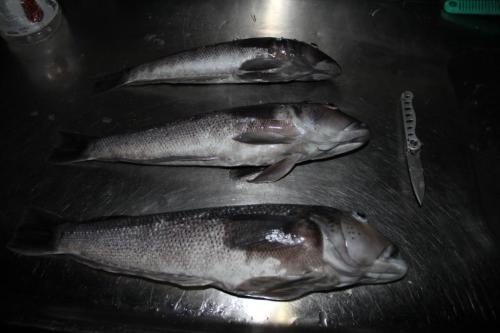
A
good feed of Blue Cod. The most delicious of all fish. Do take a handline to
Supper Cove.
An
old moose track: you can still see the indentation of the huge print above my
glasses case. Taken high on the ridge above the Supper Cove Hut.
This
one may be a moose too – a red deer track off to the right for comparison.
Henry Burn (also called ‘Moose Creek’).
Setting
off from Supper Cove: a couple of Panadeine Forte under my belt but still the
pack hurts.
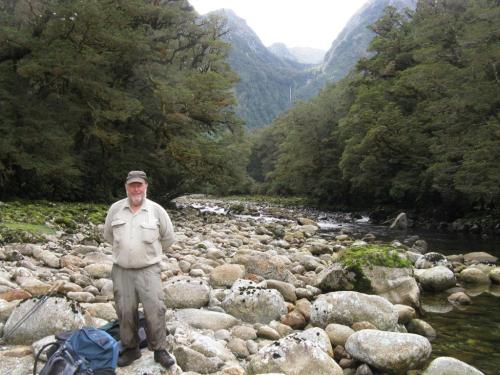
Lunch
stop Day Two: Seaforth River above Lock Marie.
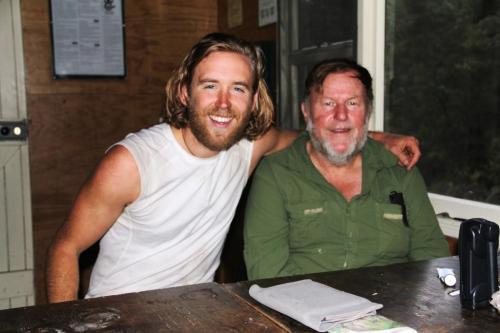
Looking
a little the worse for wear (me) at the Kintail Hut.

At
the track head (Wilmot Pass Road) end of Day Four.
See
also:
http://www.theultralighthiker.com/insects-can-ruin-a-camping-trip/
http://www.theultralighthiker.com/dusky-track-canoeing-the-seaforth/
http://www.theultralighthiker.com/dusky-track-adventures-1/
http://www.theultralighthiker.com/eddie-herrick-moose-hunting-at-dusky-sound/
http://www.theultralighthiker.com/eddie-herrick-moose-hunting-at-dusky-sound/
http://www.theultralighthiker.com/a-friend-i-met-on-the-dusky-track-fiordland-nz/
http://www.theultralighthiker.com/dusky-south-coast-tracks/
http://www.theultralighthiker.com/dreaming-of-the-dusky-track/
http://www.theultralighthiker.com/the-dusky/
http://www.theultralighthiker.com/moose-hunting/
http://www.theultralighthiker.com/fiordland-moose/
http://www.theultralighthiker.com/fiordland-moose-2/
http://www.theultralighthiker.com/hunting-in-fiordland/
http://www.theultralighthiker.com/off-to-fiordland/
http://www.theultralighthiker.com/shadowland-fiordland-video/
http://www.theultralighthiker.com/the-best-toilet-view-in-the-world/
http://www.theultralighthiker.com/10-days-in-fiordland/
http://www.theultralighthiker.com/fiordland-2009/
http://www.theultralighthiker.com/fiordland-nz-with-bryn/
http://www.theultralighthiker.com/fiordland-april-2007/
http://www.theultralighthiker.com/weather-for-fiordland/
02/08/2016: Top Posts: This site lists posts below
in order of popularity ie how many ‘clicks’ each has received, but I have a
different list. Here is a collection of my posts according to how important I
think they were. Some of them you may have never seen (for the above reason).
Some will have links which lead you on to other matters. With nearly 750 posts
there should be something for the hiker, hunter or outdoorsperson to enjoy…
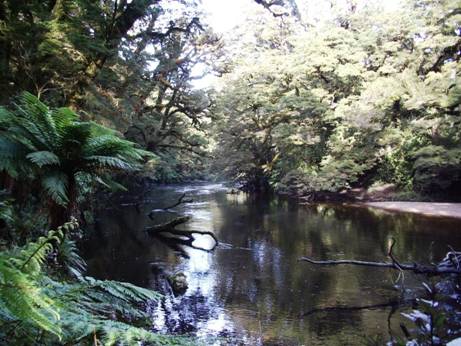
Finding
Your Way: http://www.theultralighthiker.com/finding-your-way/
How
to Light A Fire In the Wet: http://www.theultralighthiker.com/how-to-light-a-fire-in-the-wet/
Insects
can ruin a camping trip: http://www.theultralighthiker.com/insects-can-ruin-a-camping-trip/
River
Crossings: http://www.theultralighthiker.com/river-crossings/
How
to avoid being wet & cold while camping. http://www.theultralighthiker.com/how-to-avoid-being-wet-cold-while-camping/
An
Open Shelter: http://www.theultralighthiker.com/an-open-shelter/
Catching
Your Breath – Walking Uphill: http://www.theultralighthiker.com/catching-your-breath-walking-uphill/
Foot
Care: http://www.theultralighthiker.com/foot-care/
Cookset
Woes: http://www.theultralighthiker.com/cookset-woes/
Ultralight
Pack: http://www.theultralighthiker.com/ultralight-pack/
Hunting
Daypack: http://www.theultralighthiker.com/hunting-daypack/
Ultralight
Hunting Daypack Update: http://www.theultralighthiker.com/ultralight-hunting-daypack-update/
The
Deer Hunter’s Tent: http://www.theultralighthiker.com/the-deer-hunters-tent/
The
Egg-Ring Ultralight Wood Burner Stove: http://www.theultralighthiker.com/the-egg-ring-ultralight-wood-burner-stove/
Windscreens:
http://www.theultralighthiker.com/windscreens/
Water:
Hiking Desalinater or Survival Still: http://www.theultralighthiker.com/water-hiking-desalinator/
A
Soft Pillow and a Warm Bed Under the Stars: http://www.theultralighthiker.com/a-soft-pillow-and-a-warm-bed-under-the-stars/
Tent
Stakes and Tricks: http://www.theultralighthiker.com/tent-stakes-and-tricks/
The
Importance of a Roof: http://www.theultralighthiker.com/the-importance-of-a-roof/
Inflatable
Insulated Clothing: http://www.theultralighthiker.com/inflatable-insulated-clothing/
If
you could only carry two things in the bush, what would they be? http://www.theultralighthiker.com/if-you-could-only-carry-two-things-in-the-bush-what-would-they-be/
Hole-less
Poncho/Shelter/Hammock Tarp: http://www.theultralighthiker.com/hole-less-ponchoshelter/
Pitching
the Poncho: Warning: This may save your life: http://www.theultralighthiker.com/pitching-the-poncho-warning-this-may-save-your-life/
Carry
a Knife: http://www.theultralighthiker.com/carry-a-knife/
Rope
– Don’t leave home without it: http://www.theultralighthiker.com/rope-dont-leave-home-without-it/
Improvised
Bow Saw: http://www.theultralighthiker.com/improvised-bow-saw/
We
can choose to do anything: Free Will/Determinism: http://www.theultralighthiker.com/free-willdeterminism/
You
Will Not Live Forever: http://www.theultralighthiker.com/you-will-not-live-forever/
Why
you should get your feet wet when hiking. http://www.theultralighthiker.com/why-you-should-get-your-feet-wet-when-hiking/
Ultralight
Personal Hygiene: http://www.theultralighthiker.com/ultralight-personal-hygiene/
Get
Lost. Get Found: Best Plb/Epirb: http://www.theultralighthiker.com/get-lost-get-found-plbepirb/
How
to Treat a Gunshot Wound: Part 2: http://www.theultralighthiker.com/how-to-treat-a-gunshot-wound-part-2/
This
Book May Save Your Life: http://www.theultralighthiker.com/this-book-may-save-your-life/
Not
Quite Alone in the Wilderness http://www.theultralighthiker.com/not-quite-alone-in-the-wilderness/
The
Last of the Mountain Men: http://www.theultralighthiker.com/the-last-of-the-mountain-men/
02/08/2016: Sour Grapes: You will recall Aesop’s
fable concerning this. A young fox must have dropped this interesting ‘egg’ in
our paddocks yesterday morning – found as I was going around the lambs. It must
have thought it such a prize having carried it for a number of miles carefully
in its mouth, doubtless salivating over the tasty treat it would be when it
retired to its den. You can see that it has made Herculean efforts to ‘open’
it, before finally giving up on the challenge. What a tough old egg it was! May
be some use yet. I will save it against my next episode of plantar fasciitis!
02/08/2016: Her Craft or Sullen Art: (Apologies to
Dylan Thomas). We are (as you may have gathered) long since empty nesters,
though our kids do still visit (at least one of them on average) practically
every day. We recommend this. If you are nice to your kids they may just grow
up to not hate you. Ours are unlikely however to use their bedrooms ever again
as they have houses of their own nearby, though I expect their children might!
Della
has long since longed for their bedrooms to be transformed into her Craft Room.
You may also have gathered that we made this house ourselves. Every saw cut,
every nail driven…even the bricks we made and laid ourselves. You can save a
lot of money this way, and you learn a lot, skills which can be applied to many
things. However, this may be why it is never ever quite finished.
Here
are some snaps of the current metamorphosis of two of the kids’ adjoining rooms
into Della’s new work area. We have taken out a wall and closed the gap with
concertina Victorian four panel doors (the same as we have throughout the
house). When she needs the extra space she can open them up. If people need to
stay there is still sleeping accommodation and the rooms can be closed up
again. It would probably have been better is we had made the rooms this way in
the first place. I would if I had my time over again. Well, there are probably
many things I would have done differently, but even more I would not have!
In
My Craft or Sullen Art
In
my craft or sullen art
Exercised
in the still night
When
only the moon rages
And
the lovers lie abed
With
all their griefs in their arms,
I
labour by singing light
Not
for ambition or bread
Or
the strut and trade of charms
On
the ivory stages
But
for the common wages
Of
their most secret heart.
Not
for the proud man apart
From
the raging moon I write
On
these spindrift pages
Nor
for the towering dead
With
their nightingales and psalms
But
for the lovers, their arms
Round
the griefs of the ages,
Who
pay no praise or wages
Nor
heed my craft or art.
02/08/2016: Porridge: Is undoubtedly the most
compact energy dense and sustaining breakfast to eat on the trail.
Unfortunately the ‘instant’ versions of this staple have been so adulterated
and laden with diabetes promoting nasties as to be almost downright dangerous.
Here is Della’s ‘traditional’ porridge recipe. It is astonishing that it needs
only one level teaspoon of brown sugar (equivalent to ½ teaspoon of white
sugar) to make it quite sweet enough. The ‘serving size here (quite enough for
us though less than 2/3 of the recommended ‘serving size) weighs 43 grams (and
would require approx 12 grams of metho to cook. Rinse it down with a cup of hot
coffee and you are quite ready for the trail.
Della's
Porridge:
¼
cup of Uncle Toby’s ‘Traditional’ Oats (26 grams = 640kj)
½
cup of full cream milk = 1/9 cup of milk powder (17 grams = 307kj)
½
cup of water
Bring
to the boil then simmer stirring frequently.
Add
one pinch of salt half way through cooking (<.5 gram). This is important.
The oats will be ‘tough’ if you add it too soon, the sugar will not be ‘sweet’
enough if you add it too late.
When
cooked stir in one level teaspoon of loose brown sugar. (4 grams= 41kj)
Total
47 grams = 988kj = 236 calories.
An
important advantage of porridge is how compact it is. When you are
contemplating a long journey (say 10+ days on the Dusky track Fiordland NZ (http://www.theultralighthiker.com/dusky-track-adventures-1/)
for example all that food has to fit into your pack somewhere – so compactness
is an important ultralight feature.
Tip:
You need to work out a system of measures using the things which are in your
cookset. You will no doubt have a small marked container for measuring metho, a
spoon, a cup and a pot. If these don't already have measures on them you should
mark them on in some way (eg with an engraver) or mark them on a light strip of
plastic you can insert into them showing eg how far up the pot one cup of water
comes. You should remember how many spoons full make up a cup 7etc so that you
know how many to add when making up your porridge for example.
01/08/2016: If you could only carry two things in the
bush, what would they be? Now I mean: if you suddenly found yourself there,
having fallen out of a boat, after a plane crash which you miraculously
survived - or if you were just magically transported there from your living
room in just your shorts.
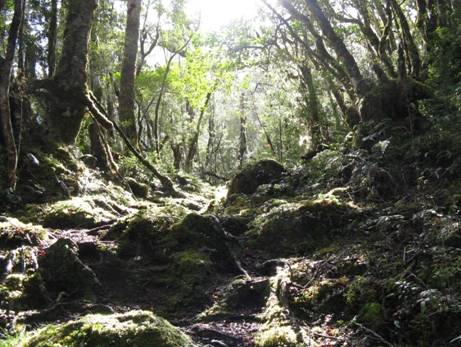
I think they should be things which you could
just always have in your pockets if ever such an eventuality happened. So
helicopters, motorbikes, flamethrowers, satellite phones and delectable members
of the opposite sex are out – OK?
I’ll
just leave you a minute to think about it…
There
are lots of things which might come in handy, aren’t there?
Many
of you will have read the (children’s) novel ‘Hatchet’ by Gary Paulson or seen
the film based on it (‘A Cry in the Wild’ 1990). A hatchet might be handy – or
a knife? What sort of knife? Folks of my generation no doubt recall ‘Hatchet’
was (loosely) based on Robert Heinlein’s novella ‘Tunnel in the Sky’ about a
group of future scouts sent to a wilderness area on a far planet as a survival
test – both excellent reads – as well as providing various suggested answers to
my introductory question.
Heinlein
would have voted ‘knife’ pretty high up any list. If only I had said ‘five
things’. Or ten! This is how your pack gets filled up with all sorts of junk
and ends up weighing half as much as you do!
By
now you are all recalling all the other ‘castaway’ books and films you have
known. It all started with Homer’s ‘Odyssey’ (a must-read if you haven’t yet)
or maybe with Mesopotamia’s ‘Epic of Gilgamesh’ (likewise). There have been so
many versions. The theme is clearly a primal plot-line. ‘Robinson Crusoe’.
‘Gulliver’s Travels’. The list goes on and on…We all love these wilderness
tales.
You
might say, ‘It all depends on the season’. Well, No. It does not. Your
experience may be different in different seasons it is true. More folks die of
cold in the wilds than from any other single thing. Exposure can strike in any
season. We nearly lost some clients a few years ago who decided to come down to
buy some sheep by coming over the ‘hump’ from Jamieson to Licola in midsummer.
They found themselves bogged in a 60cm snowdrift! Blizzards can occur at any
time in the High Country. Fortunately for them they were smokers. Be careful.
You might not survive giving up the durries.
If
it comes in cold and wet you can suddenly be very cold. The coldest I have ever
been was when I was 16 coming back from a droving trip in Western NSW for Xmas
at Lake Macquarie. I had for several months been following a vast mob of sheep
all over Western NSW on my horse camping each night on the roadside (the ‘Long
Paddock’) or in the travelling stock reserves under the ‘chuck wagon’ - ‘and at
night the wondrous glory of the everlasting stars’ as Clancy of the Overflow
opined. Coming over ‘The Range’ west of Murrurrundi it was snowing. Hard. Only
the second time I had ever seen the white stuff. I was riding a 90cc
Bridgestone motorcycle. Remember them? I was wearing shorts and a Tee shirt!
When I got to Murrurundi I bought a big bag of hot chips to thaw out my frozen
hands which were very close to being frost-bitten (it was the only thing I
could think of!). Then I was able to eat them. Multiple use. A very important
quality. Very few get a chance to starve to death. It takes too long. Six
weeks. Some die of thirst. A week? Some are killed by fire. Many fall, or
drown. Others (a tiny few) are attacked by wild animals. The greatest number
die of stupidity – or ignorance. They are the same thing, really.
A
bazooka might come in handy if you just suddenly find yourself on the planet of
the carnivorous elephantine monsters – but it might be better to hide! You will
run out of ammo eventually anyway. Should you carry a gun? But what if it
rains? What if there’s a fire? A warm coat perhaps?
Remember
though that people have lived on this continent for many thousands of years
carrying much less than you could probably easily fit in your pockets. And they
didn’t even have pockets! But carrying some essential knowledge between their
ears which you might not have. Perhaps a book on survival? Well, read one
anyway. Nothing you carry in your head will be cheating.
I
recommend Ray Mears’ ‘The Survival Handbook’. This guy has trained the SAS for
years and years. He has taken extreme trouble to really work out how to do it.
All. He has also made a number of TV programmes about related matters. Get hold
of them. So much better than Bear Gryls. In one episode he makes a long bow
(with stone tools which he first makes), a string for it, then the arrows,
arrow heads, glue and binding for the arrow heads, then the fletching. Then he
stalks and harvests a red deer, butchers and cooks it with a heap of other
things he has collected from the wild. This guy survives with style!
So
what would I take?
I
would opt for a mini Bic lighter and a mylar poncho. The ability to light a
fire (either to keep warm or to backburn to create a refuge during a wildfire)
is really essential. Remember more people die of cold than anything else. Again
the mylar poncho. Coghlans have one. (http://www.coghlans.com/products/emergency-survival-poncho-1390)
So should you, ever in your daypack or pocket. It will keep you dry and warm.
If you have to stay out all night you can hunker down in it like a mini tent
(as illustrated here: http://www.theultralighthiker.com/inflatable-insulated-clothing/)
– with a warm fire out the front to make your disaster experience just about
perfect! You will have plenty of time to figure out food, water, finding your
way home & etc whilst you sit dry in front of a warm fire. Tomorrow is
another day!
Oh,
and my third thing would be a knife!
01/08/2016: Great party costume: http://www.popsci.com.au/make/hacks/video-how-to-turn-two-ipads-into-a-gory-gaping-hole-in-your-torso,376559
01/08/2016: Progress at last: This Gun Makes And Fires Paper Airplanes: https://www.youtube.com/watch?v=J7K91g8yG_w
& http://www.popsci.com.au/make/hacks/this-gun-makes-and-fires-paper-airplanes,396606
31/07/2016: You Can Blow Soap Bubbles And Instantly
Freeze Them Into Ice Orbs: http://www.popsci.com.au/make/hacks/you-can-blow-soap-bubbles-and-instantly-freeze-them-into-ice-orbs,414294
31/07/2016: Amazing People: Woman climbs 33 storey building using suction from a vacuum cleaner. Start
video about one minute in: https://www.youtube.com/watch?v=xTMDzqVwr9E
30/07/2016: Inflatable Insulated Clothing: I am
surprised this idea has not taken off more given that it is (trapped) air which
is the insulator in all warm clothing, the more air trapped per unit weight
being the yardstick for cross comparison. A product known as Aerovest (http://www.survivalmetrics.com/store/Item/id_aerovest_emergency_survival_vest)
was available a few years ago. This provided a waterproof inflatable mylar vest
weighing around 2 oz (60 grams). It was a little difficult to inflate (and
particularly deflate and the closure and re-use features were not all that they
could be – however it could certainly save your life for a very modest weight
in your pack/pocket.
This
product Xerovest is the current iteration (http://www.xero-gear.com)
on Kickstarter where you can pre-order yours from US$10 ea. (https://www.kickstarter.com/projects/ianbruce/the-xerogear-emergency-cold-weather-vest?token=c2c732ad)
Again it weighs around 60 grams. It can be deflated with a straw and reused.
Klymit
(https://gearjunkie.com/pump-it-up-jacket ) started making a more durable one which morphed
into Nudown (https://www.nudown.com) a much more high-end inflatable products. These
combine a rain shell with an insulated jacket in one lightweight garment.
Of
course a garment does not need to be inflatable to provide a degree of
protection from the elements. Some folks such as Blizzard have a ‘bubble wrap’
approach for example (http://www.blizzardsurvival.com/) . Then
there are those which utilise simple mylar such as in the mylar poncho http://www.coghlans.com/products/emergency-survival-poncho-1390.
You
can make your own as illustrated here: http://www.theultralighthiker.com/more-fun-with-sticky-tape-ultralight-mylar-vest/ and here: http://www.theultralighthiker.com/fun-with-sticky-tape-mylar-poncho/
Emergency
shelters such as the Blizzard bag: http://www.blizzardsurvival.com/product.php/100/blizzard-survival-bag
are also a good idea. Some examples: http://www.theultralighthiker.com/survival-shelter/
Xerovest
Aerovest
Nudown
Whitney vest
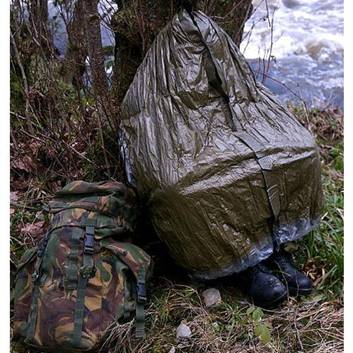
Blizzard
Survival Vest
Coghlans
Emergency Poncho
29/07/2016: ‘Great Oaks From Tiny Acorns Grow’:
Apparently all acorns are edible:
“‘Sweetest’
Acorns, meaning lowest in tannin: East Coast White oak, the Emory oak of the
Southwest, the Pin oak of the South, the Valley and Blue oaks of California,
the Burr oak of the Midwest, as well as the Cork oak and the well-named Bellota
oak of Europe.
All
acorns should be leached with water to remove bitter tannins, which will a)
make your mouth feel and taste like felt, b) make you a bit nauseous, and
possibly c) constipate you for days.
Getting
those tannins out is the big barrier to cooking with acorns. But it ain’t no
biggie. With my Valley oak acorns, after shelling I drop the acorn meats
directly into my stockpot that was two-thirds full of water. When I fill the
pot about a third of the way up with shelled acorns, if I am in a hurry, I
bring the pot of water to a boil. The water turns dark. As soon as it boils,
pour the water off into the sink and repeat the process. It requires about five
changes of water to get Valley oak acorns to taste like chestnuts.” http://honest-food.net/2014/10/13/how-to-eat-acorns/
29/07/2016: Slow Motion of Lightning Hitting Telegraph
Pole via dash cam: https://www.youtube.com/watch?v=LIC0_fDp1Xw
28/07/2016: Rain Skirt: If you are like me and
find rain pants too hot and restrictive to walk in you may find a rain skirt or
kilt will keep your lower body from the knees up much drier and more
comfortable. You can buy one from various suppliers such as I did (http://www.theultralighthiker.com/rain-kilt/)
or you can make your own. Here’s a useful Instructable on how to make your own.
http://www.instructables.com/id/Rain-Kilt-Skirt-for-Hiking/ See also: http://www.theultralighthiker.com/south-coast-track-fiordland-nz-waitutu-to-westies/
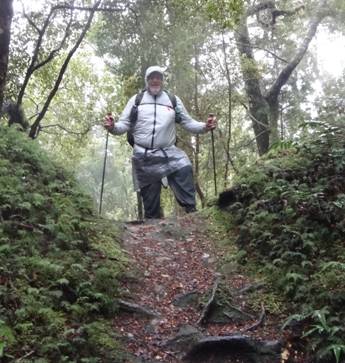
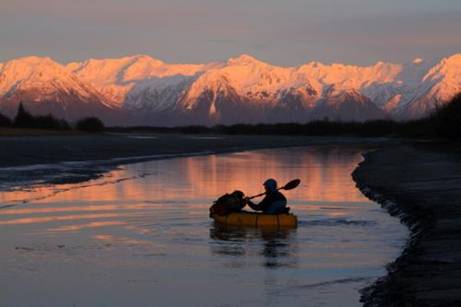
26/07/2016: Thrilling tales: Erin McKittrick: This
young lady (accompanied by her husband, Hig) is amongst the greatest living
explorers. Their 4,000 mile trek along the US Pacific Coast related in her book
‘A Long Trek Home’ is astonishing – but it proved to be only the beginning of
her adventures. Connect with her here: http://www.groundtruthtrekking.org/blog/
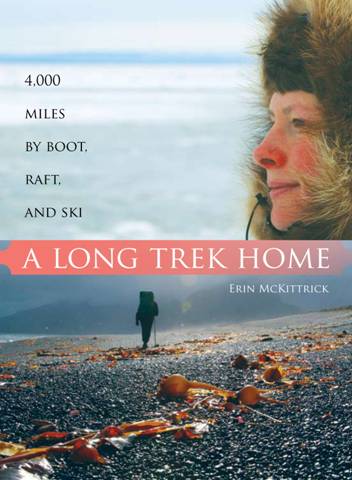
25/07/2016: Camping With Cats: We have all seen
the pics of folks camping with their dogs. Time our feline friends got into the
act: http://www.boredpanda.com/camping-with-cats-ryan-carter/
See also: http://www.theultralighthiker.com/most-travelled-cat/

25/07/2016: Tight Shoes: With age, gravity tends
to give us a larger foot size. Our feet expand under our weight. Solid,
well-made leather shoes can be stretched between a half-size to a whole
size. Poor quality shoes can not take
the stress of stretching - either the leather itself, or the stitching, will
break.
Things
to try: Shoe stretchers will adjust width or length. Cheap on Amazon. Over a
day or two, you keep increasing the tension in the stretcher. Heating the shoes
with a hair dryer or in a hot sun makes the leather a bit more stretchable.
Soaking the shoe well with water or, better, isopropyl alcohol (rubbing
alcohol) before stretching is what expert cobblers do. Simpler, soak with water
or rubbing alcohol and wear the shoes. Be careful not to overdo it or you can
end up with loose shoes.
An
interesting ‘hack’ here suggests filling a plastic bag with water and placing
it inside the shoe then freezing it/them. As the ice expands it will stretch
the shoe. I guess this would work. We probably all have a box of ill-fitting
shoes somewhere that we could experiment with. Might save a few bucks: http://www.lifehack.org/articles/lifestyle/how-stretch-shoes-that-are-too-tight.html
24/07/2016: ‘1 in a billion' police shooting: Cop's
bullet jams suspect's gun:
‘Jefferson County Deputy Sheriff Jose Ramon Marquez in an apparent
attempted robbery last winter, they just need to look at a photograph of his
weapon. The photo shows Marquez’s bullet, which he fired at Meshesha while he
was being fired on, inside Meshesha’s gun. Marquez’s .45 caliber shot had hit
Meshesha’s gun exactly in the barrel opening and traveled down the barrel,
jamming the assailant’s .40 caliber weapon completely. http://www.wnd.com/2016/07/1-in-a-billion-police-shooting-cops-bullet-jams-suspects-gun/

23/07/2016: A Dam Nuisance: We have spent the last
week or more trying to save one of our two dams. We had some sudden very heavy
rain last week which broke our newly rebuilt bottom dam and threatened the
spillway of the top dam (we worked for over a week in the summer building) and
the integrity of the dam itself.
A
number of stratagems have been implemented. If we can keep the overflow in the
pipe and the pipe hanging on the wall until the flow slows to a trickle or
stops in the spring/summer and the earth dries up enough to support large
equipment we may yet save and repair it permanently. All the work we have
carried out over the last ten days or so has been on very wet surfaces where
every step bogs your foot and requires all your strength to pull your foot out
and take another step. So it hasn’t been much fun.
Heavy
rain last winter finally broke both dams so we spent nearly $10,000 and a lot
of work repairing them last summer. Of course the earth really needed a couple
of years to stabilise, regain a good grass cover & etc. Sadly this was not
to be. We will be up for maybe another $5,000 of repairs this summer. All this
so we can have a lovely garden. It hardly seems worth it! Well, all right, it
is!
The
latest stratagem is a high tensile chain up the middle of the pipes secured
with Allthread to steel beams at each end. When we tension up the large nuts on
each end it compresses the pipes together making them resist drooping etc. It
is astonishing how much tension you can create with a shifting spanner on a ¾”
HT thread. I have had three goes at different thickness beams at each end, all
of which I have succeeded in bending. Don’t know my own strength I guess!
Top
dam finally gave way last winter.
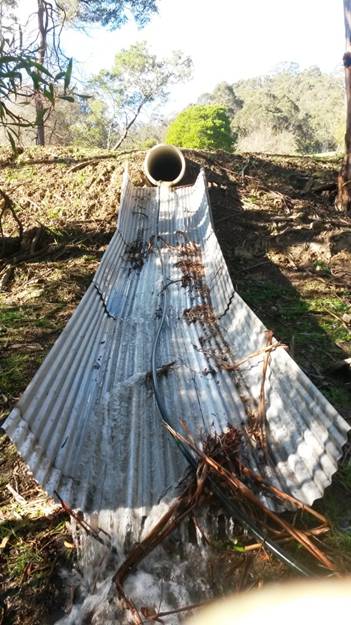
New
Spillway overflowing.
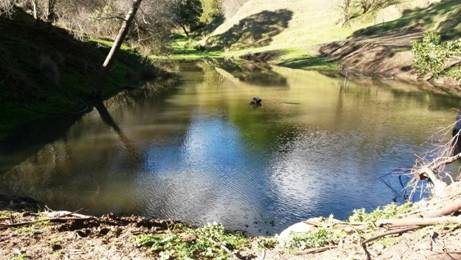
Autumn:
New dam full: lots of garden water here.
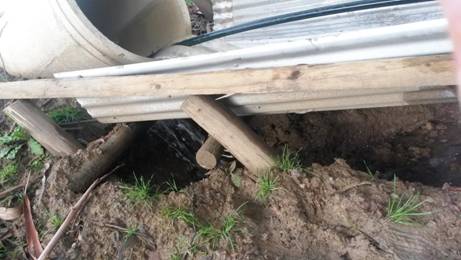
A
huge rain event and earthquake moved the pipes and the spillway. Water burst
through beneath the pipes and undermined the spillway. Insurance does not cover
damage to farm dams.
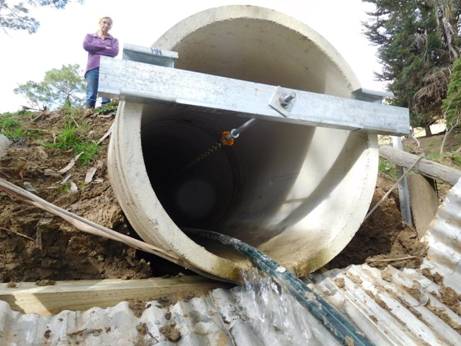
Pipes
bolted together and braced. Leaks fixed. Here’s hoping.
22/07/2016: What sorts of critters move using the
least energy per unit distance and per unit weight? Fish swimming, birds
flying, or animals walking? ‘The net cost of transport of swimming is lowest,
followed by flight, with terrestrial limbed locomotion being the most expensive
per unit distance’ https://en.wikipedia.org/wiki/Animal_locomotion
21/07/2016: Surprising discovery about turtles: http://www.theatlantic.com/science/archive/2016/07/the-turtle-shell-first-evolved-for-digging-not-defence/491087/
21/07/2016: Say ‘Hello’ to an invisibility
cloak: https://wattsupwiththat.com/2016/07/17/scientists-move-one-step-closer-to-creating-harry-potters-invisibility-cloak/
20/07/2016: Lost at Fromelles: Just like thousands
of other Australians I lost a relative at Fromelles a hundred years ago.
Private Joseph Leslie (Roy) Martin Number 1584, 30th battalion AIF, an ex
cadet, single labourer from Grenfell NSW, an uncle who would never be -
disappeared that day aged just 20 – and has never been found since. He survived
a bare month at the Front. One of 5,500 Australian casualties in a single
afternoon! Australia’s very worst day. What a tragedy! May we never repeat such
awful destruction or ever forget their heroism and sacrifice for us, our values
- and our way of life.
PS:
You should not think our military simply ‘forgot’ missing soldiers. On the day
after Fromelles ‘Roy’ was listed as missing. An inquiry was arranged. Notices
obviously went out to anyone who could shed light on his fate. Someone even
thought they might have seen this slight 126lb, 5’51/2”good-looking, brown
eyed, brown haired youth after the battle; this proved illusory. The other man
was almost certainly Roy’s older brother John Francis (Frank) Martin who
survived the war (though twice seriously wounded). The Inquiry found on 10th
December 1916 that he must have been killed in action at Fromelles. No doubt
near ‘Pheasant Wood’ – a pleasant sounding place to die! A medal was sent to
his mother. Apparently he was a ‘good rifle shot’ but this availed him little.
20/07/2016: 101 Uses For
SnapLock Bags: [From: Fifty ways to Make Survival Tools from Trash and
Household Items, by Ken Youngquist (Available here: http://survivaltek.com/?page_id=4386)]

‘Sealable
plastic bags go way beyond keeping sandwiches fresh. They are a transparent
water tight container that comes in various sizes and thicknesses. I prefer
freezer bags because they come in a thicker material and are much more durable.
Extra bags carried in a “Bug-Out-Bag” can come in handy. Here are some uses…
-
For water proof storage: Packing clothes and other items inside plastic bags
within your backpack or luggage will help sort and retrieve things more easily.
The contents will stay dry if you drop your pack or bag in water or are caught
in the rain for an extended period of time.
-
To expedite travel bag inspections: When travelling by public transportation
where security inspections take place your luggage contents can be easily
inspected by security personnel and will remain intact. I keep non-approved
items in a separate bag so that it can be easily removed and left behind
before-hand, however, it remains in my bag if I travel privately.
-
As a clothes washer: A large bag can be partially filled with water with a bit
of soap.
Next,
insert a few clothes items that need washing. Gently toss the bag from hand to
hand to agitate. Clothes can be rinsed the same way with plain water.
-
As a canteen: Water can be carried in a sealable plastic bag that when opened
at the
corner
provides a spout from which to drink. It can be placed inside a second plastic
bag for an extra measure of protection against leaks. For transport it can then
be kept inside a cloth bag or pocket, providing it with support and added
insulation.
-
As a cooler: A bag filled with ice can keep it’s contents cool for many hours.
This works best with sealed items like cans or bottles.
-
As an ice pack: A bag can be partially filled with water and frozen around an
object or instead you can just fill it with ice.
-
As a funnel: You can cut a tip off of the bottom corner and pour contents into
the top. This has worked successfully for adding gasoline into a car tank in a
pinch.
-
As a tinder carrier: Keeping tinder dry could prove to be critical when
traveling in a
survival
situation.
-
As a water lens for making solar fire: By filling the bag with water, squeezing
out the air, and forming it into a ball, you can focus light on a sunny day
well enough to start a solar method fire (yes, I’ve done this…).
-
As a fishing float or buoy: You can attach a fishing line or anchored line to
an inflated bag to either fish or mark a spot for submerged items.’
I’m
sure you can think of even a few more! Ken has a lot of other interesting ideas
for using ‘junk’ I recommend you take a look.
20/07/2016: How Hummingbirds Fly: http://gizmodo.com/hummingbird-flight-is-more-amazing-than-we-realized-1783825300
19/07/2016: Interesting new toy if you have the loose
change: http://www.gizmag.com/jet-powered-kymera-body-board-first-ride/43919/
18/07/2016: The old Appalachian tunes borrowed
lines from each other. That's how both ‘Old Joe Clark’ and ‘Cotton-Eyed Joe’
happened to die from ‘a toothache in the heel’. ‘Cotton-eye’ used to be more common. It's usually a blindness in
one eye caused by a retinal detachment. I had a similar thing last year - a
detachment of the vitreous in one eye – quite scary but not as interesting
sounding as ‘cotton eye’. The
Long History Behind the Song "Cotton Eye Joe"
16/07/2016: Boot Chains: If you don’t need a
permanent traction solution (like this:
http://www.theultralighthiker.com/4wd-boots/), you can carry some boot traction
aids such as these: https://www.rei.com/c/winter-traction-devices?r=c&ir=category%3Awinter-traction-devices&page=1
& https://www.grainger.com/category/footwear-traction-devices/footwear-and-footwear-accessories/safety/ecatalog/N-ipe
Some reviews here: http://www.trailspace.com/gear/traction-devices/
16/07/2016:
Camera Glassing: Pocket cameras have
come to have much better resolution than expensive binoculars. As an example my
Nikon Coolpix S7000 with 20X optical zoom and superb anti-shake technology will
bring very distant objects into sharp resolution. You can also make use of its
additional digital zoom. I had been having trouble reading the eartag numbers
on our sheep to record their lambing details. I had bought a new pair of 12X
binox, even a 16X monocular but they are completely surpassed by my camera –
and it is so easy.
Instead
of glassing those distant slopes with a pair of heavy binox you should try a
pocket digital camera. Mine weighs 160 grams including battery and SD card. I
notice Sony now have a new pocket model with 30X zoom and still under 240
grams! You can make up an adapter to slip into the barrel of your gun to
enhance stability, or you can use a couple of rubber bands (see photos). See: http://briangreen.net/2011/07/trekking-pole-camera-mounts.html


15/07/2016:
When I was a child there were two kinds
of marsupial 'cat'. This one which we called a 'native cat' and another one
about as big as a fox with stripes which we called a 'tiger cat'. Both (and
bandicoots, pademelons, etc) disappeared at about the same time as the
myxomatosis epidemic struck the rabbits.

13/7/2016:
Jeeralang Snow: Other people are always posting pix of the wonderful places
they are visiting (and Facebook daily reminds me of places we have sometimes
visited too) but we do so like home. If you don’t you are living in the wrong
place! We were just putting off a visit to far North Queensland due to having
to work on flood damage to our property here at Jeeralang (The joys of
farming!) when along comes a couple of inches of snow, turning the backdrop of
some dead blackberries just up the road into a thing of beauty to showcase my
even more beautiful wife, daughter and grandson against. Spot (and Tiny)enjoyed
the white stuff too, as you can see. This photo is right behind our old
Jeeralang hill property just a km or two up the road. The Jeeralang hills rise
steeply behind us. Our home property butts right up against their spectacular
native forest. It is 200 metres above sea level at our front gate, rising to
about 550 where I took this photo. It snows here like this on average about
once a year. This was my grandson’s first snow!
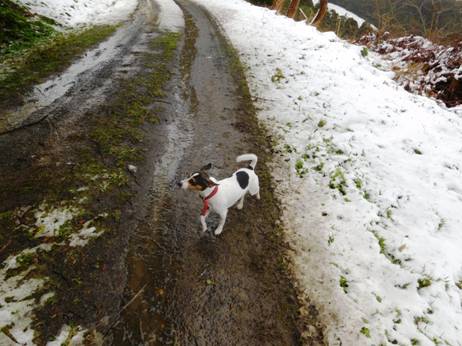
10/07/2016:
WARNING: HACKING: My posts will be a
bit lighter the next few days as I rebuild computers, etc. This post is not
about ‘ultralight hiking’ I know, but you are likely to be hiking a bit more
ultralight than you would like if these guys succeed!
We
have been comprehensively hacked (and money stolen – will be replaced by
Commbank). First these people (began to) ‘Port’ our phones to their Sims
without our awareness, knowledge or permission. Before this happened I received
an SMS SecurityCode from Commsec which I hadn’t asked for. I rang and told
Commsec but they were confident of their system. They were wrong, and had never
had this happen to them before ether! The person must already have had our
login and password at Commsec before our phone/s was ported. That is probably
obtained from my wife’s phone before it had finished ‘porting’. I wouldn’t have
thought they could get data from her smart phone without having either her
phone or Sim, but there you are. Then they hacked her Gmail account and changed
the Password. They were able to take cash from a Commsec account I can only do
transfers from, and from other bank accounts.
I
now notice one’s phone (eg Chrome) stores history, passwords etc. And of course
‘Synch’ allows other security problems. You need to delete this stuff, logs
emails etc. Telstra tells us there is a lot of this going on. All people need
to know is your name and phone number. They will have acquired other people’s
IDs from our phones. Sorry about that! They could get the same information from
the phone book etc.
Neither
Telstra, Commsec or Commbank knows how they are doing this.We have up to date
Norton on all our devices. I have changed our modem ID and Password. Shut down
all computers and phones and am rebuilding one at a time. Am typing this frm
the first one I rebuilt. Complete reformat and new genuine windows plus new Norton,
then update system scan etc, Nothing will be stored electronically in future.
Telstra
tells me the crooks can do this again anytime they want. Bizarre you have to
have two photo IDs to buy a phone/service but people can steal it
electronically without ID. You would think Telstra etc would insist that
‘porting’ can only be done in a Telstra shop after you have shown your Id and
been confirmed…BEWARE! (Pass this on). PS: It’s now happened to two (correction
three) of our friends too!
A
friend has suggested this additional Password security solution https://www.troyhunt.com/only-secure-password-is-one-you-cant/
It seems like good advice to me. Norton also has a ‘secure’ Login/Password storage
vault system.
See also: http://www.theage.com.au/business/consumer-affairs/id-theft-in-three-steps-adequate-telstra-and-telco-identity-checks-questioned-20160708-gq1a3k.html

07/07/2016:
Archaeology is exciting. There is so
much more to learn. Its secrets should never be locked away from us (eg by
spurious claims of respect for remote ‘ancestors’). I have enormous respect for
these ancient ‘Spaniards’ who were the first people into America more than
20,000 years ago - not to mention their wonderful cave art eg Cave of Forgotten
Dreams: https://vimeo.com/32371643
I hope they were my ancestors. See: http://insider.si.edu/2012/03/ice-age-mariners-from-europe-were-the-first-people-to-reach-north-america/
07/07/2016:
For Frigate Birds, Staying Aloft for
Months is a Breeze: http://www.aaas.org/news/science-frigate-birds-staying-aloft-months-breeze
06/07/2016:
Impregnable Gun Safe: The gendarmes
decreed that we had to upgrade our firearm storage though they had (as far as
we could tell) safely and happily lived in the same cabinet for over thirty
years! We had to buy a safe. Fortunately gun safes have become much less
expensive over the years. We carefully chose one from eBay for $300 which would
fit neatly in the space where the old one came out. http://www.ebay.com.au/itm/271310053701?_trksid=p2057872.m2749.l2649&ssPageName=STRK%3AMEBIDX%3AIT
This one claimed to be an 11 gun safe though I would say you could squeeze a
few more in without much trouble.

The
metal walls are a bit thicker than the old modified locker, and the locking
mechanism is much more secure. However, I think I could get in through the
exposed side of it with an angle grinder in a little while without much
trouble. This got me thinking:
I
noticed you could slip a sheet of aluminium checker plate inside the safe -
attached loosely up against the exposed side. There is a narrow space behind
the door hinge which would hold it on one side, and you could hold it in place
with a couple of screws into the wall at the back. It is important it is loose.
Then when someone cut through the steel plate their angle grinder disc would
instantly stall against the wobbly aluminium (have you ever tried to cut that
stuff with an angle grinder?) and shatter all over the place – hopefully taking
one or two of the potential burglar’s eyes/fingers with it!
06/07/2016:
Three Felonies A Day: How the Feds
Target the Innocent: Not a lot different here I’ll warrant: ‘The average
professional in this country wakes up in the morning, goes to work, comes home,
eats dinner, and then goes to sleep, unaware that he or she has likely
committed several federal crimes that day. Why? The answer lies in the very
nature of modern federal criminal laws, which have exploded in number but also
become impossibly broad and vague. In Three Felonies a Day, Harvey A.
Silverglate reveals how federal criminal laws have become dangerously
disconnected from the English common law tradition and how prosecutors can pin
arguable federal crimes on any one of us, for even the most seemingly innocuous
behaviour…With more than 4,000 crimes in federal statutes and more than 300,000
more crimes specified in various federal regulations, every complex commercial
enterprise is inevitably vulnerable to federal prosecution-and thus, given
federal prosecutors' leverage, to oversight through a deferred- or
non-prosecution agreement.’ For example, did you realise that so-called ‘credit
card ‘ knives such as the Swisscard (https://www.victorinox.com/global/en/Products/Swiss-Army-Knives/SwissCards/SwissCard/p/0.7100.T)
and Cardsharp (http://www.iainsinclair.com/en/all-products.html) have apparently been declared ‘Prohibited
Weapons’ by the police - they are so much like machine guns and hand grenades!
Yet ‘Peters of Kensington’ and many other stores are still selling them I
notice! I have been hassled the last three months over one I accidentally had
in my wallet when we went to NZ in late March. They have only just now decided
to go away and leave me alone after a lot of stress. It seemed like they were
determined to ‘test the law/make law’ for quite some time. Such tyranny is
omnipresent: It is mostly illegal to do anything at all in one of our National
Parks for example. Need I go on? https://www.amazon.com/Three-Felonies-Day-Target-Innocent/dp/1594035229
05/07/2016:
The Wood for the Trees: A Long View
of Nature from a Small Wood: This looks like such an enchanting book: https://www.amazon.com/Wood-Trees-Long-Nature-Small-ebook/dp/B016PK9VOY#reader_B016PK9VOY Reviews
here: http://www.standard.co.uk/lifestyle/books/the-wood-for-the-trees-the-long-view-of-nature-from-a-small-wood-by-richard-fortey-review-a3246291.html & https://www.theguardian.com/books/2016/may/25/the-wood-for-the-trees-by-richard-fortey-review

04/07/2016:
Google Earth gets a facelift. The
company has just introduced an updated version of Google Earth that taps sharp
new imagery from Landsat 8 satellite to give the planet's surface an impressive
makeover. These new images bring structures and features on the Earth's surface
into considerably sharper focus.
Here
is their image of the Waitutu Hut on the South Coast track Fiordland NZ. The
hut is about the size of a garage. As you can see a person wearing a red
raincoat would show up in the clearing it sits in on the Waitutu River. More
pertinently, as you scroll/stroll along the coast to the West of this point you
can clearly determine which sections of coast are navigable on foot on your way
out to Westies Hut.
We
walked along the beach from the Grant Burn to the Aarn River to avoid a flooded
section. At the time I thought we could have walked along to one or other of
the two streams to the West of the Aarn. Now you can clearly see that this
would have been easy. At the first stream there is a clear ridge on the Waitutu
side leading down to the coast. At the second you would probably have to wade
down the stream.
The
increased clarity of the images should also help when you are using it to check
out likely good hunting spots as large herbivores create and maintain clearings
in the forest which can be clearly spotted from above. These can also be good
spots to camp if nearby streams. http://www.gizmag.com/google-earth-facelift/44057/
See also: http://www.theultralighthiker.com/south-coast-track-fiordland-nz-waitutu-to-westies/
& etc.
03/07/2016:
Wintulichs Beer Sticks: On the trail
animal protein is a must, but without refrigeration you may have concerns
about food safety. One of the chief virtues of salamis and hard cheeses such as
cheddars is also their energy density at @ 7 calories per gram – and lots of
fat! There are some salamis which are labelled as needing no refrigeration.
Some are rather large eg 200 grams for a single meal http://www.theultralighthiker.com/lunch-on-the-trail/
(though we have found them quite safe open for a few days at equable
temperatures), some rather small such as our old standby Hans Twiggies @ 15
grams ea. At 50 grams per serve and in a number of delicious flavours these
Wintulichs Biersticks may fit the bill and fill your stomach. They are
available in the liquor departments of many supermarkets and also come more
economically in a 1kg pack if you can find a stockist: http://wintulichs.com/product/beer-sticks-1kg/
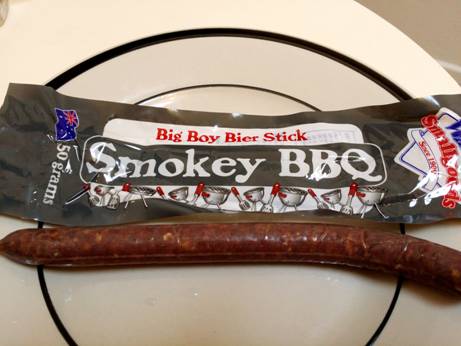
02/07/2016:
4WD Boots: These tungsten carbide
tipped studs provide huge levels of confidence in all slippery conditions underfoot
whether that is due to ice, grass slopes, moss, seaweed or wet timber. Once
installed they become part of the boot and the enhanced grip is available at
all times.

http://www.gripstuds.com/Boots.php
& http://www.supatracks.com/best-grip-boot-studs-buy-online-uk.html
02/07/2016:
Tactical Pens: Bearing in mind that
it is pretty much illegal to carry anything for self-defence and that even
something as innocuous as a credit card knife such as this http://www.iainsinclair.com/en/all-products.html
will be considered by police to be a ‘prohibited weapon’ punishable by years in
prison – and all this despite the clear inability/unwillingness on the part of
Government to protect us (and I include Defence in this – those subs: Wow!);
and that crimes against the person have risen thousands of percent since it
became illegal to carry pistols for self- defence back at the beginning of the
C20th (one more reason to be voting Liberal Democrats today) you might consider
carrying a ‘tactical pen’ such as these for self-defence – and you can always
write a ransom note (or other) with it! http://hiconsumption.com/2014/04/12-best-tactical-pens/
01/07/2016:
The Ideal Camp Shoe: A recent entry to this tough competition are Skinners
Socks http://www.gizmag.com/skinners-sock-shoes/43742/ They look interesting, but a Skinners sock
weighs 80 grams ea.
For
comparison a Croc Thong weighs 131ea, a standard Croc weighs 160ea and Sealskin
Socks weigh 88 per pair! For years these had been my choice for dry feet at
trail’s end (as you could slip your wet shoes back over them if you needed to
go outside. They do not breathe all that well though. Your feet might benefit
more from cooling down and drying out after a long day of slogging through
creeks and bogs. For weight the sealskin Socks will take some beating.
You probably know already that I am not a fan of
trying to keep your feet dry: http://www.theultralighthiker.com/why-you-should-get-your-feet-wet-when-hiking/
I
have tried these Goosefeet Over Booties https://goosefeetgear.com/products/2-waterproof-over-booties
which
weigh 20 grams ea. Their down Socks weigh 31 grams ea and are excellent if you
have very cold feet (eg in bed). The over-booties do work but they work better
with my home made thongs inside. See:
http://www.theultralighthiker.com/spare-shoes-great-for-river-crossings/

These
reduce the side slipping you otherwise get. However, they are far too
waterproof and tall so your feet tend to steam up in them.
I
am working on a pair of Dyneema jiffies @ 20 grams ea to go over my shoe liner
thongs. Here is a pic of one of six so far Tyvek prototypes of them:
I
will soon get them perfected and will post instructions about them. Getting
them to fit, stay on and be easily sewable proved harder than I thought.
I
am determined to have a pair of shoes under 100 grams and which (in ann
emergency) you can walk quite some distance in (eg 20* km before they wear
through) – just in case your shoes completely break in half. If they just come
asunder but the soles are still good you should try repairing them with some
string - which you should always carry: http://www.theultralighthiker.com/rope-dont-leave-home-without-it/
01/07/2016:
Would you eat an organic banana?

30/06/2016:
The Poor Man’s Satellite Phone:
Delorme Inreach SE @ 190 grams is a good choice if you are in the market for a
PLB or Satellite Phone. It is only slightly dearer (and heavier) than a
stand-alone PLB (so much cheaper than lighter than an Iridium Extreme) but with
two way SMS messaging functionality from anywhere on earth. You can load maps
on it and use it as a GPS. You can pair it with your mobile phone to make it
even more user friendly. It has a tracking function which can notify your
friends every few minutes of your exact location (people can even ‘ping’ you to
trigger your location) – and of course it has an SOS button which will bring
emergency services if you need rescuing. The fact that it has two-way messaging
will mean that unnecessary rescues will be reduced enormously. Costs about
A$400. http://www.inreachdelorme.com/product-info/inreachse.php
:
28/06/2016:
Spot’s Third Snow Trip: It’s so elevating to venture out for a delightful bit
of snow sightseeing (as we did on Saturday) – the coldest June day on record
apparently…after a warmer than usual autumn winter has now really hit. We are
glad of a warm fire and a cosy bed these chilly nights. The Australian bush
colours really seem to come alive with a scattering of snow to throw up its
highlights as on these mountain ash saplings:
Or
this tree fern:
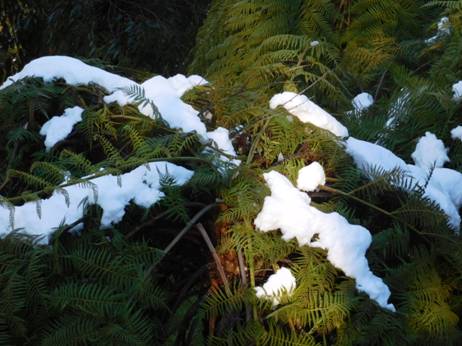
The
dogs enjoyed exploring it - with frequent leaps back into the car to rewarm
their tootsies!
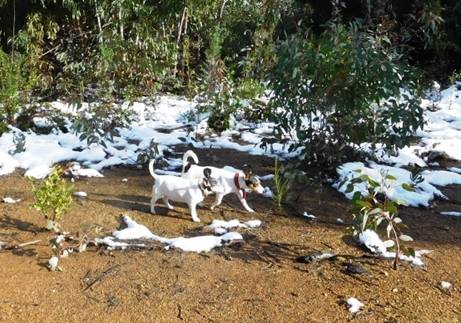
The
drifts were quite deep in places. Della showing off her Montbell down jacket:
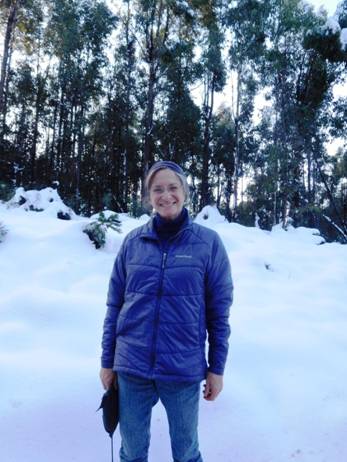
Spot
warming up against my old Mountain Designs vest which fits me again!

We
even came across some Yowie tracks! My footprint front left for contrast. As
you can see this big guy’s pace was nearly five feet!

http://www.theultralighthiker.com/mt-useful/
23/06/2016:
Thrilling Tales: The DIY Motorcycle:
Emile Leray built a working motorbike from a broken down car to escape the
African desert: ‘A Frenchman has found fame over 20 years later after pulling
off a remarkable escape from the Moroccan desert – by building a motorbike just
using parts from his crashed car. His amazing escape from the barren terrain
saw Mr Leray single handedly rebuild his Citreon into a makeshift motorbike, in
a dramatic escape which has seen him dubbed the most ‘extreme’ mechanic in the
world.’https://m.thevintagenews.com/2016/05/18/emile-leray-built-working-motorcycle-broken-car-citroen-2cv-escape-african-desert/

23/06/2016:
Alien contact not likely for another
1,500 years say scientists: http://www.gizmag.com/cornell-equation-aliens-1500-years/43907/
23/06/2016:
Why extremely rare events keep happening
all the time: http://www.chicagotribune.com/news/sns-wp-blm-rare-comment-4355e7ec-370a-11e6-af02-1df55f0c77ff-20160620-story.html
22/06/2016:
This Little Piggy:
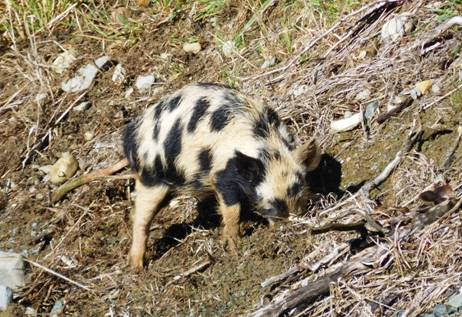
We
sighted foraging on our South Coast Track, Fiordland, NZ walk back in April.
Yesterday I spotted two more quickly disappearing into the shrubbery in a
forestry plantation near here on our afternoon walk. I had not even known till
then there were wild pigs in this part of Gippsland. These chaps had been doing
quite a bit of demolition work on the undergrowth nearby as you can see here:
I
mentioned back in May 2015 (http://www.theultralighthiker.com/jeeralang-deer/)
that over the years the number and type of deer around here had been increasing
steadily. Since then we have spotted a number of them on our afternoon walks
too. I guess deer can double their numbers every year given suitable conditions
- such as the bushfire regrowth we have had since ‘Black Saturday’. Pigs can no
doubt increase even more quickly.
What
a pity no-one introduced moose into Victoria (but perhaps they will!) I
remarked a few years ago about a pygmy hippo which had been shot along the Daly
River NT: http://www.news.com.au/national/pygmy-hippopotamus-shot-during-northern-territory-hunting-trip/story-e6frfkvr-1225798038412
. Life will find a way. Soon there may be cougars, maybe even bears roaming our
forests. What fantastic hunting opportunities are still ahead of us! Advances
in farming worldwide are leading to ever larger areas being returned to
wilderness. Our descendants will have a wonderful time exploring these exciting
vastnesses.
During
the 1860s gold rushes a crocodile was shot in the Wonnangatta River. It was
stuffed and displayed at Trail’s Hotel (Waterford) for many years until it
burned down. Many other strange creatures have turned up in Gippsland over the
years (http://www.oddhistory.com.au/gippsland/mystery-animal-of-gippsland/)
some fanciful, some such as the giant wombat and others mentioned here sent to
the Melbourne Museum for safekeeping. A grizzly bear, lion, elephant…
Before
you say ‘no such creatures can be out there still’ consider this. Last time an
organised hunt of Wilsons Prom was undertaken (1968) a hunter managed to ‘bag’
an Axis Deer, the first seen since they were released near Tooradin in the
1850s. My friend and I watched an utterly bizarre unknown creature on the
slopes of Mt Useful many years ago. Several times I have also encountered giant
echidnas in Gippsland – such as they have in New Guinea – ie an echidna about ¾
the size of a wombat! A number of times I have observed striped foxes and once
a striped dingo (ie black and gold vertical stripes - I even have a very poor
quality 35mm photo of it somewhere! I and other hunters have seen strange
creatures from time to time over the years – often it is only a glimpse.
An
example: in nearly forty years hunting in the Gippsland mountains I have only
once seen a wild emu in the forest (though I also once found an egg). However,
if you go for a drive after snow (such as we are to have on Friday down to 700
metres) you will see many emu tracks crossing the road, and those of lots of
many other seldom encountered critters. Tracks stand out astonishingly well in
fresh snow. At very least you will not believe how large deer tracks can
sometimes be. Driving on snowy roads is a beautiful adventure (but be careful!)
Maybe this weekend would be a good time to have a look around! Take the wheel
chains, and some fire lighters.
21/06/2016:
How to Become Gluten Intolerant: https://www.youtube.com/watch?v=Oht9AEq1798
21/06/2016:
You would not want to swap your life
with this woman’s. Neat tattoos though:
http://mentalfloss.com/article/81424/retrobituary-olive-oatman-pioneer-girl-who-became-marked-woman
19/06/2016:
The bottle rocket on steroids: this
would be a great project for an idle weekend: http://www.instructables.com/id/Rechargeable-Rocket-Launcher/

19/06/2016:
Great Way To Advertise a Shanghai: (which
are of course banned in nanny State Vic): http://www.outdoorsadventureoutlet.com/collections/featured-deals/products/alluminum-alloy-camouflage-bait-caster
18/06/2016: Go Land Rover: ‘In 2013, three friends
set off on a journey that they had been told was impossible: the north-south
crossing of the Congo River Basin, from Kinshasa, in the Democratic Republic of
Congo, to Juba, in South Sudan. Traversing two and a half thousand miles of the
toughest terrain on the planet in a twenty-five year old Land Rover, they faced
repeated challenges, from kleptocracy and fire ants to non-existent roads and
intense suspicion from local people. Through imagination and teamwork —
including building rafts and bridges to cross rivers, conducting makeshift
surgery in the jungle and playing tribal politics — they got through. But the
Congo is raw, and the journey took an unexpected psychological toll on them
all. Crossing the Congo is a story of friendship, what it takes to complete a
great journey against tremendous odds, and an intimate look into one of the
world’s least-developed and most fragile states.’ http://jungletrader.blogspot.com.au/2016/06/book_11.html
18/06/2016: Your life is less than ¾ of a million
hours (4 ½ million minutes). Neither the Government (nor anyone else)
should steal your time: http://www.coyoteblog.com/coyote_blog/2016/06/the-asymmetry-of-how-the-government-values-my-time.html
17/06/2016:
Google Cardboard Virtual Reality <$20:
This is simply the most amazing thing I have seen in along while. Turn your
mobile phone into a VR headset. Download 360 degree films from Youtube. My
son-in-law showed me one filmed on a roller coaster which was quite
breathtaking: https://vr.google.com/cardboard/index.html
17/06/2016:
People need to get out more: https://wattsupwiththat.com/2016/06/13/milky-way-now-hidden-from-one-third-of-humanity/
17/06/2016:
Philosopher Bertrand Russell called Karl Popper ‘s ‘The Open Society and its
Enemies’ "a vigorous and profound
defence of democracy." It is without a doubt one of the most important
works of the C20th. Increasingly liberal democracy is under threat. The ‘Open
Society’ is becoming the ‘Closed Society’. The elites rule the world. The
‘Philosopher King’ is not even a second-rate thinker any more. You can read
this great book for free here: https://archive.org/stream/opensocietyandit033120mbp/opensocietyandit033120mbp_djvu.txt
16/06/2016:
Black Diamond Spot 200 Lumens Head
Torch: This is a great new head torch. Black Diamond have boosted the
output on their new model from 130 to 200 lumens whilst still producing great
battery life (claimed 50 hours at 200 lumens with a claimed distance of 80
metres). It also has many other brightness settings as well as a red LED. It
weighs <90 grams with batteries. It is also waterproof. It is available from
US$30.
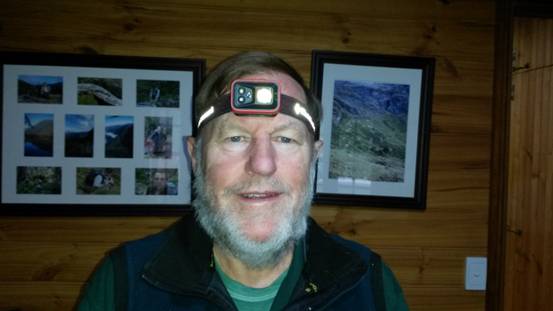
Maybe
due to increasing age/cataracts etc I had been having trouble focusing on
various inside jobs I have to do during the current wet weather with my old
head torch. This one has solved that problem. I admit it has somewhat of a
‘clunky’ appearance, but I am no beauty myself! It works brilliantly. Fiordland
NZ snaps in background.
What
they say about it: ‘Our most popular headlamp for everything from pre-work dawn
patrols to late-night rappels after a long day, the Black Diamond Spot Headlamp
now features 200 lumens of power in a waterproof package. Featuring PowerTap
Technology, easy on-the-fly brightness adjustments are literally at the tip of
your fingers. At first touch, the proximity light is illuminated, eliminating
the headlamp shuffle when transitioning from camp tasks to low-light
activities. With a handy lock mode, the Spot is safe from accidental battery
drain while in your pack or pocket.
One
TriplePower LED, one SinglePower white LED and one SinglePower red LED emits
200 lumens (max setting)
PowerTap
Technology allows fast and simple transitioning between full and dimmed power
in order to instantly increase illumination in distance or proximity modes
Red
night-vision mode has proximity and strobe settings, and activates without
cycling through the white mode
Sleek,
low profile design uses three AAA batteries and three-level power meter shows
remaining battery life for three seconds after switching on headlamp
Settings
include: full strength in proximity and distance modes, dimming, strobe, red
night vision and lock mode
IPX8: Waterproof—Tested to operate up to 1.1
meters underwater for 30 minutes. If submerged, water may enter the battery
compartment and it will still operate, and it should be dried out completely
afterwards.’
15/06/2016:
Ultralight Pen: World’s lightest pen?
Perhaps. Anyway at @ 1 gram and for US$3 you have a 2 ½’ (6.5cm) pen which will
write on practically any surface, even upside down or under water or in space.
Fisher
Space Pen’s Sealed Pressurized Ink Cartridge: Performs in temperatures from
-30ºF to +250ºF, underwater, in zero gravity, at any angle–even upside down!
The ultimate in dependability! The choice of ski patrols, search and rescue
teams, law enforcement agencies, armed forces, and everyone who demands
reliability in a writing instrument.
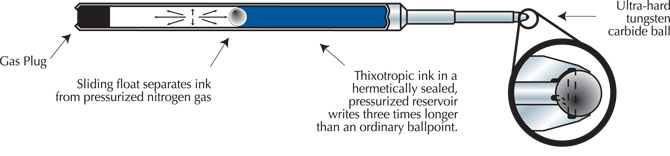

The
PR Cartridge is the fat one in the middle.
The U Cartridge is the skinny one on the top and bottom. When it arrives
it will be long like the top image shows.
It is made this way to fit several different pen barrels. If you need it to be shorter, just flex it
back and forth at the break point and it will separate, leaving you the correct
length.
Cartridge. Please note: the U Cartridges contain a much
smaller amount of ink, they write about 1200 feet depending on your writing
style, as compared to the regular PR Cartridge which should write more than
12,000 feet depending on style and surface.
POINT
SIZES - Fine contains a .9mm Ball - Medium contains a 1.1mm Ball - Bold
contains a 1.3mm Ball. Comes in 9 different colours. The ‘U’ refill costs about
US$3: http://www.spacepen.com/cartridge.aspx
Use with: http://www.theultralighthiker.com/waterproof-notepads/
14/06/2016:
Steve’s Mulligatawny: Again, not a
hiking meal but a family favourite. It may sound like a curious blend of
flavors (it is not actually an Indian recipe -as you would think) but quite
delicious nonetheless. Your taste might dictate a little more curry perhaps but
these ingredients keep my family happy. Enjoy:
Ingredients:
2
tablespoons oil
1
lge onion, chopped
3
garlic cloves, crushed
1
small chilli, seeded and chopped
700g
chicken thighs
1.5
cups red lentils, rinsed
2
celery stalks, chopped
2
carrots, chopped
2
lge potatoes, peeled and chopped
1
apple, chopped
1
red capsicum, chopped
2
teaspoons dried cumin
1
teaspoon coriander
1
teaspoon turmeric
Half
teaspoon cinnamon
2
litres chicken stock
2
sachets (=2 cups) coconut milk powder
2
teaspoons Clive of India curry powder
Salt/pepper
Juice
of one lemon
Chopped
fresh coriander for servin
Method:
• Cut chicken into cubes and brown
in hot oil. Remove
• Fry onion, garlic and chilli in
hot oil, then add spices and cook 2 minutes
• Add all ingredients EXCEPT coconut
milk powder and lemon juice
• Cook 30-40 minutes until thick
• Add coconut milk powder mixed with
water and lemon juice.
• Serve garnished with chopped fresh
coriander.
13/06/2016:
Ultralight Knife Sharpener: OK, so
you have your ultralight knife (eg the Kabar Johnson Adventure Piggyback I have
recommended so often (http://www.theultralighthiker.com/carry-a-knife/)
which you have used so many times for cutting up your lunch on the trail (http://www.theultralighthiker.com/lunch-on-the-trail/)
or splitting twigs to make a fire in the wet (http://www.theultralighthiker.com/how-to-light-a-fire-in-the-wet/)
, and it is blunt, so you need something even more ultralight to sharpen it. I
have chosen some options below which are all under 20 grams so they won’t break
your back carrying them against this eventuality:

Eze-Lap
Model S: 2-1/4″ Diamond D shaped shaft with groove for fishhooks. Opens
to 5-7/16″. Stores in pen type cap.
19.5 grams. Sharpener without cap: 8 grams. I have carried and used mine
like this for years (just the black bit in the photo below) http://eze-lap.com/hunting_fishing_outdoor_use/pocket-sharpeners/
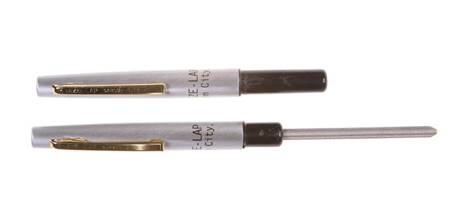
Also
available, their Model SD 2-1/2″ Diamond D Shaped Shaft with a groove for
fishhooks with Hook Disgorger on the end. Handy.
And
Model ST: A pocket sized sharpener with
tapered shaft for serrated blades.
The
DMT Diamond Mini-Sharp® Sharpener 17 grams: https://www.dmtsharp.com/sharpeners/pocket-models/mini-sharp/

The
Lansky Mini Dog Bone Crock Stick Ceramic Knife Sharpener 19.4 grams

I
particularly like this one as you don’t need to have any particular skill at
knife sharpening. The Gerber Ceramic Pocket Sharpener 17 grams. I even use mine
for touching up my machete, though it you want a really good edge (eg for
skinning a sambar) you will need to finish off a bit.
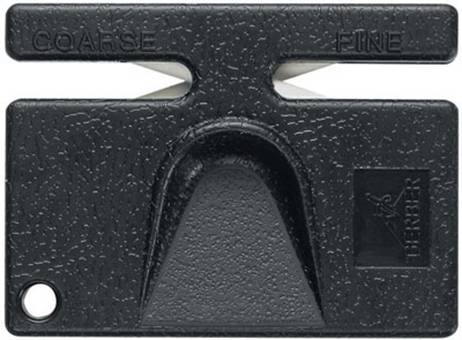
Even
lighter, a small piece of 2000grit or 2500grit sand (metal) paper wrapped
around a stick works - or you could learn to use such things as a well worn
stone from the stream (0 grams)! The old mountain men after all kept their
knives sharp this way!
11/06/2016:
A Soft Pillow and a Warm Bed Under the
Stars: Comfort. That’s what it’s really all
about. A few extra ounces ought not to be sacrificed to inadequate rest. That’s
why we always carry our Cyclone Chairs (http://www.theultralighthiker.com/cyclone-chair/)
@ 180 grams so we can really enjoy the time at the end of the day. We
use Thermarest Neoair Xlite Women’s (http://www.theultralighthiker.com/new-hiking-mat-425g/)
sleeping mats @ 340 grams and Exped UL Pillows @ 45 grams (http://www.theultralighthiker.com/exped-ultralight-pillow/)
It
is important to always have enough clothes/adequate sleeping bags so you are
toasty warm all night (without sweating, which will ruin the insulative ability
of your clothes, bag etc). We have found the Montbell range lightweight and
excellent (http://www.montbell.us/)
such as their ‘Thermawrap series of coats and vests in synthetic and their
ultra light down range such as the ‘Superior’ and ‘Ex Light’ eg http://www.montbell.us/products/disp.php?cat_id=2001&p_id=2301218&gen_cd=1
which can weigh as little as 156 grams. For sleeping I like their
Ultralight Super Spiral Down Hugger #3 bag (@-1C & 595 grams) myself.
When
the temperature drops below freezing I put a coat on the top half of my body
and a vest on the lower half. This takes pone down at least another 5-10C
without carrying any extra weight. A warmer sleeping bag will also likely be
too warm for usual camping conditions in Australia. When it gets really cold
the bag has a draw string which can be pulled in so only your mouth and the
bottom of your nose are poking out. NEVER breathe in your bag! I also own a
pair of down sock such as these https://goosefeetgear.com/products/1-down-socks
if my tootsies should feel the chill.
Of
course we have a dry tent (such as this http://www.theultralighthiker.com/honey-i-shrank-the-tent/)
and a warm fire out front, and of course two dogs for when it is a ‘two-dog
night’!
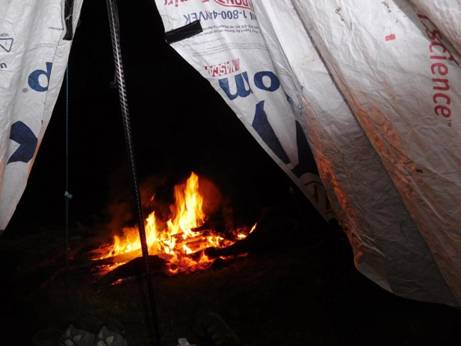
‘Down
and synthetics both have pros and cons. Down is:
Synthetics
are:
In
specific regard to the issue of moisture sensitivity, I want to point out that
synthetic insulations are absolutely not “warm when wet” like
is often claimed. Moreover, down is so much more thermally efficient that even
moisture-degraded down will be as warm for its weight as dry synthetic
insulation. Finally, I’ve never had my down insulation get truly wet. Damp
from high humidity, yes, but never wet from, say, having worn it in the rain or
fording a river — that’s what my rain jacket and pack liner are for.
With
the introduction of water-resistant down a few years ago, synthetics lost much
of their wet-weather advantage. So now it’s mostly a cost and ethical
consideration.
With
few exceptions my preference is down. It’s the superior insulation, especially
as one who tends to backpack in dry environments and as someone who can justify
their purchases with extensive use. And, equally important, down is a better
long-term investment — my heavily-used down pieces are almost as warm now as
they were when new, whereas my synthetic-fill pieces are limp, lifeless, and
needing replacement after just a season of daily use.’ http://andrewskurka.com/2015/backpacking-clothing-stop-insulated-jacket-pants/

09/06/2016:
A good emergency lightweight tarp
clip that will not let go: http://www.easyklip.com/ Mini = 12 grams. Of course,
this remains the lightest tarp clip: http://www.theultralighthiker.com/worlds-lightest-tarp-clip/
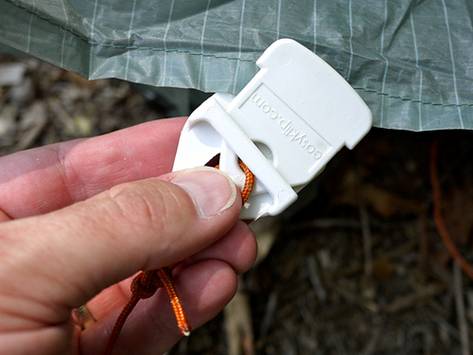
08/06/2016:
DIY Self-Tensioning Guylines: I am
not so keen on elastic rope (it is heavier than dyneema) and much of the
problem of stretch can be overcome by caternary cutting the silnylon or using
fabrics with very low stretch such as tyvek or cuben fibre, but nonetheless
this method of keeping your tent taut is worth sharing: http://gossamergear.com/wp/diy-self-tensioning-guy-lines-2
A sprung tip on my tent pole ( I use a one-pole set-up) would have the same
effect with less trouble. May work on this.
07/06/2016:
What Jack Russells Are Really For: ‘Back
before everyone lost their minds, the role of a man and a dog and a rat in
nature’s pecking order was well understood.’ Severn Valley Ratters and Friends
Go Ratting! 200 Rats Killed. Spot would have loved this. Can I recommend a
related ‘great read’? ‘Tales of a Rat-Hunting Man’ by David Brian Plummer (https://books.google.com.au/books/about/Tales_of_a_Rat_Hunting_Man.html?id=aqevZC225YYC&redir_esc=y)
one of the highlights of which is hunting a myriad of rats from the carcass of
a deceased circus elephant in an English ‘maggot factory’. Yes!
It
recalls an adventure I had fox hunting with den dogs and hounds around
Anderson’s Inlet, Gippsland many years ago. This day we came across the carcass
of an enormous whale beached on the shore. Both the terriers and the
bloodhounds entered the whale by various rents in its monstrous carcass.
Believe me you have never heard a rumour of a mournful howl till you ponder at
the belling of a bloodhound from the depths of a giant whale. It would put the
‘Hound of the Baskervilles’ utterly to shame! Over a dozen foxes issued forth
and were promptly dispatched with shotguns. We had to draw straws over skinning
them: they smelt so dreadful. The dogs had also to be sent to Coventry for some
time after as the vile odour of the dead cetacean was quite overpowering! It is
astonishing that women’s perfume was ever made of such terrible stuff! https://www.youtube.com/watch?v=yCsYg82fBeo
07/06/2016:
Waterproof Notepads: If you spend much time at all outdoors,
sometime the need to make a note in the rain will occur. Then you will need
some waterproof paper such as http://www.riteintherain.com/ (since
1916!) or http://www.myaquanotes.com/
etc. You will also need a light pen such as a waterproof pen refill http://www.riteintherain.com/blue-ink-refill-all-weather-pen
or a Fisher’s Space Pen refill http://www.spacepen.com/ which will even
write under water or in space!
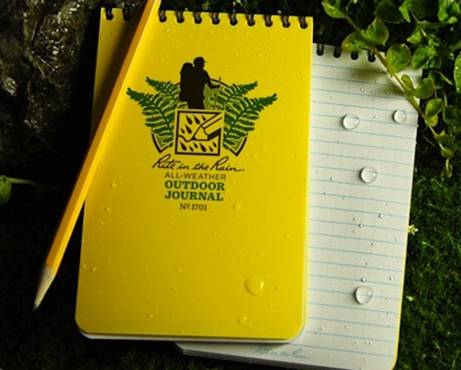

04/06/2016:
The Last of the Mountain Men. Isn’t
this the feeling everyone who ventures far from track or trail is seeking: the
freedom of the wilderness, the exultation of the hills, the distant roar of
rapids, the whistle of wind in the trees, the ubiquitous echo of birdsong, the
warning bark of a deer in the sunset… Della and I are back from three days and
approx 50 km walking in one of our own trackless wildernesses in the Gippsland
mountains, testing out ourselves and the functionality of our http://www.theultralighthiker.com/the-deer-hunters-tent/
for two hikers plus two dogs. As Della is partially sighted I have now cleared
a walking path approx 60 km long to make our journeys there easier – and there
is so much more to explore still downriver and up the three major valleys
encountered so far to keep me busy in the future.
We
need to do a little more work on warmer clothes for Della as she sleeps rather
cold. A down hood and a pair of Montbell’s ‘Thermawrap’ trousers should do the
trick (added to her down socks, two insulated jackets plus vest and -7C down
sleeping bag). On the same night where she was still a little cold (in all but
the hood and trousers) I was quite warm enough in a -1C down sleeping bag in
singlet and shirtsleeves with no socks. We are all different.
The
4WD track which gets us to within 5km of the river is very overgrown. This is a
good section. A couple more summers and we will be walking all the way, but we
will keep on driving it down whilst we can.
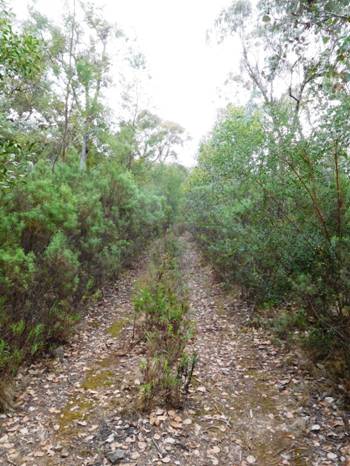
Around
a 10 km walk to the riverbank where we made our bed. A toasty warm fire heats
our tent where we are serenaded by the river’s murmur at the end of Day One.
Morning
has broken. Spot loves to help Della with the dishes.
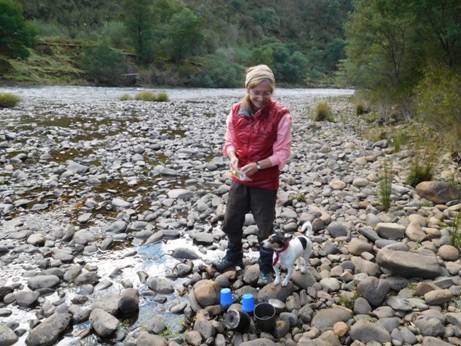
Though
a little crowded, as you can see next morning we all fit into the little tent.
You can picture us sitting on our Cyclone Chairs at the entrance watching the
best show in town, the flickering of the embers of a night as we enjoy our hot
chocolate before bed.
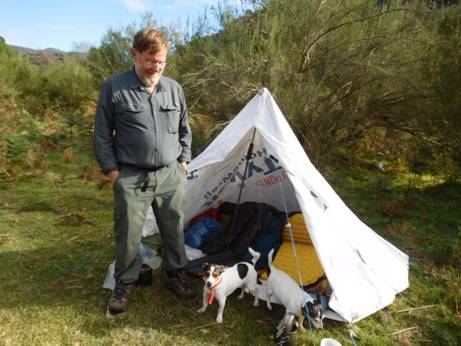
In
summer we will venture the river too on a multi-day trip with our packrafts. It
looks quite delightful. Here is a major rapid we could still hear roaring at
night from approx 5 km away!
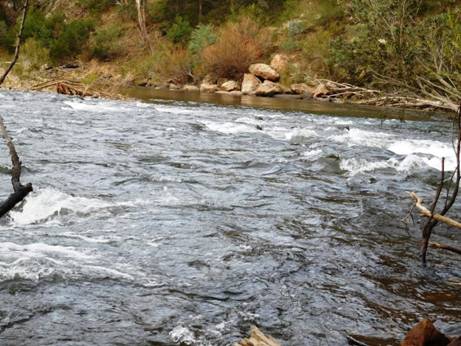
You
never tire of gazing at water on stone. Will need to watch out this one does
not tip us out of the canoes.
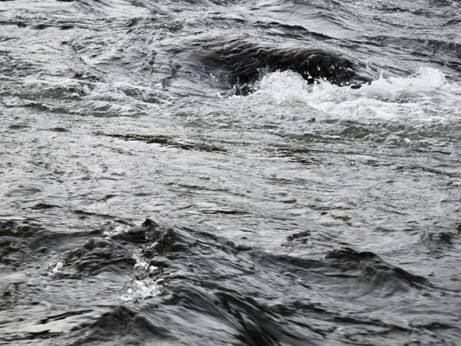
It
is a beautiful stretch of river.
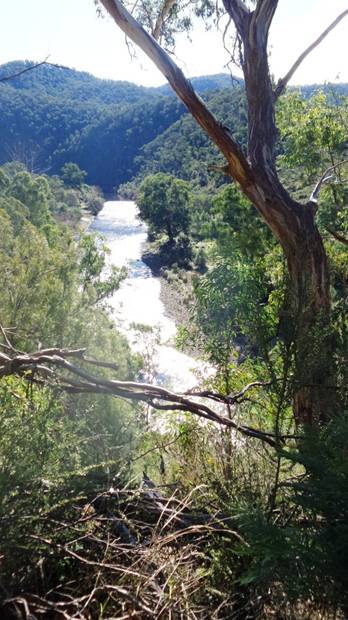
And
just keeps going on and on…
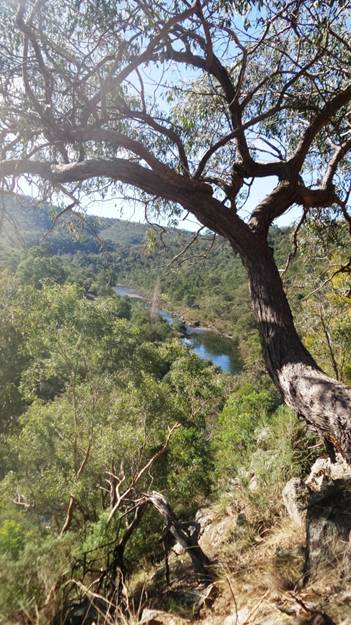
The
second night we camped high on a wonderful clear ridge with a magnificent view
of the river and the huge valleys all about. Sunset was memorable. In Della’s
photo here you can see the tent tinged with it as we put it up and I gather some
kindling in the background. Tiny has already settled in for the night.

Tiny
was quite tired out - she is 16 ½! She loves Della’s sleeping bag.
This
young ‘black velvet’ fellow was harvested for meat. Amazing ears.

Tiny
below. Both the dogs love to sit on the packs during rest stops.
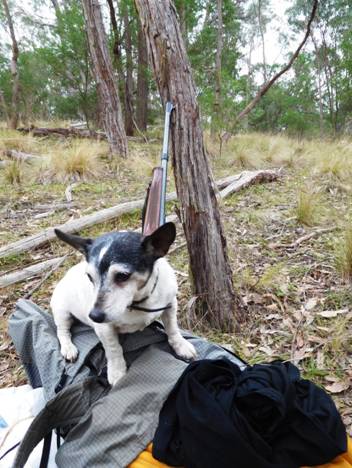
The
tent proved excellent for one – if a little crowded for all four of us, but at
<750 grams (in Tyvek) it is an easy carry. I will be remaking it (soon) with
a cuben fibre roof and 1oz/yd2 silnylon poncho floor – perhaps even with
.7oz/yd2 insect netting at the front door. This version should be well under
400 grams, so will undoubtedly become my ‘go anywhere’ tent.
See
also:
http://www.theultralighthiker.com/spots-hunting-adventures-1-mystery-river/
http://www.theultralighthiker.com/spots-adventures-mystery-river-2/
http://www.theultralighthiker.com/spots-hunting-adventures-mystery-river-3/
http://www.theultralighthiker.com/not-quite-alone-in-the-wilderness/
04/06/2016:
82: Go for it bro: ‘If I don’t fall
down or fall ill, I’m going to do it. That’s the one thing about me – when I
set my mind to something, I’m going to see it through…That will be the hardest
part of the whole thing, I won’t see my dog Molly once.’ https://gearjunkie.com/dale-sanders-oldest-to-complete-appalachian-trail
01/06/2016:
Della’s Chilli Con Carne with
Cauliflower Rice for tea last night. We will be eating a lot more of this
instead of real rice. You can also make fried rice. Blitz cauli florets in food
processor (very) briefly until it resembles rice. Toss in a frypan in a small
quantity of olive oil approx one minute. Serve! Delicious – and so good for
you. Forget carbs! See: http://www.theultralighthiker.com/this-book-may-save-your-life/
01/06/2016:
Ultralight Hiker on Pinterest: https://au.pinterest.com/source/theultralighthiker.com/
I have hundreds of ‘pins’ here (and many more to add!) Perhaps you would like
to ‘follow’ me there or ‘pin’ some of them to help me spread the word? Also,
perhaps you might like to ‘Share’ some of my http://www.theultralighthiker.com/
posts on Facebook too (or ‘Follow’ it) or ‘Like’ my Facebook page https://www.facebook.com/theultralighthiker/?ref=aymt_homepage_panel
! Hope you are enjoying my posts. Thanks for your help.
31/05/2016:
Fitting Your Backpack: This is
really good advice. Apart from having a backpack which is too heavy and too
large, the next biggest mistake people make is not having chosen/made it the
correct torso length then not having put it on correctly: http://gossamergear.com/wp/how-to-size-and-fit-an-ultralight-backpack
Gossamer
gear Gorilla: http://gossamergear.com/gorilla-ultralight-backpack-all-bundle.html
31/05/2016:
Windows 10: Just a reminder: This
App will block it or get rid of it. It works: http://ultimateoutsider.com/downloads/
30/05/2016:
The Vorso Mark II Spinning Top:
Never too old for toys. What a beauty. Spins for 9 minutes. You would just have
to opt for the ruby model: https://www.massdrop.com/buy/the-vorso-mk1-spinning-top
& http://www.vorsospin.com/ Currently on
Massdrop for US$39.99.

29/05/2016:
Amazing Mobile Apps: Altimeter,
Barometer and Thermometer: Accurate Altimeter: https://play.google.com/store/apps/details?id=com.arlabsmobile.altimeterfree&hl=en & Smart Thermometer: https://play.google.com/store/apps/details?id=com.colortiger.thermo&hl=en (also does humidity and air pressure).
29/05/2016:
Honey, I Shrank the Tent: I thought
I would make a slightly smaller
‘Decagon’
tent. It turned out to be over 250 grams lighter than the original model. See: http://www.theultralighthiker.com/new-decagon-octagon-tyvek-igloo-tent-design/)
This
one has ten equal sides 6’6” on the outside edges and 2’10” (198cm & 86.5 cm ) across the bottom. It
makes a tent which is still over 9’ x 7’6” (270 cm x 225cm) inside and 5’2”
(155cm) high at the apex and 40” (1 metre) at the door. It is wide enough for
two to sleep sideways but long enough for two to sleep lengthways too. Roof
only weight: 607 grams complete with guys, tie-outs, etc in Tyvek Homewrap
weighed this afternoon on my kitchen scales. The new (1 oz/yd2) silnylon poncho
floor (http://www.theultralighthiker.com/hole-less-ponchoshelter/)
will weigh approx 130 grams. You will need 10 x (eg) Vargo Shepherd’s Hook
stakes (http://www.theultralighthiker.com/tent-stakes-and-tricks/)
to set it up (80 grams). Total weight:
817 grams. This is more than satisfactory for such a large area.
Another
change I made to this tent is cutting off 1’ from the doorway arch and adding
closeable storm flaps which overlap at the top and join at the bottom. This
will make the tent enormously more waterproof in really bad weather. It also
means that it can be set up as a decagonal tipi with one corner high enough off
the ground you can just wriggle in underneath.
I
will be making a 1oz/yd2 silnylon model. I anticipate the roof will be under
350 grams, plus 130 grams for the poncho and 80 grams for the pegs = 560 grams!
As I will be making one for an anticipated Qld rainforest hiking trip I will be
sewing in a 1.35 oz/yd 2 silnylon floor and .7 oz/yd2 insect netting. I figure
this will not add more than another 100 grams (if that), so a total of eg 650
grams! It will also cost me only about $100.
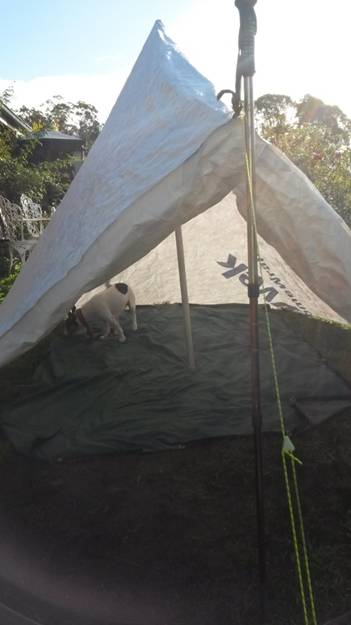
Fully
open mode: Spot checking it out.
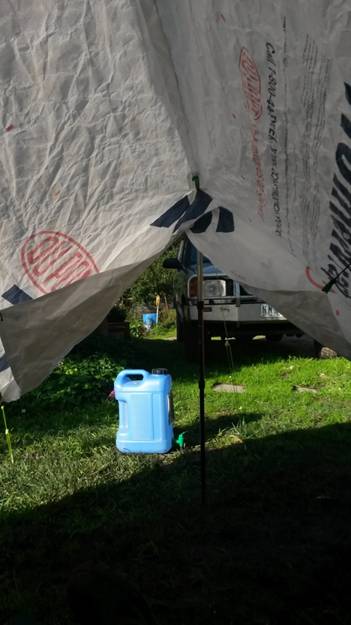
View
looking out. You would normally have a fire about where the 10 litre drum is.
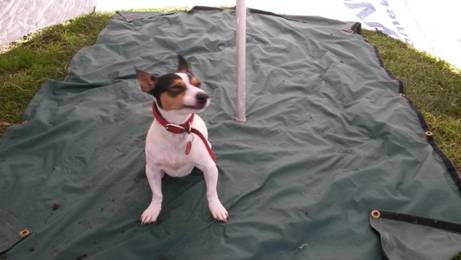
Spot's
'seal of approval'. That's a 5' x 7' (150 cm x 210 cm) poncho tarp lying on the
floor with plenty of room to spare!.
Storm
mode with doors closed. Still 1' (30 cm) of ventilation at the bottom, or room
for a dog to go in and out.
Side
view.
Rear
view: the wind will go right round this tent.
Clothesline
along the front ridgeline (yellow cord). NB the Dyneema tent pole reinforcement.
I just cut a circle of Dyneema and sewed it on after I had joined the two
pieces of Tyvek together (roughly a half circle (7 slices) and a quarter (3
slices). I then cut the slice of Dyneema I didn’t need out and sewed the two
edges of the tent together to make the tipi shape. NB: Leave eg @ 1” extra to
all your pieces for joining – likewise at least ½” for a hem around the bottom.
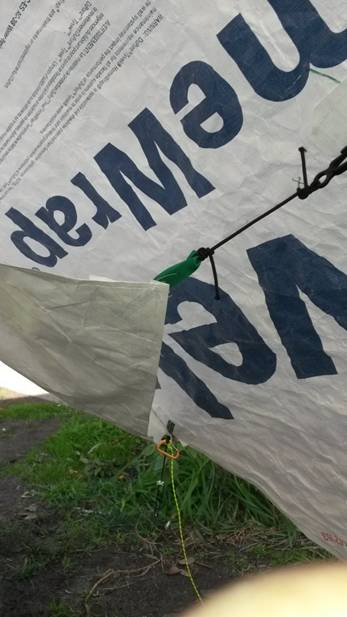
The
'doors' just hook back to loops sewn into the walls. To close, wrap hook around
hiking pole and hook onto itself. No zips.
Setting
up: Use a carabiner to join the two corners either side of the door arch
together. Now it is an octagon. Pin out the corner opposite the door, then the
two either side of that corner. They will be slightly forward of it. Then
insert the centre pole. Attach the other pole and peg it straight out (You can
move it later). The tent will now stand up by itself. Starting at the back go
around pegging all the corners out. When you get to the two either side of the
door remove the carabiner from one loop. A little adjustment may be needed to
get all the corners standing taut. It is the second easiest tent to put up I
have ever owned. The even easier one is: http://www.theultralighthiker.com/the-deer-hunters-tent/
In
really bad weather – or if there is a crowd - the tent also sets up as a
decagon. One corner is about 1’ off the ground where you can crawl in. The
decagon makes a tipi style tent which is @ 10’
in diameter.
When
hunting I will usually just break a couple of bush sticks for the poles, one 5’
2” (155cm) tall, the other about a 40” (1 metre) – or I can use our hiking
poles if hiking.
This
is really a lovely tent and was fun to make. You should have a try at one. If
you can’t get your hands on some Tyvek, you could make it very cheaply out of a
couple of blue poly tarps (not so fireproof though!).
As
usual, make one of these for your own use but if you want to manufacture them,
I would like some credit – and some cash, please!
See
also:
http://www.theultralighthiker.com/new-decagon-octagon-tyvek-igloo-tent-design/
http://www.theultralighthiker.com/does-spot-like-to-hunt-deer/
http://www.theultralighthiker.com/tyvek-solo-fire-shelter/
http://www.theultralighthiker.com/tyvek-tent-designs/
http://www.theultralighthiker.com/tyvek-twin-fire-shelter/
http://www.theultralighthiker.com/one-pole-tyvek-tipi/
http://www.theultralighthiker.com/tyvek-bivi/
http://www.theultralighthiker.com/new-tyvek-forestertent-design/
http://www.theultralighthiker.com/tyvek-jack-russell-rain-coat-13-grams/
http://www.theultralighthiker.com/catenary-curves/http://www.theultralighthiker.com/ultralight-chairgrounsheet/
http://www.theultralighthiker.com/this-book-may-save-your-life/
http://www.theultralighthiker.com/pedometer-app/
http://www.theultralighthiker.com/free-willdeterminism/
http://www.theultralighthiker.com/you-will-not-live-forever/
28/05/2016:
Pedometer App: Much cheaper than a
‘Fitbit’, etc. Look on Google Play. There is any number of them free. I am
using Walklogger. Your data might
look something like this (if you spent Sunday and Monday in bed – copied this
image from Google). Michael Mosley’s great book http://www.theultralighthiker.com/this-book-may-save-your-life/
which will make you well again (as you may never have been) recommends 10,000
steps (plus the diet) a target which will keep you quite busy; it will
certainly change your routines if you are to achieve it, but it will also get
you ready for longer multi-day hikes: The DSouth Coast Tarck Fiordland NZ
beckons: http://www.theultralighthiker.com/westies-hut/
. The alternatives are ill-health and death; not much of a choice really.
Surprising really how many people are determined to commit suicide by mouth!
27/05/2016:
Steve’s Pasta
E Fagioli: Della was off being crafty again, leaving me a temporary
widower – so I had to shift for myself. I made THIS excellent soup. I think it
is very nearly the best meal I have ever made, so I will share it with you:

Ingredients:
1
tablespoon olive oil
2
med onions chopped
2
lge cloves garlic chopped
1
lge carrot chopped fine
2
stalks celery chopped 1 cm cubes
500g
thin pork sausages (browned &) chopped approx 20mm
2
teaspoons dried oregano leaves
1
teaspoon dried basil leaves
2
Teaspoon sweet paprika
1
400g can chopped tomatoes with juice
4
cups chicken stock
1
400 g can cannelloni beans
1
cup very small shell pasta (1cm)
2
tablespoons fresh chopped parsley
Directions:
- Heat
olive oil I a large pot medium heat
- Add
and brown sausages (chop)
- Cook
onion in oil 2 minutes
- Stir
in garlic, carrot, celery and cook 3 minutes
- Add
basil, oregano and paprika
- Toss
to coat
- Stir
in tomatoes and stock
- Bring
to a boil
- Reduce
heat and simmer 30 minutes
- Stir
in beans and tiny pasta
- Simmer
8 minutes until pasta is tender
- 12
Stir in parsley and serve; (Serves 4-6)
PS:
To lower the GI I guess you could sub some cauliflower for the tiny pasta and
it would taste just as good. Cheers.
26/05/2016:
Clear PVC backpack Lid for Solar
Charger: I have this wonderful little solar chargerhttp://www.bushnell.com/hunting/outdoor-technology/powersync/solarwrap-mini
which is useful for battery back-up as it contains a 2200 Ma battery, and will
recharge tired batteries. The trouble with such a device on the trail is that
it is hard to deploy whilst walking, particularly if it rains a bit
(electronics really hate water). You can attach it with a bit of string through
the hole one end, and drill two holes through the end clips so that it can be
attached at the other end. This will allow you to drape it down or over your
backpack.
For
a further modest investment you can place it and the item to be charged in one
of Sea to Summit’s map cases which have enough attachment points to obviate
this. I am going to make a PVC lid myself (using a waterproof zip which exactly
fits my backpack (so it will stay in place) and which is easily removable when
you want to get something out of your backpack.
I
have the Bushnell Solarwrap Mini Dimensions: Weight: oz
3.1 oz, Size: in 4.3" x 1.25"
Deployed Length: in 18.25"
Nonetheless it looks like it will fit in the Medium map case with the ‘tail
folded over: http://www.seatosummit.com.au/products/outdoor/tpu-guide-map-cases/
(about A$30) You may find something else suitable on eBay cheaper but most do
not have attachment points both t=ends.
At
78 grams I feel this is a little too heavy for the purpose. It is also nearly
twice as wide as it needs to be. If I make my own it will come down to more
like 50 grams, I'm sure. A small price to pay though really for always having
all batteries fully charged. Also I should be able to not carry at least an
equivalent weight of unneeded batteries.
See
Also:
http://www.theultralighthiker.com/mobile-phone-battery-life/
http://www.theultralighthiker.com/charging/
http://www.theultralighthiker.com/power-from-heat/
25/05/2016:
This Book May Save Your Life: At
very least it will make it enormously better. Enough that you can look forward
to enjoying hiking in your 70s, 80s and 90s (coming up sooner than you think!)
It will totally CURE Type 2 Diabetes in 8 weeks! Get a copy now: ‘The 8-week
Blood Sugar Diet’ Michael Mosley: http://www.amazon.com/8-Week-Blood-Sugar-Diet-Reprogramme/dp/1780722400
US$7.13 or : https://kat.cr/the-8-week-blood-sugar-diet-how-to-beat-diabetes-fast-and-stay-off-medication-epub-zeke23-t12373712.html

24/05/2016:
Bathtime on the Trail: The One Gram
Platypus Shower: An ordinary water bottle cap will fit any Platypus bottle.
You can make holes with a large needle (doll needle pictured – much safer).
With nine holes as pictured one litre lasts 6 ½ minutes. I usually carry one 2
litre Platypus and a one litre one. Della carries the same. Similarly each has
a pot of approx one litre capacity.
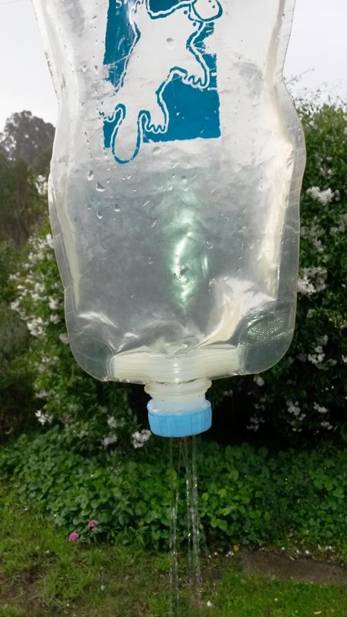
A
litre of boiling water added to a litre of cold water makes a pretty good
shower temperature. 4 litres of water each gets us pretty clean in the
backcountry where there is plenty of wood to provide the heat, eg with this: http://www.theultralighthiker.com/the-egg-ring-ultralight-wood-burner-stove/
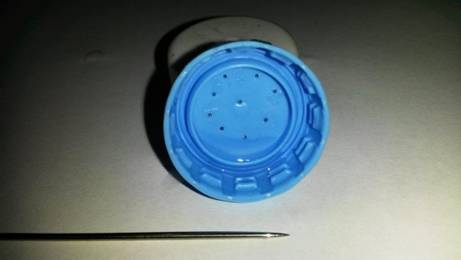
A
couple of grommets in the base of the Platypus bottle (both on one side) will
allow you to hang it up from a carabiner on a piece of string. A loop tied in
the string a little higher up will allow you to catch the neck of the bottle to
turn the shower off. I am working on converting one of those water bottle
on/off bite valves which some water bottles come with to a shower for the same
purpose. Looking for a cap which can be glued on which is just the right size.
Like
this (7 grams):
See
Also: http://www.theultralighthiker.com/?s=hygiene
There
are a variety of purchasable models of this device (some very dear) and all of
which weigh more than a gram! Make your own and convert your Platypus bottles
for hanging (2 minutes max)
Also
see:
http://www.amazon.com/Platypus-7594-Shower-Kit/dp/B000J2H8ZE
http://www.instructables.com/id/Water-bottle-sprinkler-cap/
http://www.theseedbomblaboratory.com/bottle-top-sprinklers.html
http://www.ebay.com/itm/WATERING-CAP-ATTACH-SOFT-DRINK-BOTTLE-PLANT-MINI-SPRINKLER-SHOWER-PLASTIC-x6-PC-/161933729804?hash=item25b400a00c:g:znkAAOSwK7FWhMc2
http://www.bottleshower.com/about/
http://www.treehugger.com/gadgets/pocket-sized-gadget-repurposes-plastic-water-bottles-portable-shower-or-wash-station.html
http://spatap.com/ Video with times (https://www.youtube.com/watch?v=BzV7ZyYXFvA)
http://www.instructables.com/id/Simple-Handheld-Camping-Shower/?ALLSTEPS
http://www.amazon.com/Portable-Camping-Shower-Simple/dp/B00DVXXIQQ
http://vandogtraveller.com/the-bottle-cap-camping-shower-by-matt/
24/05/2016:
How to Grow Old: Ancient Wisdom for
the Second Half of Life Hardcover by Marcus Tullius Cicero (Author), Philip
Freeman (translation) US$9.72 ebook: http://www.amazon.com/How-Grow-Old-Ancient-Wisdom/dp/0691167702/ref=pd_sim_sbs_14_2?ie=UTF8&dpID=41Gb5-RT52L&dpSrc=sims&preST=%3Cu%3EAC_UL320_SR214%2C320%3C/u%3E&refRID=1YPHKCS3JRJ780Y8WWBD
23/05/2016:
The Egg-Ring Ultralight Wood Burner
Stove: This is a development of the traditional ‘three-stone fire’ using
three tent pegs and an egg-ring. The aluminium egg-rings cost $8 for 3 on eBay
and stop the pegs from falling in/out. You need to drill three equidistant
holes around the edge. Presumably you already carry tent pegs. These are the
Vargo’s Shepherd’s Hook Titanium Pegs I wrote about here: http://www.theultralighthiker.com/tent-stakes-and-tricks/ They weigh 8 grams each. You would be better
with the plain ones for this purpose, though the paint will quickly burn off
I’m sure. The pot is Vargo’s Titanium 450 ml ‘Travel Mug’ with the stay-cool
rim (62 grams) http://www.vargooutdoors.com/titanium-travel-mug-450.html#.V0E8kuS8vcs
The
egg ring fits even in this cup when not in use. The egg-ring weighs 11 grams. A
titanium windscreen would be a useful addition adding perhaps another 3-4
grams: http://www.theultralighthiker.com/windscreens/
You can see Spot approves of the set-up. If you haven’t an egg-ring and/or you
want to make the set-up lighter, you could cut the top off a tin can (one which
has a ring pull) with a can opener which cuts around the wall of the can. This
will produce a lighter ring when you take the top off. If you can find a
largish aluminium cat food can, this ring might only weigh 3 grams. If you use
the 1 gram stakes I used here http://www.theultralighthiker.com/ultralight-multi-fuel-stove-cookset/
you will have a set-up which weighs only 6-7 grams. Beat that!
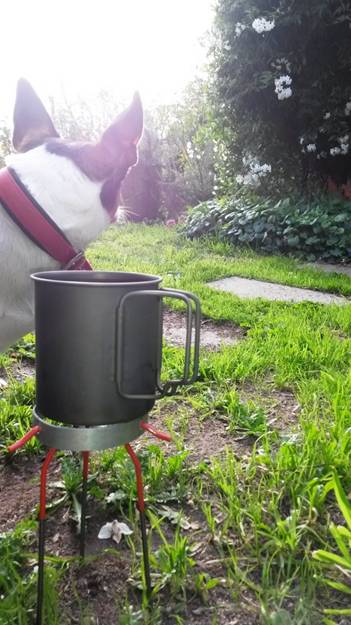
22/05/2016:
Cloud Forests of Nth Qld: Mid winter
is the time to visit and do some fascinating hikes in this part of our country.
14 July is the average coldest day in Cairns (22C). It is 5-10C cooler up on
the tablelands and in the high cloud forests, so pleasant walking then. There
is a huge expanse of country up there which is @ 1500 metres up. Bartle Frere
may be our place to start. We really enjoyed its environs (Babinda Boulders,
Josephine falls etc) on our last trip Nth. There are some fine sounding walks
further Sth around Cardwell/Tully etc. Will be checking for deals on ‘Tiger’
for around that time. Lambing time too unfortunately, though that is not so
hectic now we are retired from large-scale sheep raising:
http://www.nprsr.qld.gov.au/parks/misty-mountains/pdf/misty-mountains-general-map.pdf
http://www.tablelandadventureguides.com.au/2010/07/main-peak-trek-bartle-frere/
http://www.nprsr.qld.gov.au/parks/great-walks-wet-tropics/
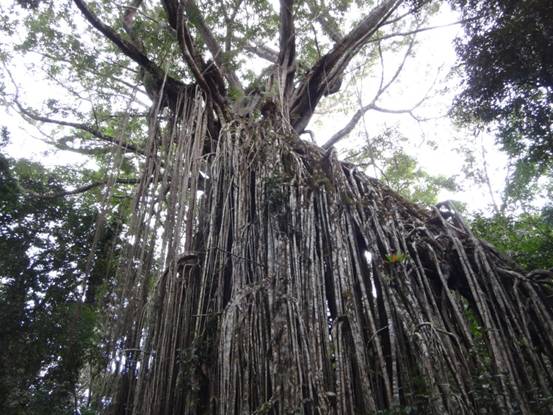
20/05/2016:
This would have to give you pause
about venturing into croc country! Lots more great outdoors pics here: http://www.rivermenrodandgunclub.com/cool-and-different-pictures.html

19/05/2016:
Stoveless Cooking: Warning: This may
not be for everyone: http://gossamergear.com/wp/stoveless-camping-crotch-pot
‘This
third option between stoves and no-cook is the brainchild of
Gossamer Gear founder Glen Van Peski. Infrared images of the human body confirm
what is basically common knowledge; one of the hottest parts of the human body
is the crotch area. Your body naturally generates significant heat while
hiking; why not harness this heat for a warm dinner…Glen has used this system
for years, and we finally talked him into exposing it to the
rest of us. The
Crotch Pot™ is constructed of ultralight cuben fiber, and attaches to
any pants with belt loops. If your favorite pants don’t have loops, just use
some safety pins to attach the pouch. Any recipe that you pour hot water into
and let stand will work.’
18/05/2016:
Steve’s Lamb Stew: This is a family
favourite. Nothing special maybe (certainly not Ultralight Hiking tucker – I
guess you could dehydrate it), but try it anyway. It doesn’t have to be
Mother’s Day before you make some…Cheers.
Ingredients
(approx):
1
doz. lamb bbq. chops or equiv.
6
lge. potatoes, skin on
5
lge. onions
2
med. carrots
1
ave. turnip
1
ave. parsnip
½
ave. sweet potato
1”
x 5” pumpkin
6
sticks celery
1
ave. capsicum
Start
heating in a v. lge. pot 1 lite water. Dice all ingredients ¾” cubes and add to
the pot. When all in add boiling water to just cover them. Add (approx
amounts): 1 teas. Salt, 2 teas. coarse ground black pepper, 2 teas. sweet
paprika, 2 beef stock cubes (or equiv.), 2-3 teas. Worcestershire sauce, ½
teas. Tabasco (wash hands straight after). Cover and simmer 1-2 hours. For best
taste store in fridge overnight and reheat.
18/05/2016:
Cats eat birds, they say: https://www.youtube.com/watch?v=PWc6aF6aMQ8
17/05/2016:
All-In-One Hammock, Tent, Poncho,
Backpack at 1.2 kg: This looks like an interesting concept. If you have
US$319 in loose change you might book yourself one of these. 7 second set-up
sounds great. Check out its specs below. Almost too good to believe: https://www.kickstarter.com/projects/255929858/flying-tent-7-seconds-to-the-stars
& https://gearjunkie.com/flying-tent-hammock-poncho
16/05/2016:
The Importance of a Roof: Getting
dry, staying dry, that’s what survival comes down to. Alan Remnant pilot and
Owner of Wings on Water, Te Anau, Fiordland (http://www.wingsandwater.co.nz/)
who has flown me in to Supper Cove so many times (one of the world’s greatest
trips) tells me he has often had to ferry deceased hikers out of there too,
folks who could not understand a few simple lessons, like ‘Take a Tarp!’
Though
all the DOC’s Walks’ brochures explain the necessity of this, eg ‘You may not make
it to, or back to a hut’ every year folks turn up to hike in a pair of thongs,
carrying a couple of shopping bags – or something just as injudicious. I have
run into people all the time who are carrying half the house on their back, but
no tent or tarp – indeed no knowledge of bushcraft which would help them find
their way once they lost the trail!
On
our recent South Coast Track walk (See eg http://www.theultralighthiker.com/south-coast-track-fiordland-nz-waitutu-to-westies/)
on the last day Della and I were walking out in the rain (the only rain on our
eight day trip, so not so unpleasant really). It rained steadily all day, not
specially heavily, and was not specially cold, but it was so humid that before
long we were soaked to the skin – a not infrequent experience despite whatever
impossible ‘breathability’ manufacturers of raingear might advertise.
Being
soaked is not such a problem whilst you are moving or if your insulation is up
to it, but as soon as you stop you start to feel the cold as the rain is
constantly stripping the heat from your body. You need dry air around you to
prevent this. Air is a good insulator. We stopped for lunch in an old woodshed
(just a couple of rusty sheets of gal roughly thrown up next to one of the huts
at the Track Burn). Just getting out of the rain for a few minutes so that it
was not continually stripping one of body heat was such a pleasure. It can be a
lifesaver too.
Track
Burn: Sharing the last of the 'Ambrosia' apples: As you can see, it was wet
enough to drown a 'waterproof' camera!
If
you are stuck out in the rain for any protracted period of time (especially
overnight) you really need a roof so you can dry out and stay dry. Even on a
long day walk or hunt you need to carry a tarp so that you can do this (or have
the knowledge and ability to construct a rough shelter) because you never know
when you might be spending an unexpected night (or two) outdoors. The river you
need to cross might come up during the day (This has happened to me a number of
times). You might lose your way, become injured (or your companion may – this
has also happened to me a number of times); you can just seriously underestimate
how long it will take getting back to shelter (walking in the dark is always
fraught with danger - but if you have to do it you need to master the technique
of looking out the sides and bottoms of your eyes - where you actually can see
in the dark!) You may just become exhausted - wet shoes which unexpectedly take
on too much weight have done this to me (See eg http://www.theultralighthiker.com/keen-shoes/)
.
Whatever
the reason, it is always wise to have some form of shelter. I often carry an 8’
x 8’ cuben tarp which weighs under 150 grams. (I am about to improve on this
with a cuben version of this http://www.theultralighthiker.com/the-deer-hunters-tent/ and a 1 oz/yd2 silnylon poncho floor). I have
slept peacefully under the cuben tarp in the rain quite a number of times. I
would say a (cheaper) 7’ x 7’ (eg silnylon) tarp would be the minimum
requirement, and can be used as a hammock tarp too. You would need 4.2 metres
of eg this http://www.tiergear.com.au/11/online-shop/xenon-sil-11)
so it is going to cost you around $50 to make, it and it will weigh around 5.5
oz or @ 160 grams including tie-outs. Even my ‘Holeless Poncho’ may save your
life erected as a shelter (and double as a raincoat) See: http://www.theultralighthiker.com/hole-less-ponchoshelter/
& http://www.theultralighthiker.com/pitching-the-poncho-warning-this-may-save-your-life/
. In the above fabric (which I am very impressed with) it will weigh less than
130 grams I think including waterproof zippers and tie-outs. I will make one
soon and weigh it. I will also do a post soon about constructing a rough
‘bough’ shelter. The ‘best’ shape is not at all what you might think! Watch
this space!
15/05/2016:
Tumble Hitch: A really useful knot
particularly when doing temporary tie outs eg of guylines, boats, dogs etc. You
can always ‘lock’ it by passing the end back through the top loop so it can’t
unravel: http://www.animatedknots.com/tumble/#ScrollPoint
14/05/2016:
The Perfect Keychain Knife: Spyderco
Honey Bee: This may be the perfect keychain knife. It is just a bit shorter
than a Yale ‘C’ door key, so it fits in your fob pocket on your key ring
perfectly. Yet it is an ever handy useful tool with its razor sharp blade, just
right to open a bag or parcel, peel a fruit, dress a fish or rabbit, whittle a
spoon, carve your name for posterity on a tree in the far wilderness, or
whatever your imagination can lend it:
‘Spyderco’s micro-sized slipjoints are fully functional,
impressively sharp folding knives that are very much at home on a keychain.
Their stainless steel handles are the perfect palette for engraving or other
embellishment and their Trademark Round Holes are much more user friendly than
traditional nail nicks.’ https://www.spyderco.com/catalog/details.php?product=440
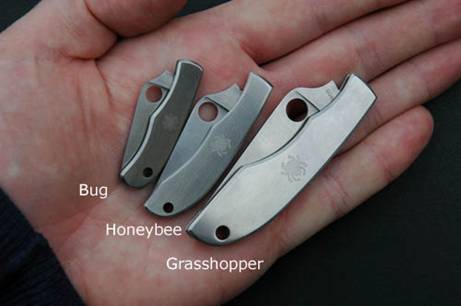
13/05/2016:
The Deer Hunter’s Tent: I decided it
was time to upgrade my Tyvek Solo Fire Shelter (http://www.theultralighthiker.com/tyvek-solo-fire-shelter/)
into something much better and which could accommodate two - and dogs! I also
wanted to use my ‘Holeless Poncho (http://www.theultralighthiker.com/hole-less-ponchoshelter/)
as the floor. I intended that this should result in a ‘roof’ (in Tyvek for its
‘fireproofness’) that was around 400 grams, and a poncho ‘floor’ in silnylon
that would be around 170 grams. Adding another 80 or so grams for tent pegs
should still result in a tent which was under 600 grams, and fit for all
weathers. It would also provide a raincoat (maybe a spare) which would
otherwise weigh maybe half the weight of this tent!
I
have now discovered some 1 oz/yd2 silnylon which is reasonably priced at $11.95
a metre (http://www.theultralighthiker.com/australian-outfitter/) so that I can make the whole thing much
lighter (55% of the weight, ie under 400 grams all up). In cuben you could go
even lighter but it is very expensive at around $30/yd (http://www.zpacks.com/materials.shtml)
I have a piece I can salvage from another project so I will make a cuben model
with a 1oz silnylon poncho floor – I expect the whole thing will weigh under
300 grams after I have made another one in Tyvek to get the measurements just
exact. This one was the prototype. Not
bad for a two person tent though!
The
waterproof section of the floor could only be 5’ by 7’ (the size of the
poncho), less a bit so that you get a ‘bathtub floor’ effect. However, there is
also a floorless ‘vestibule area of about 5 square feet for dogs, and gear
stowage. I expect if you are vertically challenged like us you will have plenty
of room to shove bits and pieces at the ends and side. We will fit.
It
was extremely windy when I took the photos but it is showing no inclination to
fall down – and it went up in seconds! That’s what I like. It is also raining
but it is nice and dry inside. As with all my tents it is intended you will
warm it with a cosy fire out the front, a nice touch if you are enjoying winter
hunts in Gippsland, as I will be doing.
There
are three different modes. The ‘normal’ fully open mode which will be easiest
to get into. The peak is 5’ high. The rainy day mode where you can half close
it and stay dry yet still enjoy the benefits of the fire. The storm mode for
when it really wants to blow and bucket down and you need to keep it all out
and keep the tent from blowing away. If much taller tepees withstood the winds
on the Great Plains for centuries I expect this little guy will withstand a
rainy night in Gippsland!
Open
Mode.
Half
Open Mode.
Storm
Mode.
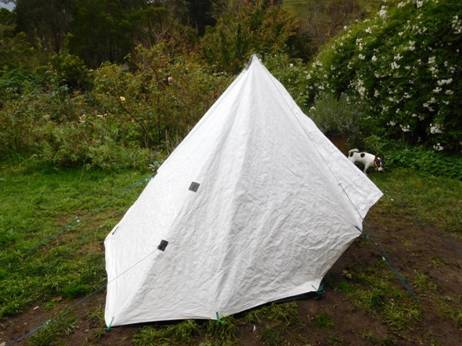
Side
View.
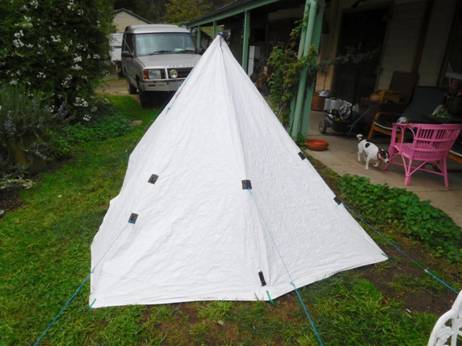
Rear
View.
See
also:
http://www.theultralighthiker.com/does-spot-like-to-hunt-deer/
http://www.theultralighthiker.com/tyvek-solo-fire-shelter/
http://www.theultralighthiker.com/tyvek-tent-designs/
http://www.theultralighthiker.com/tyvek-twin-fire-shelter/
http://www.theultralighthiker.com/one-pole-tyvek-tipi/
http://www.theultralighthiker.com/tyvek-bivi/
http://www.theultralighthiker.com/new-tyvek-forestertent-design/
http://www.theultralighthiker.com/tyvek-jack-russell-rain-coat-13-grams/
http://www.theultralighthiker.com/catenary-curves/
http://www.theultralighthiker.com/ultralight-chairgrounsheet/
Instructions
will be added later. If you would like to buy a kit with pattern, instructions
and materials, please let me know.
For
now, what I did to make this version: sewed on the entrance flaps (as per
instructions here: http://www.theultralighthiker.com/tyvek-solo-fire-shelter/)
then set the tent up 5' high with tarp clips configuring it around the
dimensions of the poncho which I marked on the ground (with tent pegs). I also
wanted the tent to tie out more tautly so I extended the tie down point at the
rear by 3" and the middle tie down points by the same amount. I moved the
two side tie down points to exactly conform to the dimensions of the poncho,
then I brought the two front flaps together about 15" out from the pole
and cut off the bottoms. Before I cut off the sides of the front flaps I pegged
them out into the half open position and pinned them together about 18"
forward of the peak so as to make a rain shelter at the front when the tent was
open. I marked a position to sew a pocket to take a pole at the inside of the
peak. I also marked a point on the roof to sew in a loop to hang my torch from.
Taking the tent down, I laid it out on the floor and made sure that the sides
were symmetrical and marked catenary curves along the bottom sections. When I
had sewn in the new tie downs, pocket etc I set it up again and added some
stick-on Velcro for the door closures. I will recalculate all the dimensions
and make a wholly new copy-able model (soon).
On
this prototype which turns out to be slightly smaller than the poncho and what
it can be, I may sew in a Tyvek bathtub floor (approx 210 grams) just to see
how that works. I will have to cut a piece which is slightly bigger than the
tent floor then set the tent up on top of it, then carefully trim and pin so
that the floor is always bigger than it needs to be (this may mean a little
excess at the corners) so that the floor doesn’t hinder the tent’s pegging out
nice an taut. All the same it will be nice to have a tent which goes up in
seconds (just right) and is ready to move right in. This tent goes up so fast I
can imagine putting it up for lunch on wet days!
NB:
Here is a neat way to do the catenary curves: (http://www.tiergear.com.au/25/-make-your-own-adventure-blog)
'using a length of 6mm dowel (or some other equivalent), and some heavy weights
to keep it in place position the dowel so that it intersects the two corners
and the mid catenary cut mark, and draw a line along the dowel.'
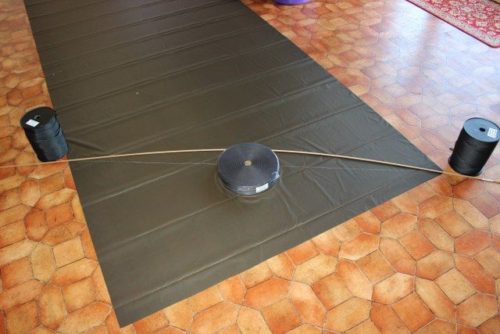
PS:
The tent has stood up perfectly to a very windy wet night – it looks no
different to what it did when I set it up yesterday afternoon. Inside perfectly
dry.
12/05/2016:
Soda Can Stove Mark 2: Progress is ubiquitous:
this guy has rejigged the ‘traditional’ soda can stove so that it heats up more
quickly and generally works better. It’s the one on the right. Full
instructions here: http://www.instructables.com/id/Improved-Soda-Can-Stove/?ALLSTEPS
If it’s a wet day it may be time for a little DIY therapy.
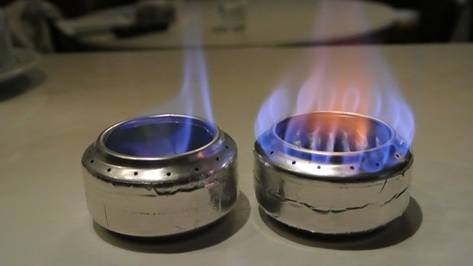
11/05/2016:
Australian Outfitter: This is great
news. In the depth of Tasmania there is an Aussie Outfitter and cottage
manufacturer who can supply a myriad of interesting stuff which you previously
had to wait ages for from the US etc – and at a very reasonable price. I
purchased some 1oz/yd2 silnylon (2,000 mm waterproofness) for my new poncho
& tent project (details to follow soon) and some very elusive mitten hooks
(same), all posted same day, but I will be going back for some of his
1.35oz/yd2 which has a waterproofness of 5300 mm for a tent floor! And many
other things. Simon stocks a bewildering array of goodies (I was particularly
interested in the ‘Dutchware’ range) and also manufactures various hiking
goodies (hammocks, tarps, quilts etc) and for all you non-sewers out there
sometimes has time to do custom work, so talk to him! Check out his ‘Make Your
Own Adventure' blog and DIY Guides which contain many useful patterns with
instructions. Like me he is also one of those sensible folk who drive a Land
Rover. Pictured one of his splendid Goshawk hammocks, just waiting for one of
his wonderful Bettong tarps to complete it. Forget about your swag and try one
of these: http://www.tiergear.com.au/
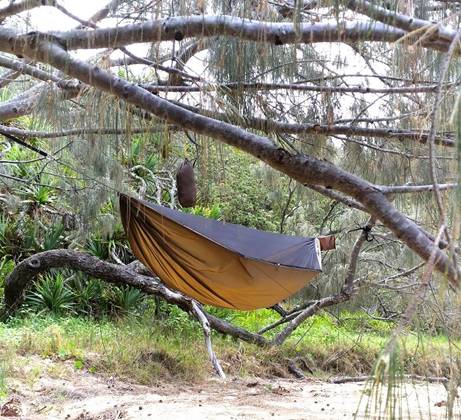
10/05/2016:
Home Made Wood Splitters. Winter is
coming. Some great ideas here for your next DIY project: https://gearjunkie.com/homemade-wood-splitting-machines
09/05/2016:
Tent Stakes and Tricks: Give some
thought to your tent pegs. Your tent won’t be anything without them, or without
good ones – and they can weigh nearly as much as the tent! In windy weather tie
your tent stakes to your guy by threading them through the hole in the peg.
This allows you to push the stake completely under the ground for maximum
purchase and ensures the guy cannot flap loose from the peg. This is much
easier to do if you use Clam Cleats mini line locks: http://www.theultralighthiker.com/the-perfect-guy-line-for-a-hiking-tenttarp/
You can use mini carabiners such as these http://gossamergear.com/gg-logo-mini-biner.html
to make this easier still at approx 3 grams per guy. Tip: the angle your stake
should be driven in should be a little less than 90 degrees to the guy line,
enough so that the force vector is inclined to push the stake in rather than
lift it pout.
Some
good stakes: Vargo have five stakes I would recommend: 1. The lightest their
fluoro shepherd’s hook stake: http://www.vargooutdoors.com/titanium-tent-stake-fluorescent-orange-head.html#.Vy6gKdR97IU
Length 165 mm Width 3.5 mm Weight 8
grams which have a little extra bit that really anchors the hook to the ground
when driven all the way in, (I don’t know why all tent stakes aren’t brightly
coloured to prevent loss – all of the following can have a piece of reflective
guy line added to increase visibility): 2. their Ultralight Titanium Nail Peg: http://www.vargooutdoors.com/titanium-nail-peg-ultralight.html#.Vy6g6dR97IU Length 152 mm Width 4 Weight 8 grams 3. the Titanium Ascent Stake http://www.vargooutdoors.com/titanium-ascent-tent-stake.html#.Vy6jX9R97IU Length 158 mm Weigh 10 grams 4. the Titanium
Crevice Stake: http://www.vargooutdoors.com/titanium-crevice-stake.html#.Vy6kE9R97IU
Length 152mm Weight 12 grams. If you want really serious holding their 5.
Aluminium Summit Stake is a good choice: http://www.vargooutdoors.com/aluminum-summit-tent-stake.html#.Vy6ks9R97IU
Length 190 mm Weight 14 grams. The DAC JStake has been a competition winner for
years and is just about unbendable: http://www.mont.com.au/dac-j-stakes-6- pack Length 160 mm Width 11 mm
Weight 11.3 gm
A
couple of others to consider: Zpacks 6.4 inch Carbon Fiber Tent Stakes Length
16 cm Width 7.5 mm Weight 6.2 grams http://www.zpacks.com/accessories/stakes.shtml have superior holding ability (due to their
width) yet are light and will pass through airport security! For really serious
anchoring you can even get longer carbon fibre stakes http://www.rutalocura.com/Tent_Stakes.html Length 22.5 mm Weight 7.5 grams
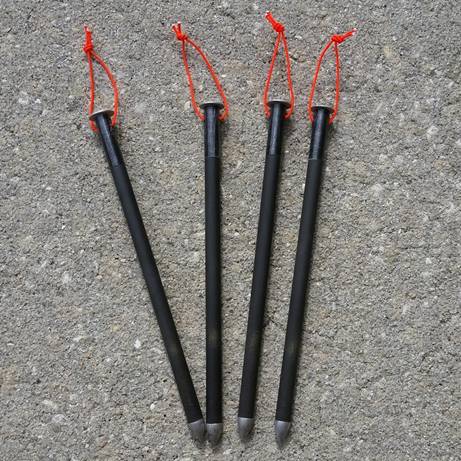
A
similar longer stake is the Easton Nano Nail Stake Length 20 mm, Weight 12
grams: http://www.mountainlaureldesigns.com/shop/product_info.php?products_id=104

07/05/2016:
New Decagon Octagon Tyvek Igloo Tent
Design: I am really pleased with this new tent as I have solved the problem
of how to construct a pyramid tent without zips and which has a verandah to
completely exclude the rain. It is a huge tent. As you can see, you can warm it
with a fire out the front; there is plenty of room for two (plus dogs) and all
their gear – and then some! There is ample standing room. It has a bathtub
floor. You can lock it down to an invulnerable octagon in storm mode. It has a
clothesline, three hangers, glasses etc pockets both sides. It needs ten stakes
(@ 8-11 grams each = 110 grams) to erect and two poles (which can be cut up the
bush – or use two-three hiking poles or you can buy Easton/Carbon ones here: http://www.questoutfitters.com/tent_poles.htm).
In
Tyvek it weighs 1,030 grams (including floor and tie-outs) and would weigh
about 420 grams (under 550 inc. stakes) in Cuben Fibre (.67oz/yd2 camo for the
roof & 1 oz/yd2 for the floor). It would weigh about 750 grams (without
stakes) in 1.3oz/yd2 Silnylon. I overdid it on the bathtub floor (6” sides)
width and height and length of beak. Could easily shave a couple of hundred
grams off this weight on my next model. Two Easton poles (if needed) would
weigh under 200 grams. This model consists of ten equal triangles, two sides 7’
(2.1m) and one 3’ (.9m). You could easily scale it down quite a bit and still
fit two people and their gear in it. If you shortened the height of each
triangle to two 6’ sides and the width to 2.8” (which would be about the
minimum I guess – haven’t tried this size), the tent should weigh perhaps 60%
of what it does now, say under 700 grams anyway – in Tyvek, and clearly about
half that in cuben! Instructions and plans: Let me know if you would like to
purchase a kit with pattern and instructions.

Front
View.
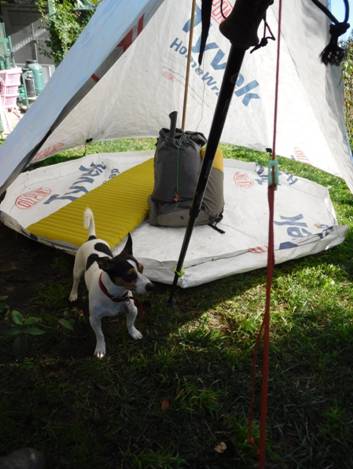
Inside
View: plenty of room for two 6' (1.8 m) Neoair mats and lots of gear.
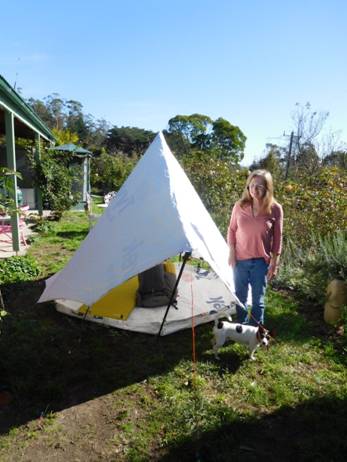
Plenty
of standing room.
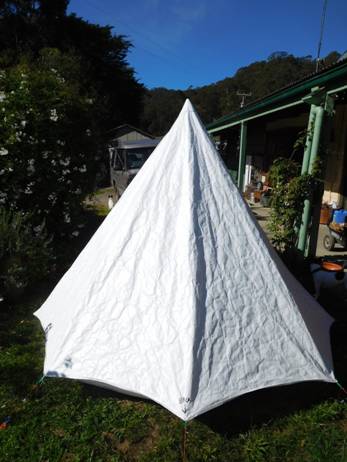
Rear
View.
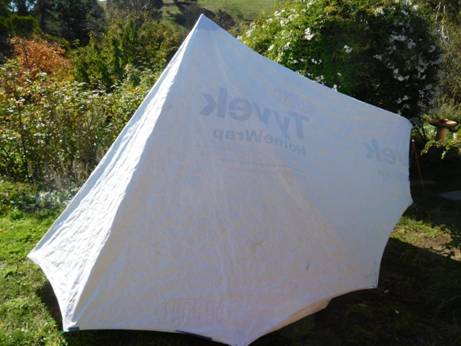
Side
View.
See
also:
http://www.theultralighthiker.com/does-spot-like-to-hunt-deer/
http://www.theultralighthiker.com/tyvek-solo-fire-shelter/
http://www.theultralighthiker.com/tyvek-tent-designs/
http://www.theultralighthiker.com/tyvek-twin-fire-shelter/
http://www.theultralighthiker.com/one-pole-tyvek-tipi/
http://www.theultralighthiker.com/tyvek-bivi/
http://www.theultralighthiker.com/new-tyvek-forestertent-design/
http://www.theultralighthiker.com/tyvek-jack-russell-rain-coat-13-grams/
http://www.theultralighthiker.com/catenary-curves/
http://www.theultralighthiker.com/ultralight-chairgrounsheet/
07/05/2016:
Mysteries of the cosmos: Why do
trousers always appear in pairs (do they?) whereas moose sheep, etc always
appear singly!
06/05/2016:
Get Lost. Get Found: Plb/Epirb:
Which one to buy? If you just want a straight emergency beacon, the decision is
relatively simple: weight, battery life, replaceable battery or not…but there
are many devices out there which offer much more. Some (such as Spot) are
one-way messengers, others two-way. Some offer ‘breadcrumb’ tracking which
means they report your position (eg to contacts) every few minutes, so that you
don’t have to ‘trigger’ them to have people realise you need help yet send
emergency services to your exact location. It is not that hard to imagine a
scenario where you are unable to trigger your epirb even if you aren’t dead!
Some have maps, weather…all sorts of frills. Then there are essentially a
number of different sat phone systems if you want to go the ‘whole hog’.
If
an emergency beacon plus one-way messaging and light weight (and the ability to
change batteries) are the main consideration it is hard to go past the Spot
Messenger. It perhaps pairs well with an Iridium satellite phone as each uses a
different communication satellite system so you not only have two emergency
devices (in case one fails) but two systems as well. Another interesting device
is the Delorme Inreach SE which also pairs with your mobile but offers two-way
text communication.
I
think these two are my best options: Spot Messenger: http://www.findmespot.net.au/spot-gen3-gps-messenger/
& http://static1.squarespace.com/static/532cc334e4b0c8441ae7e9df/t/5376a2b9e4b095f55e73d717/1400283833538/SPOT+Gen+3+Brochure.PDF
@ 114 grams and A$209 and Delorme Inreach SE: http://www.inreachdelorme.com/product-info/inreachse.php
& http://www.inreachdelorme.com/assets/pdf/DeLorme_inReach_Brochure.pdf
@ 191 grams and US$300.
NB:
Iridium have a number of other products might suit you: https://www.iridium.com/products/types/Personal-Tracking
See
also: http://www.theultralighthiker.com/personal-locator-beacon/
PS:
I have always had some means of communicating (eg distress). I always let
someone know exactly where I was going and when they would next hear from me/
should do something. Mostly I have had a 2-way radio which could access
repeaters and/or a sat phone. I am just now thinking of adding a plb/epirb to
the sat phone in case one fails (and the person at home triggers an unnecessary
search). When Della and I are walking together we would each carry one so that (eg
if one is swept away in a river crossing) the other can still call for help. I
have hiked eg the Dusky Track in Fiordland NZ many times. Each year they fly
out a number of bodies from there. I have personally called in air rescue to
fly out bruised and bloodied folk on several occasions, folk who had no means
of communication!
05/05/2016:
You Will Not Live Forever: I know, I
know…but I have tried being old for quite a while now (I am over my 2/3
century); it’s not all it’s hyped up to be, so I decided to do something about
it! Turn back the clock time! For over a year now I have been working at
shedding that unnecessary avoirdupois. I am now lighter than my kids can
remember me being, but am still a ways shy of my weight at 20. My goal is to
return to that weight (under 11 stone/70 kg) and to a comparable or better
level of fitness – hopefully before year’s end. I know I can still comfortably
walk 20-30 km a day up and down mountains through trackless bush with a
substantial pack (as you have no doubt noticed). I want to be able to go a
little further – and easily. Frankly the prospectus for aging and death would
not sell to the dumbest mark, yet most of my age group seem content to espouse
‘taking life easy’, ‘kicking back and relaxing’ ‘smelling the roses’, etc, etc.
Poppycock! They are just waiting to die! ‘Rage, rage against the dying of the
light’ (Dylan Thomas) is more my style. Indeed, ‘my purpose holds To sail
beyond the sunset, and the baths Of all the western stars, until I die…To
strive, to seek, to find, and not to yield.’ (Tennyson, Ulysses)
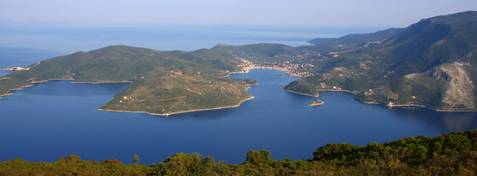
Ithaca
04/05/2016:
Keen Shoes:
Voyageur.
Keen
make some excellent comfy shoes, particularly if you have wide feet like me in
which case you pretty much have no other choice anyway. I have had a number of
Keen shoes: Targhee 2, Gypsum, Marshall and now Voyageur. Until I bought the
Marshall I thought Keen had pretty much sorted out the water absorption problem
with their shoes. That is shoes which take on too much weight when wet and
which will not give it up again anytime soon,. They had not!
The
Marshall took on much more than twice their own weight (over 450 grams of
water) and were still sodden days later despite sitting on the sun in the
verandah next to my old pairs of Gypsum and Targhee 2 (which I tested
simultaneously) which were bone dry the next day - whereas the Marshal were still
wet four days later. This is a disaster. I will say Keen generously refunded me
the money on the new Marshal but not before they had caused me some angst. I
would also like to issue a further warning: I switched out the shoe liners for
a pair of orthotic liners which I thought would be more comfortable. These
liners took on and held 100 grams of water per shoe as well! Double disaster!
Lesson: 1. Test and weigh long before you go. 2. Make sure you have pretty new
shoes ready before any big trip!
We
were heading off to hike the South Coast Track in NZ on the Easter Monday (See:
http://www.theultralighthiker.com/westies-hut/
& etc). After close of trading on the Thursday before Easter just as we
were heading off for our afternoon walk I happened to turn over my old pair of
Gypsum when I realised the soles were starting to deteriorate such that they
might have let me down days from anywhere. On reflection I realise that I have
waked over 3,000 km in these shoes and they are still quite serviceable for
daily walks – so no complaints there! Just as clearly though I needed a new
pair of shoes.
I
would only have Easter Saturday morning to buy them.- and I needed size 8 1/2s.
Much frenzied ringing around informed me that my only accessible alternative
was a pair of Marshall from a local retailer, so I bought them. Carrying that
extra 450 grams of water on each foot for a week certainly took some of the
gloss off our otherwise wonderful walk. In retrospect I would have been much
better off taking my old pair of Redback leather boots which though they start
off dry around 100 grams heavier, would have been over 300 grams lighter when
wet – a certainty in Fiordland.
I
have advanced the suggestion to keen that they test weigh all their boots wet,
after five minutes walking after they are wet and after a number of hours
drying and that they post this data along with their dry weights. I offered to
repost all this data on my website right here, but they say they are not in the
business of weighing wet shoes – which is a great pity. Perhaps they will
change their minds? The sales representative I spoke to at Keen though owned a
pair of the new Versatrail himself which he kindly tested for me. I can state
that they add about 150 grams when wet much the same as my old Gypsum, Targhee2
and my new Voyageurs. (I haven’t tested the new Targhee or Gypsum)
I
have now bought a new pair of Targhee 2, Gypsum and Voyageur shoe, all in 8 ½.
The new Gypsum and Targhee 2 weigh around 520 dry (a significant increase for
my old Targhees which were size 8 – I hope they have not changed the lining)
and the Voyaguers around 425 dry per shoe. The Voyageur added 150 grams when
wet some of which pumped out after a few steps. They have lost 50 grams
overnight in fairly cool air so I daresay they would dry on my feet in about
half an hour as my old Gypsums and Targhees usually do.
As
the Voyaguers start off 100 grams lighter and are 100 grams lighter when
wet I suggest they will become my
default hiking shoe. The new Versatrail is (apparently) marginally lighter
still (and quick drying etc) but does not have such an aggressive sole so might
be more appropriate on formed walking paths than in the backblocks.
I
am unaware of any shoe manufacturer who will tell you the wet weight of their
shoes. They are also liable to change the composition of shoes without notice
too so that anew pair might be different in this regard than your old ones. I
have a whole basket of (new) shoes which I will never again wear as they either
have this (too heavy wet) defect or the other main serious defect that they
will not grip on wet surfaces. As well
as stating dry and wet weights manufacturers ought to be required to state a
coefficient of friction for their soles both wet and dry.
I
will update this post if I hear from any of them – and after I have tested out
my new Targhee and Gypsum.
See
also:
http://www.theultralighthiker.com/foot-care/
http://www.theultralighthiker.com/why-you-should-get-your-feet-wet-when-hiking/
PS:
If you are in Australia, We bought five pairs of Keens from these folk
yesterday. They were cheaper even than I could buy them on the net: http://www.dfo.com.au/Moorabbin/Stores/Escape-2/ They have
a huge range, stocking pretty much no other shoe brand – plus some backpacks,
etc.
03/05/2016:
Save your phone: Good advice: do it
now! http://www.coyoteblog.com/coyote_blog/2016/04/sometimes-it-pays-to-be-a-total-geek-and-some-advice-for-android-owners.html
01/05/2016:
Does Spot Like to Hunt Deer?
This
is our Jack Russell, Spot. Does Spot like to hunt deer? Say, ‘Yes’ Spot. Good
Dog! Spot is three years old. He came into our lives as a 40th wedding
anniversary present. Perhaps we should have called him ‘Ruby’, but ‘Spot’ seems
to fit him best. He is the greatest Jack Russell in the world. Aren’t you Spot?
You see! This is my very first Gif. I will get better at it. Expect to see some
more of them and other video content over time. Perhaps you missed this video
already though : http://www.theultralighthiker.com/videos/thomson-river-canoe-trip-2006-complete/
Spot
is learning to flush and bail. Every night we take the dogs for a five km walk
somewhere around the Jeeralangs where we live. The area is heavily forested
with innumerable solitary tracks. We never see anyone else walking or driving,
so it is nice. We see lots of kangaroos and wallabies. These are good practice.
Sometimes we see any of four species of deer which have become relatively
common hereabouts: red, sambar, fallow and hog deer. Spot is getting a little
practice on them. Soon it will be cool enough to head for the mountains with
him again where there will be mostly only sambar deer (lots of them!) and very
little other game.
When
I say, ‘Fetch ’em out’ you should see him move! There are some deer out there
who are in for a big surprise this year! The great thing about Jack Russells is
they are as game as Ned Kelly yet they are so compact they require very little
food on a hunting trip, and they will fit in your sleeping bag with you – though
Spot has his own – soon to be an ultralight one, approx 100 grams! Sambar deer
don’t tend to run from them. They bail, and whilst bailed pretty much ignore me
and focus on the dog. This is very foolish of them – but they are tasty! Are
they yummy Spot? You see!
I
am pretty much finished the roof of my new tent. I am just sewing some
reinforcing at the peak and the beak tonight, and some tie outs there for
hanging my lantern/torch (http://www.theultralighthiker.com/mini-super-torch-a-weeks-light-weighs-50-grams/)
– and stringing a clothesline, that is after working in the vegie garden all
day. Tomorrow I will start on the bathtub floor. This tent is going to be able
to sleep four people and will weigh less then 800 grams including the floor,
pegs, guys, stuff sack etc – and you can have a fire just outside to warm it.
It will weigh in at about 400 grams in cuben fibre – I intend to make another
in .63oz/yd camo cuben with a 1oz/yd floor. I am quite gobsmacked about it –
and will be posting about it when it is finished, and maybe after I have taken
it on a little expedition somewhere. I had better also finish Spot’s new
sleeping bag! Back to work! Did you know Spot has a raincoat: http://www.theultralighthiker.com/tyvek-jack-russell-rain-coat-13-grams/
01/05/2016:
If you have not tried Kanzi apples yet, please do! Available Safeway and Coles.
If you are in NZ try Ambrosia. It certainly is.
30/04/2016:
100-year-old skier at peak performance: https://www.youtube.com/watch?v=yR-OX_KiFdY
29/04/2016:
Lunch on the Trail: Arnotts VitaWeat
Biscuits 9 Grains are one of our standbys. Each biscuit is approx 8 grams and
100 kj or 25 calories (3 per gram) so that about 6 biscuits (150 calories) plus
some nutritious topping makes an adequate lunch. We store them in lightweight
plastic freezer portion containers to prevent breakage.
I
have already mentioned peanut butter as an excellent topping (See: http://www.theultralighthiker.com/peanut-butter-toast-soldiers/)
Another favourite topping is D’Orsogna
Traditional Romano Italian Salami (which does not require refrigeration until
opening (and we find keeps fine for the three days it takes us to eat in @ 20C
temperatures – ditto the following cheese) and Mainland Noble Cheddar or Colby.
The Noble is a delicious new low fat cheddar which you might find hard to
source.
Both
salami and cheddar were invented (way back in the Middle Ages) for just such a
purpose (ie long life compact food) and it is hard to beat them. Both the salami and the cheese are over 400
kj or 100 calories per 25 gram serve (ie over 4 calories per gram). Della and I
find that a 200 gram pack of cheese plus a 200 gram salami last us with 36
biscuits for three days’ lunches. Per day each of us is eating 67 grams of
salami/cheese plus 6 biscuits 270 + 150 = 420 calories, quite enough for a
nutritious lunch on the trail!


Another
favourite lunch standby is Della’s Coconut Rice plus a sachet of tuna. (See: http://www.theultralighthiker.com/dellas-coconut-rice-hiking-food/)
or if we want something hot one of the CupaSoup meals is great (For example: http://www.theultralighthiker.com/hiking-meals-continental-hearty-italian-minestrone/
28/03/2016:
Why you should get your feet wet when
hiking. This has ever been my advice: ‘When you come to a stream just step
right in it, don’t pussyfoot around trying to keep your feet dry. Ultimately
you won’t succeed and you put yourself at risk of a fall, like this one’:
:
28/03/2016:
Hummingbird close-ups: http://www.wimp.com/photographer-captures-the-grace-and-beauty-of-hummingbirds/
27/04/2016:
Ultralight Chair/Groundsheet: I
found this image on Pinterest
but
could not find who to recognise/praise for it (my apologies to the clever
inventor). I have been going to make one of these
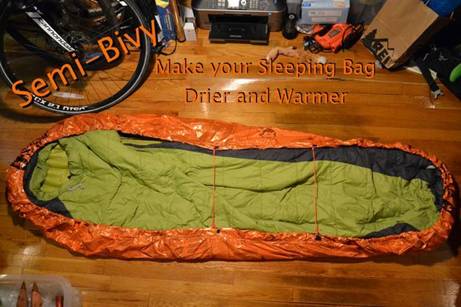
(see:
http://www.theultralighthiker.com/tarp-bathtub-groundsheet/)
out of Tyvek (will be soon for my new tent). I think it will be a simple matter
to add some ‘pockets’ as illustrated in the first picture so that a one person
groundsheet can do double duty as an ultralight chair with the addition of a
couple of hiking poles (as shown) or a couple of broken off sticks. Maybe a
couple of webbing straps need to be added. I will experiment. As I have said
before: ‘Watch this space…’
27/04/2016:
Strange creatures: http://neveryetmelted.com/2016/04/20/leptocephalus/
26/04/2016:
The Powder Philosophy: 98 Year Old
Skier George: https://www.youtube.com/watch?v=FYhP0w2BXgg
25/04/2016:
Sleeping Pad Pack Frame: If you
don’t own a Gossamer gear pack but want to add an Air Beam to another frameless
pack for load transfer you could try this idea: http://www.zpacks.com/large_image.shtml?backpacks/options/sleeping_pad_l.jpg
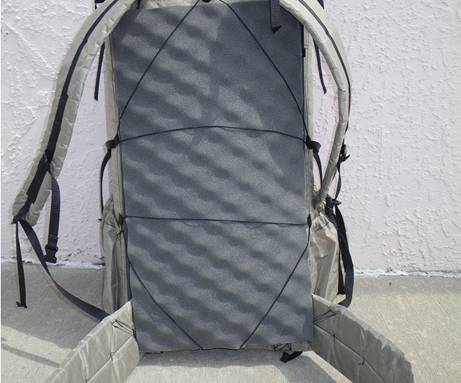
Zpacks
Zero plus Gossamer Gear Sitlight pad shown.
We
added this system ourselves with some elastic to a pack (plus one Klymit Air
beam) with spectacular results, not least being a dry back! Mountain Laurel
Designs also have a load transfer system (http://www.mountainlaureldesigns.com/shop/product_info.php?cPath=25&products_id=208
using a Klymit pad (See also: http://gossamergear.com/gg-airbeam-pack-frame.html)
which goes inside your pack).
You
could try that (ie putting it inside your pack) anyway if you aren’t handy at
sewing. I suspect the idea originated first with Ray Jardine (http://www.rayjardine.com/ray-way/Backpack-Kit/index.htm?g_page=9).
I
prefer it on the outside of my pack for the dry back option, what a winner (!)
and as a handy trail seat for rest stops.
See
also: http://www.theultralighthiker.com/air-beam-pad/
& http://www.theultralighthiker.com/klymit-air-beam-inflatable-pack-frame-update/
24/04/2016:
Klymit Packraft (now under $169.95)
and currently on Massdrop for $99 – snap one up! I did and I already have an
Alpacka, which this is not, but it is much lighter and will get you across that
difficult rive which lies in your path – or many other uses: ‘The LiteWater
Dinghy is a gamechanger. It is an advanced pack raft that will beckon
adventurers toward new horizons. Designed with input from pro kayakers and
packrafters, Klymit’s first entry into the paddle sports market has been made,
and made with vigor. Featuring an advanced boat shape that tracks water and an
ergonomic seating position that allows comfortable, upright, and well supported
paddling position, the LWD paddles well and feels good on the water. Weighing
in at 35 oz and packing down to 4 x 9 inches, you will forget you had it in
your pack. Alpine lakes and rivers are now part of your backcountry playground,
stay dry canyoneering, go camp on an untouched island with the LWD…why not? The
smartest comfiest packraft ever. Packs to the size of your 32 oz bottle. Two
valves for quick inflation & deflation, includes dry sack pump. Six tie off
zones. Provides back support for better stability and comfort while paddling.
Arrow shape design increases maneuverability. Ideal for canyoneering and
backcountry water. http://www.klymit.com/index.php/litewater-dinghy-lwd.html
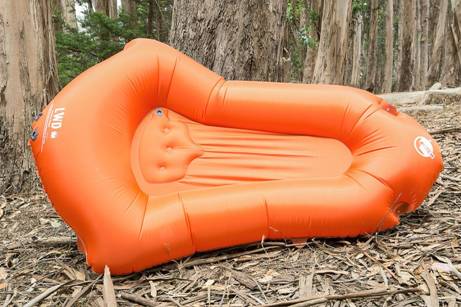
23/04/2016:
Catenary Cut tarp: Looking for an
ultralight sewing project? Six Moon Designs have this excellent free pattern
for a cat cut tarp complete with insect netting plus sewing instructions: https://www.sixmoondesigns.com/images/stories/pdf/Pattern_NightWing.pdf
A number of others are available if you look for them, eg here: http://www.backpacking.net/makegear.html
PS: The ‘Jones Tent’ (approx 500 grams) is not named after me!

22/04/2016:
Backpack Repairs: You may have
noticed this photo in one of my recent posts about the South Coast Track: Della
making sterling efforts to repair my backpack under trying conditions:
overcast, rain, sandflies etc at the Waitutu Hut; a woman to die for: http://www.theultralighthiker.com/south-coast-track-fiordland-nz-waitutu-to-westies/
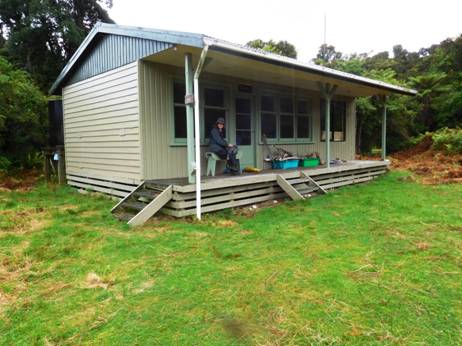
Now
that we are home she has properly repaired my old backpack whose cuben fibre
back panel had shredded and become quite irreparable with even more tape. She
has carefully unpicked it and replaced the back panel and the rear pocket with
4.8 oz/yd2 dyneema (like the rest of the pack) so that it is now quite
bullet-proof (yet still under 500 grams!)
This
was a difficult repair, quite beyond my ability even if I had the hands for it
(They are coming along though! http://www.theultralighthiker.com/hannibal-lektors-hand/
), so I am more than delighted. Once I have sewn up our new octagon/decagon
tent (http://www.theultralighthiker.com/catenary-curves/),
we will be off somewhere to test it out!
The
sewing is doubly difficult as first I had to download a sewing machine repair
manual, then dismantle the sewing machine whose reverse gear stopped working.
It is at the moment in pieces all over the dining room table. If/when I succeed
in fixing it, it will be on with the sewing!
In
the lounge room the pack seems most comfortable. I was having an incurable
problem with load transfer in a replacement pack which caused me no end of
trouble in NZ. Thank you Della.!
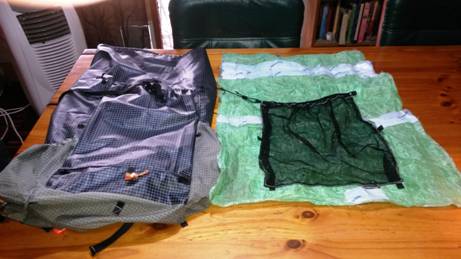
Once
I am done with tent design I intend to move on to backpacks. Similarly to tents
I feel most of the offering out there (in bought items) are unfit for purpose,
too expensive and too heavy. Making your own backpack ought also give the
opportunity to properly tailor the pack for fit which should improve comfort
immensely.
21/04/2016:
Catenary Curves: They are the solution
to tarp/tent problems. I have known about them for so long and done nothing.
Well, yesterday I was having a problem getting my new project, a Tyvek
octagon/decagon shelter to sit properly. I created the curve you see on the
piece of plywood by hanging a piece of rope between two screws then, using the
pattern produced as a template I cut the curves out. Instantly the tent wanted
to stand upright nice and taut. It will be much better when it is properly sewn
with tie-outs and etc. The tent looks to be a winner. In this (its largest
configuration) it creates a ‘fire tent’ which is 10.5’ (350cm) long and 7’ wide
(210cm) and 6’6” high (195cm), big enough to sleep four adults and their gear
out of the rain eg on a hunting expedition (anticipated). The weight (floorless
model) 550 grams in Tyvek. It will be less than 150 grams in cuben fibre! I
will be posting about it soon and reworking all my old plans too with what I’ve
learned. Watch this space!
Catenary
curve and template.
Largest
configuration: opening height 2’9“ (85 cm)
Nice
and roomy inside. The turquoise object is a 7’ x 5’ (210 x 150 cm) poncho used
as a groundsheet. Room for two of these!
NB:
Here is a neat way to do the catenary curves: (http://www.tiergear.com.au/25/-make-your-own-adventure-blog)
'using a length of 6mm dowel (or some other equivalent), and some heavy weights
to keep it in place position the dowel so that it intersects the two corners
and the mid catenary cut mark, and draw a line along the dowel.'
20/04/2016:
Why Are My Seedlings Leggy? http://www.gardeningknowhow.com/garden-how-to/seeds/leggy-seedling.htm?src=slid
This teaser caught my attention and inspired me to talk about my new capillary
mat seedling starters. I have used a ‘Smart Valve’ (http://www.gardensmartshop.com/category_s/1841.htm)
to regulate the water in the cat litter tray, a cut down plant tray, a couple
of used containers and some polyester felt from Spotlight to create them – and
they work a treat! You have to thoroughly wet the felt and potting mix to get
the system started. Pictured are seedlings which came up and looked after
themselves during our trip to NZ/. Today is bookmarked to plant them out and
start some more. With this system every week I will start and plant out the
seedlings which we will later harvest and eat so that we can be sure of a
constant supply of fresh vegies. You can see Bok Choy (two plantings) , Daikon,
Kohl Rabi etc doing well in the photos:
Workings:
Smart Valve left rear.
Ready
to plant.

After
a couple of weeks.
19/04/2016:
500 Gram Tents: On Massdrop this
morning Big Sky’s Wisp one person tent @ 567 grams (300 grams in Cuben!) for US
$159.99 & US$11.75 postage: http://bigskyproducts.com/big-sky-wisp-1p-trekking-pole-super-bivy-tent.aspx
This has got to be good value, and must start to make you question why you
might still be lugging around that perhaps 2 kg tent. There is even room in the
vestibule for your pack and Jack Russell!
17/04/2016:
South Coast Track, Fiordland, NZ,
Della’s Version: Finally finding time to go through the pix. Internet
availability being what it is in wilderness areas, I missed the chances to post
pix on a daily basis, so I will do a daily selection now we are home to mirror
the days on the track. Day one was totally passive, involving a jet boat ride
over the beautiful Lake Hauroko and then helter-skelter down the fast-running
Wairaurahiri River to the sea. There we stayed overnight in lovely wilderness
accommodation and prepared our packs for the big walk ahead.
Our
jet boat waiting. Lake Hauroko was like a mill-pond:

Lake
Hauroko from the jet boat:
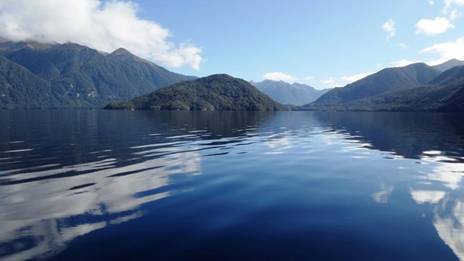
Speeding
down the Wairaurahiri River. Pretty exciting!
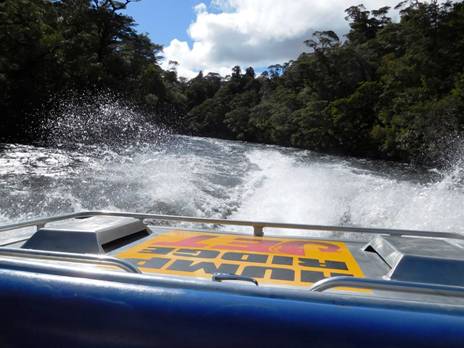
Nearly
at the sea. The walk-wire we will cross later in our travels.
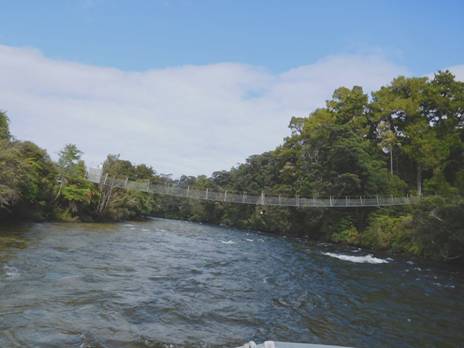
South
Coast Track, Fiordland, NZ, days 2 and 6.
I
have grouped the 2 days together (there and back again) from the Wairaurahiri
River to the Waitutu Lodge. After a couple of hours along the coast, the going
was mainly through the Waitutu Forest, which has never been logged and belongs
to the Maori. This was the hardest piece of walking, about 10 hours with
minimal breaks each time, and much hard going through deep mud, treacherous
tree roots and stream gullies. Still, the scenery was wonderful. Strangely, we
didn't take any pics of the nasty, hard bits...just too busy getting through
them, I guess!
The
mouth of the Crombie River, Steve with Pete (and his pig dog, Sophie),
caretaker of the Waitutu Lodge who accompanied us on part of the walk.
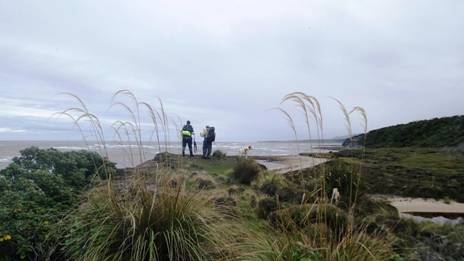
There
is always a friendly robin to help with the lunch stops in Fiordland.

Steve
in a drier section of the track.
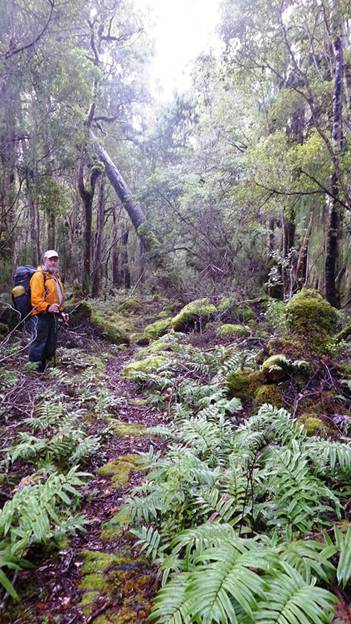
Ain’t
this just beautiful!
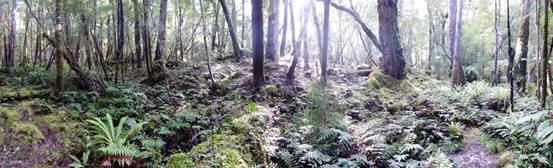
The
coast at the Waitutu Hut where we spent the nights of day 2 and day 5.
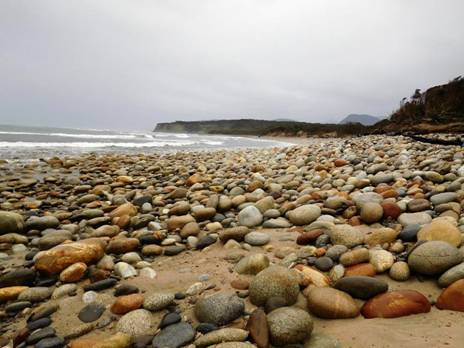
That's
me negotiating a walk wire over the Crombie.
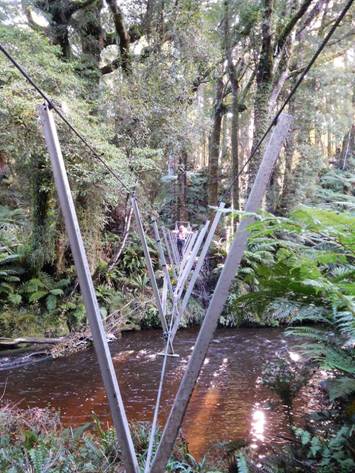
Five
minutes after setting out. The first mud!
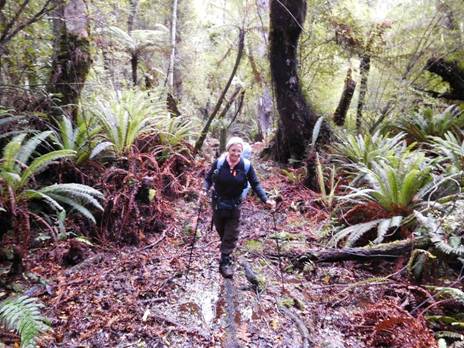
Day
3 South Coast Track, Fiordland, NZ. On this day we set out from the Waitutu Hut
heading for Westies Hut, an advertised 6 hours away. This destination was the
big one of the trip, as we had failed to make it in 2015 due to a knee injury
on my part. Very few people seem to have been there, as we could glean only a
little hearsay of the track conditions, most of which suggested very wet and
muddy going. We set out in light drizzle which cleared by mid-morning. The
track was a little muddy at the beginning, but as we climbed gently it became
lovely, dry, open forest. Sadly, around lunchtime, we were stopped in our
tracks by a flooded river with no safe crossing apparent. The water appeared to
be at least chest-deep, and with heavy packs it presented a dangerous obstacle.
We knew that some people walked along the beach around the headlands, but the
high tide was not conducive to that either. Fortunately we came across a
comfortable hut hidden in the forest so we reviewed the situation overnight and
with tide times supplied by Matt via our satellite phone planned to skip around
the headlands at low tide the next day. Westies Hut was still accessible, we
hoped!
White
moss made the ground look snow-covered.
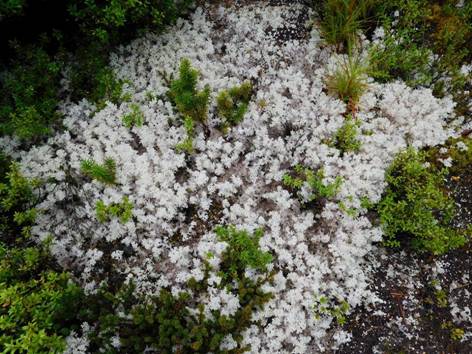
Some
muddly sections, but isn't this white moss amazing!
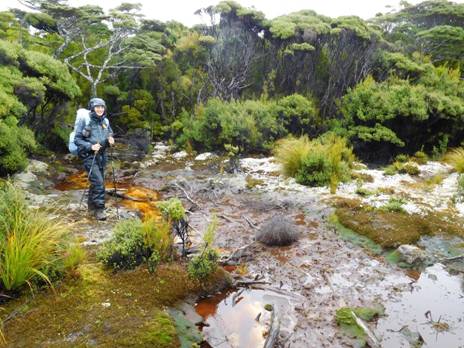
Steve
in the more open forest section.
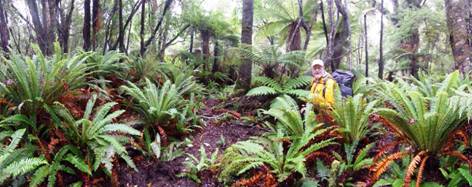
No
go across this river. Someone had tied rope, but this little black duck was not
about to wade chest deep!

The
cliffs we needed to walk around....tide is too high at this stage, but maybe in
the morning...
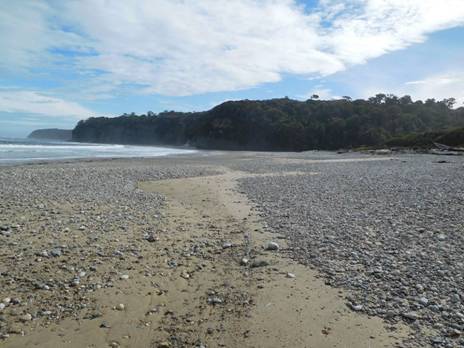
Days
3 and 4 Fiordland South Coast Track, N.Z.: Finally to Westies Hut and back
again!
Well,
the tide was low enough around lunchtime to skirt the 2 big headlands on the
beach. The beach walking was lovely and Steve managed to beat a path along pig
and deer runs back to the walking track afterwards. The walk to Westies was
delightful and descending the cliff to reach our final destination almost a
piece of cake. Westies consists of some privately owned huts nestled in a huge
complex of sea caves. The huts were comfortable and the scenery breathtaking.
The lashing of the sea all night was a bonus! Not too many people venture out
as far as Westies, and we saw no-one on our travels, but it was well worth the
effort! Finally we made Westies in our second year of trying!
Not
a bad place for a lunch stop!
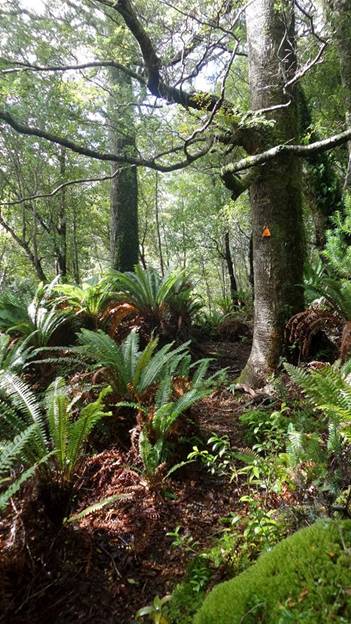
A
view of Westies coastline from the track.
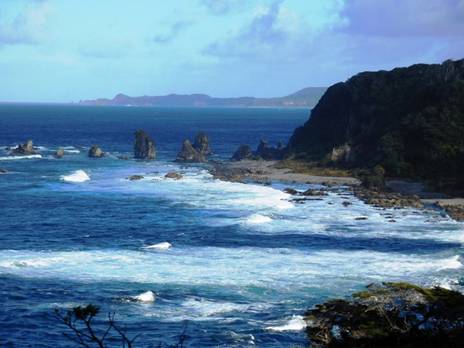
The
final descent. The rope was helpful!

Westies
huts in the main cave. There were many more caves to explore, including a
separate one for the outhouse!
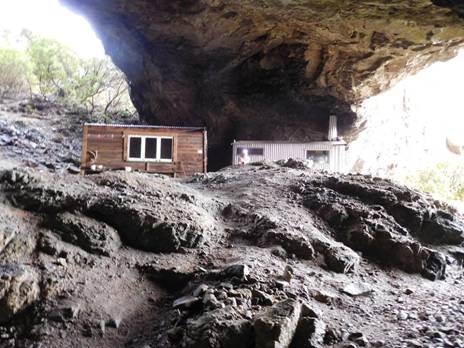
Heading
back to the Waitutu Hut , Day 4. Steve got to practise using his new knuckles
on this rope!
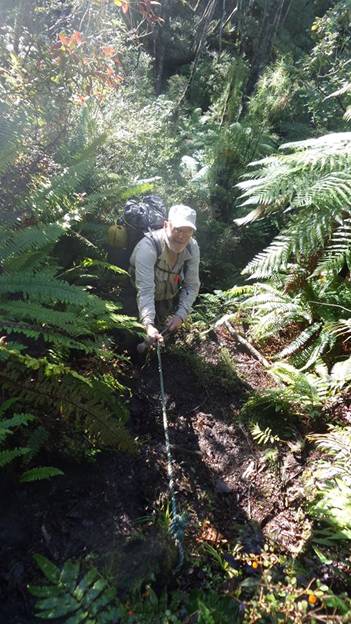
Our
walk around the cliffs at low tide
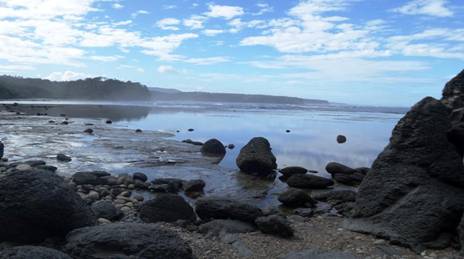
Last
of the Fiordland pics today, covering days 8-11. At the end of Day 6 we arrived
back at the Wairaurahiri Lodge for much-needed washing of ourselves and our
muddy clothes. After a day's rest, we set off for the 2 day walk to our waiting
car. We walked this section last year, and so didn't pause for many photos this
time. The first day to Port Craig is along the old logging tramway and is easy
walking. After a night spent in the quaint old Port Craig school-house, we set
off in the steady rain for a wet slog to the carpark. The scenery on this
section is lovely too, but our cameras were trying to stay dry in our packs.
Much of our waterproof gear failed us on this last day: Steve's waterproof
hearing aids, our " Event" fabric raincoats and Steve's waterproof
camera, not to mention his very absorbent new hiking shoes. Part of the problem
was the warmth and humidity which worked against the breathability of some of
the items. Anyway, we have no pix of this last day but plenty stored away from
2015. Finally, we spent the last 2 days doing some tourist stuff: a touch of
shopping for me as well as revisiting the drive to Milford Sound and
discovering the Mount Aspiring National Park. There are some appealing walks
around Mount Aspiring for another visit!
Setting
out from the Wairaurahiri Lodge: clean and re-energised!
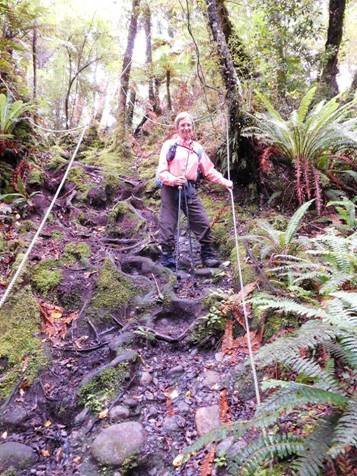
The
tramway track en route to Port Craig.
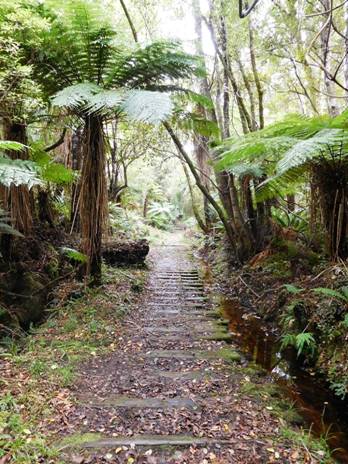
The
amazing viaduct over the Percy Burn.
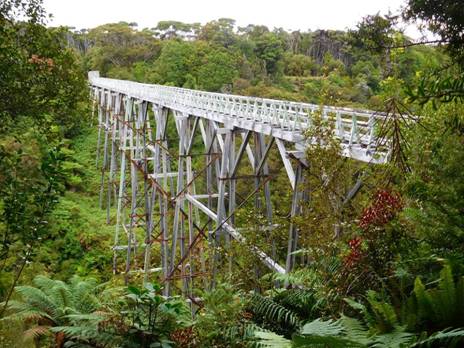
Mount
Aspiring National Park.
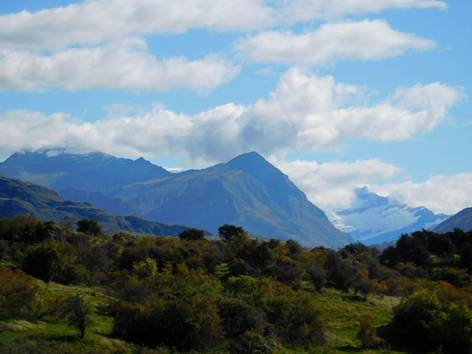
Mount
Aspiring National Park: Waterfall with rainbow.
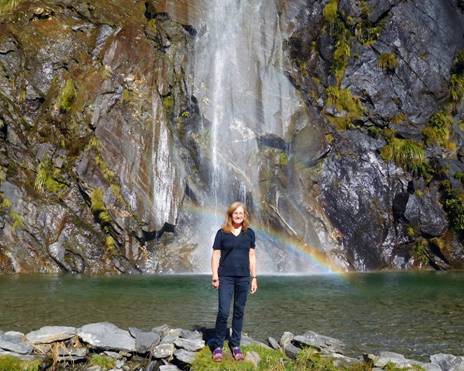
17/04/2016:
South Coast Track Fiordland NZ: Waitutu
to Westies: Do not be put off this trip. It is wonderfully worth the
effort. After the first half hour it is a fine (mostly dry) track with many
interesting features. Here and there you can step a few yards off it for wonderful
views of the sea.
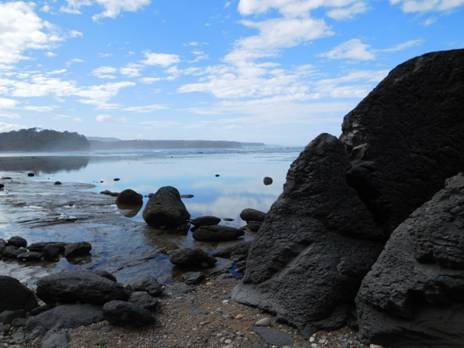
It
is possible to walk much of the distance along the beach. The first half hour
on the beach is mainly stones so you may prefer the section of wet track which
is an alternative. After half an hour on the
track there is an well-marked exit to the beach. You can walk all the
way to the Grant Burn, just after which you can rejoin/exit the track. You can
easily walk from the Grant Burn to the Aarn River and rejoin the track there
(we did). I believe you could walk along further to the next major stream and
easily walk up the dry ridge on the true left bank of it to rejoin the track.
Walking
along the beach is probably OK from half tide (ie three hours before) to low
tide and maybe for an hour after that. You have to remember that it will take
over an hour to walk from the beach entrance a half hour after the Waitutu to
the Grant Burn, then a bit over an hour again to the Aarn River. There are a
couple of points you would not get around at a higher tide and the rocks would
become very slippery, so you have to watch the tide and the condition of the
sea. Only do this if you know what you are doing. Allow three hours. High tide
could trap you in such a way it would be impossible to climb cliffs to escape
the sea. Walking from the Waitutu to the stream after the Aarn River would cut
off over 3-4 hours of what for us would otherwise be a seven hour plus walk.
The two river crossings (walkwires) split the trip almost exactly in three –
about 2 ½ hours each.
Just
after the Grant Burn (400 metres) the next stream is flooded by its mouth being
blocked. It is more or less a swim, ie not ‘Della-able’– which is why we walked
along the beach. We marked the way to (and from) the beach with orange tape.
To
begn: Crossing the Waitutu:
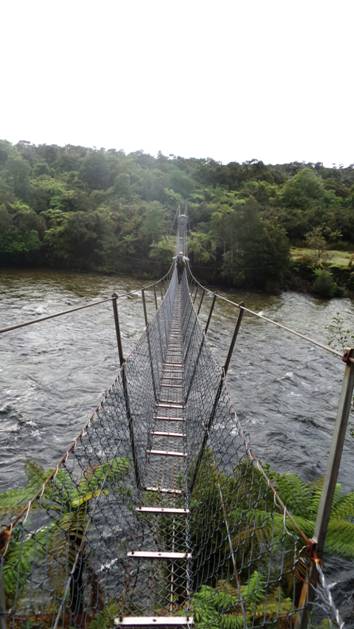
Beach
at the Waitutu looking West:
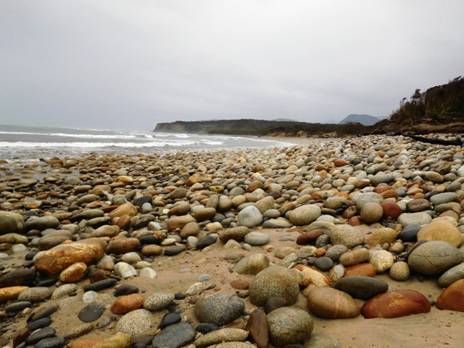
Looking
up the Waitutu River:
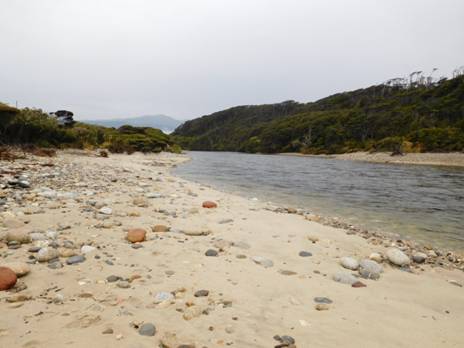
Della
doing repairs to my pack on the Waitutu verandah:
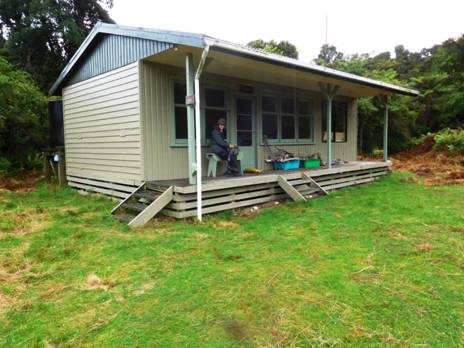
View
from the hut verandah of the Waitutu:
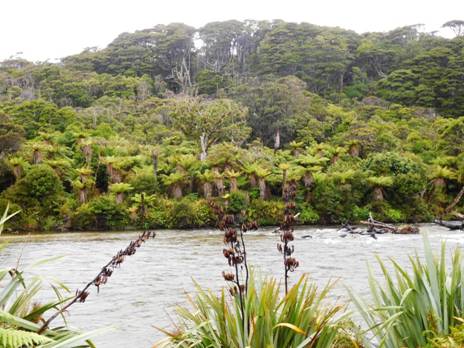
Half
an hour from the Waitutu looking West (walkable):
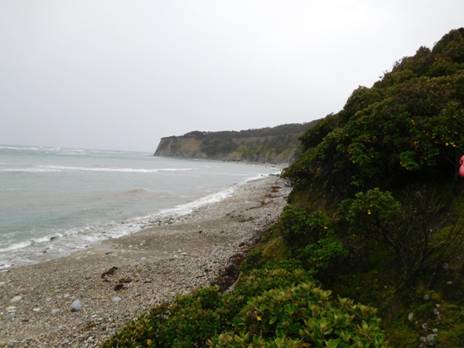
‘Like
snow upon the desert’s dusky face’
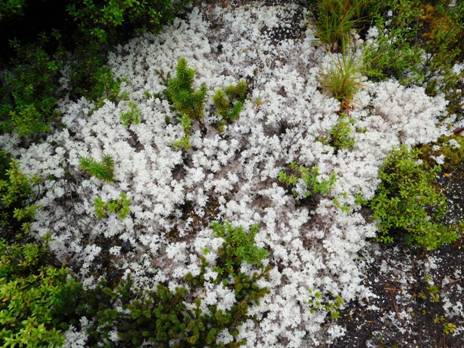
And
mud actually:
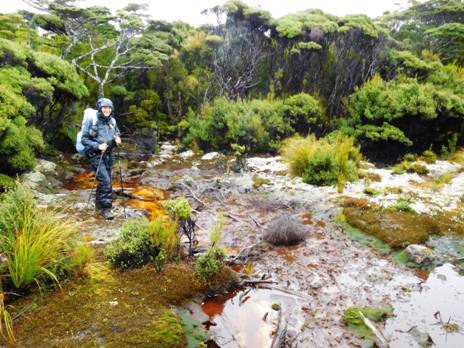
Old
telegraph ‘pole’. They used to just cut the top off a tree!
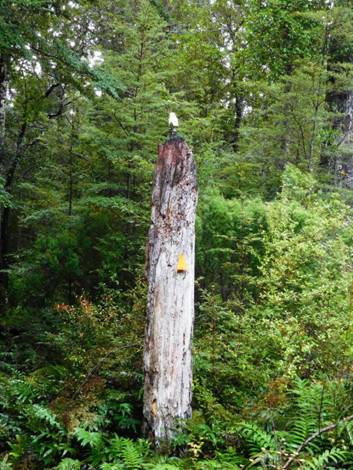
Crossing
the Grant Burn:
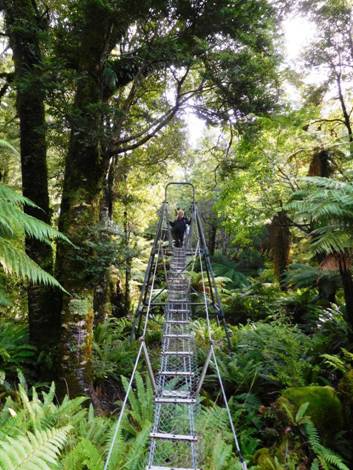
Flooded
stream we could not cross just after the Grant Burn:
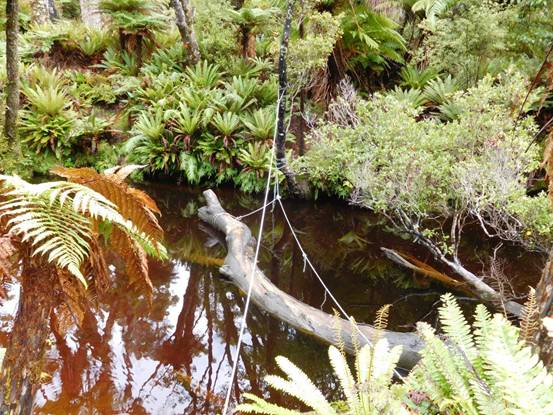
Grant
Burn looking East:
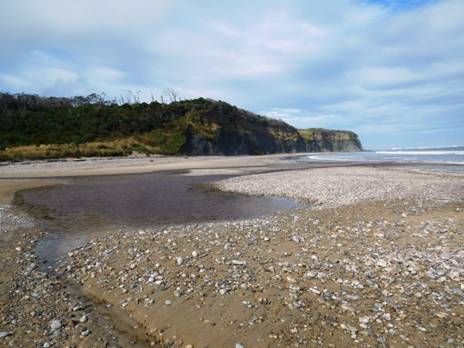
Red
billed shearwaters:
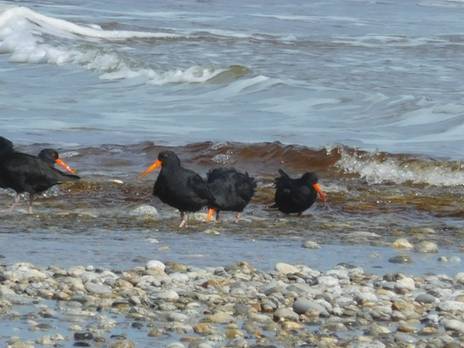
A
warm DOC hut we found:
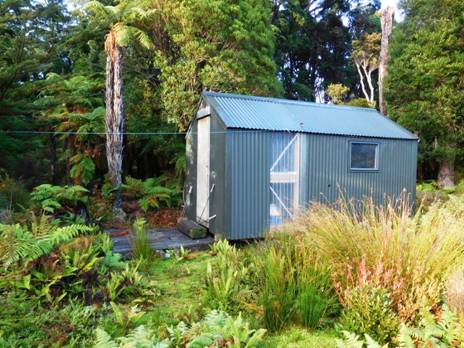
It
was small enough our body heat easily warmed it:
Grant
Burn looking West:
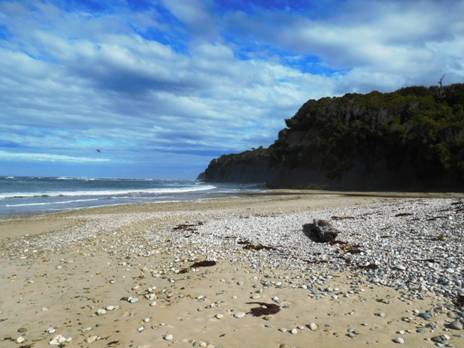
Looking
back towards the Grant Burn from Knife and Steel Harbour:
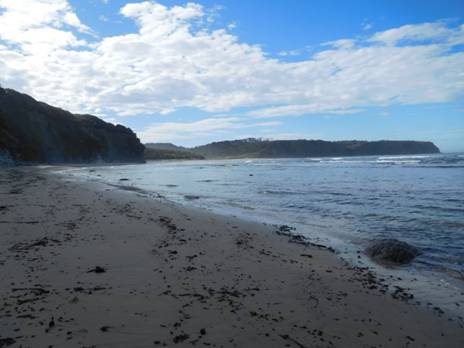
Approaching
Knife and Steel:
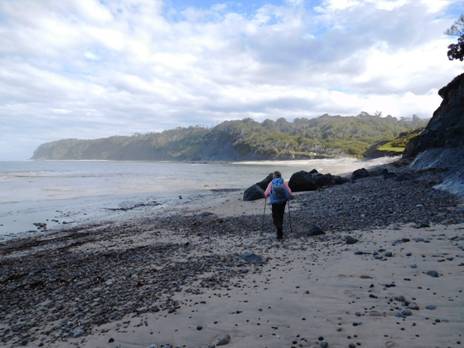
Knife
and Steel: the old hut (white dots) would have been a welcome sight.
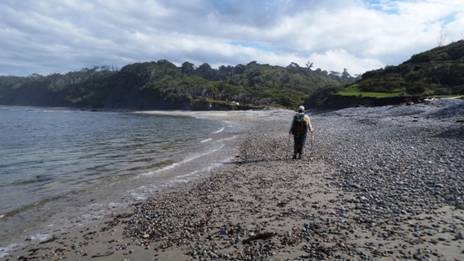
The
old winch at Knife and Steel once used to pull fishing boats up on the beach.
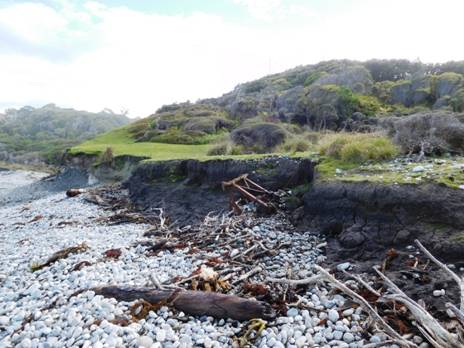
Remains
of the old hut at Knife and Steel after DOC had their way with it:
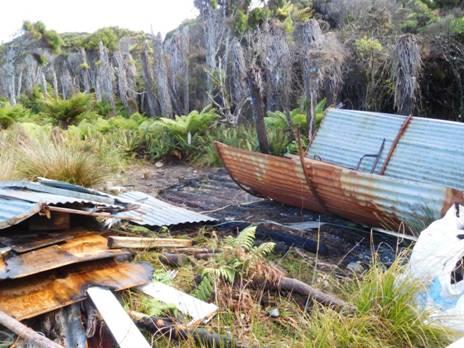
Blue
crane and redbilled shearwaters:
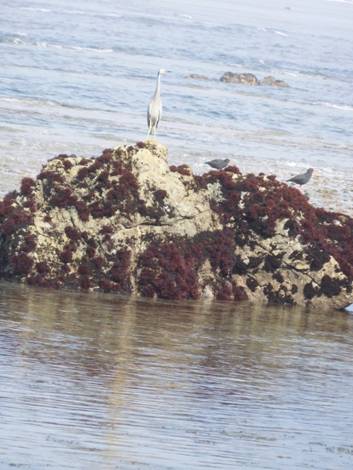
Looking
back towards Knife and Steel:
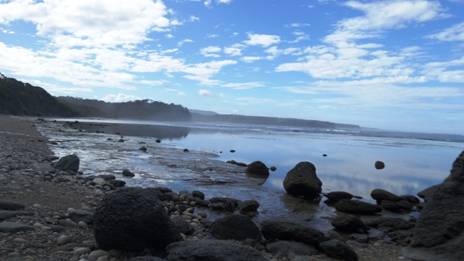
Here
and there streams simply cascade down onto the beach:
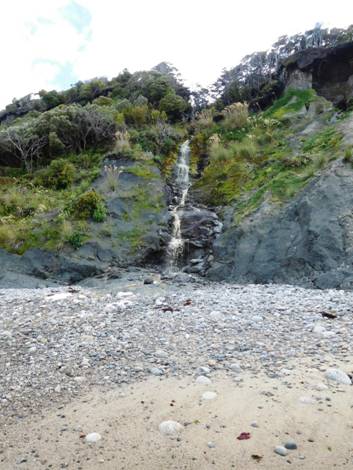
Aarn
River looking West; still walkable:
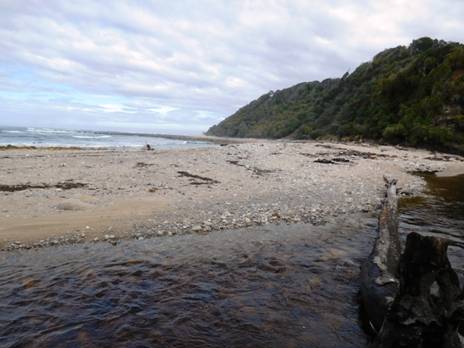
Aarn
River:
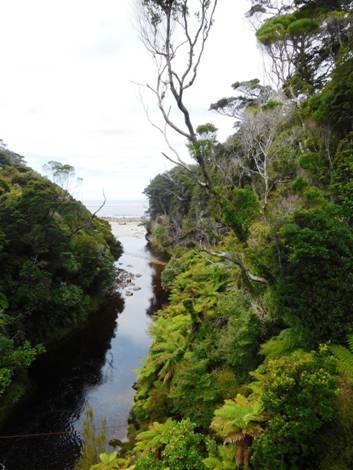
Remains
of the Aarn River hut:

Aarn
River walkwire:
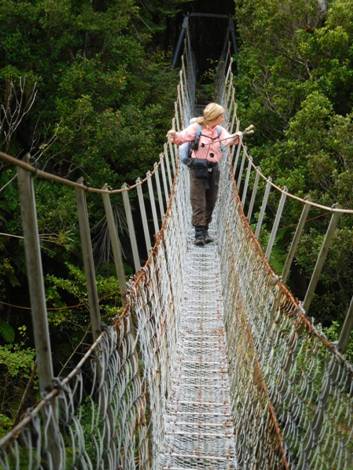
Near
the stream after the Aarn River someone has thoughtfully erected a bosun’s
chair for the weary traveller:
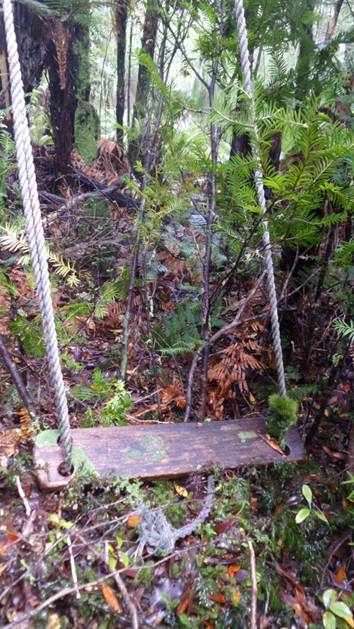
I
think you could walk along the beach to the first stream after the Aarn:

One
more river to cross:
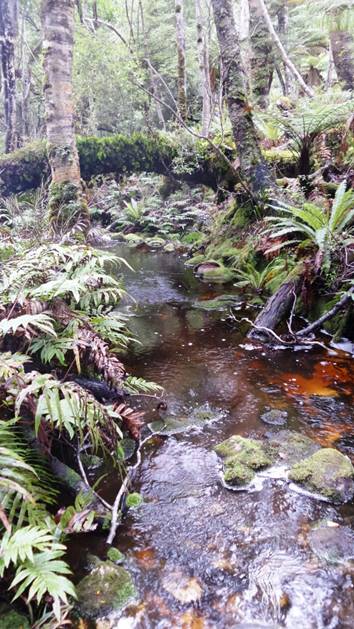
Fungal
surprises along the way:
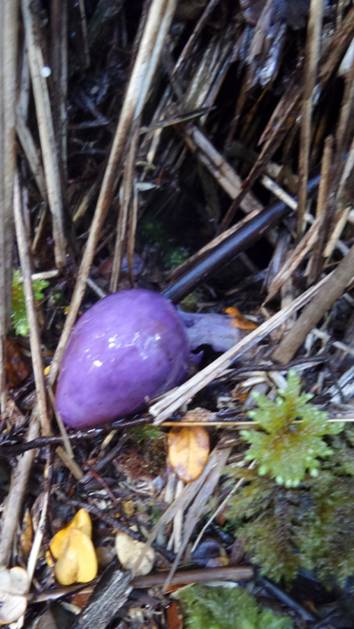

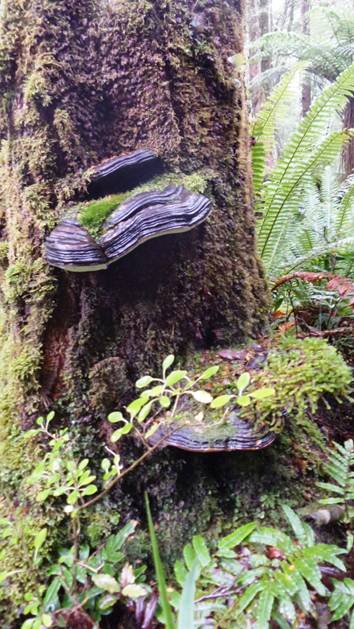

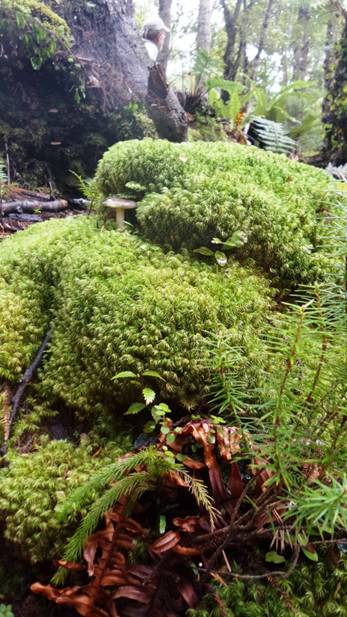
Most
of the way out to Westies the track is dry and easy:

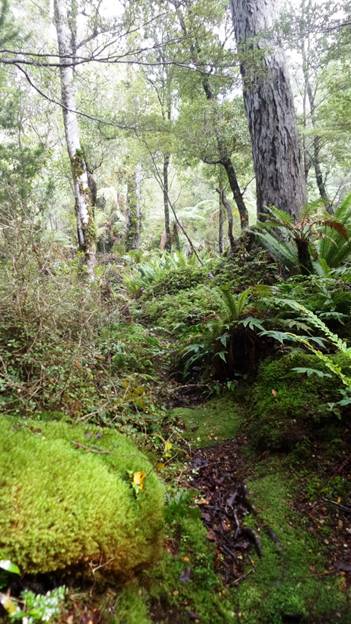
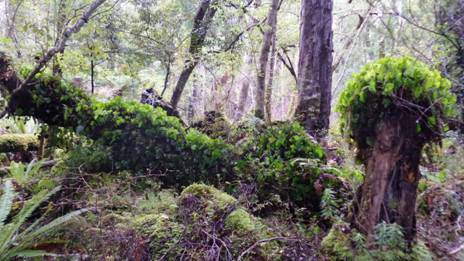
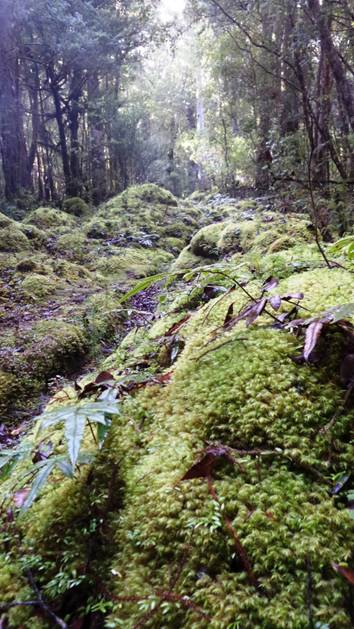
With
many glimpses of the sea:
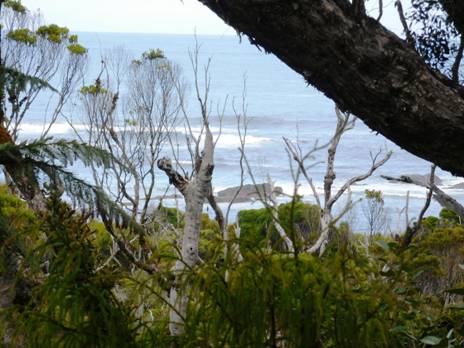
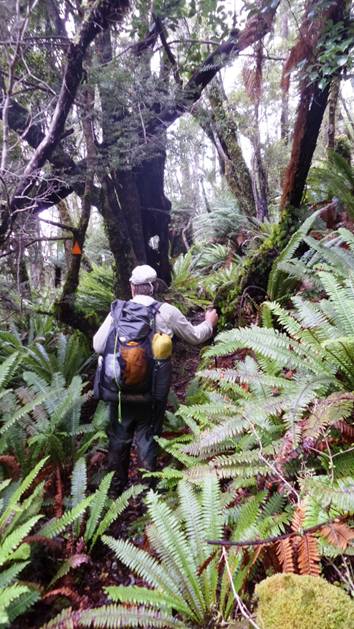
A
final stream crossing:
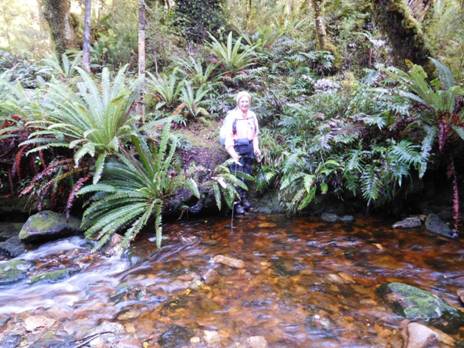
First
view of Price’s Harbour – Westies is not in the cave on this (Eastern)
headland:
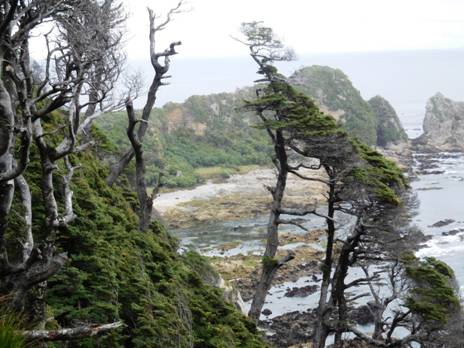
It
is on the other side of this Western headland:
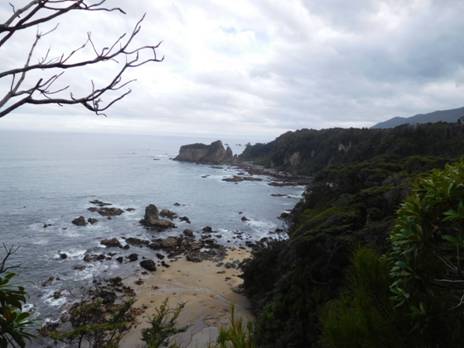
A
steep descent to Westies Hut and you are there:

See
also:
http://www.theultralighthiker.com/westies-hut/
http://www.theultralighthiker.com/south-coast-track-fiordland-nz-wairaurahiri-to-waitutu-2016/
http://www.theultralighthiker.com/dusky-south-coast-tracks/
http://www.theultralighthiker.com/fiordland-2014-2/
http://www.theultralighthiker.com/a-walk-in-fiordland/
http://www.theultralighthiker.com/bucket-list-westies-hut/
http://www.theultralighthiker.com/fiordland-wairaurahiri-to-rarakau/
http://www.theultralighthiker.com/fiordland-wairaurahiri-to-waitutu-part-4/
http://www.theultralighthiker.com/westies-hut-topo-map-errors/
http://www.theultralighthiker.com/waitutu-forest-fiordland-warm-air-pockets/
16/04/2016:
South Coast Track Fiordland NZ:
Wairaurahiri to Waitutu: Since we were there last year some new
alternatives have emerged. On the way out we were able to follow alovely dry
even old hunter’s route along the coast to the crossing of the Crombie Stream,
then walk up the ridge on its true right bank (facing downstream) and rejoin
the South Coast track. Many beautiful views along the way.

There
used to be a convenient hunter’s hut at the Crombie Mouth (the ‘Manuka Lodge’)
but it has ‘unfortunately’ been burned down. An educated guess about who was
responsible would be reasonable. DOC is also in the process of dismantling an
excellent ‘survival’ hut at Knife and Steel Harbour, the next inlet West of the
Grant Burn. It is no longer usable.
This alternative route along the coast avoids
about half of the worst section of the South Coast Track. From the Wairaurahiri
River to the Crombie Stream is muddy and rough. From the Crombie to about half
an hour after the Angus Burn it is even muddier and nastier. After that, there
is a short wet bit for half an hour after the Waitutu, then it is a fine track
all the way to Westies.
Also,
about an hour after the Angus Burn there is a new track down to the DOC hut at
Long Point – worth a side trip if you have the time. You can stay there. The
hut is about an hour off the main track and nearby the lighthouse there with
many beautiful views. It is about two hours from the Long Point Hut to the
Waitutu Hut. We noticed another track off towards the coast only about half an
hour from the Waitutu Hut. This may be a loop track to/from Long Point. The
first exit was marked with white triangles; the second with orange. Some
exploration would no doubt reap rewards. A little closer to the Waitutu you
will also notice a track which head off upriver to the Slaughter Burn, Lakes
Poteriteri & Hauroko. There is some tape nearby these three exits, but you
have to be watching out for them nonetheless. For variety it may also be
possible to walk some of the distance (out to the Crombie for example) along
the beach at low tide.
On
the way back to the Wairaurahiri, about an hour after you cross the Crombie
Stream keep your eye out for a short cut track to the Waitutu Lodge off to your
right (just before the steep stream crossing – Tiny’s Creek). If you are
staying at the Waitutu Lodge (You Should!) this dry short cut will be most
welcome. I guess it cuts off about hald an hour of unpleasantness.
Della
at the Wairaurahiri Mouth (looking East) before setting out. So clean:
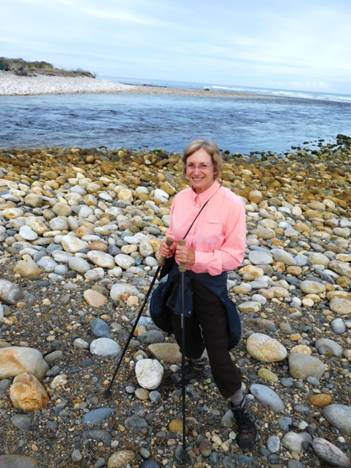
Wairaurahiri
looking West:
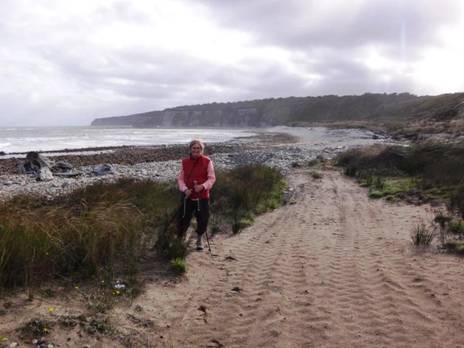
Giant
Rimu. There are lots of them. The Waitutu Forest was never inhabited by man:
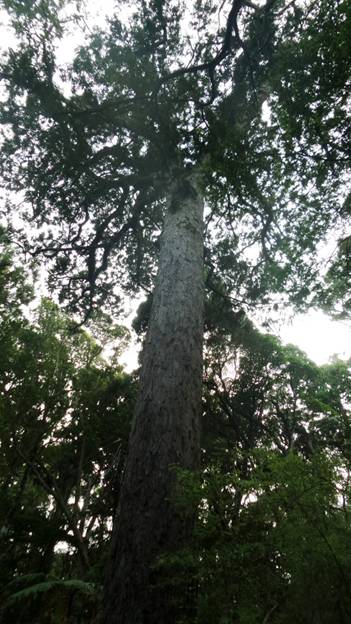
Setting
off on ‘Tiny’s Track’ towards the Crombie:
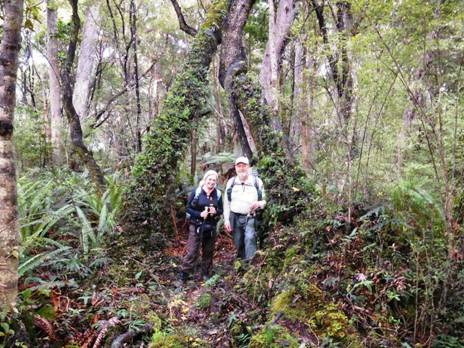
Deer
pen just off track half way to the Crombie: looking West. Beach walkable.
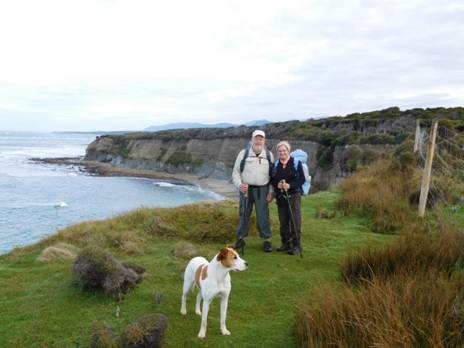
Same
spot looking East.
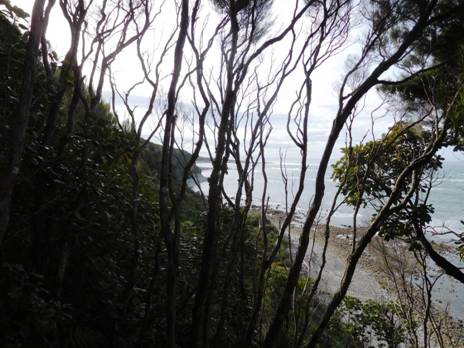
Detail:
Crombie Mouth:
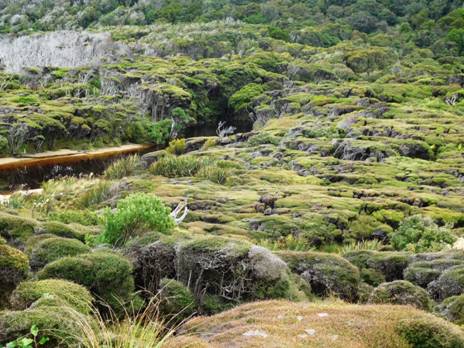
Sophie
at the Crombie Mouth:
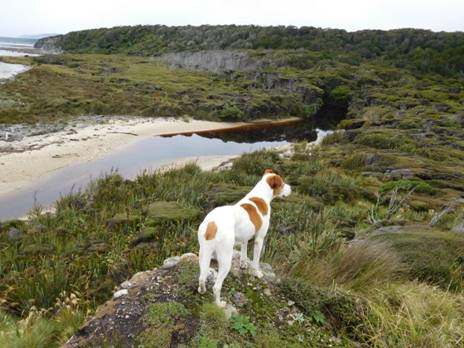
Pete,
Steve & Sophie surveying the Crombie Mouth:
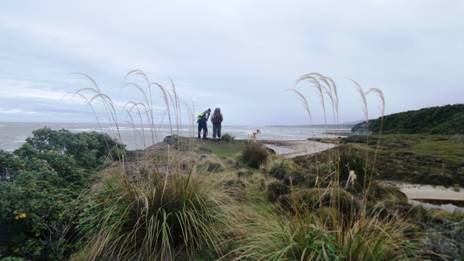
Crombie
Mouth looking back East: Walkable?
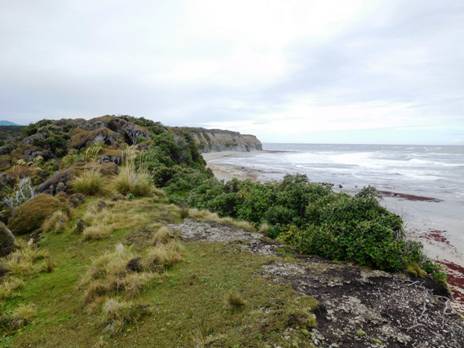
Pete
& Della: Crombie Mouth looking West: Beach looks walkable all the way to
Long Point from here.
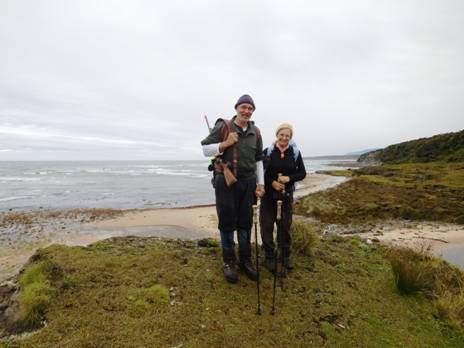
Here
is a zoom of it:
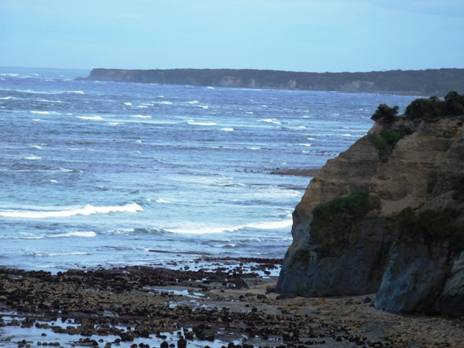
Della
crossing the Crombie: return journey:

The
track is very muddy from the Crombie to about half an hour after the Angus Burn
(Long Point turnoff):
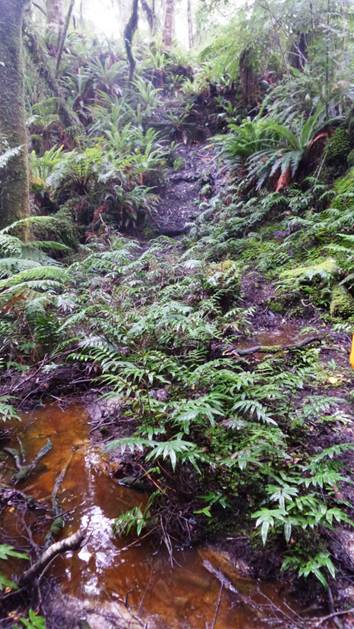
Angus
Burn resident robin:
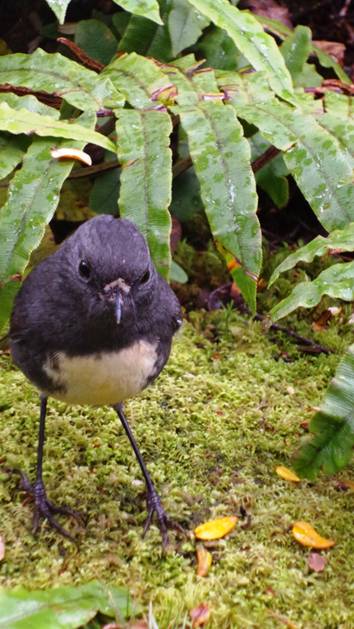
Crossing
the Angus Burn:
Half
an hour after the Angus Burn the track suddenly improves; the last hour or so
is dry and pleasant:
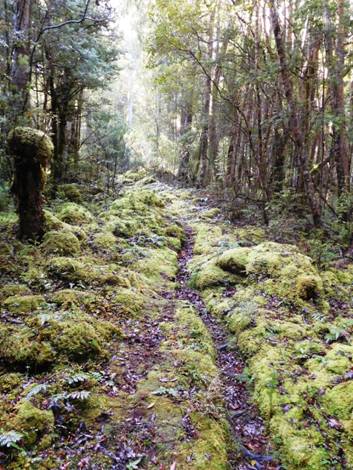
With
numerous beautiful vistas:
And
interesting things to see, like this stump:
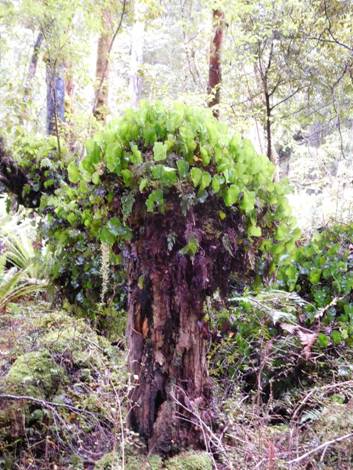
And
this mushroom:

A
fine dry track:

Pretty
much all the way to Westies:
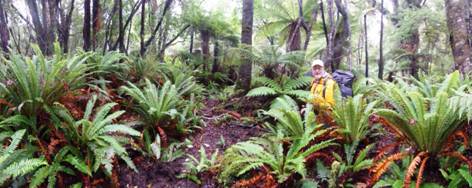
Quite
open just before the Waitutu:
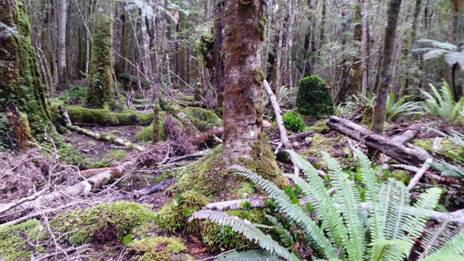
Waitutu:
first view of the sea:
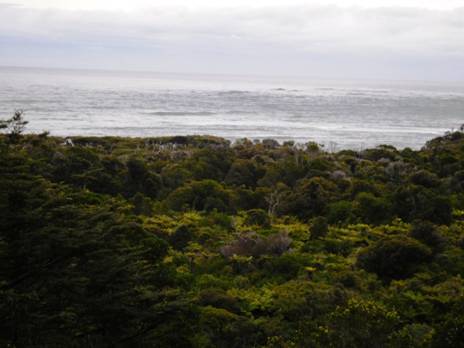
Waitutu
River crossing:
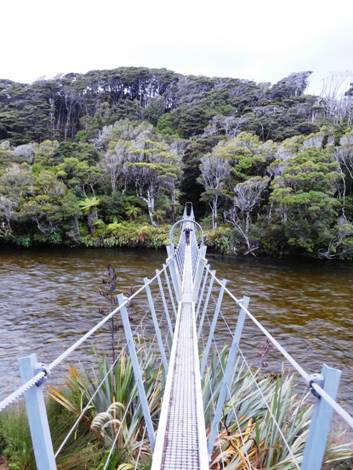
Beach
at Waitutu looking back East:
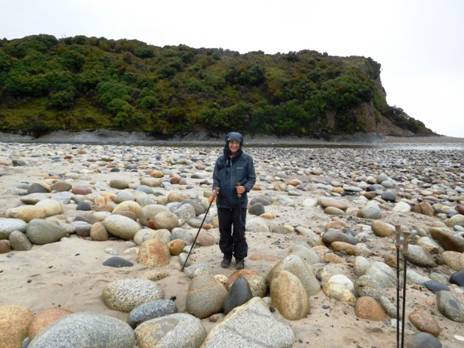
See
also:
http://www.theultralighthiker.com/dusky-south-coast-tracks/
http://www.theultralighthiker.com/fiordland-2014-2/
http://www.theultralighthiker.com/a-walk-in-fiordland/
http://www.theultralighthiker.com/bucket-list-westies-hut/
http://www.theultralighthiker.com/fiordland-wairaurahiri-to-rarakau/
http://www.theultralighthiker.com/fiordland-wairaurahiri-to-waitutu-part-4/
http://www.theultralighthiker.com/westies-hut-topo-map-errors/
http://www.theultralighthiker.com/waitutu-forest-fiordland-warm-air-pockets/
http://www.theultralighthiker.com/westies-hut/
15/04/2016:
UL Pillows: For many years I used
the Graham Medical Small @ .6 0z (17 grams). This was a great pillow when it
had dual chambers. After I could no longer buy the dual version (though the
single is still the lightest pillow available) I started looking for a
replacement and finally settled on the Exped UL Medium @ 1.6 oz (46 grams)
which gets me a great night’s sleep (coupled with the Thermarest’s Neoair Xlite
Women’s sleeping pad – which I also couple with a Big Agnes Cyclone Chair for a
comfy seat in the wilderness: http://www.theultralighthiker.com/cyclone-chair/
). Here is a comparison of what’s available: https://backpackinglight.com/ultralight-inflatable-pillow-gear-guide-jordan/ I would certainly be prepared to try Neoair’s
Siza S (might be warmer on a cold night – 1.9 oz or 54 grams) or Big Sky’s
Dreamsleeper Deluxe @ 1.4 oz (40 grams). One thing I like most about Exped’s is
it is asymmetric so that you can choose from a number of different
configurations.
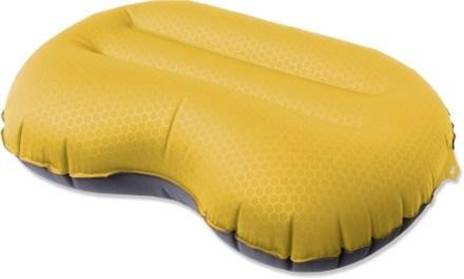
14/04/2016:
UL Gaiters: I admit I had not just realised
how much mud (and grass seeds) a pair of lightweight ankle gaiters would keep
out of your shoes/socks. Della wore a pair of Sea to Summit ones on our recent
South Coast Track hike (See http://www.theultralighthiker.com/westies-hut/
& ff) and managed to retain completely clean socks/shoes. Since then we
have received a pair of MLD’s ‘Superlight Gaiters’ (http://www.mountainlaureldesigns.com/shop/product_info.php?cPath=37&products_id=114)
@ 46 grams per pair. I doubt there will be many occasions these will be off my
feet. I hardly ever go anywhere without their ‘Rain Mitts’ @ 40 grams a pair, a
sure way to keep your pinkies dry and warm. Sea to Summit have a slightly
heavier version here: http://www.seatosummit.com.au/products/gaiters/tumbleweed-gaiters/?ref=outdoor
See also: http://www.theultralighthiker.com/ultralight-mitts-and-gaiters/

14/04/2016:
Laybag: Not exactly ultralight, but
an inflatable hammock/raft @ 1200 grams. A neat idea: https://vimeo.com/160150388?from=outro-embed
& https://en.laybag.com/collections/frontpage/products/lay-bag-green-2?variant=16884098881
13/04/2016:
Fire Engine Rolls Over Peanut Lighter:
Impressive. A little heavy maybe (14.3/19.9 grams) , but refillable and
well-nigh indestructible: https://www.youtube.com/watch?v=cpAKR3DmLZQ
After recently suffering a failure with a Mini-Bic (I had a spare) – 12 grams.
I am seriously considering my firelighting options. After all if you seriously
value your life the ability to light a fire in the wilderness is utterly vital: http://www.theultralighthiker.com/how-to-light-a-fire-in-the-wet/ Available (in a number of sizes), here: http://www.countycomm.com/tipeanutlighter.html from $US29.50.
12/04/2016:
Westies Cave: We have just returned
from this magical place four days walk along the South Coast Track from
Tuatapere, Fiordland NZ where we stayed in this wonderful hut nestled in a sea
cave at the Western end of Price’s Harbour at the far end of the fabulous
‘South Coast Track’:
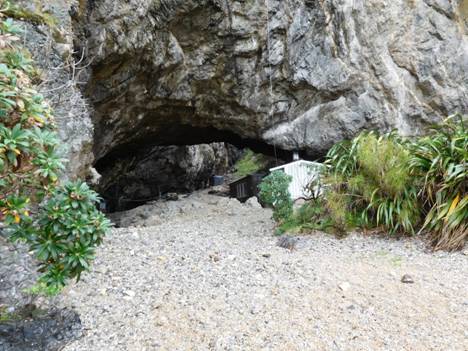
This
is the first view you have of Price’s Harbour from the track. The topo map and
GPS incorrectly locates the Westies cave and hut at the eastern end of the
harbour in the cave marked with a white arrow on the rocks. Ignore this. Follow
the track to the track junction (.5 hour) and take the left fork, marked with
square orange reflectors instead of the usual triangular ones you have been
following up to now.
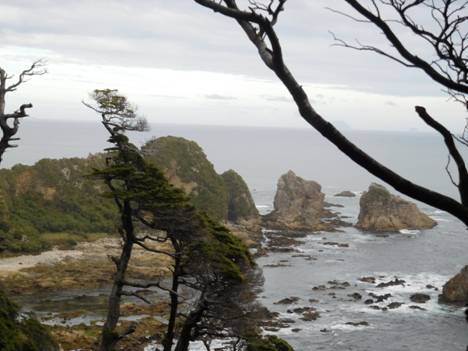
The
hut (cave) is in the opposite (Western) side of the Western end (below) of
Price’s Harbour.
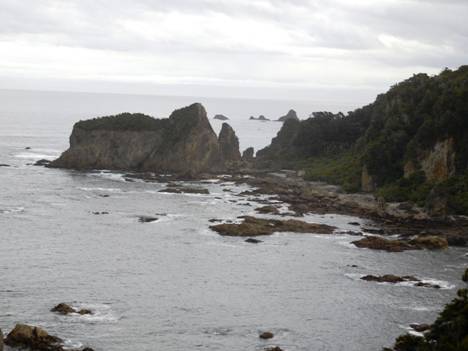
The
turn off (below) is impossible to miss:
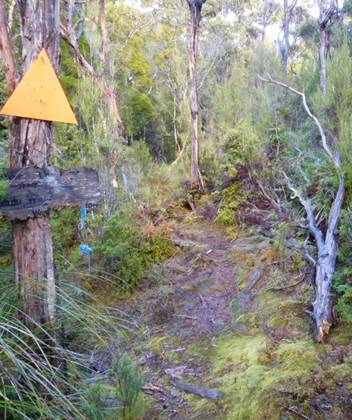
Gazing
down at the beach in Price’s Harbour – nary a footprint there:

First
view of the vista to the West of Price’s Harbour. ‘Victoria’s ‘Twelve
Apostles’, eat your heart out!
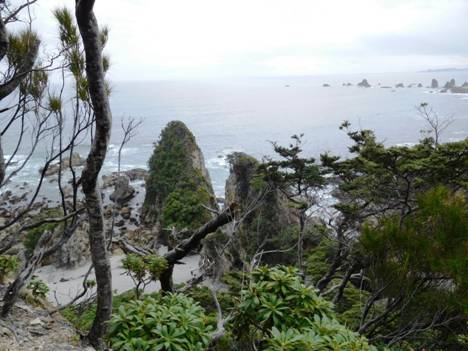
First
view of Westies Cave; the two huts are snuggled down in there:

First
view of Westies hut(s):
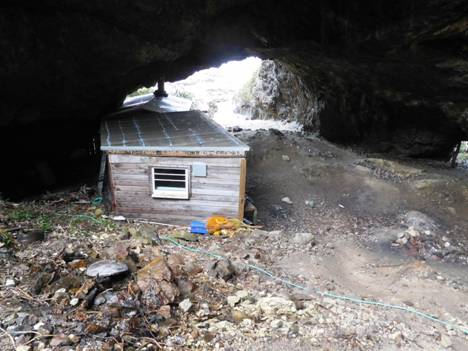
Westies
main hut (where he lived for a number of years) is nestled just inside the cave
mouth with a splendid view out to sea:
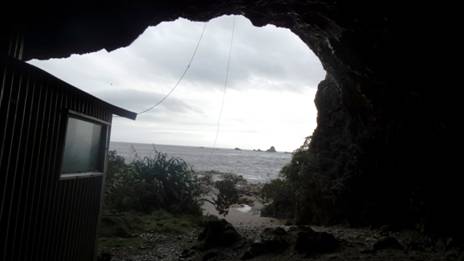
View
from the toilet:
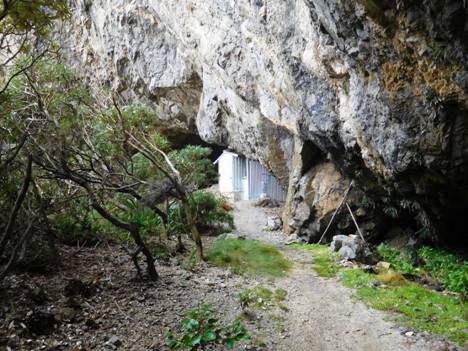
I
will add this to my list of interesting toilets:
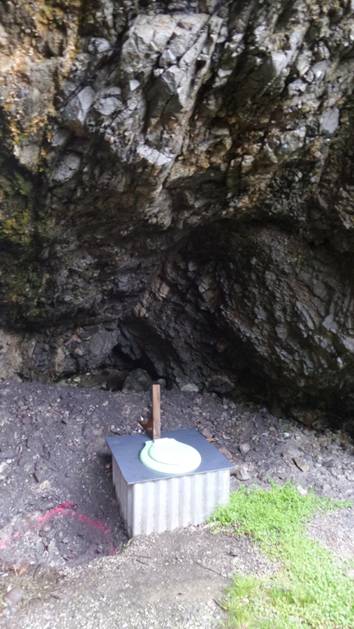
The
cave has a second (western) entrance. This is the splendid view from it:
And
with me being a blot on the landscape:
And
this a few steps further along:
Looking
back East towards the main cave:
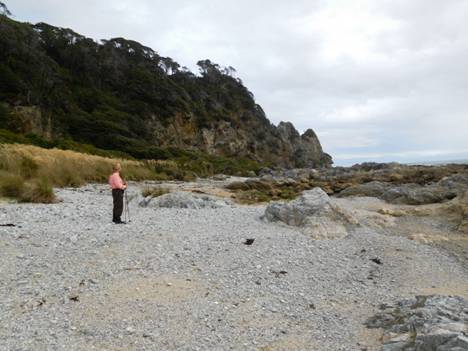
You
had to descend dizzying cliffs through the jungle to get down here:
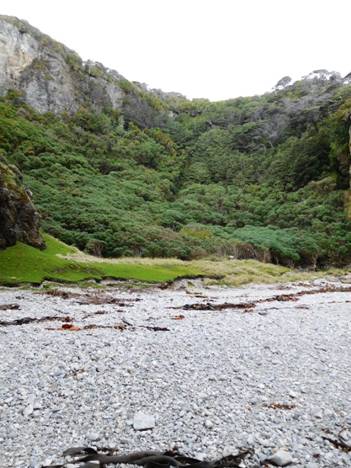
Like
this:
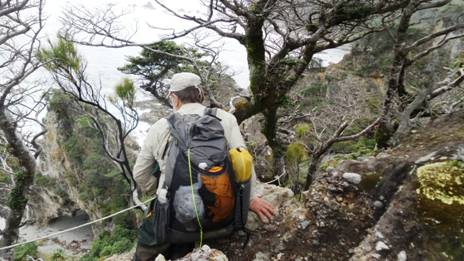
My
(hand) specialist was doubtful why I asked whether my new knuckles would be
strong enough to climb a rope:
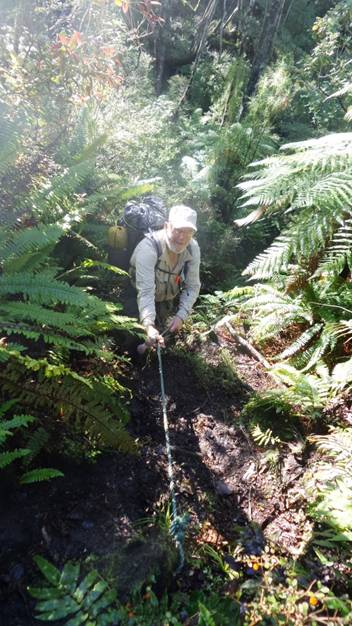
To
the East one cave leads to a little beach or another cave. There is a veritable
maze of wonderful sea caves:
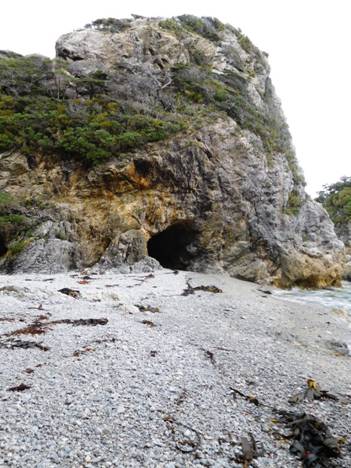
So
many:
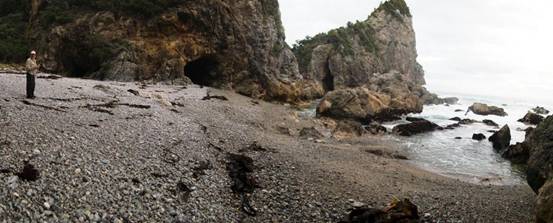
With
delightful glimpses through them:
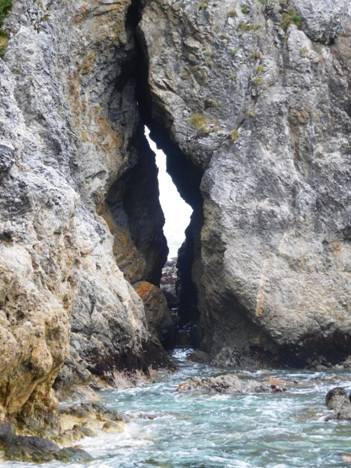
They
frame beautiful landscapes:
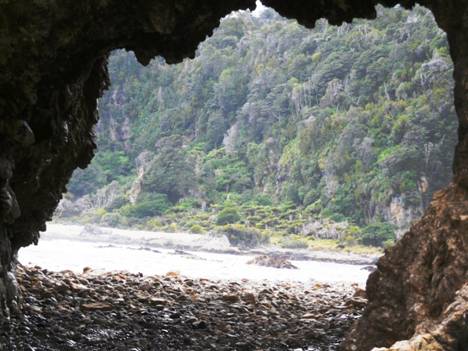
You
can just walk through from one to the other:
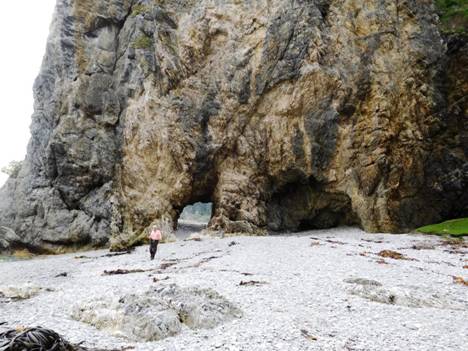
Again
and again:
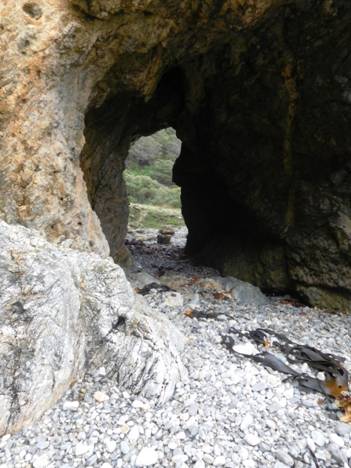
Until
you’re not sure which way is back:
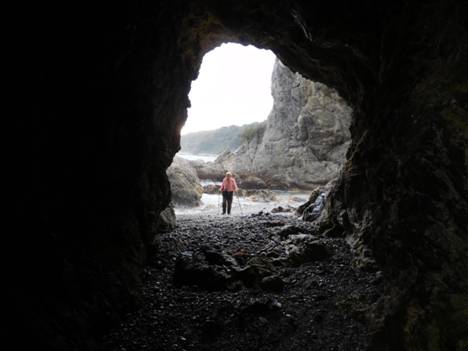
A
worry if the sea is rising:
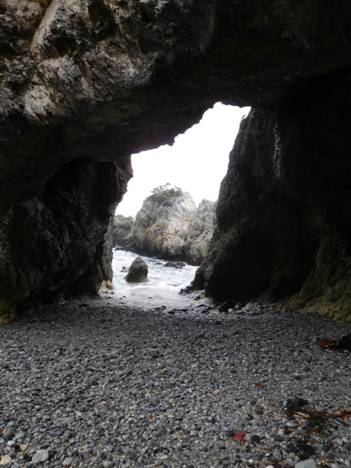
Another
outstanding feature of Price’s Harbour are the awesome stone monoliths:
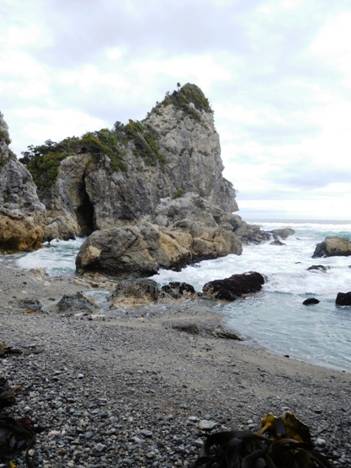
They
are so enchanting:
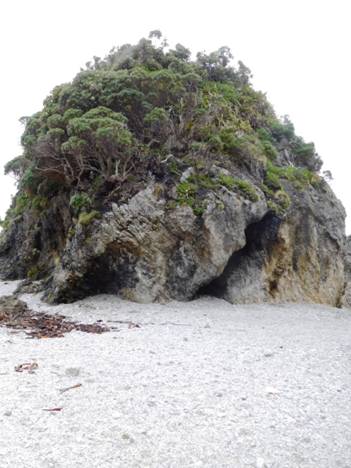
Some
come with their own mermaids (wrapped well against sandflies):
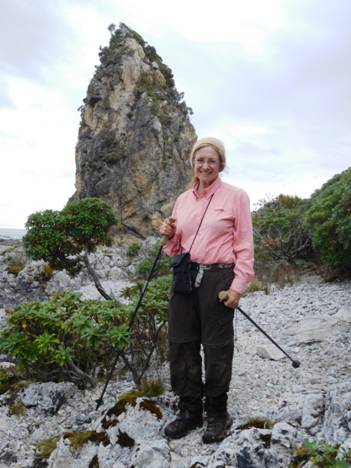
Finally
you look out East towards the other headland of Price’s Harbour – the one the
GPS wrongly thinks the hut is in:
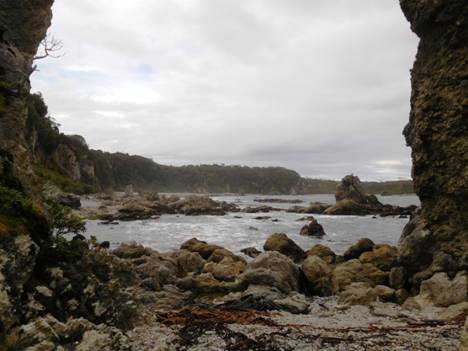
The
main cave is very large. The huts have seven berths (a double in the main hut)
and five bunks in the second hut. There is ample room on the floor to sleep a
few people more. Outside a veritable army could camp.
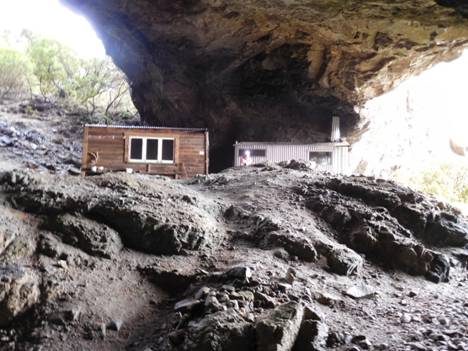
There
is a ‘chip’ water heater and a hot shower:
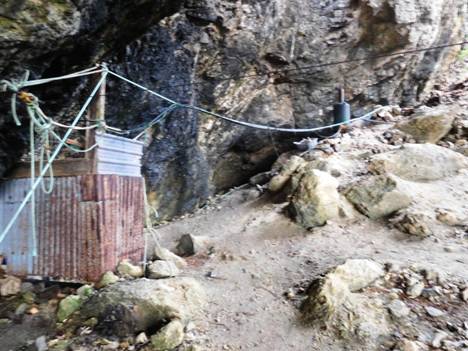
Inside
the main hut is friendly and cosy. Four could easily sit around the table.
There is a two seater lounge, a double bed, a pot belly stove, sink (with
water), a couple of windows with splendid views out to sea. What a home it is.
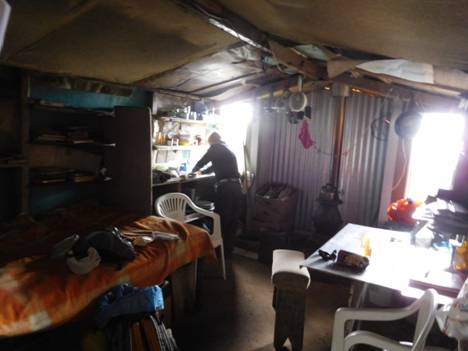
The
bunk house:
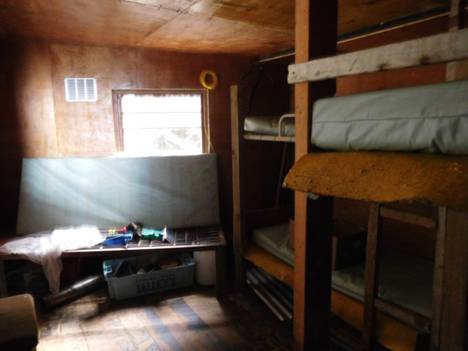
Above
the ht is the water supply: a small stream (you might need to clean out the
filter, and a rain catchment roof for the ‘dry season’. There are carefully
printed instructions about how to operate the plumbing.
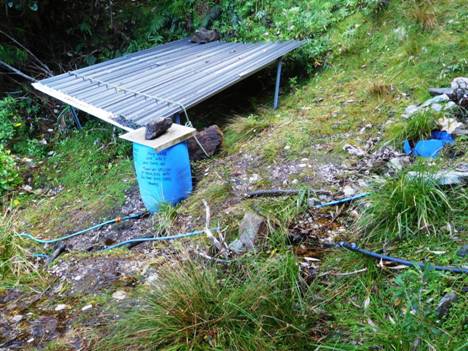
This
was our last view of Westies. What a wonderful place it was!
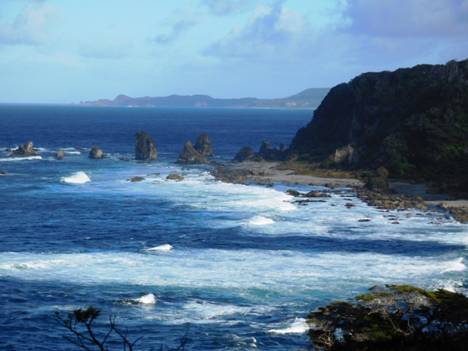
See
also:
http://www.theultralighthiker.com/dusky-south-coast-tracks/
http://www.theultralighthiker.com/fiordland-2014-2/
http://www.theultralighthiker.com/a-walk-in-fiordland/
http://www.theultralighthiker.com/bucket-list-westies-hut/
http://www.theultralighthiker.com/fiordland-wairaurahiri-to-rarakau/
http://www.theultralighthiker.com/fiordland-wairaurahiri-to-waitutu-part-4/
http://www.theultralighthiker.com/westies-hut-topo-map-errors/
http://www.theultralighthiker.com/waitutu-forest-fiordland-warm-air-pockets/
10/04/2016:
Just waiting on Jetstar to whisk us away from all of this. Farewell to
Fiordland's beautiful South Coast Track! Much more to follow:
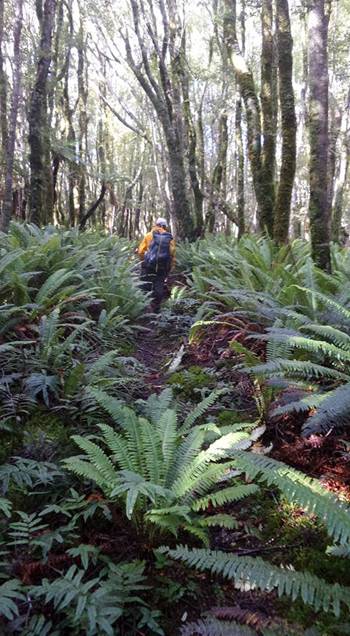
27/03/2016:
Glamping Wilsons Prom: You can spend
a lovely two days walking from Mt Oberon Car park to Wilsons Prom Lighthouse
and back staying in pretty plush accommodation at the lighthouse. The distances
are considerable, but this way you only need to carry a daypack with emergency
supplies, a bottle of wine to drink on the verandah at night etc, so the 19.1
km there via Telegraph Saddle and the slightly longer journey back via Little
Waterloo Bay is quite ‘doable’. If two retirees can do it, so can you! You can
also (instead) take the slightly longer route from Tidal River via Overon Bay
(23.8 km). For details, bookings and pictures about the accommodation, see
here: http://parkweb.vic.gov.au/explore/parks/wilsons-promontory-national-park/things-to-do/wilsons-promontory-lightstation
Of course, if you can’t quite make those distances or if you want to camp out,
there are campsites with water, etc at the Half Way Hut, Roaring Meg (about an
hour from the lighthouse) and at Little Waterloo Bay (about half way back). You
may notice an absence of Jack Russels in this post – too public a (banned) spot
for them I’m afraid. The pictures lack something from their absence…
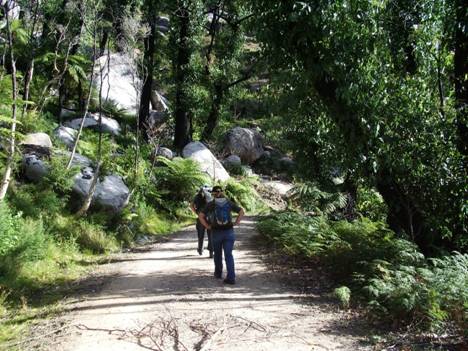
Heading
off.
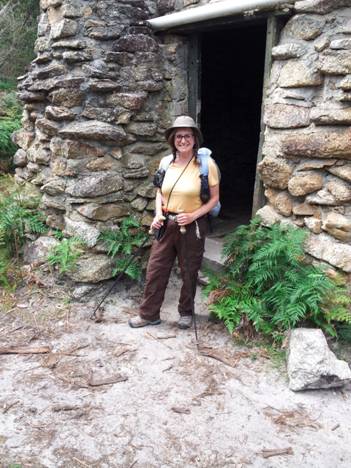
The
Half Way hut (water and campground) along the telegraph Track.
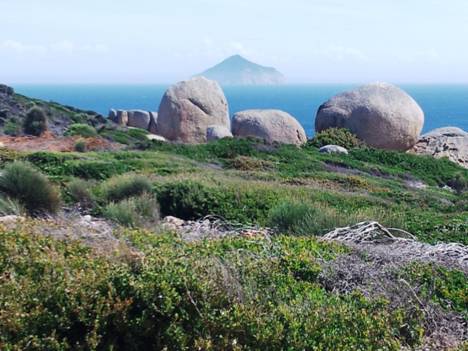
Granite
Tors and first view of Rodondo Island.
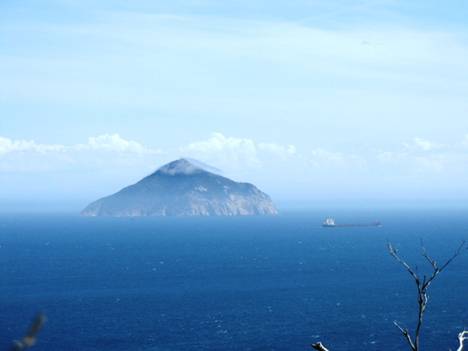
A
ship sails past Rodondo Island which has been climbed (but not by me).
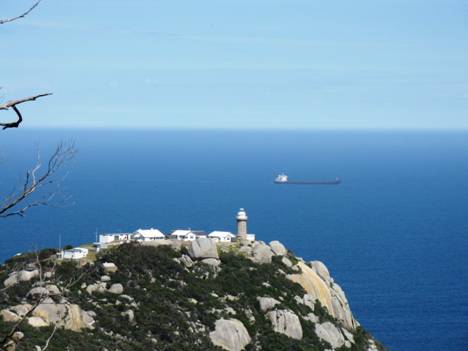
First
view of Wilsons Prom.
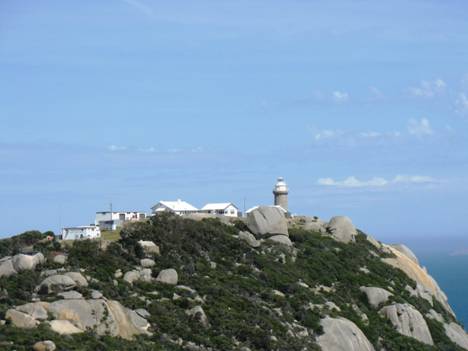
Wilsons
Prom buildings (detail).
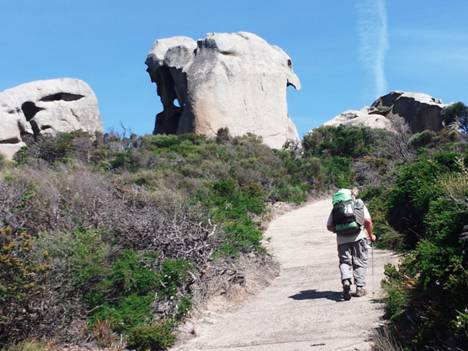
Road
from the docks to the lighthouse - interesting eagle rock.
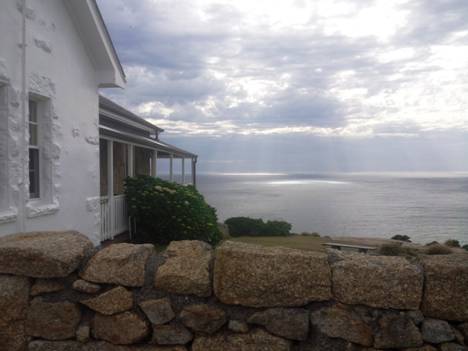
The
lighthouse keeper’s cottage (accommodation).
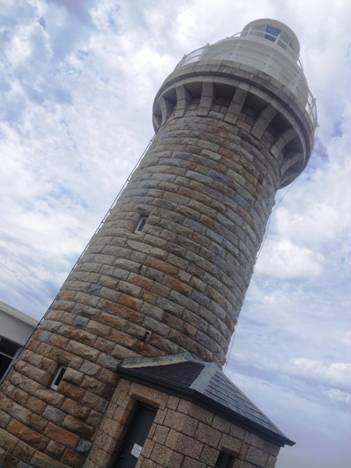
The
leaning tower of Wilsons Prom.
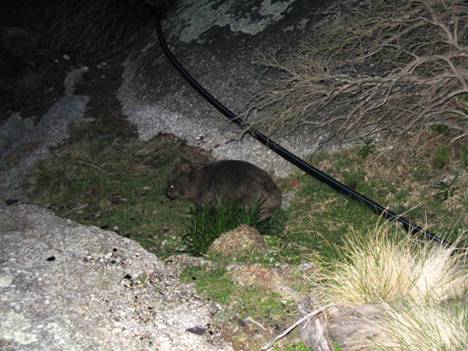
Wilsons
Prom's resident wombat.
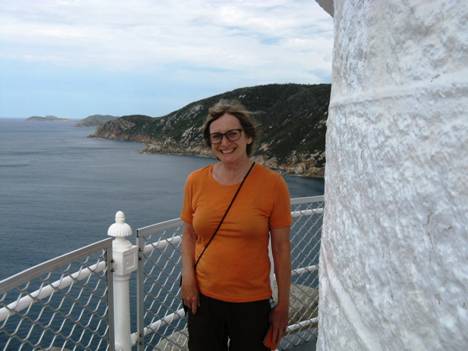
The
beauties of Wisons Prom lighthouse.
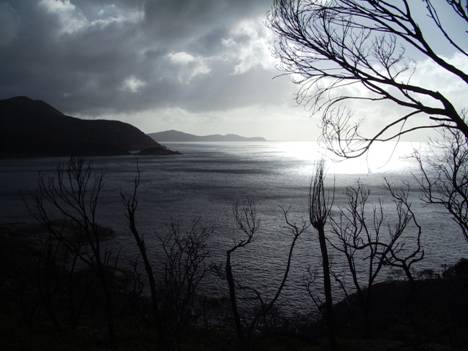
Wilsons
Prom sunset.
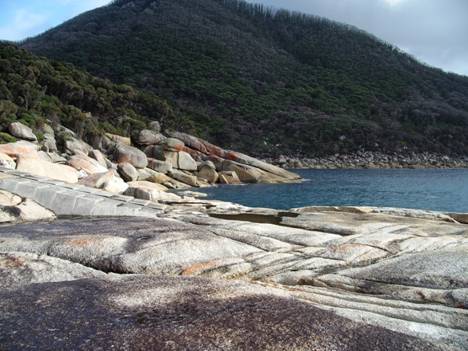
Wilsons
Prom docks.

Interesting
granite tors at the Prom.
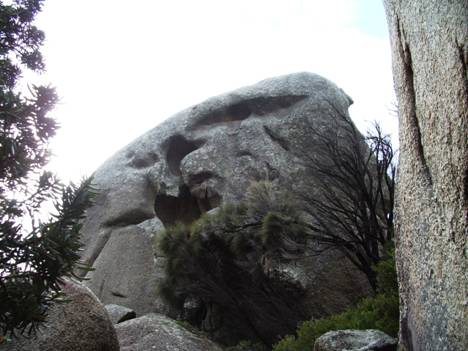
Another
view.
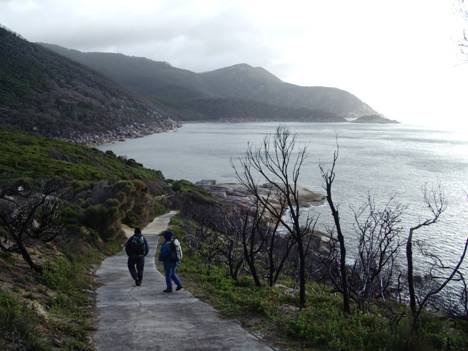
Leaving
the Lighthouse.
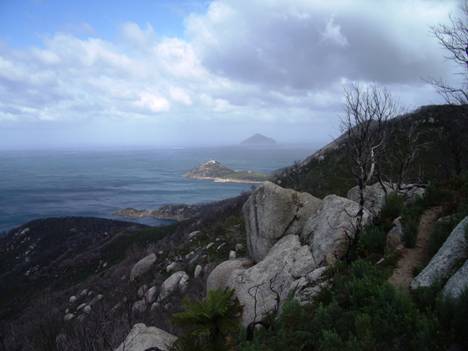
View
back towards the lighthouse from the Waterloo Bay track.
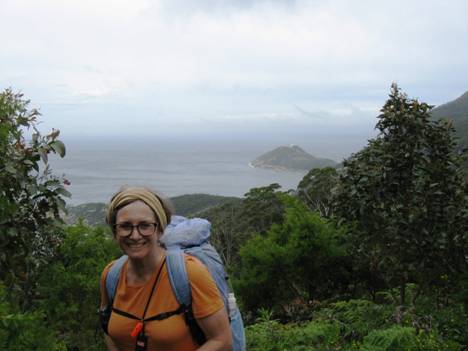
Last
view of the lighthouse.
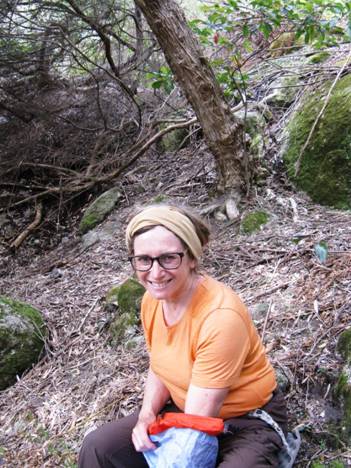
Lunch
stop.
All
the tracks are well made and maintained. Easy walking.
Many
refreshing fern gullies along the Eastern side.
Little
Waterloo Bay-
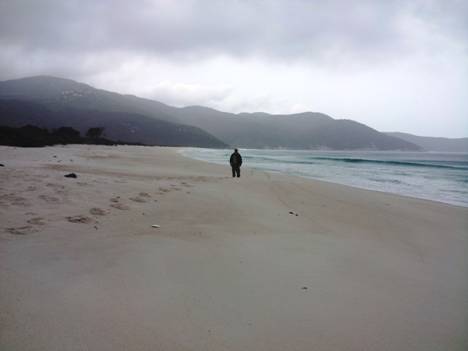
You
could not wish for whiter sand or bluer water anywhere.
An
Easter Island monument on the way back to the Telegraph track.
26/03/2016:
A free tool which gets rid of those annoying Windows 10 upgrade reminders: GWX
Control Panel: http://ultimateoutsider.com/downloads/
26/03/2016:
Tasty Hiking Meals: Things you can just buy from the supermarket
are just so much preferable to those expensive, unpalatable hiking meals.
Here’s two we tried tonight in preparation for an upcoming trip: Continental
Roast Chicken and Leek Risotto with Sirena Lemon & Black Pepper or Chilli
Flavour Tuna Fillet. Della and I shared the 115 gram Risotto and each ate 100
grams of tuna. Along with a CupsSoup (below) it was enough for dinner for us.
Tonight we had Continental Hearty Garden Vegetable CupaSoup with (per cup) @ 3
heaped teaspoons of Hormel Bacon Pieces http://www.theultralighthiker.com/hormel-real-bacon-pieces/
and 3-4 teaspoons full of Continetal Deb Mashed Potato plus @ ½ teaspoonful of
Clive of India Authentic Curry powder (plus some black pepper for me). The
curry powder made this soup nearly as delicious as the Minestrone I described
here: http://www.theultralighthiker.com/hiking-meals-continental-hearty-italian-minestrone/ Tuna Fillet 170 calories ea, Risotto 420
calories/2 = 210 ea, Soup 157 calories
ea plus Bacon & Potato 90 calories = 247 Total 627 calories for 232.5 grams
(2.7 calories/gram) See also: http://www.theultralighthiker.com/?s=food

25/03/2016:
Backcountry Meat: Simmenthal Jelly
With Sliced Beef 140 grams net (can 12 g) 413 kj (99 calories). Quite
delicious. Some folks are apparently ‘addicted’ to this stuff: it takes not
unlike a very good quality corned beef, but not salty. Add to meals or eat on
Vita Wheat biscuits for lunch. Available most (Italian) delicatessens.
(Pictured larger can). I have tried the canned hams (Plumrose is quite good, but
salty). Many other canned meats are not very appetising or too salty too
(including canned chicken). Add this to your other (safe) long-life meats such
as Hans Striker twiggies, and Hormel Real Bacon Pieces (http://www.theultralighthiker.com/hormel-real-bacon-pieces/)
, sachet (or canned tuna, etc.) for some much needed protein on the trail. See
also: http://www.theultralighthiker.com/?s=food

24/03/2016:
Enginesaver: Low Engine Water Alarm:
For many years we have had these fitted to our Subarus and Land Rovers. I also
add a Piezo wired in (in parallel) with the Low Oil Sensor light so that an
audible alarm sounds when oil pressure is low. The low oil sensor is almost
always on the earth side (ie screwed into the block), so such a piezo is very
easy to fit. This way you have a light and audible alarm when the oil or water
is low. Of course both alarms sound every time you turn on the key (before the
engine starts) but you get used to this a lot more quickly than you do to the
(alternative) huge cost of repairs. These two modifications will definitely
prevent you ‘cooking’ your engine and save you thousands of dollars in repairs
or replacement engines. Usually the cause is a leaky water hose or a failing
oil pump, quite inexpensive to fix. Once I had a chunk of rock stove a huge
hole in my radiator which dumped all the water before I even noticed. On
another occasion a very similar thing happened to the oil. Since I have fitted
these I have prevented engine loss several times. http://www.enginesaver.com.au/
Can be fitted to most types of car. Kits are available for specific models.
Kits for Land Rover here: http://www.enginesaver.com.au/landy1.htm

23/03/2016:
Human ingenuity at its best: ‘DIY
lighter-fuel rifle delivers a fusillade of earplugs…If desired, however, its
regular foam earplugs can be replaced with ones that are stuffed into a short
length of aluminum tube and tipped with a sharp metal point, adding a bit more
punch.’ http://www.gizmag.com/lighter-fluid-fueled-shotgun/38384/
See it in action here: https://www.youtube.com/watch?v=oP9SkJreLK0
22/03/2016:
Quest for the Ultimate Ultralight Knife
Never Ends: This offering (The Ti Minimalist’ with 2 5/8” – 67 mm blade)
from Kestrel Knives gazumps my chosen Kabar Johnson River Piggyback (http://www.theultralighthiker.com/new-knife/)
It weighs 14 grams including the sheath, compared to the Piggyback’s 36.5
grams. Of course it is also 10 times the price, so I probably won’t be making
the switch soon. Still, there are always birthdays, etc: http://www.kestrelknives.com/shop/9tfpid32dziv4gubj2uve2nhwv4dsp
This probably is about the lightest you can get which will still split small
timber for fire lighting (a must in the backcountry!) See Also: http://www.theultralighthiker.com/carry-a-knife/
& http://www.theultralighthiker.com/never-have-to-sharpen-your-knife-again/
Of course there are others in the same ball
park, eg: Ultralight Titanium Knife
Total Length: 7 3/4", Blade Length: 3 1/2",Weight of Knife:
1/2 oz, Weight of Sheath: 1/4 oz. https://www.etsy.com/listing/227733086/7-34-ultralight-titanium-knife?ref=related-1
Review:
http://www.trailspace.com/gear/buck/hartsook-ultralite/#review31084
‘On my scale, the knife alone is 12g, the lanyard is 5g, and the sheath is 10g
for a total of 27g / .95 oz.’ http://www.buckknives.com/product/buck-hartsook-ultralite/0860BKS-B/
Izula
Knives 2 2 oz: http://www.eseeknives.com/izula.htm
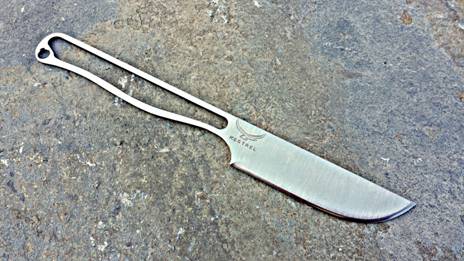
22/03/2016:
Life Will Find a Way: Coming back
from a weekend visit to Dunnolly we pulled over at the Gisborne exit on the Calder
freeway (background), then went down the Water Treatment Plant Rd on the left
to a dead end, roundabout and small roadside plantation where we could have
lunch and let the dogs stretch their legs. This plantation and a narrow strip
along the creek below were what counted as forest around there. Nonetheless a
deer was clearing making it home and had enthusiastically rubbed this black
wattle:
22/03/2016:
‘Friends, I shall ask you to be as quiet
as possible. I don't know whether you fully understand that I have just
been shot; but it takes more than that to kill a Bull Moose. But fortunately I
had my manuscript, so you see I was going to make a long speech, and there is a
bullet - there is where the bullet went through - and it probably saved me from
it going into my heart. The bullet is in me now, so that I cannot make a very
long speech, but I will try my best.’ Theodore Roosevelt, October 14, 1912,
after being shot by an attempted assassin. He spoke for 90 minutes.
21/03/2016:
Moose frolic in garden sprinkler: A
tip for Fiordland moose hunters: I think this short clip well illustrates the
need moose have to cool down in warmer weather. In a Fiordland summer, it is
really too warm for the average moose (given the absence of cool lakes in which
they could browse underwater plants). They needs must spend long periods of
time lying in the cool streams – which is why practically every moose ever shot
there was in close proximity to such an area. Around the time of the moose
‘roar’ (I heard a bull call there on the last day of February) following up the
various ‘burns’ and ‘streams’ might put one up, (I did so in the Hilda Burn
years ago) so that you might claim that $100,000 reward for a photo of a live
Fiordland moose. It would be just too bad to shoot one, nowadays: https://www.youtube.com/watch?v=yNy9jTeolUk
20/03/2016:
Solunar tables (https://en.wikipedia.org/wiki/Solunar_theory)
: I have a friend who swears by these. He claims enormously enhanced
fishing/hunting success using them. I have certainly noticed that there are clear
peaks in game activity; I have even noticed a relationship myself with the
phases of the moon…perhaps it is time to give this theory a test? There are
various websites you can go to to create/download tables for your area. Some
are free, eg http://www.huntfishsport.com/web.aspx?cmd=calendar

17/03/2016:
Massdrop is an online retailer that
sells niche products to enthusiasts at a discount. If you’re not familiar with
them you should sign up on their website and check out the member deals that
they’re offering. They’re one of the few retailers that sell ultralight
backpacking gear at a good discount. https://www.massdrop.com/my-communities/drops

16/03/2016:
Leatherman ‘Squirt’: I have long
carried the Leatherman ‘Micra’ (still do). http://www.theultralighthiker.com/leatherman-micra-multitool/
This is the very best tool for cutting toenails on the trail. Also handy for a
million and one other things: cutting up fish, splinters, opening bottles (you
can use the bottle opener backwards as a can opener, repairing your glasses, etc.
The ‘Squirt’ with its handy pair of pliers might come in handy for other
repaiirs, or as a fishing tool etc if you do not need such a serious pair of
scissors for your nails. Both tools are around 50 grams.

1.Springaction
Needlenose Pliers 2. Spring-action Regular Pliers 3.Spring-action Wire Cutters
4. 420HC Knife 5. Spring-action Scissors 6. Flat/Phillips Screwdriver 7. Bottle
Opener 8. Wood/Metal File 9. Medium Screwdriver
See
also:
http://www.theultralighthiker.com/carry-a-knife/
http://www.theultralighthiker.com/138-lumen-single-aaa-flashlight/
15/03/2016:
Winston Churchill told us: ‘The
truth is incontrovertible. Malice may attack it, ignorance may deride it, but
in the end, there it is.’ He also said, 'Men occasionally stumble over the
truth, but most of them pick themselves up and hurry off as if nothing ever
happened.'
14/03/2016:
Upper Yarra Track Side Trip: Poverty Point:
From the Thomson River Bridge/s (‘Thomson Station’) you can walk a lovely 8
km circuit up along the West bank of the river then down along the East bank.
If I were walking the entire UYT I would come down to Thomson Station as soon
as it joined the Mormon Town Track and walk up the West bank as it is far more
beautiful, and would otherwise be missed – as would the two excellent campsites
to be found along it. The first only about 200 metres from the main roads is
large enough for several caravans (there was a 25’ one parked there as we
walked by). The second campsite is on a large flat along the river about 300
metres below the Poverty Point Bridge – there is a track down to it. The track
also crosses two small creeks on each side of the river which would provide a
campsite on a flat section of the track (if you can get your tent pegs in).

Within
100 yards of the main road you start to see these beautiful fern gullies. You
cross Jack Creek and take the walking track to the right (signposted).
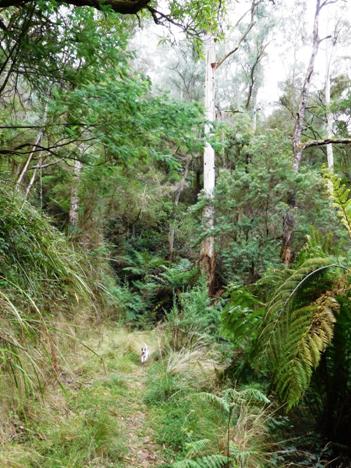
Both
tracks follow the routes of old timber tramlines so they are delightful easy
going. A Jack Russell like Spot can really tear along them!
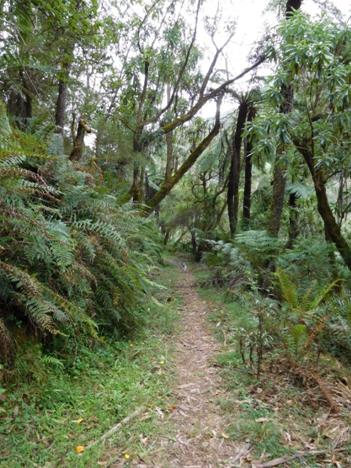
Here
he comes again!
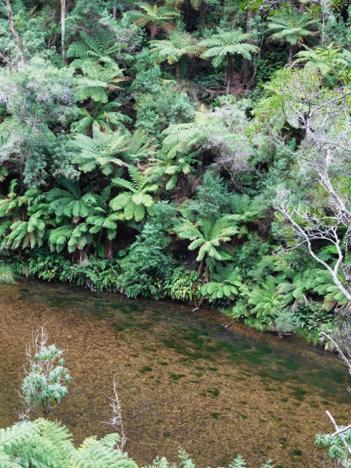
The
track on the West side provides splendid views of the beautiful Thomson River -
which provides wonderful canoeing opportunities when the river heights are
right. See http://www.theultralighthiker.com/canoeing-the-thomson-river-gippsland-victoria/
and this video: http://www.theultralighthiker.com/videos/thomson-river-canoe-trip-2006-complete/
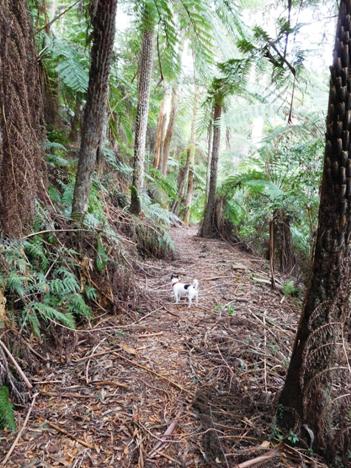
There
are plenty of cool, shady areas to stop and rest. Soon you come to the second
stream:
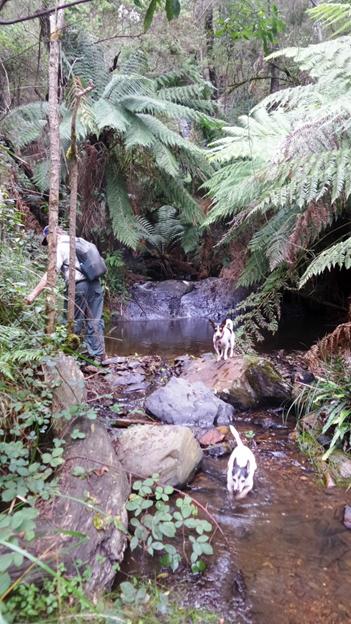
'By
channels of coolness the echoes are calling,
And
down the dim gorges I hear the creek falling’ Bellbirds, Henry Kendall: http://www.mountainman.com.au/kendall.html
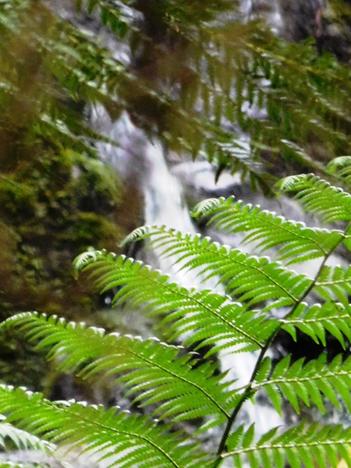
You
can dimly glimpse the waterfall above the last photo.
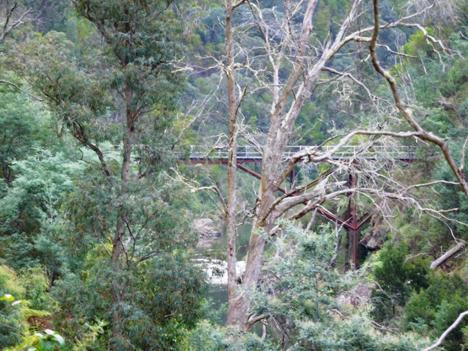
After
about 1.5 hours the Poverty Point Bridge looms in sight.
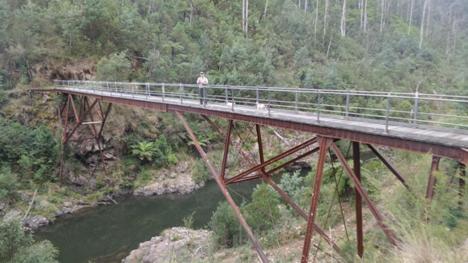
Unbelievably
the bridge was constructed (prefabricated) in England in 1900 and shipped out
to this remote place.
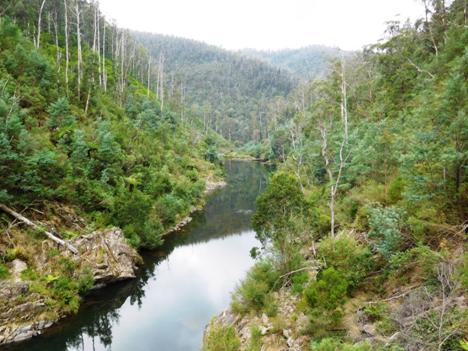
View
downstream from the bridge: you can just make out the flat in the river
mentioned earlier where you can camp.
Tiny
is 16 but still enjoys a long walk (and a cool puddle). This is a stream on the
east bank. She is looking up to a bench where once a timber getter's house
stood. They had cellars under their bark huts for milk/cheese (from their
goats) and pocket handkerchief vegie gardens up along the streams. Saturday
nights they would walk (10 km) into Walhalla to socialise. In the past people
had to ‘make do’. They raised a nation of strong, independent people.
Maps
for this section:
Walhalla
South T8122-2-S and Avenza Pdf App.
See
also:
http://www.finnsheep.com/THE%20UPPER%20YARRA%20WALKING%20TRACK.htm
http://www.finnsheep.com/Track%20Instructions.htm
http://www.theultralighthiker.com/upper-yarra-track-update-section-one-moe-yallourn-rail-trail/
http://www.theultralighthiker.com/upper-yarra-track-update-section-two-yallourn-north-to-wirilda-park/
http://www.theultralighthiker.com/upper-yarra-track-update-section-three-wirilda-to-moondarra/
http://www.theultralighthiker.com/upper-yarra-track-section-four-moondarra-to-erica/
http://www.theultralighthiker.com/upper-yarra-track-section-five-erica-to-walhalla/
http://www.theultralighthiker.com/upper-yarra-track-section-seven-mushroom-rocks-carpark-to-phillack-saddle/
http://www.theultralighthiker.com/upper-yarra-track-section-nine-phillack-saddle-to-block-10-road/
http://www.theultralighthiker.com/upper-yarra-track-ada-tree-to-big-pats-creek/
See
also Upper Yarra Track Winter Route & Side Trips:
http://www.theultralighthiker.com/western-tyers-river-great-for-crays/
http://www.theultralighthiker.com/the-western-tyers/
http://www.finnsheep.com/THE%20UPPER%20YARRA%20WALKING%20TRACK.htm
http://www.theultralighthiker.com/upper-yarra-track-st-gwinear-track-junction-to-whitelaws-hut/
http://www.theultralighthiker.com/upper-yarra-track-summary-cumulative-distancestimes/
http://www.theultralighthiker.com/upper-yarra-track-osheas-mill/
http://www.theultralighthiker.com/a-beautiful-world/
http://www.theultralighthiker.com/upper-yarra-track-winter-route-caringal-scout-camp-tyers-junction/
http://www.theultralighthiker.com/upper-yarra-track-winter-route-western-tyers-morgans-mill-skinners-camp/
http://www.theultralighthiker.com/upper-yarra-track-winter-route-western-tyers-to-tanjil-bren/
http://www.theultralighthiker.com/kirchubel-if-you-go-nowhere-else-in-the-world-at-least-go-here/
http://www.theultralighthiker.com/upper-yarra-track-winter-route-downey-to-newlands/
http://www.theultralighthiker.com/upper-yarra-track-glamping-baw-baw-overnight-hike/
http://www.theultralighthiker.com/upper-yarra-track-side-trip-poverty-point/
http://www.theultralighthiker.com/upper-yarra-track-sidetrip-horseshoe-tunnelcoopers-creek/
14/03/2016:
How do we Know What Dinosaurs Looked
Like: http://www.sciencefocus.com/article/nature/how-do-we-know-what-dinosaurs-looked-like

13/03/2016:
Quote of the Week: ‘The amount of
energy necessary to refute bullshit is an order of magnitude bigger than to
produce it’ Alberto Brandolini

11/03/2016:
If I seemed quiet the last couple of
days, I flew up to Sydney and drove back, picking up a car for my daughter
and son-in-law who have the wisdom most folk don’t that new cars are a
ridiculous waste. A close relative of mine was parting with a 20 year old
Cherokee (whose odometer shows it to be still under warranty!) which will yet
provide hundreds of thousands of kilometres of reliable motoring. It was such a
pleasure driving this fine car back from Sydney. Since @ 2000 motor vehicles
have all taken a wrong turn in so many ways, making them utterly preposterous
to purchase. If you can get hold of a quality vehicle from the era 1995-2000, you
should do so instead of wasting your money on the rubbish now available.
08/03/2016:
Unconditional Love: People often
spout utter nonsense like this, but really there is no such thing, nor ought to
be. Love, like so many things is a trade – if you continue to get nothing back
it will wither and die, as it ought. If you love and are loved you can expect
to have to work at it quite a bit, indeed if it is a worthwhile thing (as you
would expect it to be) you will want to work at it quite hard. The obverse is
it is worthless to you. What is worthless to you is like to become worthless to
the other people in the relationship too! So quit already with the
protestations of ‘unconditional love’: it is hollow and tiresome!
06/03/2016:
Girard Tankless Water Heater: This
piece of gear is certainly a win/win. I will certainly be fitting one and
swapping my existing storage heater out. There is a kit so it will fit in the
same entry hole so no structural damage to the camper. It will create a couple
of cubic feet of extra storage space inside the camper (always welcome). It
will weigh nearly 30 kg less (fuel saving and handling improvement) and it will
use only about half the gas, so that will also last longer. It will need me to
remove the fridge in order to fit it, but I need to do this anyway (would you
believe?) in order to swing the door the other way (which will be much more
convenient): http://www.adventurerv.net/girard-tankless-propane-water-heater-p-27164.html

05/03/2016:
Tray Back Campers and Other Heavy Loads:
I have just finished fitting the suspension/steering hardware I mentioned here: http://www.theultralighthiker.com/twin-shock-absorbers/
I then loaded up the camper on the Defender. Let me say the difference is
astonishing. The whole rig now handles like a passenger car; the ride is
wonderful; everything feels so safe and relaxing. Looking forward to many
interesting trips. Watch this space!
This
concludes the mods we needed to make the vehicle handle the (somewhat
unbalanced) weight of the camper. I will also be fitting a second under tray 85
litre water tank, and switching out the hot water system for an instantaneous
one which will save 30kg in overhang (and total) load, eg: http://greenrvproducts.com/girard-tankless-rv-water-heater/
Here
are all the mods we needed (and advise): Move all possible weight to the front
of the rear axles and below the tray (at least down and forward – this may
require modification of the camper, or careful selection/design before
purchase/build); standard height heavy duty springs and twin shock absorbers
front and rear, heavy duty return to centre steering damper (described above);
seriously upgraded shock absorbers; polyair (rear) assist suspension (inflate
to max ie @ 35 PSI – NB also: tyre pressure needs to be vastly increased under
heavy load. Recommendations are something like +5PSI per additional 100 kg! –
tyres need to be ply-rated for such pressures. Check!); fit anti sway bars
front and back; fit under tray storage boxes (4) and utilise storage behind
seats; fit a winch and bull-bar to the front of the vehicle to help to balance
the load (NB: the vehicle’s suspension has to be upgraded (or match) the total
loaded vehicle weight plus eg a 10% ‘margin of error’ or it will never be safe
– and might not be insured!)
NB:
You will always have extreme difficulty making a dual cab (safely) carry a
camper or other heavy load. Some are (much) worse than others, due to overhang,
etc. Land Rover Defenders are complete stand outs in this category - as well as
in genuine off-road (clearance, entry/exit angles, etc) & many other areas.
It may just not be possible to fit a camper to your dual cab particularly if it
has a tub. Professional advice should be sought. My experience is that like
most other professional advice it is pretty
hopeless though! Happy Camping!
See
also:
http://www.theultralighthiker.com/tray-top-camper/
http://www.theultralighthiker.com/staircase-for-camper/
http://www.theultralighthiker.com/camper-defender-upgrades/
http://www.theultralighthiker.com/four-wheel-campers/
http://www.theultralighthiker.com/first-trip-in-the-tray-back-camper/
http://www.theultralighthiker.com/glide-on-camper/
http://www.theultralighthiker.com/snowy-river/
http://www.theultralighthiker.com/stealth-camping/
http://www.theultralighthiker.com/early-easter-4wd-misadventure/
http://www.theultralighthiker.com/blond-bay-lake-tyers/
http://www.theultralighthiker.com/western-tyers-river-great-for-crays/
04/03/2016:
Limited Range Bullets: Human
ingenuity never ceases to amaze! This interesting idea will seriously reduce
unintended damage from spent rounds whether in warfare or hunting: http://www.gizmag.com/us-army-researchers-limited-range-bullet/42068/

03/03/2016:
Thermarest Speedvalve: Thermarest
has a new range of easy to inflate mats. These guys go up (and down) so easily
it will be hard to resist the temptation to replace our ‘old’ mats. Fortunately
for us they have not (yet) extended the new valve’s availability to our
favourite mat the Neoair Xlite Women’s! (http://www.theultralighthiker.com/new-hiking-mat-425g/)
The regular 20” x 72” Neoair with this valve would be hard to resist though for
hammock camping where its ‘square’ profile helps keep your shoulders warm. You
have to spend your –har-earned’ on something though – you can’t take it with
you! And what better to spend your money on than anything which facilitates
your next great trip to the backwoods! See: http://www.cascadedesigns.com/therm-a-rest/mattresses/fast-and-light/neoair-xlite-max-sv/product
I posted about this idea back in August 2014. Thermarest have finally taken the
idea up: http://www.theultralighthiker.com/another-way-to-inflate-your-air-pad/
See Also: http://www.theultralighthiker.com/highlights-of-the-outdoor-retailer-summer-2015-trade-show/
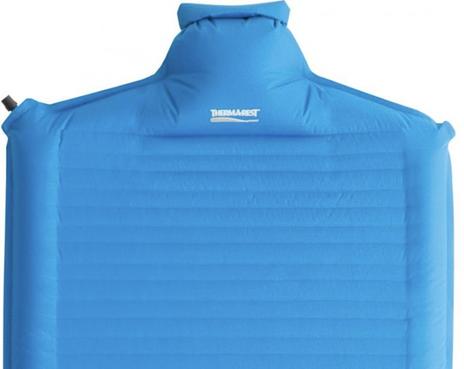
02/03/2016:
‘I don’t hold with furniture that talks’
from Empire of the Air’ by Ken Burns - the story of radio. What a doco! I just
love that early C20th quote denying radio: it has such resonance with all those
Luddites who today deny GM, fracking, vaccination, etc, etc…
01/03/2016:
Hiking Meals: Continental Hearty Italian
Minestrone & Hearty Garden Vegetable CupaSoups Soups: I have long
lamented the dreadful quality (and undeserved price) of pretty much all
backpacking meals. That’s why I have largely concentrated on recommending good
supermarket meals which fill the bill: well-priced, tasty and nutritious, good
calories per gram ratios, quick, energy efficient and easy to prepare &
etc. I previously noted this tasty combo: http://www.theultralighthiker.com/hiking-food-soup/
The nutritional info on the Minestrone (& etc) packets is very handy. The
current Minestrone (75 grams = 147 calories) recommendation is as follows: add
3 large teaspoonfulls of Hormel Real Bacon Pieces (20 grams = 75 calories) and
a slightly larger quantity of Continental Deb Instant Mashed Potato (great for
thickening and adding nutrition – 20 grams = 15 calories). In total we have 110
grams and 237 calories and 2.15 calories per gram. One serve would be fine for
breakfast/lunch; two would make a reasonable, tasty meal!

29/02/2016:
You would be soulless if you don’t
long for one of these: https://www.youtube.com/watch?v=3gwZ2lHtG0Y
& http://www.gizmag.com/candela-vibrophase-candle-power-zvex-effects/42038/
29/02/2016: Upper Yarra Track Glamping: Baw Baw
Overnight Hike: This is a beautiful glamping trip. You can walk from the
Mushroom Rocks Carpark (just North of Erica - or from the Mt St Gwinear
Carpark) to the Baw Baw Village in approx 5 ½ hours (our retiree speeds with
overnight packs) each way. There is accommodation there year round, but at
least three nights a week there is also a restaurant. Stay overnight and walk
back across the glorious Baw Baw Plateau next day to your car. You need only
carry a day pack. It really is one of Victoria’s scenic wonders. There is so
much changing vegetation, topography and wildlife to see. As it is always
nearly 10C degrees cooler than Melbourne or the Latrobe Valley, 30C degree
temperatures there will make for a very pleasant time on the Plateau. There is
also often a cooling breeze. The trail is easy, well-marked and well maintained
all the way. Be sure you take the turn-off to Baw Baw 100 metres AFTER Phillack
saddle – the Vicmap shows the old trail exiting from Phillack saddle to Baw Baw
from the Alps /Upper Yarra Walking Tracks.
The old trail is all but impassable – though we have passed it! If you
don’t want to pay for accommodation etc, there are good campsites with water
eg. at Mushroom Rocks, Talbot Peak, near the St Gwinear turn-off (Camp Saddle)
and at Phillack Saddle. If you fancy a slightly longer walk, it is two hours
walk out from Phillack saddle to the old Mt Whitelaw Hut site where there is
also a pleasant camp with water. You need not carry more than 500ml-1 litre of
water as there is frequent water along the plateau, eg Mushroom Rocks, Talbot
saddle, St Gwinear turn-off, Phillack Saddle, Mt Whitelaw etc. Baw Baw forecast
here: http://ozforecast.com.au/cgi-bin/weather.cgi?station=Mt+Baw+Baw.VIC&radar
Baw Baw accommodation/information, etc here: https://mountbawbaw.com.au/
Phone: 03 5165 1136 Village Restaurant: 03561123 The shop is open 365 days and
offers pies, sandwiches, drinks etc and a small selection of grocery items. See
also: http://www.visitbawbaw.com.au/
Telstra NextG will work pretty much all the way across the Plateau. Maps
Walhalla North T8122-2-N especially & Walhalla South: T8122-2-S and the
Avenza Pdf App: http://www.theultralighthiker.com/gps-phone-apps-25k-vicmaps/
There is another great thing you can do: Walk from Baw Baw to Walhalla over two
days staying: Baw Baw, Mushroom Rocks Scout Hut (https://www.vicscouts.com.au/j-w-mcmahon-ski-lodge.html)
, (or the NBW Hut – or camp out), then eg Star Hotel, Walhalla (or vice versa).
There is an (expensive) outfitter who can arrange this fully catered trip so
you carry only day packs, ie: http://www.greatwalhallaalpinetrail.com/
See
also:
http://www.theultralighthiker.com/upper-yarra-track-sidetrip-baw-baw-to-mt-st-phillack/
http://www.theultralighthiker.com/upper-yarra-track-section-seven-mushroom-rocks-carpark-to-phillack-saddle/
http://www.theultralighthiker.com/upper-yarra-track-section-nine-phillack-saddle-to-block-10-road/
http://www.theultralighthiker.com/upper-yarra-track-baw-baw-to-newlands-rd/
http://www.theultralighthiker.com/upper-yarra-track-st-gwinear-track-junction-to-whitelaws-hut/
Mushroom
Rocks: one of nature's wonders - and a fine place to camp!
Phillack
Saddle - another pleasant camp if you are not up for the glamping at Baw Baw
Village.
28/02/2016:
Thrilling Tales: Daniel Boone: If
Boone could do it, I can: ‘According to one story, in 1810 or later, Boone went
with a group on a long hunt as far west as the Yellowstone River, a remarkable
journey (from Missouri to Montana) at his age, if true. In 1816, a United
States officer at Fort Osage, on the Missouri, wrote: We have been honored by a
visit from Colonel Boone, the first settler of Kentucky; he lately spent two
weeks with us.... He left this for the river Platt, some distance above. Col
Boon is eighty-five years of age, five feet seven inches high, stoutly made,
and active for one of his years; is still of vigorous mind, and is pretty well
informed. He has taken part in all the wars of America, from before Braddock's
war to the present hour.’ https://en.wikipedia.org/wiki/Daniel_Boone
Audobon
Portrait at age 85!
28/02/2016:
Moose Team: If I ever catch a moose
in Fiordland I may do this with it: http://maggiesfarm.anotherdotcom.com/archives/27719-Moose-Team.html
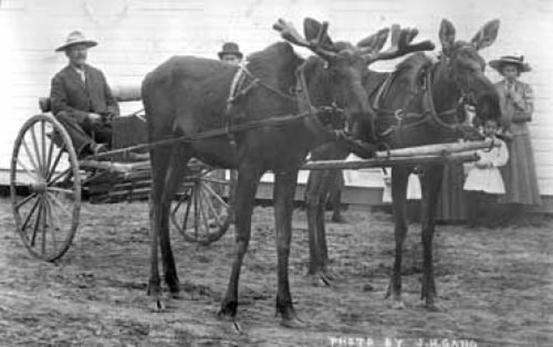
27/02/2016:
Hannibal Lektor’s Hand: So far (I
think) it has not crept out an night to do mayhem on the innocent – but it’s
sure looking impressive. I am now an amalgam of machine parts: you might like
to tell anyone you know whose fingers are crippled with arthritis: there is a
better way. Don’t wait too long. The more deformity has already occurred the
harder it is to correct. However you can have new joints in your hands -
probably not the tip ones which they would fuse if they were painful, but all
the ones further away from your finger tips – and you will be up and using them
(a little) after a week, and progressively more and more until you should be
able to climb a rope with them once more after @ 6 months. It is also
surprisingly cheap, and not specially painful. Like the microsurgery
(neurosurgery – up and hiking same day, pain free!) I had (laminectomy) on my
spine to correct similar arthritic problems, I (so far) wholeheartedly
recommend this procedure. One of the knuckles had 0 degrees of movement a week
ago; the other less than 20 degrees. I guess I have 60 degrees now one day out
of a cast in both and improving on that every day. In six months time I will be
(almost literally) a new man – back to my ideal weight and fitter than I have
been my whole life – which has been a pretty fit one: I still have no trouble
walking 20-30 km through the bush carrying a hiking pack day after day at 66;
but I want to do more, and there is only this one life to do it in! Do remember
that: don’t kick back and take it easy - as if waiting for your second innings.
There will be no second innings. Make the most of this one. As I said the other
day: ‘We can choose to do anything. The
corollary: we can do anything we choose.’ http://www.theultralighthiker.com/free-willdeterminism/ Caption: Still a bit swollen and mercurochrome
stained.
27/02/2016:
Mobile Phone Battery Life: Here’s
some good advice. Another important point: choose a phone which has a removable
battery such as my Galaxy S4 Mini or Della’s Galaxy K – with a 10x optical
zoom! We always carry a couple of spare batteries on longer hikes – and a solar
charger http://www.theultralighthiker.com/charging/ – I went for the MPJ spare batteries because
they already have 50% more energy than the proprietary ones yet still fit in
the phone: http://www.nytimes.com/2016/02/25/technology/personaltech/tips-and-myths-about-extending-smartphone-battery-life.html?hp&action=click&pgtype=Homepage&clickSource=story-heading&module=second-column-region®ion=top-news&WT.nav=top-news&_r=0
24/02/2016:
Upper Yarra Track Sidetrip: Baw Baw to
Mt St Phillack:
What
a way to escape the heat! Others may flock to the beach. We give our hearts to
the mountains. Mt Baw Baw was to be 8C cooler than home (with no power) and
with a delightful cooling 30 kph breeze. When we left our car at the bottom of
Candleheath Drive (Go down Frosti Lane next to the shop until you come to the
sign for Mueller’s Track) it was a balmy 24C with a cool breeze blowing. So
suck eggs!
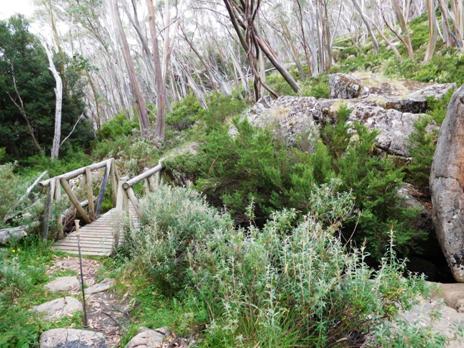
Take
Mueller’s track. Just cross this magic bridge – watch out for trolls!

Once
more into the bush dear friends!
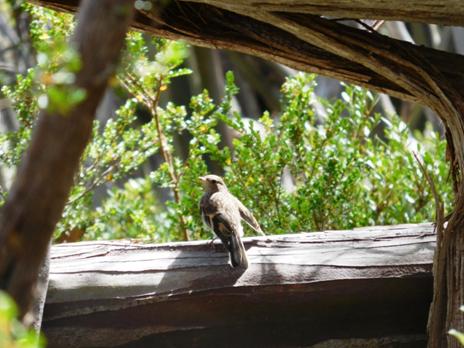
Jackie
Winters are as common as sparrows up there.

So
are native snowdrops! Follow Mueller’s Track. Take every turn to the left until
you come to here:
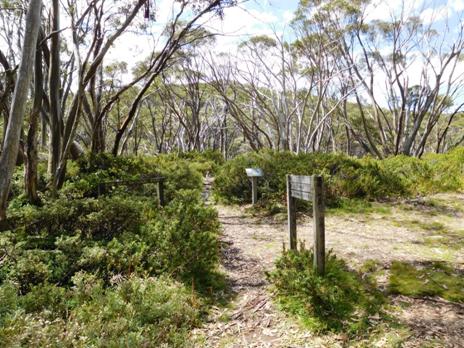
The
turnoff to the new (St Gwinear) track near Baragwanath Flat (where the old
track also exits – don’t take that!) is impossible to miss. On the way back
take every turn to the right. Mt Baw Baw is a maze of tracks. You can wander
round in circles for hours! It is very lovely though! The track follows a ridge
but crosses two gullies – so water every km.
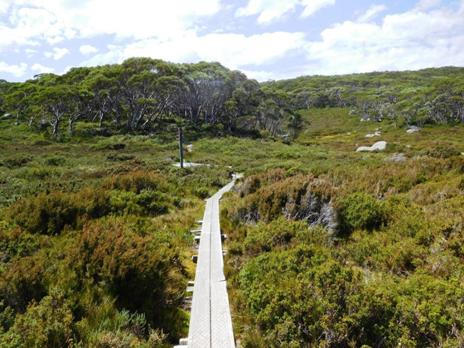
This
one is West Tanjil Creek.
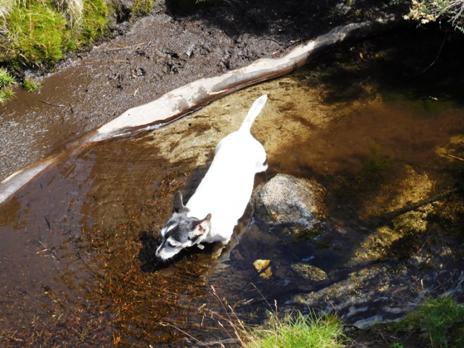
Time
for Tiny to have a bath.
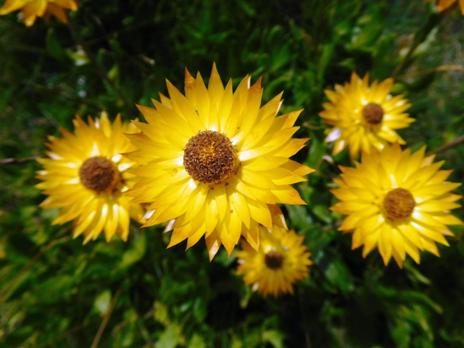
A
host of golden everlasting daisies - so much better than those fleeting
daffodils!
Spot
races ahead, then races back. I was calling him back for fear of snakes. We saw
none, but there were innumerable very fat skinks. They must store it against
the winter cold.
He
leaps on a giant tor having similar (lichen) spots to himself.
The
intersection with the Alps & Upper Yarra Tracks. ‘This is the way we went
last week’, says Spot.
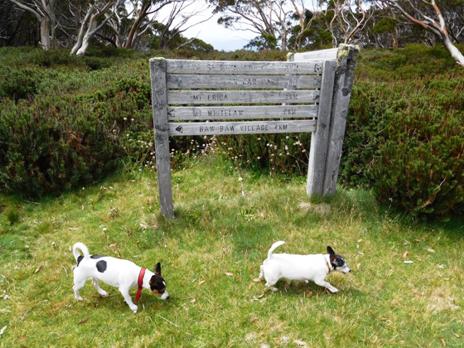
Here
we are again at Phillack Saddle (http://www.theultralighthiker.com/upper-yarra-track-section-nine-phillack-saddle-to-block-10-road/
) Such a delightful place to camp. You can read the track distances if you zoom
in (double click). Are we staying again, the dogs want to know. Not this trip.
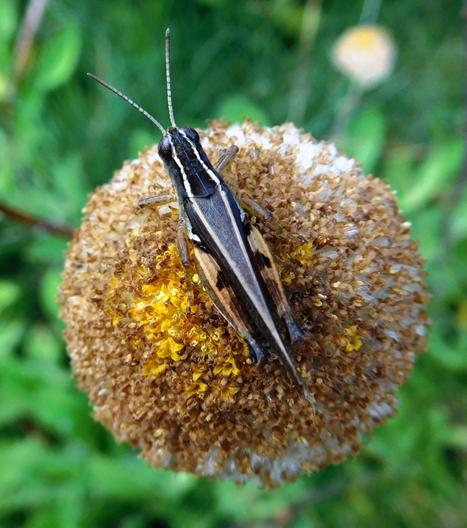
‘To see a World in a Grain of Sand
And a Heaven in a Wild Flower’ (Blake)
Wonder
too at these amazing miniature native violets! The tip of my hiking pole for
comparison.
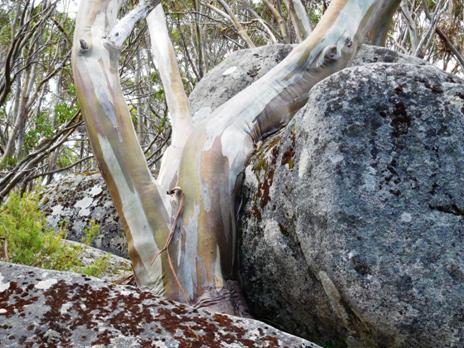
This
snow gum has loved this stone ever so long...
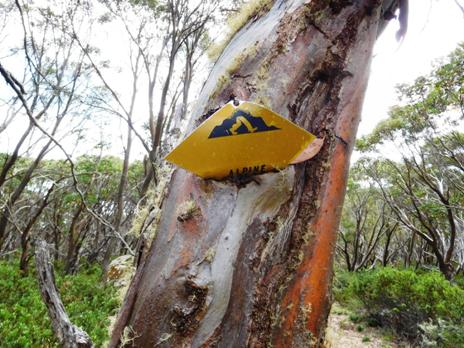
And
this one galled by man's cruel sign - anthropomorphism is fun, but do not seek
truth that way!
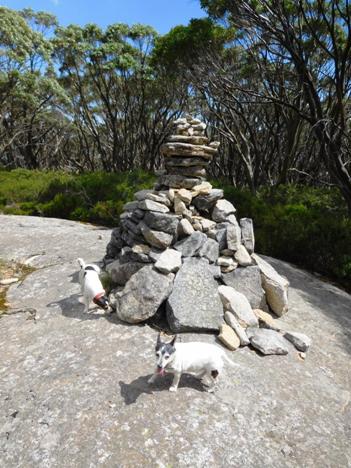
At
last (after 1.5 hours) Mt St Phillack: Spotty barked several times at the
cairn. His opinion is cairns ought not to be there - but Jack Russells...they
can go anywhere!
This
is a walk you might do on a summer trip to Mt Baw Baw. There is plenty of
accommodation – even a restaurant: https://mountbawbaw.com.au/
24/02/2016:
Unbearable Lightness of Being: Of course there must be some (lower) limit to
how light things can go. It seems insulated clothing & sleeping bags are
about to experience one of those quantum falls. Introducing Aerogel & Graphene:
http://futurism.com/jackets-withstand-liquid-nitrogen-made-using-solid-material-thats-99-8-air/
You can already buy Aerogel blanket insulation eg here: http://www.buyaerogel.com/product-category/blankets/
Could be the ‘must do’ for DIYprojects? It will probably have to get a little
cheaper first too! Unless I a misreading the data sheet it may never be light
enough for our purposes though (or breathable). Spaceloft 5mm blaket’s quoted
density is 0.15 g cm-3 (2.45 oz/69 g per square foot) which would be 621 grams
per square yard - much heavier than competing ultralight hiking insulation. I
may be sticking to my 900 fill power down sleeping bag a little longer yet!

24/02/2016:
I have just received two prosthetic finger joints. The first instance of these
were implanted in the 1940s, but I did not really appreciate how old the
prosthetician’s art is: 6th century foot prosthesis found in Austria: http://www.thehistoryblog.com/archives/39927
23/02/2016:
Upper Yarra Track Section Nine: Phillack Saddle to Block 10 Road:
What
a lovely section of track! The high country has so much beauty, so many surprises.
Phillack Saddle is a wonderful spot to camp on lawns tended by nature’s
gardeners amid the alpine heath. There is beautiful clear water just off the
saddle and a lovely stream (below) at Freeemans Flat. It will be about 7.5
hours to our car at the Block 10 Road – if we make it!

Phillack
Saddle
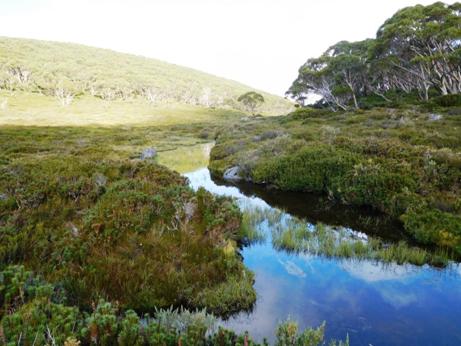
Freemans
Flat
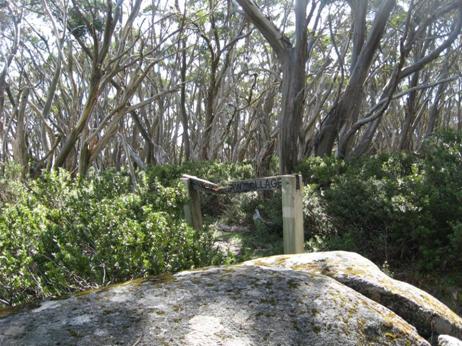
100
yards after Phillack Saddle you come to the new track across to Baw Baw
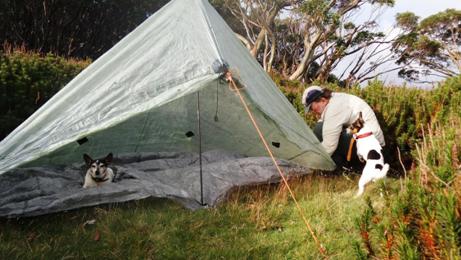
Spot
helped put up the Zpacks Solo Plus tent whilst Tiny rested.
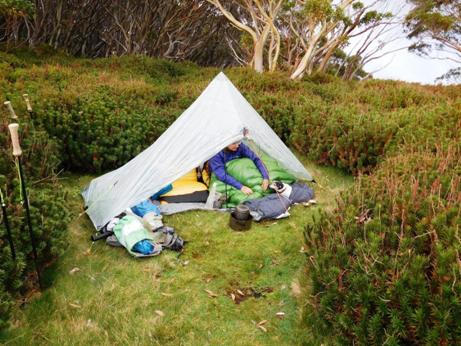
Della
and Tiny went to bed early. They are old girls!
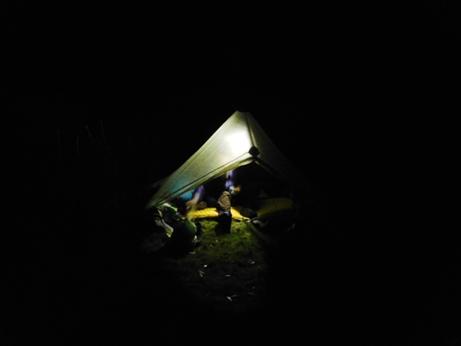
The
new Maratac torch makes a great lantern: http://www.theultralighthiker.com/mini-super-torch-a-weeks-light-weighs-50-grams/
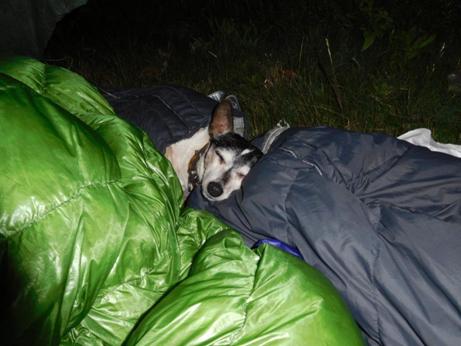
Tiny
was tired out. She is 16 1/2.
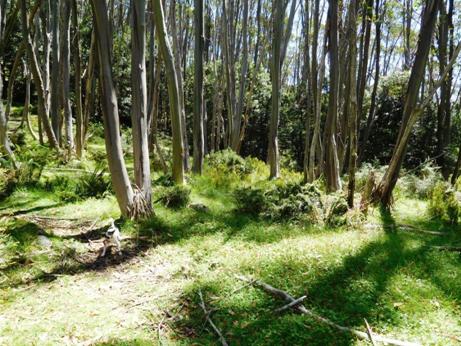
There
are other lovely spots to camp along the way but no water until Whitelaws Hut
and then .5 km after the Upper Yarra
turn-off. After two hours you reach the
Whitelaw Hut site (water to the North). Another hour brings you out onto the
old forest road up from Newlands which you will follow. Half an hour along it
you come to the intersection. It is only @3km down to Newlands Rd but the road
is overgrown with seasonal weeds which will slow you down. 1.5-2 hours for this
section, then about 2.5 to the Block 10 Road.
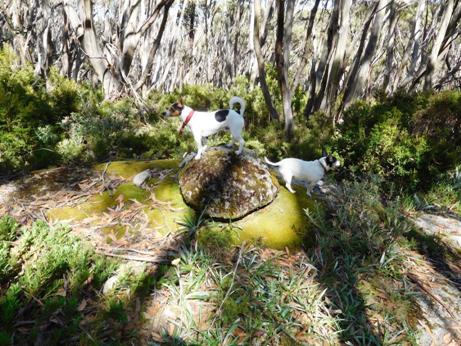
The
dogs demonstrate: 'High Point'.
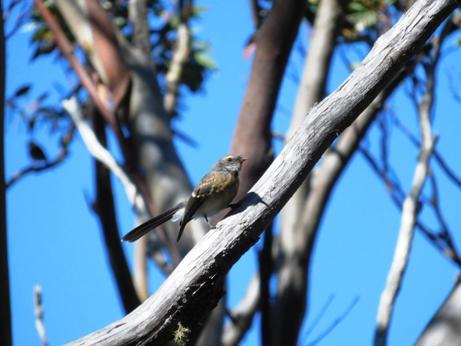
There
are many friendly critters along the way: fantail.
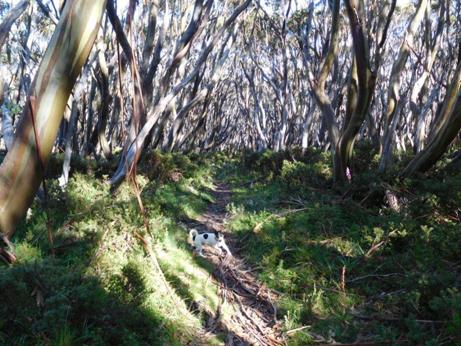
'Hurry
Up' says Spot.
We
are always too slow for him. He is only 3!
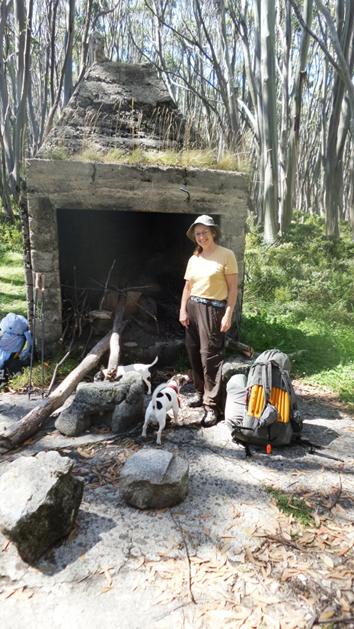
Here
we are for lunch at Whitelaws Hut. There are plenty of camps here.

Tiny
helped hreself to a muesli bar from my pack when I wasn't looking. Chewy!
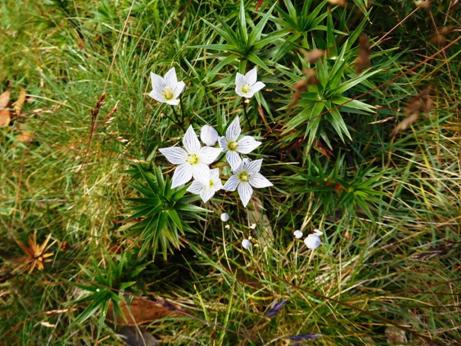
Many
beautiful flowers adorn the path.
And
interesting denizens: this was the fattest skink I have ever seen. Must have
been nearly 1" in diameter but only 6" long!
An
hour after Whitelaws Hut you hit an old road - which shou;ld be kept clear for
emergencies and park maintenance in my opinion, but it is neglected.
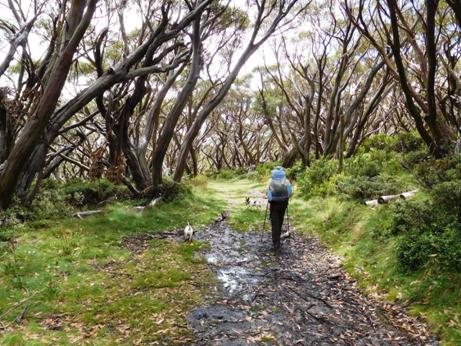
You
can easily walk abreast along here.
This
is the turnoff. Turn downhill, South. Parks have stuffed a hopeless map between
the timbers. That is the sum total of their efforts.
There
were many beautiful sites in this section, but as much of it needed slashing,
Inforgot to take photos.
Lots
of spots you could camp on the way down to Newlands. There is water as well
where you first cross the Thomson - which is 60 cm wide at this point. The road
is wide and level.
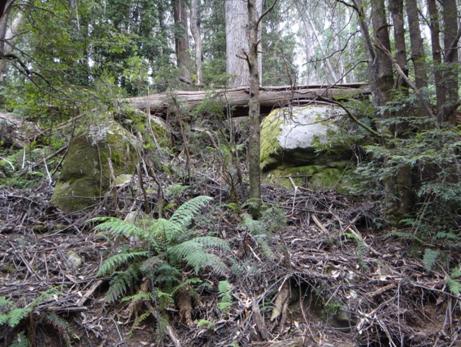
A
huge dead tree suddenly crashed down as we passed: There but for fortune...
The
Frangipani Saddle - and the skull of a hiker our dogs pulled down and ate!
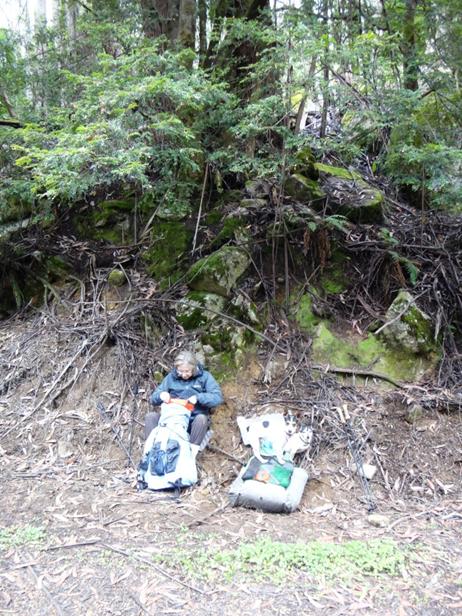
Snack
time at Frangipani Saddle.
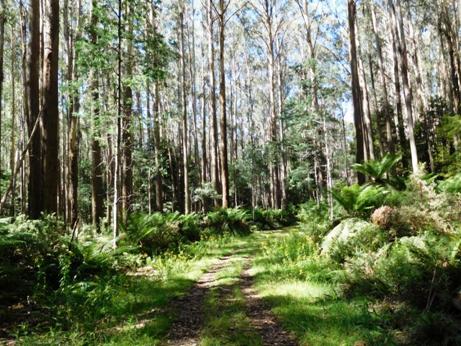
Newlands
Rd is the most gorgeous in the whole world!
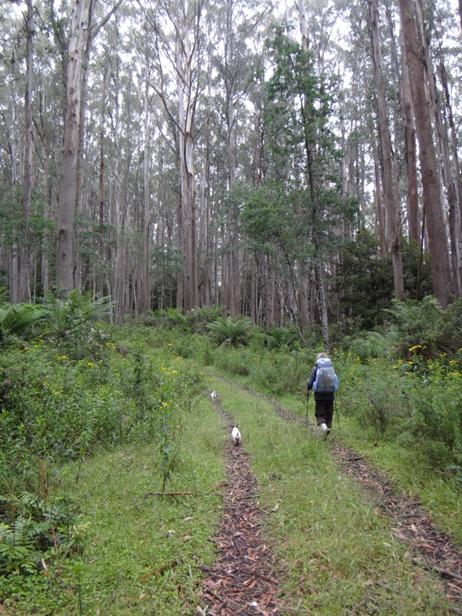
Della
striding out once more.
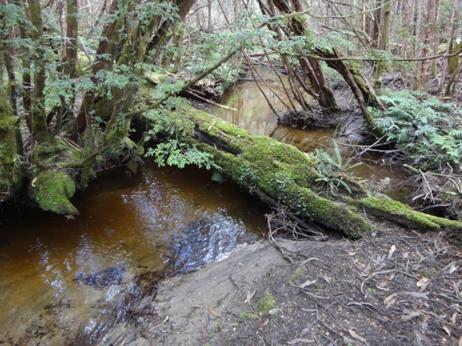
You
cross (and parallel) the diminutive Thomson River lots of times. It abounds in
trout. There are numerous camping opportunities in Newlands Rd. The last is at
the final crossing where there is a fine spot and a sign saying, ‘ No Camping’.
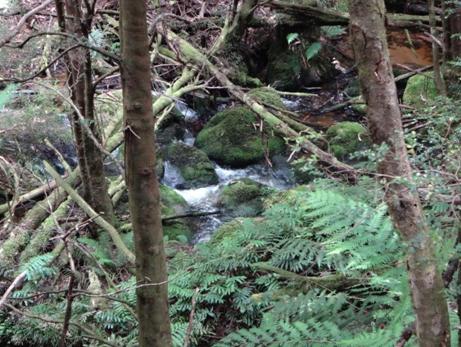
Newlands
is just outstandingly beautiful...
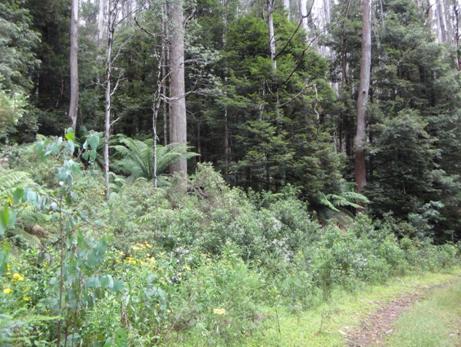
And
no cars...
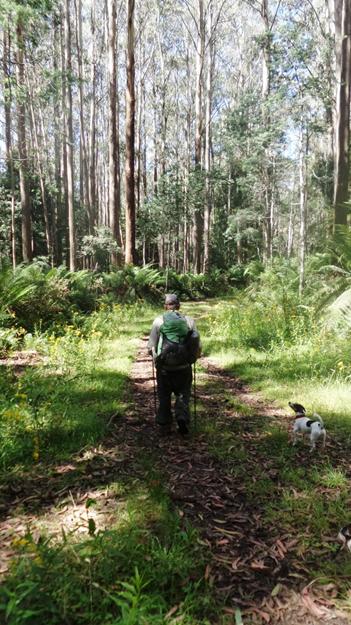
Just
the bush, Spot and Tiny, and us.
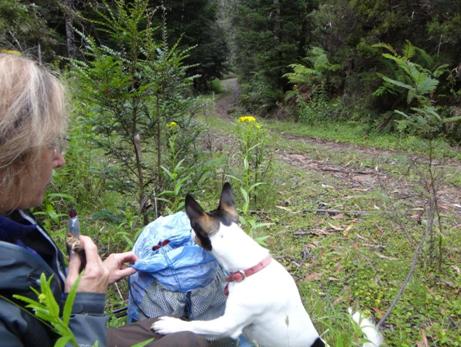
Anything
for me, Della? Smackos?
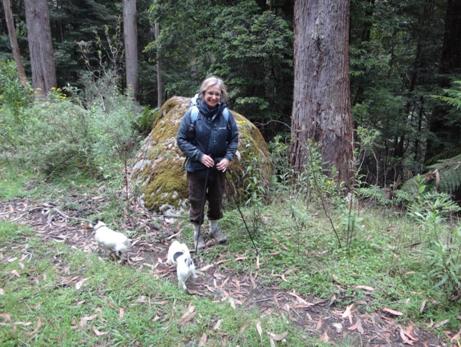
This
grnite tor had rolled a long way!
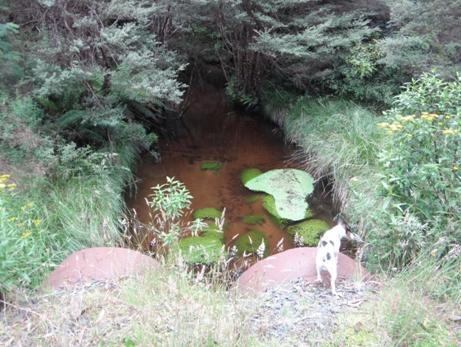
There
are bridges so you won't get your feet wet anywhere from the Mushroom Rocks car
park.
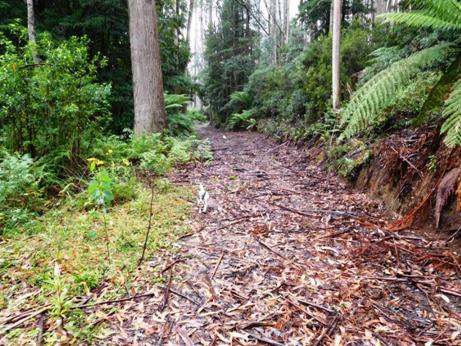
After
the last crossing you can take a prominent road to the North.

Well
something had been eating them. Not me unless I'm sure though.
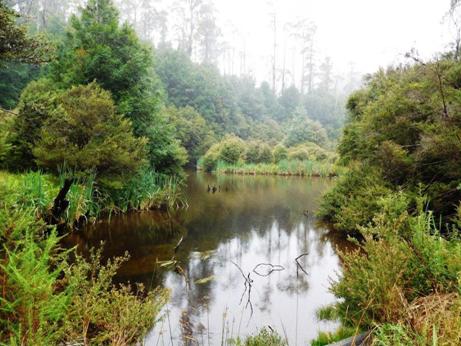
After
about half a km there is a pretty little lake full of trout!
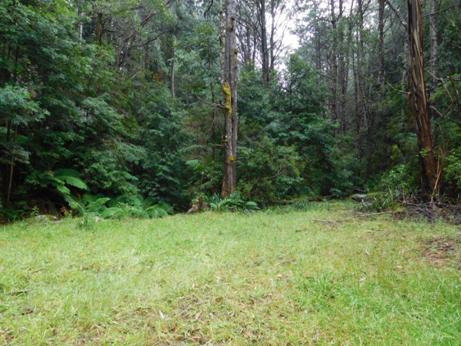
A
superb camp site. Nobody around.

MMBW
Control gates.
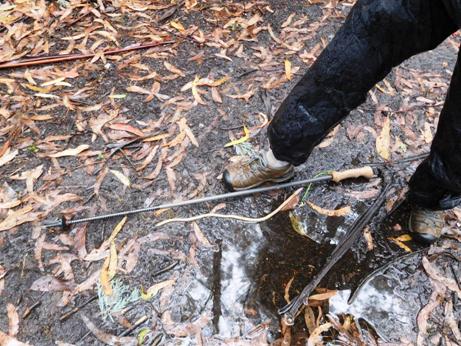
We
encountered this giant worm pout for a walk!
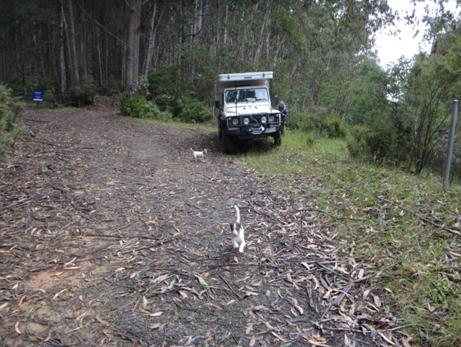
Figure
1At last, here we are at the Block 10
Road gates. There are a couple of nice spots to camp here, but no water - go
back to the lake!
For
the section Baw Baw to Phillack Saddle see:
http://www.theultralighthiker.com/upper-yarra-track-baw-baw-to-newlands-rd/
This
map may help. You should walk along the Village Trail clockwise. That way you
will come to the new track to Phillack Saddle before you come to the old which
is wee-nigh impassable – though we managed it. On the new track it is 1-1.5
hours; probably nearer 3 on the old. Be warned!
Telstra
NextG mobile phone works most places across the Plateau.
Maps
for this section:
Mostly
Walhalla North T8122-2-N and part of Noojee North T8122-3-N and Avenza Pdf App.
See
also:
http://www.finnsheep.com/THE%20UPPER%20YARRA%20WALKING%20TRACK.htm
http://www.finnsheep.com/Track%20Instructions.htm
http://www.theultralighthiker.com/upper-yarra-track-update-section-one-moe-yallourn-rail-trail/
http://www.theultralighthiker.com/upper-yarra-track-update-section-two-yallourn-north-to-wirilda-park/
http://www.theultralighthiker.com/upper-yarra-track-update-section-three-wirilda-to-moondarra/
http://www.theultralighthiker.com/upper-yarra-track-section-four-moondarra-to-erica/
http://www.theultralighthiker.com/upper-yarra-track-section-seven-mushroom-rocks-carpark-to-phillack-saddle/
http://www.theultralighthiker.com/upper-yarra-track-ada-tree-to-big-pats-creek/
See
also Upper Yarra Track Winter Route:
http://www.theultralighthiker.com/western-tyers-river-great-for-crays/
http://www.theultralighthiker.com/the-western-tyers/
http://www.finnsheep.com/THE%20UPPER%20YARRA%20WALKING%20TRACK.htm
http://www.theultralighthiker.com/upper-yarra-track-update-section-one-moe-yallourn-rail-trail/
http://www.theultralighthiker.com/upper-yarra-track-update-section-three-wirilda-to-moondarra/
http://www.theultralighthiker.com/upper-yarra-track-section-four-moondarra-to-erica/
http://www.theultralighthiker.com/upper-yarra-track-section-five-erica-to-walhalla/
http://www.theultralighthiker.com/upper-yarra-track-st-gwinear-track-junction-to-whitelaws-hut/
http://www.theultralighthiker.com/upper-yarra-track-summary-cumulative-distancestimes/
http://www.theultralighthiker.com/upper-yarra-track-osheas-mill/
http://www.theultralighthiker.com/a-beautiful-world/
http://www.theultralighthiker.com/upper-yarra-track-winter-route-caringal-scout-camp-tyers-junction/
http://www.theultralighthiker.com/upper-yarra-track-winter-route-western-tyers-morgans-mill-skinners-camp/
http://www.theultralighthiker.com/upper-yarra-track-winter-route-western-tyers-to-tanjil-bren/
http://www.theultralighthiker.com/kirchubel-if-you-go-nowhere-else-in-the-world-at-least-go-here/
http://www.theultralighthiker.com/upper-yarra-track-winter-route-downey-to-newlands/
23/02/2016:
Upper Yarra Track Section Seven: Mushroom Rocks Carpark to Phillack Saddle:
This
is a beautiful easy section comprising widely varying vegetation and
topography, the spectacular ‘Mushroom Rocks’, the ruin of the Talbot Peak hut,
Mt St Phillack, the highest point on the Baw Baws, and a delightful camp at
Phillack Saddle. Side trips can be taken to Mt St Gwinear and Baw Baw Alpine
Village.
It
is about 20 minutes walk from the car park (toilets, water, scenic side-trip)
to the Mushroom Rocks where there is scout hut accommodation if you have
arranged it. It is another hour to Talbot Peak hut site (each way). From there
it is about 2.5 hours to the St Gwinear turn-off and about another half hour to
the Phillack Saddle and and the Baw Baw turn-off and a further 1-1.5 hours to
the Baw Baw Village. Say about 5.5 hours from the car park to the Village each
way. You can stay at the village, even have a meal, so you could do this walk
overnight with just day packs.
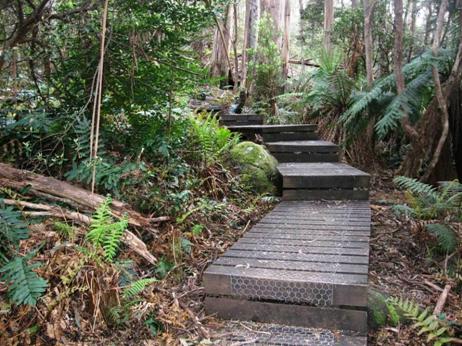
Some
parts of the track are even board-walked. You won’t get your shoes dirty as far
as Mushroom Rocks at least.
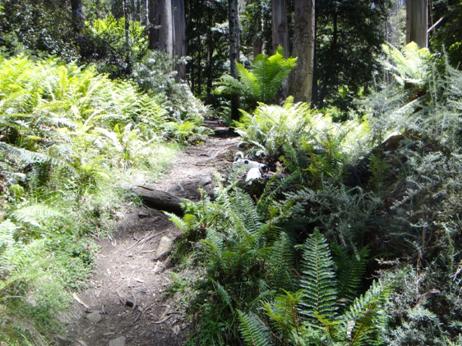
Lots
of lovely smells to interest the dogs who wondered which generation (of dogs)
was this all being 'saved' for. Well, this one apparently!
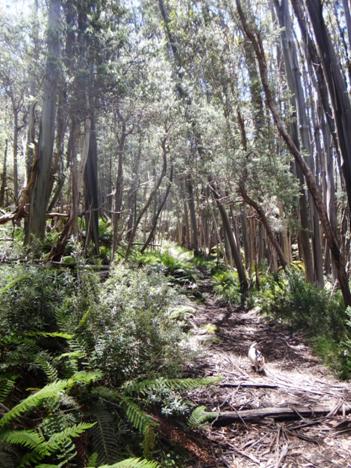
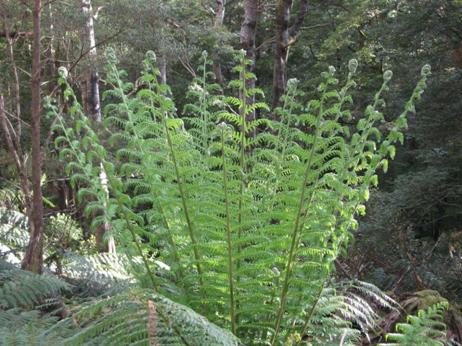
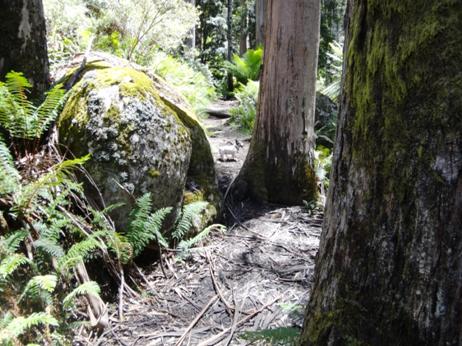

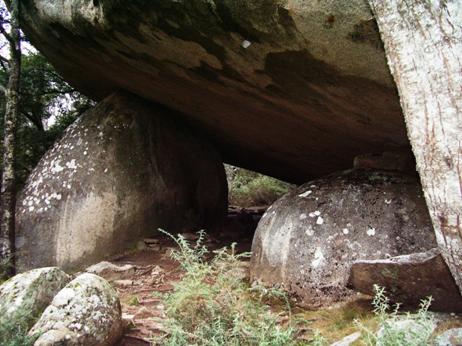
Mushroom
rocks shelter, There is another (one person) at the St Gwinear turn-off.
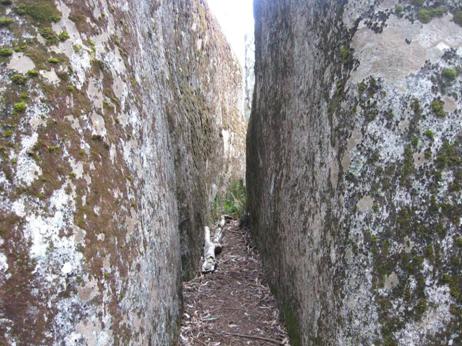
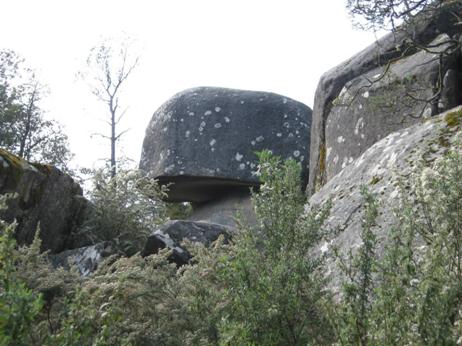
You
can see why they are named 'mushroom rocks'.
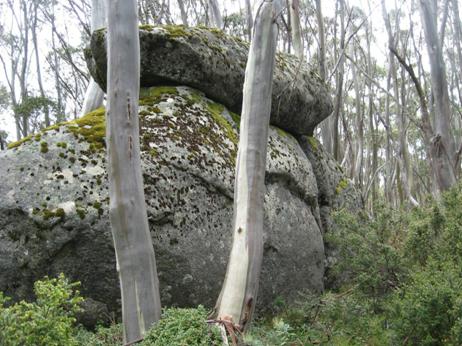
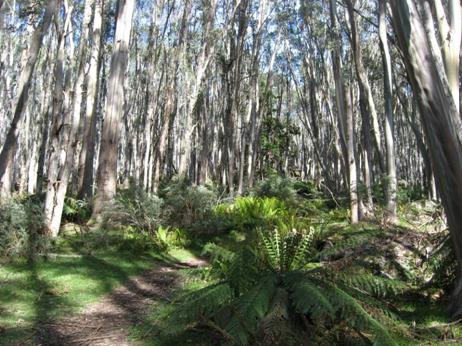
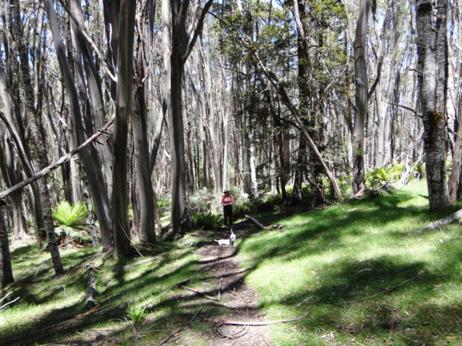
These
alpine meadows are delightful.
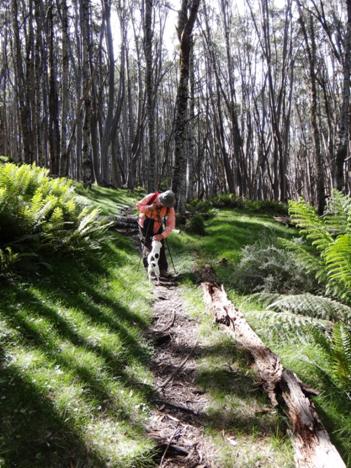
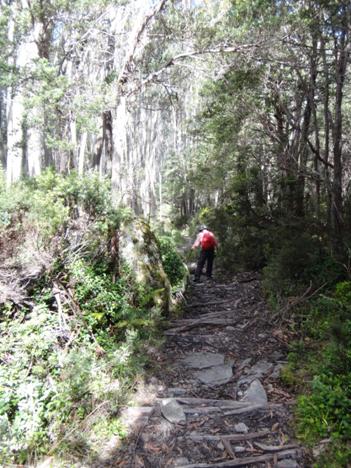
There
is a small steepish section.

Water
often collects in hollows in rocks or weeps out from underneath them. Tiny
slakes her thirst.
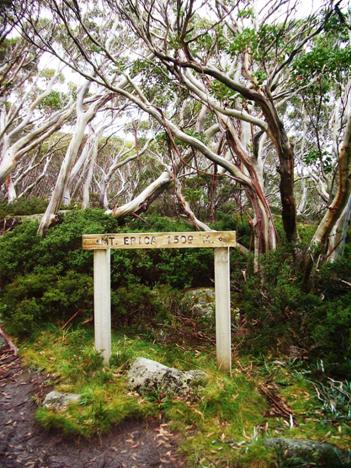
Mt
Erica summit.
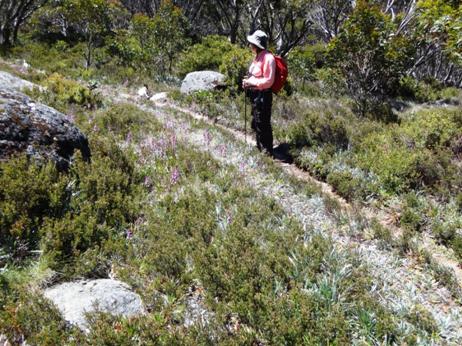
Suddenly
you break out into an entirely different landscape.

The
dogs were as puzzled as we were by where the stream at Talbot Peak was flowing
from!
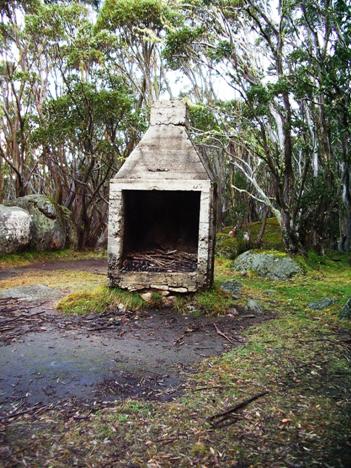
Remains
of the old Talbot Peak hut, quite a pleasant campsite with a delightful
mountain stream nearby.
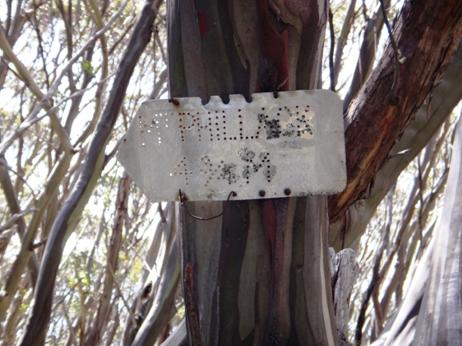
An
old sign at Talbot Peak still in miles! Signage used to be better in the past –
usually reflective so you could even find your way in the dark as well you
might need to in an area which can be beset by blizzard conditions at any time
of the year!
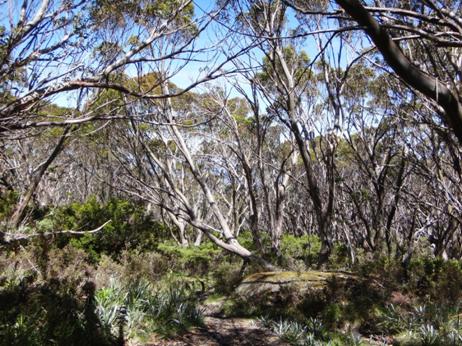
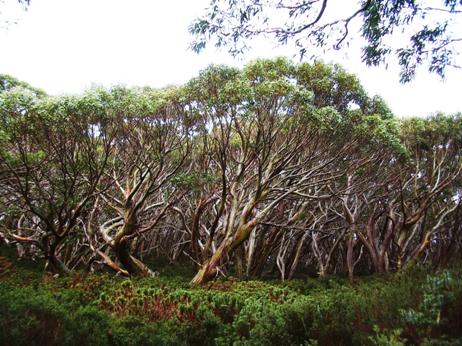
The
plateau is easy walking. Surprisingly flat, in fact.
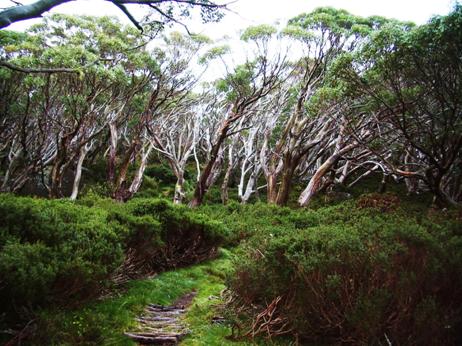
The
path is wide and well maintained. Many places two can walk abreast.
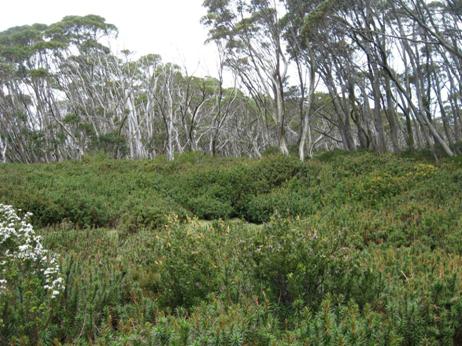
Here
and there are small clearings inviting solitary camps if you have thought to
carry enough water from the last supply.
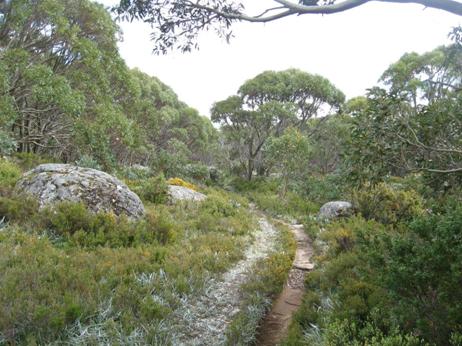
Huge
granite boulders are common all over the plateau. It would not have been so
pleasant on the day they were falling from the sky!
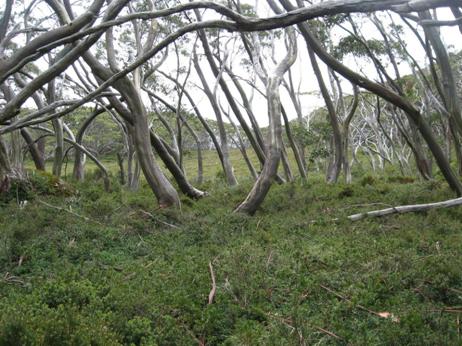
In
many places the terrain and vegetation are clearly windswept. It us a good walk
to carry a few extra tent pegs.

There
are many lovely scenes to greet the eye.
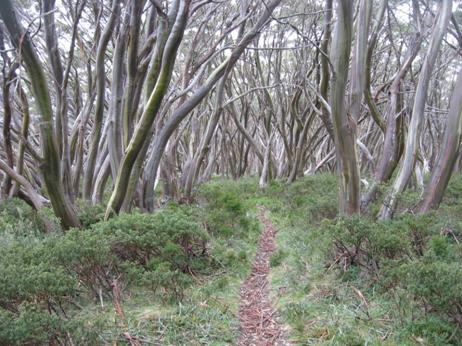
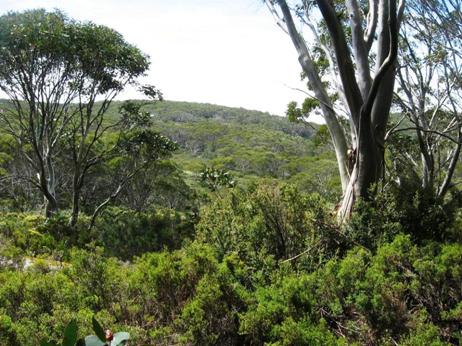
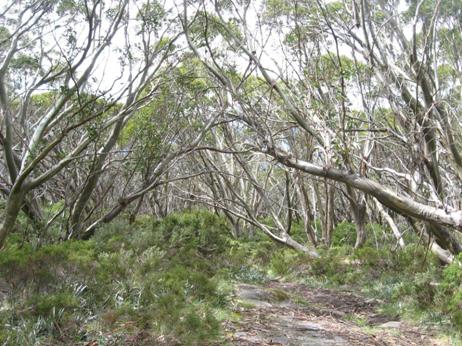
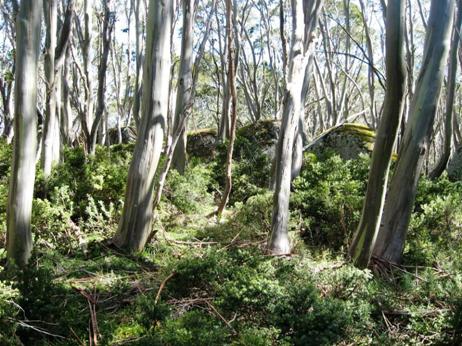
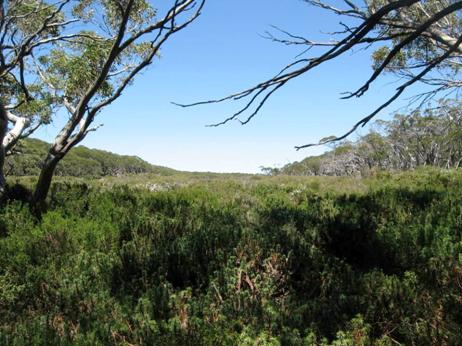
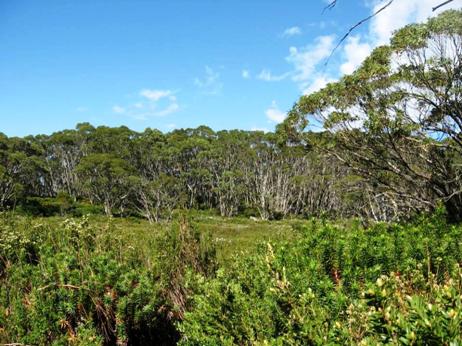
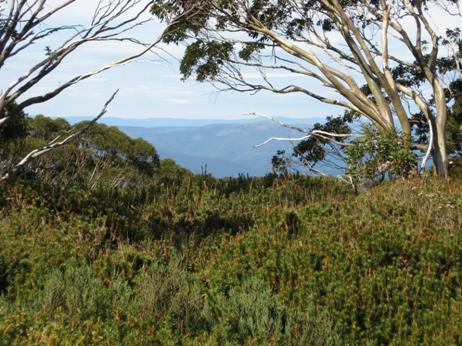
As
you cross the plateau you get only occasional glimpses of what would be a
magnificent view if only they would cut all the wretched trees down!
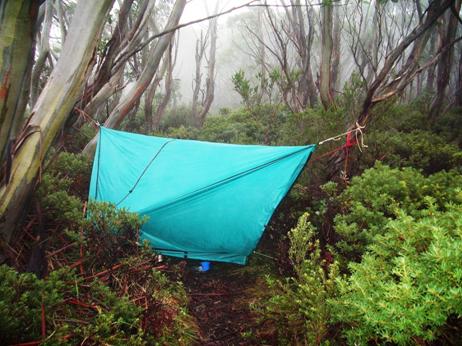
One
wet night I camped right across the track in my hammock. It rained during the
night turning the track into a stream 150mm deep. Yet I stayed dry – one of the
advantages of hammock camping. During the night it was so humid that a light
rain fell under my hammock tarp. The DWR on my sleeping bag handled it fine.
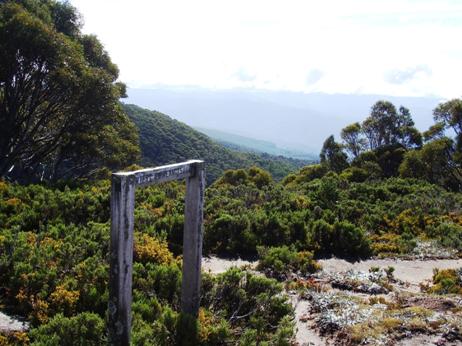
Mt
St Gwinear track intersection looking towards Mt St Gwinear.
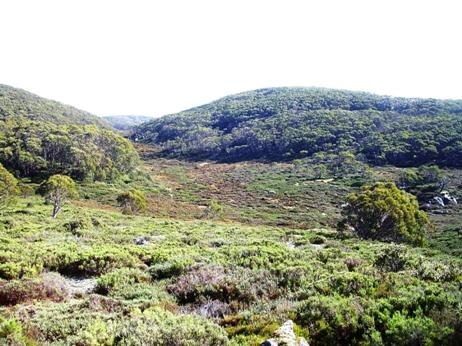
View
towards Mt St Gwinear from the track intersection. Water can be obtained from
the North Cascade Creek below.
Mt
St Phillack (cairn) the highest point on the plateau.
Phillack
Saddle just before the turn-off to Baw Baw is a fine place for an overnight
camp. Water on the South side.
This
is the real turn-off to Baw Baw a hundred metres or so past Phillack Saddle
heading West. The old track exited right at the saddle but is unmaintained and
well-nigh impassable today (though scenic). Whereas it takes about 1.5 hours to
walk across the new route it takes twice as long on the old.
PS:
My thanks to Gerard White for some of the preceding photos.
Telstra
NextG mobile phone works most places across the Plateau.
Maps
for this section:
Mostly
Walhalla North T8122-2-N and part of WalhallaSouth T8122-2-S and Avenza Pdf
App.
See
also:
http://www.finnsheep.com/THE%20UPPER%20YARRA%20WALKING%20TRACK.htm
http://www.finnsheep.com/Track%20Instructions.htm
http://www.theultralighthiker.com/upper-yarra-track-update-section-one-moe-yallourn-rail-trail/
http://www.theultralighthiker.com/upper-yarra-track-update-section-two-yallourn-north-to-wirilda-park/
http://www.theultralighthiker.com/upper-yarra-track-update-section-three-wirilda-to-moondarra/
http://www.theultralighthiker.com/upper-yarra-track-section-four-moondarra-to-erica/
See
also Upper Yarra Track Winter Route:
http://www.theultralighthiker.com/western-tyers-river-great-for-crays/
http://www.theultralighthiker.com/the-western-tyers/
http://www.finnsheep.com/THE%20UPPER%20YARRA%20WALKING%20TRACK.htm
http://www.theultralighthiker.com/upper-yarra-track-update-section-one-moe-yallourn-rail-trail/
http://www.theultralighthiker.com/upper-yarra-track-update-section-three-wirilda-to-moondarra/
http://www.theultralighthiker.com/upper-yarra-track-section-four-moondarra-to-erica/
http://www.theultralighthiker.com/upper-yarra-track-section-five-erica-to-walhalla/
http://www.theultralighthiker.com/upper-yarra-track-st-gwinear-track-junction-to-whitelaws-hut/
http://www.theultralighthiker.com/upper-yarra-track-summary-cumulative-distancestimes/
http://www.theultralighthiker.com/upper-yarra-track-osheas-mill/
http://www.theultralighthiker.com/a-beautiful-world/
http://www.theultralighthiker.com/upper-yarra-track-winter-route-caringal-scout-camp-tyers-junction/
http://www.theultralighthiker.com/upper-yarra-track-winter-route-western-tyers-morgans-mill-skinners-camp/
http://www.theultralighthiker.com/upper-yarra-track-winter-route-western-tyers-to-tanjil-bren/
http://www.theultralighthiker.com/kirchubel-if-you-go-nowhere-else-in-the-world-at-least-go-here/
http://www.theultralighthiker.com/upper-yarra-track-winter-route-downey-to-newlands/
21/02/2016:
Free Will/Determinism: We can choose to do anything. The corollary: we can do
anything we choose. This is a priori. Truth. Though many people find it hard to
choose, choosing instead the mob. (Horace: ‘odi profanum vulgus et arceo’)There
is this other truth: Many of the best things which happen to us are
serendipity, so it is unnecessary to obsess about personal choice. The most
obvious example of the former is what we choose to put in our mouths. We re
indeed what we eat – indeed mostly too much! Of course much of this (and the
resulting overweight) is mere habit. For just shy a year now I have chosen to
eschew booze. This strategy scythed 10+ kg from my waistline, but it was not
enough. I have many adventures and interesting journeys I choose to undertake
yet, (eg off-track travel in Fiordland in pursuit of the wily moose – Supper Cove
to Herrick Creek; Jane Burn to Gardiner Burn, Big River to Cromarty, Slaughter
Burn to Lake Poteriteri… spring to mind) and I cannot be http://www.theultralighthiker.com/
with an excess of avoirdupois. There is precious little left I can take off my
pack weight – though that being said I have thought of a few wrinkles yet – so
keep coming back! Three weeks ago (and ¾ of a stone) I chose to cease
carbohydrates, milk products, nuts, sugar…I have no doubt that ‘health experts’
who tout 11 stone (70 kg) as being the ‘ideal’ weight for my height are right.
Let’s see how long it takes to get there. Fortunately I love fresh fruit and
vegies, so this choice is not hard for me at all. I do not understand why the
Federal Government ‘chooses’ to spend billions on ‘health care’ for a
population whose chiefest problem is that they are excessively overweight and
underactive. It seems to me that if they ceased ‘benefits’ altogether for a few
weeks/months the ‘problem’ would simply go away! May I remind you again of this
delightful volume: ‘Moir’s Guide South: The Great Southern Lakes and Fiords’?
Tripod
Hill from Centre Pass, Dusky Track, Fiordland, New Zealand.
21/02/2016:
Moir’s Guide South: The Great Southern Lakes and Fiords’: There is something
about dreaming of the wild places – and these are some of the wildest places on
earth. This is an indispensable companion to bushwalking/tramping in New
Zealand. Even if it remains forever a ‘coffee table’ book, do buy it anyway. If
you have a bent for exploration/ searching for the elusive moose as I do, it
will suggest to you some interesting routes you may essay, eg: Supper Cove to
Herrick Creek; Jane Burn to Gardiner Burn, Big River to Cromarty, Slaughter
Burn to Lake Poteriteri… Available eg: https://alpineclub.org.nz/product/moirs-south/
1702/2016:
Other amazing secrets of DNA: http://arstechnica.com/science/2016/02/ancient-hook-ups-with-neanderthals-left-lasting-effects-on-our-health/
14/02/2016:
Trailstar: This an interesting, innovative concept
(http://www.mountainlaureldesigns.com/shop/product_info.php?cPath=51&products_id=102) . It provides a huge shelter area for a small weight
spend (18 oz – 513g in Silnylon; 11oz – 313g in Cuben) . Could be good for a
small group of hunters. Each might also carry something like this:http://www.theultralighthiker.com/tarp-bathtub-groundsheet/ Mountain Laurel Designs have a deserved reputation
for quality products: we own a number of their products and are more than happy
with them (eg Supermid Tent & Event Rain Mitts). On my wish list is one of
their Exodus Packs (http://www.mountainlaureldesigns.com/shop/product_info.php?cPath=25&products_id=103) with the addition of their Lightweight Suspension
Upgrade (http://www.mountainlaureldesigns.com/shop/product_info.php?cPath=25&products_id=208) This would make an excellent pack for backpacking or
hunting.
14/02/2016:
Twin Shock Absorbers: You may not know you can fit twin shocks front and rear
to improve handling on rough roads or under heavy loads. I already fitted twin
shocks to the rear of our vehicle and it made a huge difference. Pictured is
the Bearmach Twin Shock Absorber Front Turret for a Land Rover
Defender/Discovery. NB: You CAN fit standard height heavy duty springs to your
vehicle for off-road or heavy carrying work; you don't have to fit a 2"
lift which will increase body roll. You don't need this extra clearance on a
Land Rover anyway. Terrafirma make these for Land Rovers, for example. A heavy
duty return to centre steering damper might also work well in demanding
circumstances. We are fitting all three devices to our Defender (the one with
the camper: http://www.theultralighthiker.com/tray-top-camper/
) to improve steering/handling under heavy load & on rough tracks.

13/02/2016:
New Tyvek ‘Forester’ Tent Design: I have been playing with Col. Whelen’s famous
‘Forester’ Tent design: http://www.theultralighthiker.com/col-townsend-whelens-forester-tent/
I have certainly come to the conclusion that the classic A-frame tent sloping
away to the back has seldom been bettered. I reduced some of his dimensions and
increased others. We do not need such a tall tent as his, particularly at the
rear, nor quite so wide, but we do need a little more overhang at the front as
we will want closeable flaps at the front in case of heavy rain.
I
have realised that if these flaps (and the back wall are sewn in under an
overhang, a covered ventilation system will result at the tops. At the back
(certainly) I will want to be able to close this when there is a very cold wind
blowing. At the front, probably not. I also realise how easy it will be to have
mosquito curtains inside the flaps. They can simply hang down and overlap. When
the flaps are not needed to keep out rain, they can be pegged out to create
more space (as shown).
This
prototype has a floor area approx 7’ wide at the front and 4’ at the back. Its
inside length is about 6’6”, long enough for us. I have altered Whelen’s
dimensions as follows: ridgeline 8’6”- 9’, length of side walls 7’6”, front
height of side walls 6’6”, rear height of side walls 2’10”. That is a
‘standard’ 6’ x 4’ blue poly tarp you see lying in it.
If
I make this tent entirely in Tyvek (including a sewn in ‘bathtub’ floor
(supported at the front by the walls, the pole and an elastic draw cord), and
closeable flaps and sewn in back it will weigh 720 grams (546 in silnylon)
without the insect screen which will only add about 50 grams. I am really
surprised how light it will be for such a large tent. It is big enough to sleep
three people (if they are very good friends) and there is plenty of room still
for all their gear at the front. It will be a palace for Della and me - and the
two dogs! Most important, you can sit around on your http://www.theultralighthiker.com/cyclone-chair/
in it with a fire out the front even when it is raining! You can also get
dressed standing up!
If
I sew a fringe about 6” high of insect screen around the edge of the bathtub
floor and then sew it to the walls, I will have ventilation all around by
simply elevating the whole tent a couple of inches. This could be good on a hot
day.
I
have just erected the prototype using some tarp clips, so it doesn’t drape as
well as it will when sewn. You could just leave it like this and add the flaps
and back end in with Tyvek tape – if you can’t sew.
The
tent can be erected with a pair of hiking poles plus the addition of a short
tube of aluminium/carbon fibre - or with sticks you find at camp!
We
will ‘finish’ off the prototype (in Tyvek) and try it out some before I settle
on a ‘final’ design – which I will then post. I may decide to 'catenary cut'
the ridgeline for example, particularly for the silnylon model
PS:
I have also planned some alterations to my http://www.theultralighthiker.com/tyvek-solo-fire-shelter/
I can easily make it big enough for two by adding two small flaps at the front
and widening the floor by about 1’. I have also figured a way to create a sort
of wrap around ‘umbrella vent’ at the top utilising the two front guys, a piece
of Tyvek and some Velcro. I have also worked out a way to half close the front
door to create the maximum dry space when the door is not completely closed.
This is (usually) the most serious drawback of 'pyramid' type tents. It will
still be even lighter than the above tent - about 450 grams in silnylon; under
300 with a cuben fibre roof. Great for solo overnight hunts/trips. I will
update the post when I have made them (the alterations).
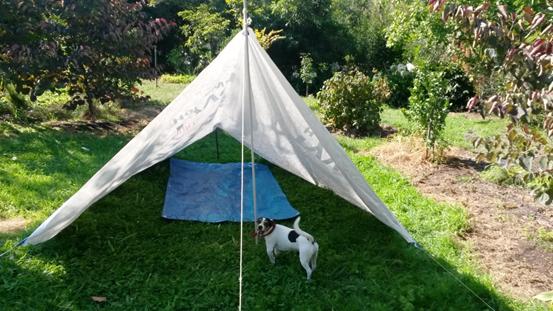
This
is a good standing height for Della, and fine for me with a bit of a slouch. It
has Spot’s ‘seal of approval’.
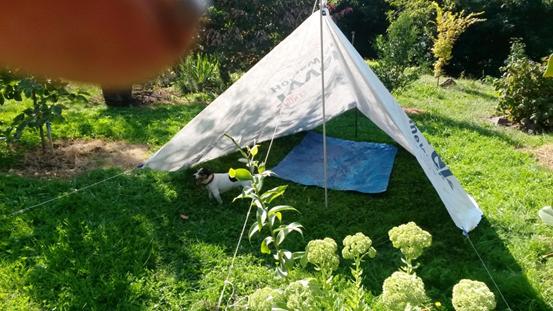
I
know about the finger, but I could not resist the picture of the dog!
13/02/2016:
Bionic Hands: I am about to become a cyborg: Exciting times for me next week as
I begin the acquisition of new hands. My old ones have pretty much worn out,
particularly the Pip joints (the ones nearest the palm) on my index and little
fingers. The little ones have been ‘frozen’ for years and the index ones are
very swollen, crooked and painful now. Next week I will have them removed (in a
conscious day procedure) and replaced with metal alloy. Left hand first. Then,
all going well in about three months: right hand. The cost is (surprisingly)
very little. Afterwards I may not be able to play the piano, but I will sure be
able to use them for something. Hopefully (being machines) they do not creep
out at night to commit mechanical mayhem!
12/02/2016:
Zenni: As we age eyes (and ears) impose unwanted expenses. Some of these can be
avoided by buying your glasses here (as we do). Medicare after all covers the
prescription cost – so it is yours. Ask for/demand a copy. You will also need
the pupillary distance (PD). You can measure it well enough yourself.
(Instructions on Zenni’s page.) I buy flexible titanium frames with multi-focal
lenses for around US$50 plus US$10 delivery. Single focus glasses complete
start at around US$7 plus delivery. The delivery charge will cover multiple
pairs. I usually get a few at a time. You need to measure the specifications on
an old pair of glasses you like eg bridge width, height and width of lenses,
arm length, shape etc. All these things can be input to Zenni’s page. When
chosing frameless you can chose different sizes and shapes of lenses. You can
upload a picture of yourself to see how they will look. You can buy all the
coatings you care for, safety glasses, sunglasses, etc. Give them a try: http://www.zennioptical.com/ PS:
I also buy my hearing aids from these folk: http://thehearingcompany.com/Siemens-AQUARIS-Models_c_124.html
As you can see the
top-of-the-range Siemens Aquaris Waterproof cost US$1595ea there as compared
with sometimes upwards of A$7,000 here. These folk are willing to tune them
(for a fee) http://www.hearingsavers.com.au/.
Most won’t. See also: http://www.theultralighthiker.com/securing-hearing-aids/

12/02/2016:
‘The Road to Endor’ by E.H Jones is simply the most amazing true escape story,
ever. I have been recommending it to people for fifty years but it has largely
been out of print. I have not owned a copy myself for most of that time – the
dangers of lending books to ‘friends’! Now once more I can: You can download an
epub etc version of it here: https://archive.org/details/roadtoendor00unkngoog
I just have. It will be on my phone in a minute to read again tonight. I am
astonished this astounding escapade (I am not going to spoil it for you) has
never been made into a film, but perhaps it is just too hard to believe, yet it
is true. The scenario did not imply Turks were stupid; indeed gullibility is an
epidemic disease. E.H. Jones is no relation (so far as I know – worse luck!).
Later in life he became famous (as I’m sure you know) as Freud’s biographer. A
seriously clever chap. Do read this book. And may I re-remind you about the
last war book I recommended: http://www.theultralighthiker.com/ion-idriess-the-desert-column/
What a world we live in where so much (great literature etc) is free! I assume
you have also discovered Project Gutenberg: https://www.gutenberg.org/
as well as the Internet Archive – the archive also has some wonderful films;
explore a little.
11/02/2016:
Hydraulic Rams: I helped a chap build one of these years’ ago to pump water
from a stream way down in the bush at the bottom of his property to near his
house at the top so he could run a vegie garden. At best you get 1/10th
of the water (diminishing with head to be pumped) without any source of power
save the flowing water. In this case it was ample and it worked smoothly
without maintenance for many years (maybe still) : DIY instructions to build
from standard plumbing fittings eg here: http://www.instructables.com/id/Hydraulic-Ram-Pump/ See also: http://www.theultralighthiker.com/hand-drilling-water-wells/

11/02/2016:
Oral B Pro 3000: Della bought us this wonderful new toothbrush yesterday as an
anniversary present. It is astonishingly better than the old model: it cleaned
my teeth to that shiny new feel you get when you have them professionally
cleaned at the dentist using the old brush head. Two brushes (now) with the new
‘Flossaction’ brush has completely removed all my plaques. This is seriously
good. If you have ever used the calculator at ‘Live to be 100’ website
(https://www.livingto100.com/) you will know that flossing your teeth adds a
year to your life expectancy. That alone should argue the desirability of your
changing toothbrushes. Apparently the rechargeable battery will last two people
a week without recharging too! It is a beauty!
08/02/2016:
Cryptozooology is fun. As a youth I delighted in the famous work ‘On the Track
of Unknown Animals’. Mystery creatures continue to have an allure (not least my
own quest for the Fiordland moose: http://www.theultralighthiker.com/?s=moose)
See https://en.wikipedia.org/wiki/On_the_Track_of_Unknown_Animals
& http://www.news.com.au/technology/science/animals/12-unidentified-creatures-that-washed-up-on-beaches-around-the-world/news-story/ceb11698de2ef2cde6a31bba92414a8c
07/02/2016:
Dylan Thomas, a lover of words: Notes On The Art Of Poetry
I
could never have dreamt that there were such goings-on
in the world between the covers of books,
such sandstorms and ice blasts of words,
such staggering peace, such enormous laughter,
such and so many blinding bright lights,
splashing all over the pages
in a million bits and pieces
all of which were words, words, words,
and each of which were alive forever
in its own delight and glory and oddity and light.
07/02/2016:
Della: Steve and I, with Tiny and Spot, spent the last 2 days walking over the
Baw Baw Plateau from Baw Baw across to Newlands Road on the Upper Yarra Walking
Track. It was a delightful walk and we selected good weather for it (which is needed!).
One section on the first day was particularly hard-going, and only on the
second day did we discover that we had taken an old, heavily overgrown route to
Phillack saddle instead of the (apparently!) new route which now exists.
Computer maps are not always up to date! It was beautiful, but daunting. We
will return to try out the new route another time! The second day's walk from
Phillack Saddle to Newlands Road was lovely and good walking, apart from the
last couple of kilometres where the track was overgrown with seasonal weeds. A
beautiful trip overall!

Mueller's
cairn, Baw Baw summit. Leaping dogs!
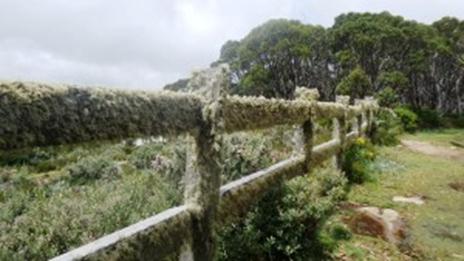
Baw
Baw, Mueller's Lookout. Love the bearded fence!
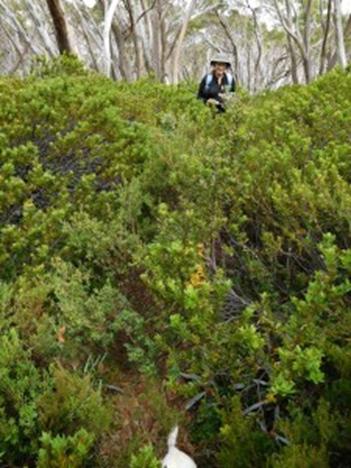
Old
(wrong) Baw Baw to Phillack Saddle track. The track is well below the chest
height of the vegetation.
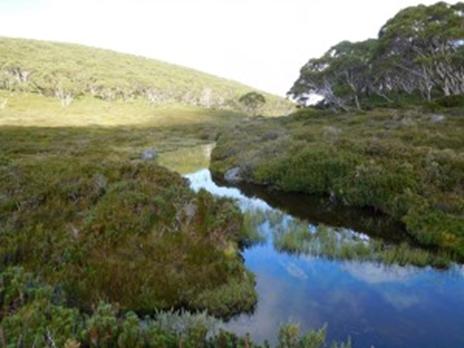
But even wrong tracks have their bonuses. This is indeed
a splendid vista. Freeman's Flat.
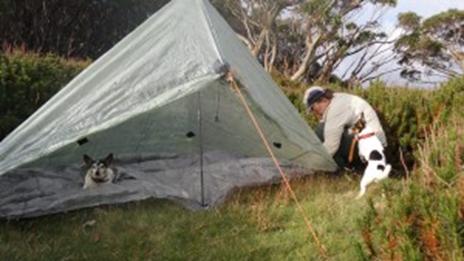
Phillack
Saddle: first night's camp. Dogs being helpful. Tiny went to bed before the
tent was up!
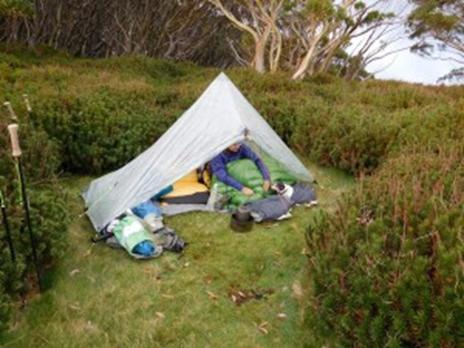
Tiny
and me warm in in our tent.
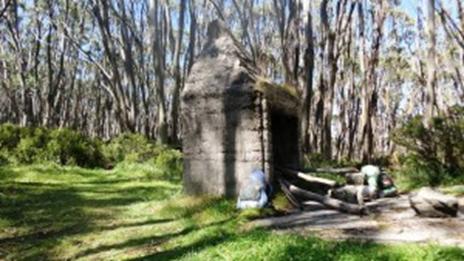
Mount
Whitelaw hut ruin. Lunch, day 2.

Love
this pic that Steve took! He was going to snap this fairly mundane rock when
the 2 dogs leapt on top and made the picture a winner!
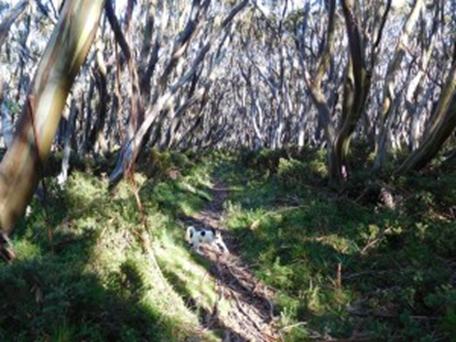
Great
scenery. Spot leaping ahead.
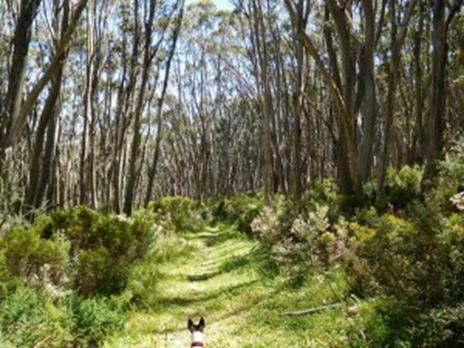
Spot
leading the way.
Mobile
Phone works most places along the top of the Baw Baw Plateau.
Vicmaps:
Walhalla North T8122-2-N & Noojee North T 8122-3-N
WARNING:
The Vicmaps incorrectly locate the trail from Baw Baw to St Gwinear as coming
off the 'Village Trail' at Baragwanath Flat: This is the old trail which is
well-nigh impassable (though we did!). The new (well-maintained) trail begins a
little west of there and exits onto the Alps Walking Track West of St Phillack
Saddle (where there is an excellent campsite with water), not right at the
saddle as does the old trail. Warning 2: Trails down from the Alps Walking
Trail to Newlands Road: there is only one trail, not two as shown on the
Vicmaps. It is an old gently sloping forestry road approx 7 metres wide. In
places it is a little overgrown (mostly with annual weeds), but easy to follow.
I marked it with coloured tape every half a km or so. The beautiful 3 km down
to Newlands Rd will likely take you 1.5-2 hours. NOTE: There is a good camp
with water on this old road as it crosses the diminutive Thomson River (here
just a brook) about .5 km off the main Alps Trail. After hitting Newlands Rd
you can camp on the side of the road every time it crosses the river or is near
enough to the river for water (lots). About a km before the end of Newlands Rd
after the last Thomson River crossing (with its 'No Camping' sign - ignore),
there is a track off to the North which leads to a beautiful dam about half a
km away full of trout with delightful campsites. This is the last good campsite
with water before you get to Toorongo (Link Rd)
07/02/2016:
Hand Drilling Water Wells: This cutter has successfully hand drilled many
hundreds of metres of water wells. For example, on our Hazelwood flats farm we
drilled 10 times 25 metre deep 100mm diameter bores which collectively provided
enough water to irrigate 50 acres: 66 megalitres (606 million litres) of water
annually. Compare that to your ‘normal’ domestic consumption. My wife Della and
myself I were able to hand drill these by ourselves with only the aid of a fire
pump.
In
Victoria no permit or licence is required for a bore of 3 metres depth. It is
surprising how many places will produce useful amounts of water at that depth.
Try the dry bottom of your nearest gully for a start, or any dampish patch on
your block. If you are only watering a vegie garden and home orchard (and not
many acres of pasture) it is likely that a small number of such low producing
bores will suffice.
You
can spend the money acquiring a bore and a water licence if you want to go
deeper. The bore permit is all you will need if your needs are ‘stock and
domestic’ which will allow you to water the above plus 3 acres for fire
prevention purposes! We went 25 metres at Hazelwood as the deeper aquifers were
already allocated (but this shallower one was not, so we were able to acquire a
licence for it). Some of those bores flowed 2-4 litres per second! A well-point
system of say 10 such bores linked underground by a powerful suction pump, each
bore’s production controlled by a check valve can water a large area – in this
case 50 acres! Even ¼ litre per second of flow (pumped/siphoned 24/7 will
produce enough to run a (1L/sec) pump for 6 hours per day over the summer. If
you have a secure storage dam which can be filled from it, you can do even
better.
Even
a small spring can be ‘proved’ to produce significant water. A friend of mine
has trenched an approx 30 metre per side ‘V’ below such a spring on his
hillside, lined it with gravel and agricultural drainage pipe carrying the
water to a sump which he pumps into a 20,000 litre tank to irrigate his garden.
Unbelievably this small damp patch on his hillside is producing between 1-2
litres per second – easily enough to keep his allowed 3+ acres green. The
largest (gold) fish farm in Australia (at nearby Boolarra) exists because of
the owners’ ability to capture and re-use (over and over) the production of one
really good spring in one small valley (approx 2 km long!)
Here’s
how to do it: This is a 1” plumbing fitting. You need to make several sections
(depending on the depth you want to go) of 1” gal water pipe threaded both
ends. 2 metre lengths are good. You will need a number of barrel unions to join
them as you go deeper. At the top you will need a (water-tight) swivel to
direct the fire pump’s jet down the tube. The water needed can be trucked to
site in one of those 1 square metre ‘cubes’ you see everywhere. You need a
couple of pipe vices bolted to approx 75 cm lengths of ¾’ RHS so you can turn
the pipe and cutter (clockwise) whilst the water is flowing. The water will
soften the bottom and wash the cuttings out the top. Dig a bit of a drain to
allow the water to escape or you will always be working with wet feet (The
water can be recaptured in a small pond lined with plastic sheeting). Gravel
makes the going more difficult (but it is just such coarser materials where
water flow is best). Stones will almost certainly stop you. Choose another hole.
Sometimes a stone can/will be forced into the softened wall on the side of the
hole, so persist a while. You can hear/feel the nature of the material you are
going through. Also the colour of the water and the material you are digging
through will reveal itself in the water you are washing out of the hole. Sand
is good. You will be astonished just how much water will flow through a couple
of feet of sand at 10’ depth.
I
suggest drilling a 6” pipe for a 4” casing. Plastic pressure pipe is best (as
it will withstand compressed air needed to clean the well in order to complete
it). You can slot it with a stone blade on a 4” angle grinder. The pipe comes
in 6 metre lengths. It might be easier to use 3 metre lengths and glue them
together with joiners. A chap I know used thin-walled pre-slotted 90 mm
drainage pipe to construct a well-point system which irrigated many acres, but
there is a greater danger of the pipe collapsing. It hasn’t after 30+ years! 90
mm pipe will probably require a hole (cutter) of approx 120 mm. You will find
it much harder to buy a submersible (or other) pump to fit down a 90mm pipe,
but a foot valve is no problem.
You
can construct a tripod and pulley system to lift out the sections of pipe if
you are going very deep. Be sure not to drop things down the hole. Monkey
wrenches are notorious for their ability to find their way down wells. Tie them
to a steel post with some stout string (likewise anything else you are likely
to drop down the hole). I know this from experience! It is unpleasant to have
to abandon a half-dug well because of some object you have dropped down it and
are unable to ‘fish’ out. You can spend many fruitless hours of such ‘fishing’.
Likewise you can construct a wooden clamp out of 150mm x 50mm treated pine
boards to hold the slotted pipe as you lower/force it into the well. It is
useful to cut teeth on the bottom of the pipe so that as you turn it it cuts
its way down. The best water bearing material will tend to collapse preventing
the pipe from going down. If it sticks, compressed air/water may clean the bore
to allow its passage as you case the well. You will need the compressed air
(250+ cu ft/sec) to clean and ‘prove’ the well anyway. You can ‘concentrate ‘
the water/air for such (bottom) by slipping a 90mm pipe inside your 100 mm pipe
with caps both ends one allowing water in (top) the other (bottom) allowing
water to jet out will move the obstructing material up the 100 mm pipe so that
it will go down to the bottom. When it is in place you need to seal the bottom
by drooping a plastic bag of mortar mix down it, then breaking the plastic bag
with your steel pipe so it will set. When it is set you can use compressed air
to ‘prove’ the well. Washing it out with compressed air will jet water
containing fines high in the air (you will need a raincoat) and move coarser
material nearer your slots. It is a washing machine sort of action. You surge
the material out, let the bore refill the surge it out again. You can do this
for say half an hour. You need a pretty big compressor to do this well, say
over 250 cuft/sec. Finer horizontal slots (lots of them) are best. Water flows
best through coarse material. I have seen a hand dug bore like this flow 9
litres per second. That would be enough to irrigate several acres!
The
method set out in the link below also works really well for very small diameter
wells in sandy material. You can drill using your garden hose! A 3/4 “ hose
will deliver lots more water. I guess you could rig your Guerney up to it to
really cut through tough material like clay. It is ridiculously inexpensive.
All pipe fittings available at Reece’s or Bunnings (50 mm and 32 mm pressure
pipe). Installing a 50mm barrel union ‘cutter’ to the bottom works even better.
You can go down 3 metres in a few minutes and install a 32mm slotted suction
pipe. If you are using a fire pump it really scoots down. This would work
really well in many bayside locations where the ground is mainly sand and the
water is quite close to the surface. The limit to how ‘high’ a pump will suck
is 7 metres but it will suck very little deeper than 5 metres. If you suspect
there may be water in your back yard this may be worth a try. Be sure to check
where utility cables/pipes are first before you drill. If you are only using
plastic ‘teeth’ on your 2’ pipe it should not cut through them, but best to
find out where they are anyway. Now (when there is no drought) would be a good
time to drill in preparation for water restrictions in the future, but anyway
utility water is so expensive particularly if you have a larger garden. Be sure
to get your water EC (electroconductivity) checked before watering the garden
with it. Very salty water can harm your plants (eg http://www.dpi.nsw.gov.au/agriculture/resources/soils/salinity/crops/saline-irrigation)
By the same token you can use much saltier water in higher rainfall areas or
where the soil is quite sandy. This is a great link: ‘How To Drill Your Own Water
Well’: http://www.drillyourownwell.com/index.htm
Some
other ideas here. Happy drilling:
http://www.rural-water-supply.net/en/implementation/manual-drilling/177-an-introduction-to-hand-dug-and-drilled-wells
Drive
your own freshwater well by Len McDougall
http://www.backwoodshome.com/articles2/mcdougall128.html
http://wayback.archive.org/web/20080107184220/http://www.drillingfab.com/
'Portable
Water Well Drilling Rigs new or used, DIY books and manuals. We sell Portable
water well drilling rigs plus well drilling troubleshooting books. Our best
selling book is water well drilling rig plans.Complete guide to build your own
drilling rig. For rock or compact soils.'
02/02/2016:
McKenzie’s Quick Cook Minestrone Soup: At first glance these excellent tasty
mixtures might seem a bit too lean for backpacking, but I used half the
recommended water, so a packet made up to one litre with water (so it would fit
in my 1100 ml billy). I used the stock sachet and added a 50 gram sachet of
tomato paste and approx half a container of the Hormel’s bacon pieces I wrote
about the other day (http://www.theultralighthiker.com/hormel-real-bacon-pieces/)
These three ingredients made up into a very tasty soup (approx 500 mls each for
two people) and containing 2392 kj (minestrone = 180 grams) + 178 kj (tomato =
50 grams) + 159 kj (bacon= 42.5 grams) = 2729 kj. Between two people this 653
calories (272.5 grams = 2.39 calories per gram ) provides each with 326
calories. Half was more than I or Della could eat – even though it was very
pleasant. Another time I might leave out the McKenzie’s Stock Sachet (which
comes in the packet – as I don’t like salt very much) and add maybe a ¼
teaspoonful of ‘Harissa’ eg Masterfoods ‘Middle Eastern Spice Blend’. Folks who
don’t mind salt might add the McKenzie’s flavour sachet, and if they don’t want
to carry a sachet of tomato paste (in case it leaks) might substitute a 24 gram
(= 114 calories) sachet of Continental ‘Sensation’ CupaSoup ‘Vine Ripened
Tomato’ instead. I’m sure folks can think of a few other ideas to mix and match
this to make a tasty meal. I have already remarked that you can thicken a soup
(I didn’t feel this one needed it) with Continental Mashed Potato: http://www.theultralighthiker.com/hiking-food-mckenzie-quick-cook-soups-180-grams-per-packet/

02/02/2016:
Upper Yarra Track: St Gwinear Track Junction to Whitelaw’s Hut:
The
route along the tops is a delightful mix of alpine heath and snow gums. Every
couple of kms you will find a small stream (sometimes to the side of the track)
with fresh water. For example there is water near the St Gwinear turnoff, just
after Mt St Phillack, at Mustering Flat and in the valley next to the Mt
Whitelaw Hut site. Gerard White and his partner Bridgette kindly shared these
photos from January 2015. Near Mt St Phillack:
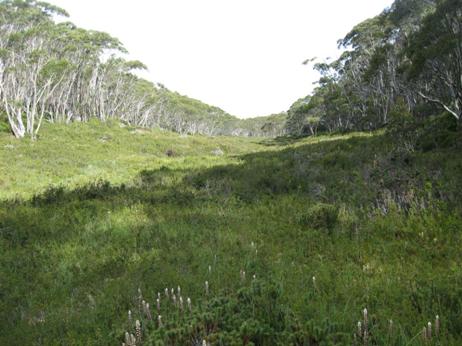
Most
times of the year (save winter) there is a riot of wildflowers
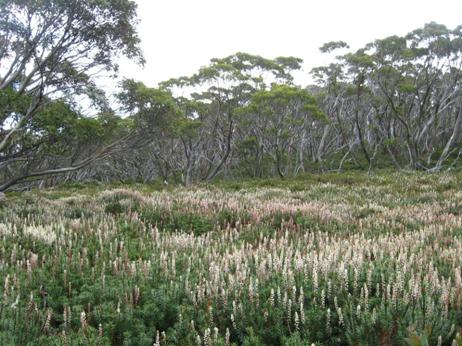
These
lovely little fellows close up.
The
path is well defined and maintained.
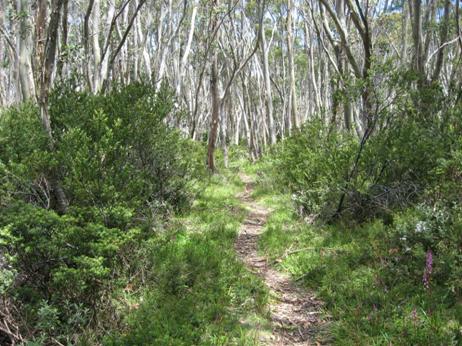
With
many things of interest on all sides.
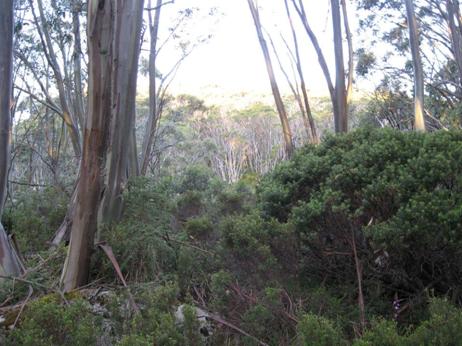
The
grass is well clipped by small herbivores whom you may see morning/evening.
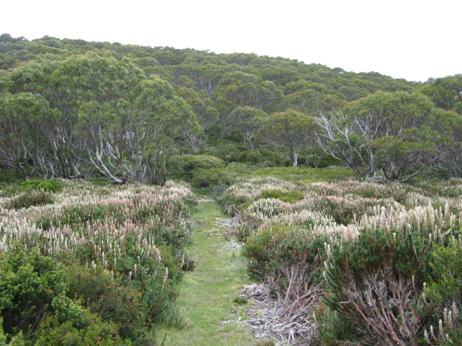
Large
granite tors are a feature of the Baw Baws.
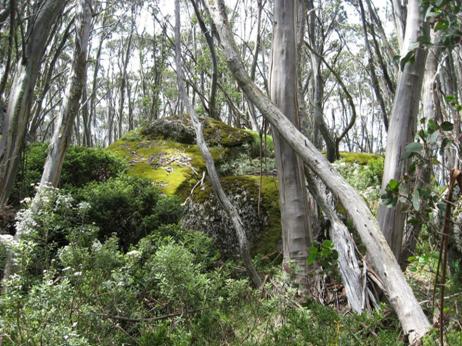
There
are some lovely vistas.
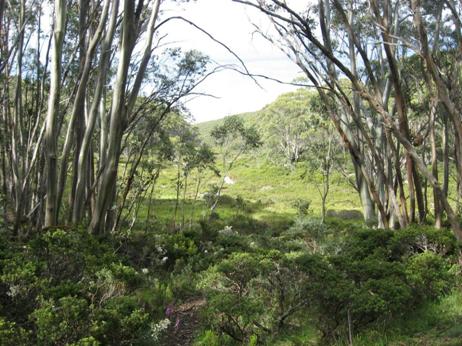
As
the evening shadows lengthen.
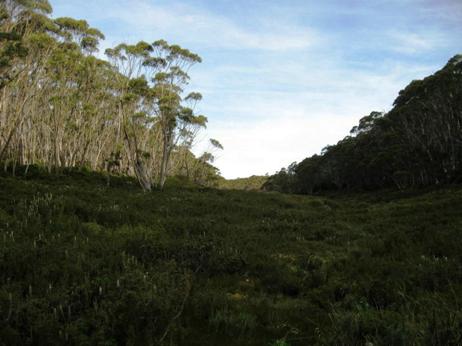
Some
of these prostrate plants amongst the snow gums are dwarf native pines.
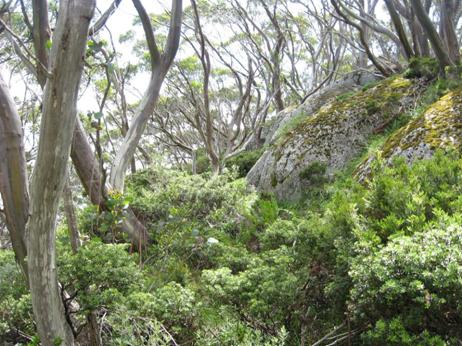
Whitelaws
Hut site. There used to be four huts: the first at the Yarra Falls, the second
in Newland Rd, the third at Mt Whitelaw, the fourth at Talbot Peak (Mt Erica).
Walkers coming from Melbourne used to stay at McVeighs Hotel (now under the
Yarra dam) the first night out, and were in Walhalla on the sixth night.
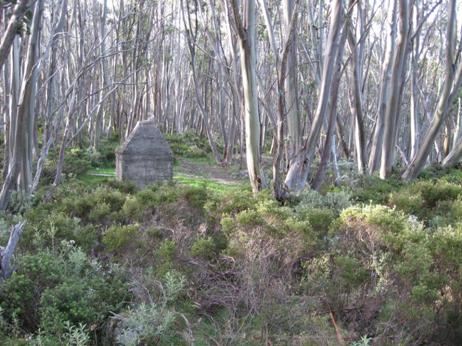
A
shame these huts were destroyed by the 1939 fires and never rebuilt. They were
quite large, had concrete floors and fireplace, bunks, pots, pans, crockery.
Delightful spots to stay as you journeyed along. Still camping out today is not
without its pleasures.
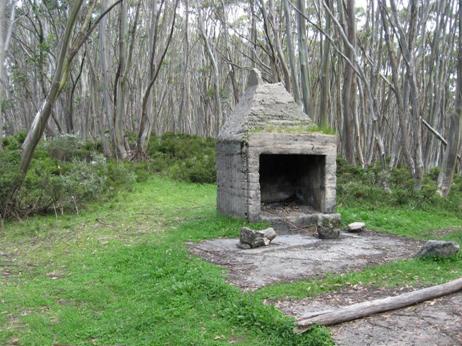
Many
pleasant views around the hut.
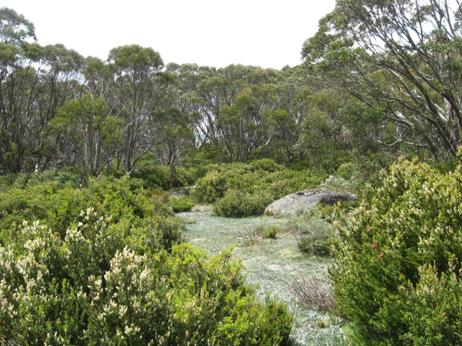
As
you lie abed, this is the view of the sky you see.
Water
can be obtained from this stream nearby.
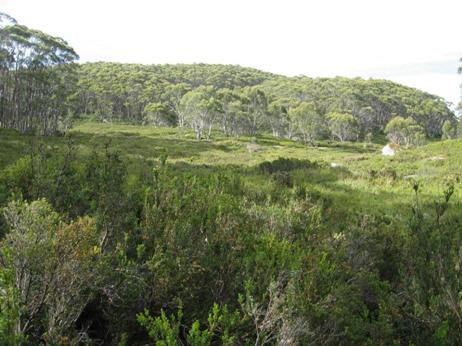
Snow
gums are very slow growing. Some of these trees are very old.
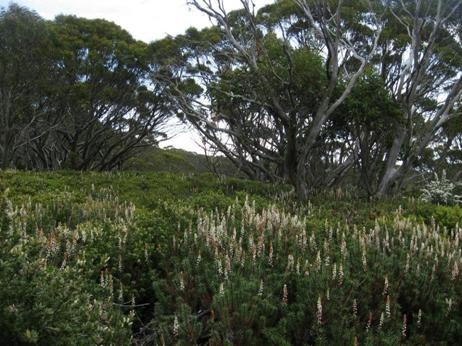
The
path continues on towards its turn-off to Newlands Rd in about 2 km.
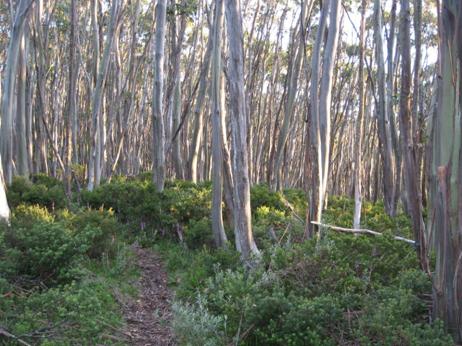
See
also:
http://www.finnsheep.com/THE%20UPPER%20YARRA%20WALKING%20TRACK.htm
http://www.finnsheep.com/Track%20Instructions.htm
http://www.theultralighthiker.com/upper-yarra-track-update-section-one-moe-yallourn-rail-trail/
http://www.theultralighthiker.com/upper-yarra-track-update-section-two-yallourn-north-to-wirilda-park/
http://www.theultralighthiker.com/upper-yarra-track-update-section-three-wirilda-to-moondarra/
http://www.theultralighthiker.com/upper-yarra-track-section-four-moondarra-to-erica/
Mobile
Phone works most places along the top of the Baw Baw Plateau.
Vicmaps:
Walhalla North T8122-2-N & Noojee North T 8122-3-N
WARNING:
The Vicmaps incorrectly locate the trail from Baw Baw to St Gwinear as coming
off the 'Village Trail' at Baragwanath Flat: This is the old trail which is
well-nigh impassable (though we did!). The new (well-maintained) trail begins a
little west of there and exits onto the Alps Walking Track West of St Phillack
Saddle (where there is an excellent campsite with water), not right at the
saddle as does the old trail. Warning 2: Trails down from the Alps Walking
Trail to Newlands Road: there is only one trail, not two as shown on the
Vicmaps. It is an old gently sloping forestry road approx 7 metres wide. In
places it is a little overgrown (mostly with annual weeds), but easy to follow.
I marked it with coloured tape every half a km or so. The beautiful 3 km down
to Newlands Rd will likely take you 1.5-2 hours. NOTE: There is a good camp
with water on this old road as it crosses the diminutive Thomson River (here
just a brook) about .5 km off the main Alps Trail. After hitting Newlands Rd
you can camp on the side of the road every time it crosses the river or is near
enough to the river for water (lots). About a km before the end of Newlands Rd
after the last Thomson River crossing (with its 'No Camping' sign - ignore),
there is a track off to the North which leads to a beautiful dam about half a
km away full of trout with delightful campsites. This is the last good campsite
with water before you get to Toorongo (Link Rd)
See
also Upper Yarra Track Winter Route:
http://www.theultralighthiker.com/western-tyers-river-great-for-crays/
http://www.theultralighthiker.com/the-western-tyers/
http://www.finnsheep.com/THE%20UPPER%20YARRA%20WALKING%20TRACK.htm
http://www.theultralighthiker.com/upper-yarra-track-update-section-one-moe-yallourn-rail-trail/
http://www.theultralighthiker.com/upper-yarra-track-update-section-three-wirilda-to-moondarra/
http://www.theultralighthiker.com/upper-yarra-track-section-four-moondarra-to-erica/
http://www.theultralighthiker.com/upper-yarra-track-section-five-erica-to-walhalla/
http://www.theultralighthiker.com/upper-yarra-track-summary-cumulative-distancestimes/
http://www.theultralighthiker.com/upper-yarra-track-ada-tree-to-big-pats-creek/
http://www.theultralighthiker.com/upper-yarra-track-osheas-mill/
http://www.theultralighthiker.com/a-beautiful-world/
http://www.theultralighthiker.com/upper-yarra-track-winter-route-caringal-scout-camp-tyers-junction/
http://www.theultralighthiker.com/upper-yarra-track-winter-route-western-tyers-morgans-mill-skinners-camp/
http://www.theultralighthiker.com/upper-yarra-track-winter-route-western-tyers-to-tanjil-bren/
http://www.theultralighthiker.com/kirchubel-if-you-go-nowhere-else-in-the-world-at-least-go-here/
http://www.theultralighthiker.com/upper-yarra-track-winter-route-downey-to-newlands/
02/02/2016:
Upper Yarra Track: Ada Tree to Big Pat’s Creek:
As
you can see the track is well made, delightful and easy to follow from the Ada
Tree all the way to Warburton, with numerous signposts. If you have a couple of
days to spare, this is a pleasant jaunt. You can turn it into a loop: http://www.theultralighthiker.com/ada-tree-loop-walk-4-days/
Gerard White and his partner Bridgette completed this section of the walk back
in July 2015 (even encountering snow at Starlings Gap!) and have kindly
provided the photos below:
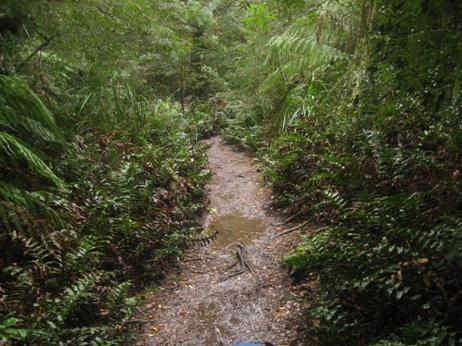
The
Ada Tree is huge,
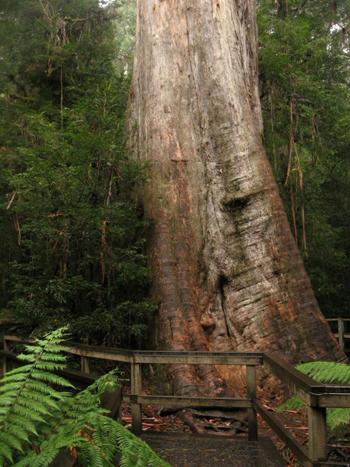
With
a tiny crown typical of these giant Mountain Ash.
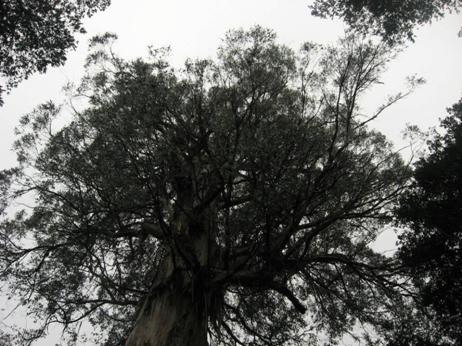
Many
photo ops along the trail. Hobbits would like this.
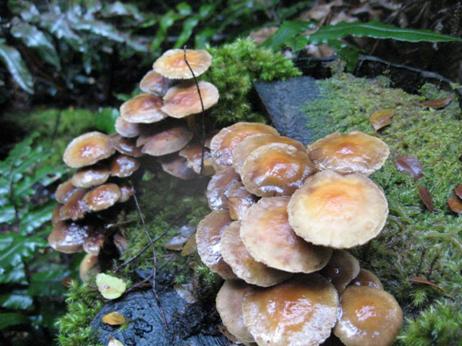
A
few stream crossings which do not even daunt Jack Russells – though they may
need a raincoat in the wetter weather. See: http://www.theultralighthiker.com/tyvek-jack-russell-rain-coat-13-grams/
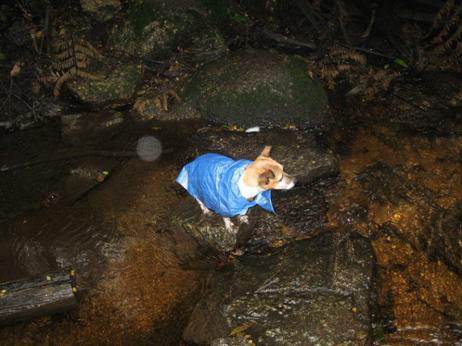
You
pass the remnants of a number of old timber settlements, eg ‘The New Ada Mill’,
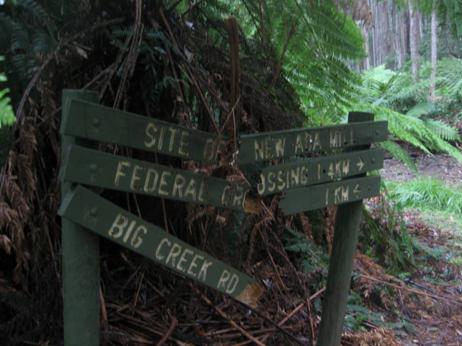
What
a colossal log jam
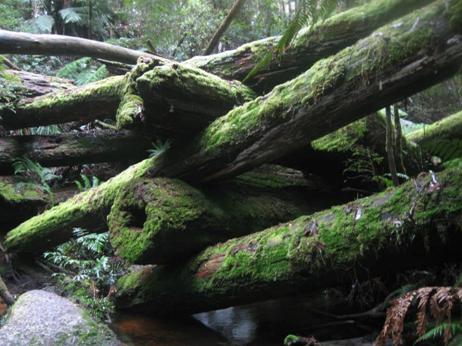
And
again. Fortunately you don’t have to scramble over it.
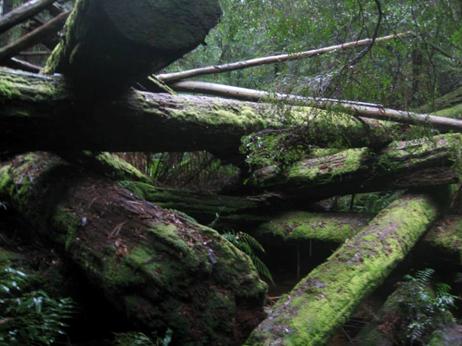
You
can gently tiptoe round it.
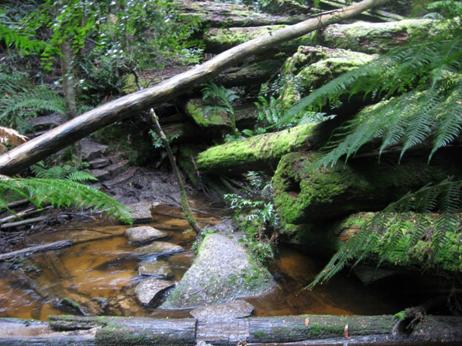
Wondrous
how the memories of yesteryear meld into the forest.
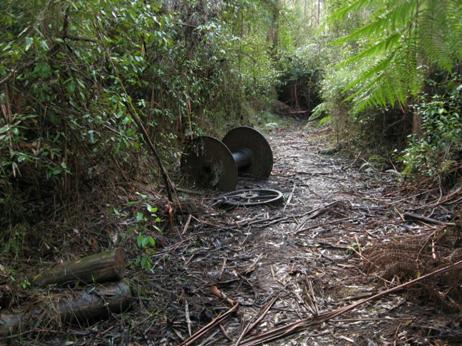
The
turnoff to the Walk into History (High Lead) trail.

Jack
Russels always lead the way.
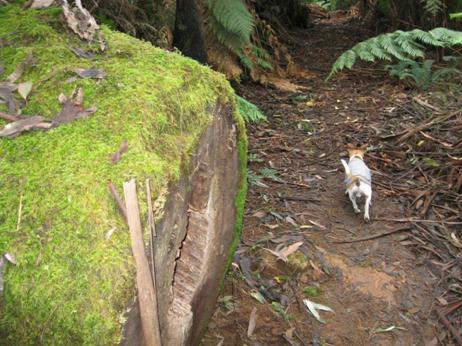
Ruins
of an enormous drum used for winch logging.
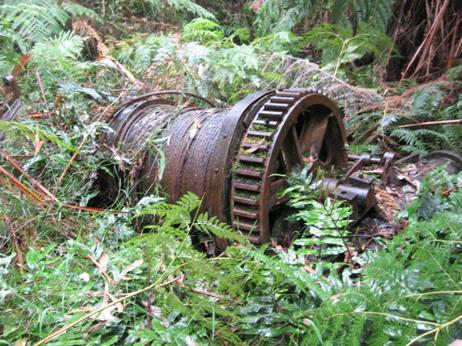
And
an old steam boiler
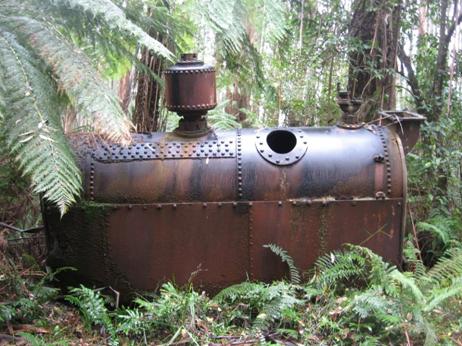
From
Starlings gap it is 9 km to Big Pats creek camp ground.
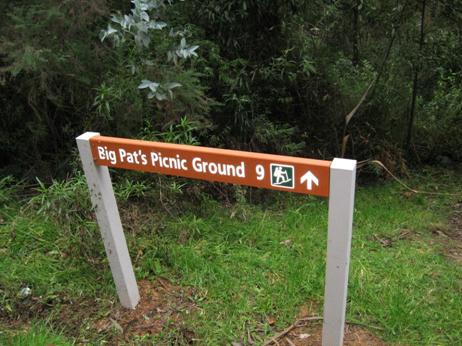
Starlings
gap is quite beautiful, and can be reached by car for day walks..
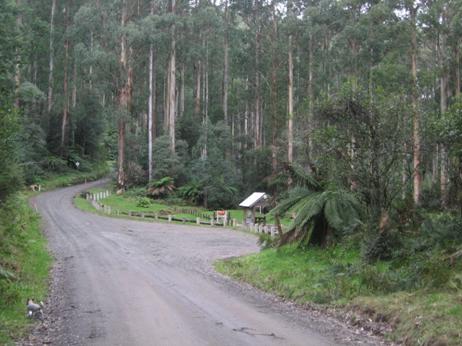
With
delightful facilities.
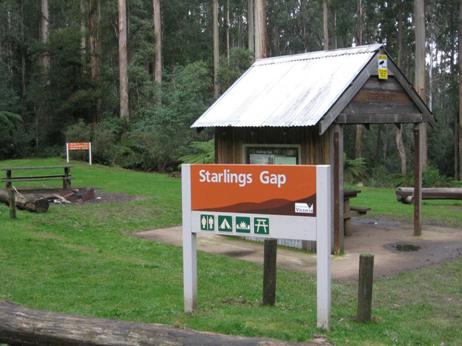
Lots
of logs to sit on. Picnic tables, fire pits.
Even
a light dusting of snow in July.
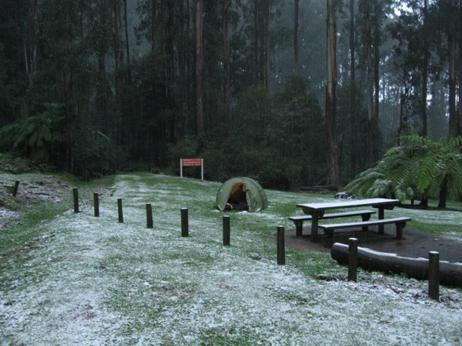
A
beautiful track leads along the river towards Warburton.
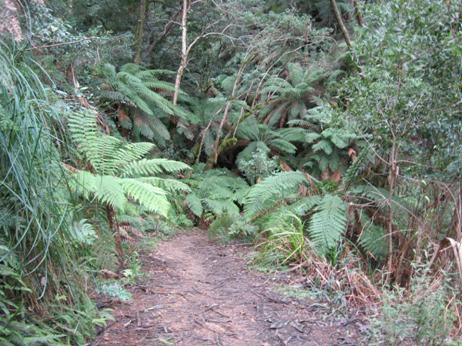
Fringed
by some splendid timber.

Delightful
mossy logs.

A
simply beautiful stream.
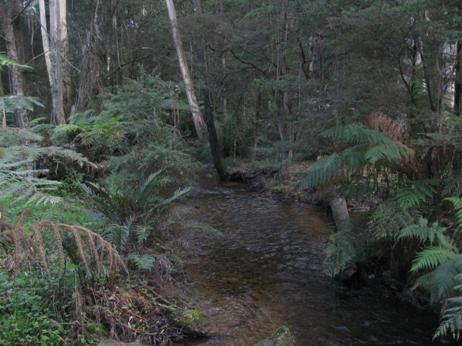
Plenty
of crays here.
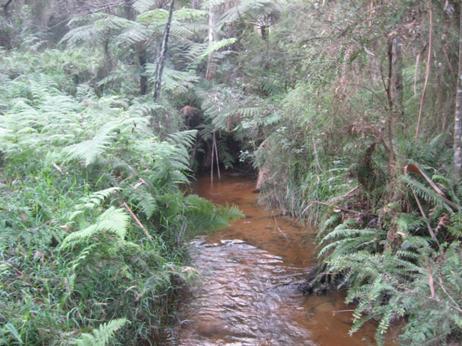
The
track is an old timber tramway.
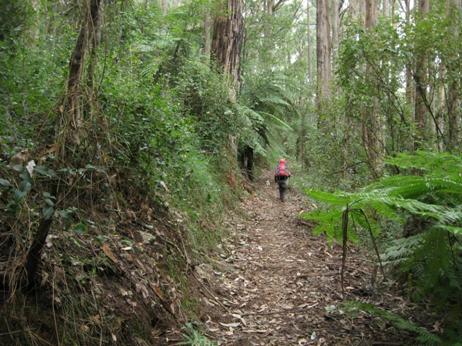
The
track begins/ends here.
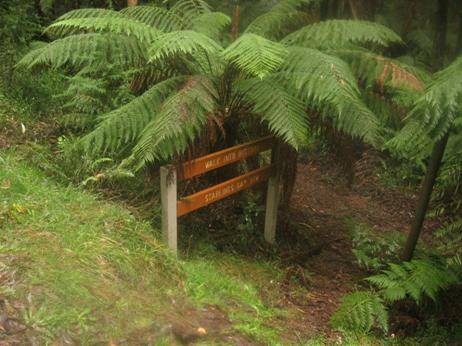
Big
Pats Creek.
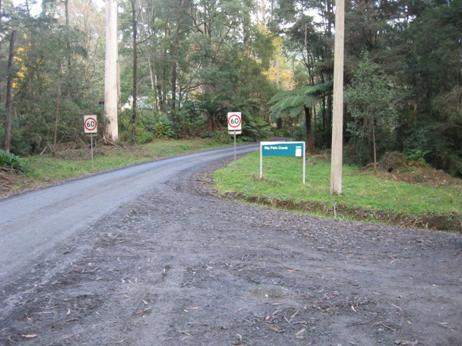
Turnoff
to/from Big Pats Creek. A pleasant stroll into Warburton: 6-7 km, say 2 hours.
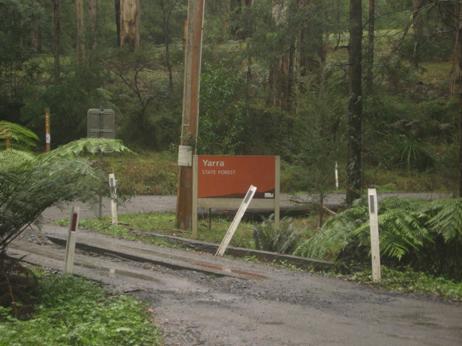
See
also:
http://www.finnsheep.com/THE%20UPPER%20YARRA%20WALKING%20TRACK.htm
http://www.finnsheep.com/Track%20Instructions.htm
http://www.theultralighthiker.com/upper-yarra-track-update-section-one-moe-yallourn-rail-trail/
http://www.theultralighthiker.com/upper-yarra-track-update-section-two-yallourn-north-to-wirilda-park/
http://www.theultralighthiker.com/upper-yarra-track-update-section-three-wirilda-to-moondarra/
http://www.theultralighthiker.com/upper-yarra-track-section-four-moondarra-to-erica/
See
also Upper Yarra Track Winter Route:
http://www.theultralighthiker.com/western-tyers-river-great-for-crays/
http://www.theultralighthiker.com/the-western-tyers/
http://www.finnsheep.com/THE%20UPPER%20YARRA%20WALKING%20TRACK.htm
http://www.theultralighthiker.com/upper-yarra-track-update-section-one-moe-yallourn-rail-trail/
http://www.theultralighthiker.com/upper-yarra-track-update-section-three-wirilda-to-moondarra/
http://www.theultralighthiker.com/upper-yarra-track-section-four-moondarra-to-erica/
http://www.theultralighthiker.com/upper-yarra-track-section-five-erica-to-walhalla/
http://www.theultralighthiker.com/upper-yarra-track-st-gwinear-track-junction-to-whitelaws-hut/
http://www.theultralighthiker.com/upper-yarra-track-summary-cumulative-distancestimes/
http://www.theultralighthiker.com/upper-yarra-track-osheas-mill/
http://www.theultralighthiker.com/a-beautiful-world/
http://www.theultralighthiker.com/upper-yarra-track-winter-route-caringal-scout-camp-tyers-junction/
http://www.theultralighthiker.com/upper-yarra-track-winter-route-western-tyers-morgans-mill-skinners-camp/
http://www.theultralighthiker.com/upper-yarra-track-winter-route-western-tyers-to-tanjil-bren/
http://www.theultralighthiker.com/kirchubel-if-you-go-nowhere-else-in-the-world-at-least-go-here/
http://www.theultralighthiker.com/upper-yarra-track-winter-route-downey-to-newlands/
01/02/2016:
Upper Yarra Track Sidetrip: Horseshoe Tunnel/Coopers Creek
Only
a bit over a km from Platina Station on the walk from Erica to Walhalla you can
take this lovely walk down to the historic Horseshoe Tunnel. The tunnel was
created over a century ago to divert the river so the dry river bed could be
sluiced for gold. The sidetrip takes about 1.5 hours (or several days if you
decide to camp out!) This early section is fringed with wild cherries. Seats
are provided at strategic intervals for the weary traveler.
The
track passes through a beautiful fern gully as it zig zags down the hill to the
river.
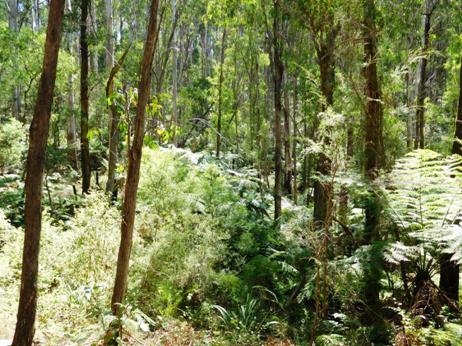
There
is some good timber along the way.
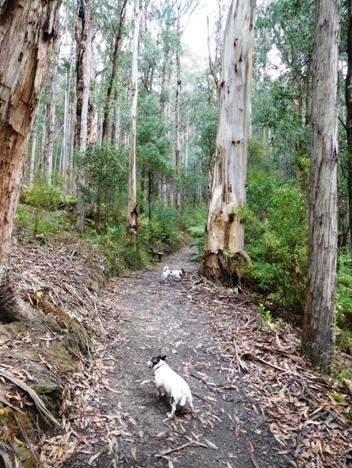
At
the bottom there is this delightful picnic table and informative signs. You
could easily camp right here. There is a fireplace as well.
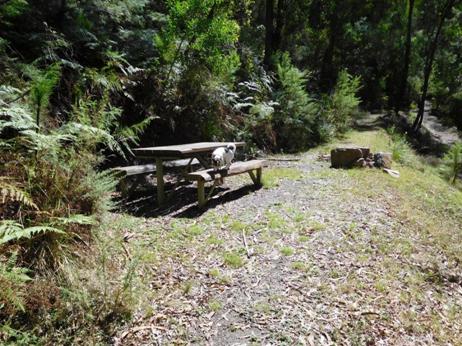
You
can see the river exiting from the tunnel if you stand on the table – as I did
for this shot.
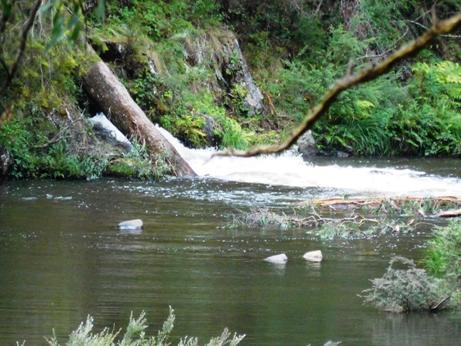
Close
up it looks much fiercer.
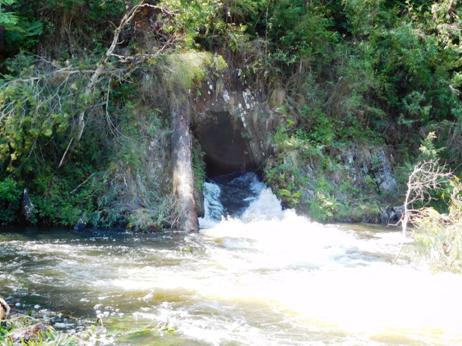
You
walk alpong the dry river bed to the inlet.
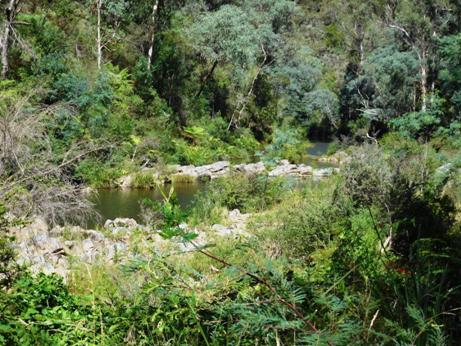
As
usual Spot leads the way. Plenty of places you could camp along here.
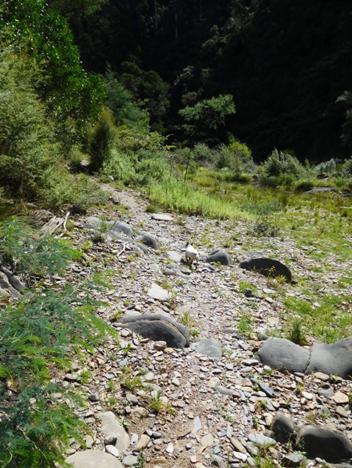
The
track is fringed with lots of wild mint which casts up a delightful aromatic
fragrance – another memento of the pioneer women of yesteryear.
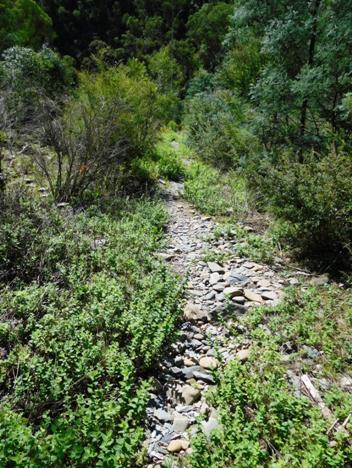
You
would not want to accidentally fall into the inlet. You would be pretty sore
and sorry by the time you came out the other side – if you lived to tell the
tale at all! Apparently on the day it opened the builder, his wife and children
were swept through it – and they survived!
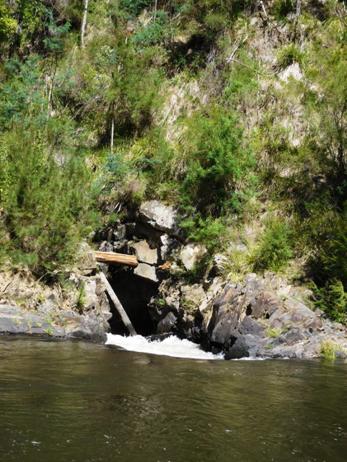
There
is a beautiful beach both at the inlet and the exit – lovely places for a swim
on a hot day.
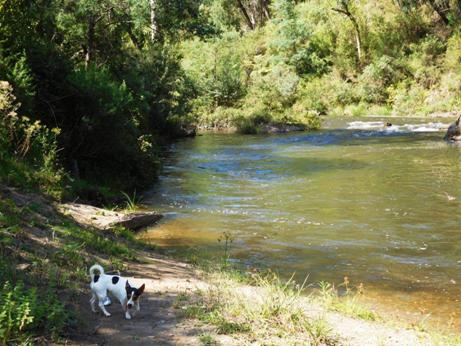
Spot
and Tiny were more interested in lunch than in the tunnel – background.
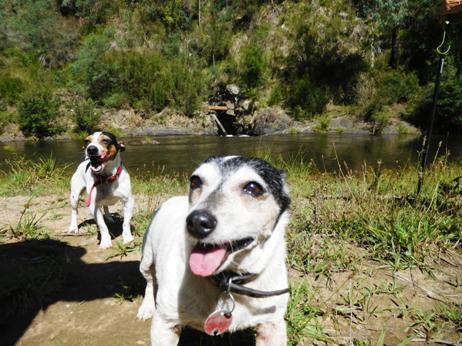
This
shaggy local barely noticed us as we passed.
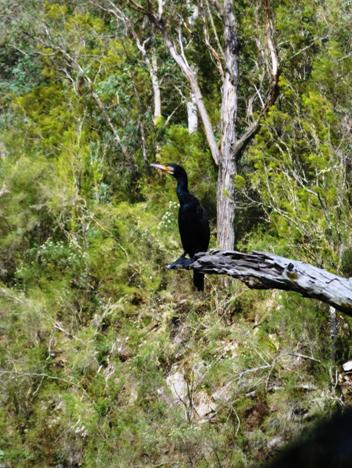
Coopers
Creek is also only a couple of km from Platina Station. Excellent canoeing and
swimming.
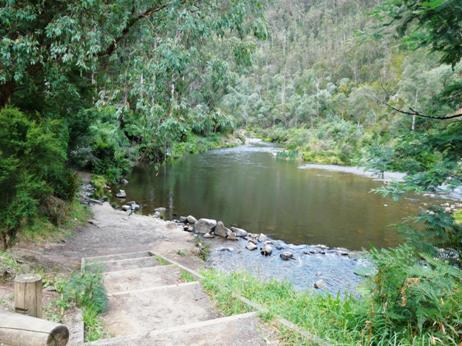
And
extensive camping opportunities (with toilet facilities).
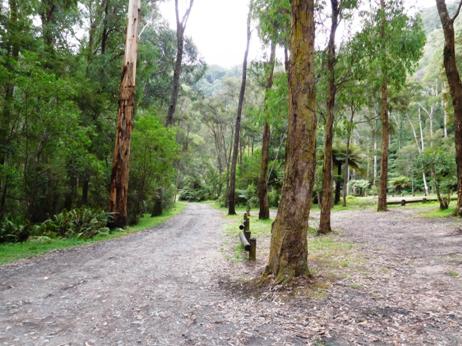
The
Vicmap for this section is Walhalla South T8122-2-S
See
also:
http://www.finnsheep.com/THE%20UPPER%20YARRA%20WALKING%20TRACK.htm
http://www.finnsheep.com/Track%20Instructions.htm
http://www.theultralighthiker.com/upper-yarra-track-update-section-one-moe-yallourn-rail-trail/
http://www.theultralighthiker.com/upper-yarra-track-update-section-two-yallourn-north-to-wirilda-park/
http://www.theultralighthiker.com/upper-yarra-track-update-section-three-wirilda-to-moondarra/
http://www.theultralighthiker.com/upper-yarra-track-section-four-moondarra-to-erica/
Mobile
Phone works beautifully until you plunge downhill towards the Thomson River.
SMS may still work. You will come back into mobile range after you leave
Walhalla and begin the climb up from the Thomson River after the Poverty Point
bridge.
See
also Upper Yarra Track Winter Route:
http://www.theultralighthiker.com/western-tyers-river-great-for-crays/
http://www.theultralighthiker.com/the-western-tyers/
http://www.finnsheep.com/THE%20UPPER%20YARRA%20WALKING%20TRACK.htm
http://www.theultralighthiker.com/upper-yarra-track-update-section-one-moe-yallourn-rail-trail/
http://www.theultralighthiker.com/upper-yarra-track-update-section-three-wirilda-to-moondarra/
http://www.theultralighthiker.com/upper-yarra-track-section-four-moondarra-to-erica/
http://www.theultralighthiker.com/upper-yarra-track-section-five-erica-to-walhalla/
http://www.theultralighthiker.com/upper-yarra-track-summary-cumulative-distancestimes/
http://www.theultralighthiker.com/upper-yarra-track-osheas-mill/
http://www.theultralighthiker.com/a-beautiful-world/
http://www.theultralighthiker.com/upper-yarra-track-winter-route-caringal-scout-camp-tyers-junction/
http://www.theultralighthiker.com/upper-yarra-track-winter-route-western-tyers-morgans-mill-skinners-camp/
http://www.theultralighthiker.com/upper-yarra-track-winter-route-western-tyers-to-tanjil-bren/
http://www.theultralighthiker.com/kirchubel-if-you-go-nowhere-else-in-the-world-at-least-go-here/
http://www.theultralighthiker.com/upper-yarra-track-winter-route-downey-to-newlands/
31/01/2016:
Sub Five Pounds: A gear list mayhap more appropriate for well-trod trails,
safer places than where I prefer to venture – I dream yet of Herrick Creek and
this wonderful photo - but less than 2.5 kg all up shows where savings may yet
be made: http://gossamergear.com/wp/sub-5-pound-baseweight-backpacking
More about Fiordland Moose Hunting here: http://www.theultralighthiker.com/eddie-herrick-moose-hunting-at-dusky-sound/
& here http://www.theultralighthiker.com/moose-hunting/
& here http://www.theultralighthiker.com/fiordland-moose/
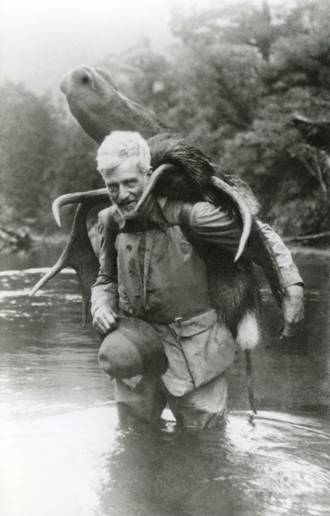
29/01/2016:
Some very different ways to lighten your backpack: http://adventure-journal.com/2016/01/10-tips-to-lighten-your-backpack/
27/01/2016:
Cookset Woes: Some people seem to think it is fashionable to lug around the
kitchen sink and a range simply to warm a couple of evening snacks, so you see
people all the time with a food prep setup which weighs maybe a kg – or more.
The empty canisters of such systems typically weigh more than my ultralight pot
and Caldera Cone system together – and I need carry no fuel! Evernew deep pot
with frypan lid = 123 grams plus Caldera Cone and two titanium tent pegs @ 44
grams = 167 grams. I think people need to seriously reprise their
cooking/cookset options.
The
lightest fuel option is a wood burner, followed by an Esbit, followed by metho
(for short trips) with canisters coming a poor last. I carry a few bits of
esbit as fire starters, a small metho stove and some metho for lazy meals and
for long simmers which can be tedious with a wood.
You
can balance a pot on three tent pegs (a variation of the three stone fire), the
triangular ones work best, but you are quite likely to lose your meal if you
aren’t very careful. You do learn to be more careful.
I
progressed to the Bushbuddy stove http://bushbuddy.ca/indexs.html
which I still think is great at about 150 grams and C$120. It burns cleanly,
without scarring the earth or the danger of starting a bushfire. You only need
a handful of dry twigs to boil a billy of water. These can even be found in
Fiordland most times!
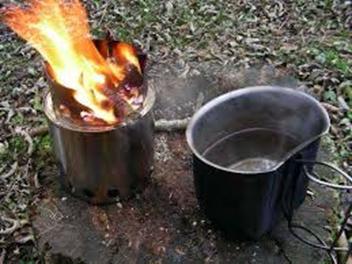
I
was lucky enough that Della bought me the Rolls Royce knock off of this stove,
the Suluk TDW http://www.suluk46.com/products%20%20-%20P14%20TDW%20Stove.html
which weighs only 86 grams: http://www.theultralighthiker.com/suluk-stove/
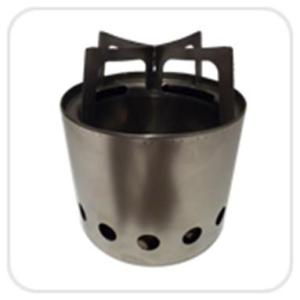
If
you don’t mind a tiny bit of scorched earth the Caldera Cone (with two tent
pegs) usually weighs about 44 grams altogether
https://www.traildesigns.com/stoves/caldera-cone-system
See my post: http://www.theultralighthiker.com/hiking-cookware/

My
favourite for an alcohol stove is the Brasslite http://brasslite.com/products/brasslite-turbo-i-d-backpacking-stove/
which weighs 47 grams, because you can simmer/fry with it – so important if you
plan to catch fish.
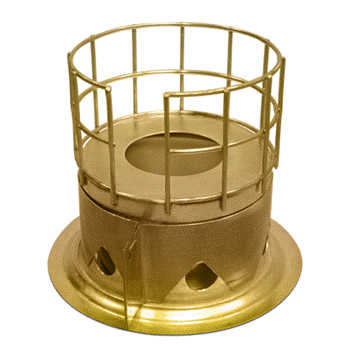
If
you want a simple boiler, either make your own (eg the Supercat http://www.theultralighthiker.com/supercat-hiking-stove/
or Garlington http://www.theultralighthiker.com/diy-side-burner-metho-stove/
or http://www.theultralighthiker.com/soda-can-stove/
) or maybe buy one from Minibull Designs https://www.minibulldesign.com/productcart/pc/viewPrd.asp?idproduct=195&idcategory=2
(I have used their Elite @ 7 grams for many years) or get one with your Caldera
Cone from Trail Designs (above) – theirs also have simmer rings.
If
you are going to burn wood, you need a fixed blade knife so you can split wood
to get at the dry heart wood and make ‘exelcior’ for fire lighting. Actually
this is something you need to be able to do anyway if you are to survive in the
woods if things turn very nasty – and they can! See: http://www.theultralighthiker.com/carry-a-knife/
& http://www.theultralighthiker.com/how-to-light-a-fire-in-the-wet/
Of
course, you also need a lightweight cook pot. If you are on a budget, an
aluminium billy from a disposals store is hard to beat. Otherwise: http://www.theultralighthiker.com/ultralight-cook-pots/
Don’t forget the importance of windscreens: http://www.theultralighthiker.com/windscreens/ See also: http://www.theultralighthiker.com/toaks-ultralight-titanium-cook-system/ & http://www.theultralighthiker.com/hiking-cookware/
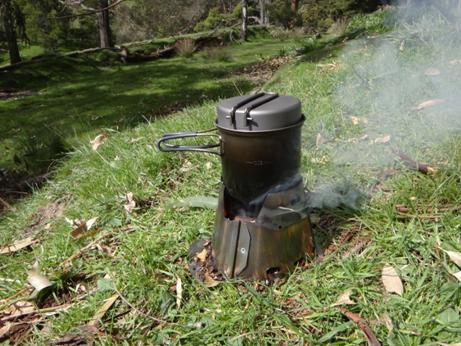
This
is a useful product to prevent your burning your lips: http://www.theultralighthiker.com/hot-lips/
You
might also give serious thought to adding a desalinator to your cookset so you
never run out of water: http://www.theultralighthiker.com/water-hiking-desalinator/
This
site is the encyclopedia of DIY stoves; many hours of fun and enjoyment here: http://zenstoves.net/LinksGeneral-DIY.htm
What
to cook is yet another issue eg: http://www.theultralighthiker.com/hiking-food-2/
23/01/2016:
Hormel Real Bacon Pieces: This dehydrated food is quite delicious (if somewhat
pricey at >$4 for 85 grams – dehydrated weight, but you have to figure it
represents nearly half a kg of bacon!), but it keeps without any refrigeration
and will add some zap to an otherwise fairly bland pasta meal for example
(particularly if you add some Kraft Cheddar cheese as well – which also keeps
without refrigeration indefinitely). It is not at all salty -unlike the Kraft
cheese. Available Coles.

This
would go well as an addition to Farm Pride’s excellent Powdered Eggs (available
in the cake aisle in supermarkets). These reconstitute as scrambled eggs really
well – the addition of a little powdered milk adds a nice touch. I would just
stir some of this dehydrated bacon into the mix and serve with an accompaniment
of Continental mash for a hearty breakfast, for example.

See
also: http://www.theultralighthiker.com/hiking-food-2/
http://www.theultralighthiker.com/hiking-yoghurt/
http://www.theultralighthiker.com/peanut-butter-toast-soldiers/
Suggestion:
Try a search for ‘food’ in the Search bar at the top right of the page. I have
posted many ideas there over time.
http://www.theultralighthiker.com/toaks-ultralight-titanium-cook-system/
http://www.theultralighthiker.com/hiking-cookware/
http://www.theultralighthiker.com/windscreens/
http://www.theultralighthiker.com/suluk-stove/

21/01/2016:
Upper Yarra Track: Section Five: Erica to Walhalla:
12
km – @ 4 hours.
It
is 2 km (a bit over half an hour) along the rail trail to the Tyers-Rawson Road
or Knotts Siding. The trail exits right at the Walhalla turn-off. There is an
information board opposite. It is very easy walking having been an old railway
line. It is about 7 km (1.5-2 hours) from there to Thomson Station where you
can catch a train sometimes into Walhalla. The times are on the noticeboard:
Wed, Sat, Sun Public & Xmas school holidays about three times a day. It
costs $15-20, but you may be lucky: http://www.walhallarail.com.au/index.php?EXP=697
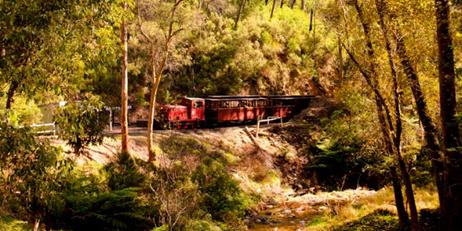
Half
way (3 km) along the trail (Platina Station – shelter hut) you can turn off and
drop down (2 km) to Coopers creek on the Thomson where there is a popular camp
ground (toilets, water). The hotel there is now (unfortunately) closed.
From
Platina Station you can also take an (approx ½ hour each way) excursion to the
‘Horseshoe Tunnel’ (http://www.visitbawbaw.com.au/walking-cycling/horseshoe-bend-tunnel)
a river diversion put in during the early C20th to extract gold from the stream
bed (Toilets, water, camp). The whole river was intended to flow through, it
thus granting access to any alluvial gold in the river bed.
From
Thomson Station to Walhalla Station along the rail trail (watch out for
trains!) is about 4 km (1 hour). Walking is not allowed on the railway line.
You can walk along the ‘Alpine Walking Track’ what used to be (part of) the
Poverty Point Tramline (as we did), or the Mormon Town Track& Telecom
Tracks or along the main road. Both start on the true left bank immediately you
cross the bridge across the Thomson. There is a trail on either side of the
river upstream of the Thomson road bridge. The one on the West bank can be used
to access the township of Rawson just
couple of kms away (store, hotel – weekends, accommodation etc) , or you
may use it if you are avoiding Walhalla and/or walking across the Baw Baw
Plateau (in the winter) perhaps. See Winter Route.
The
trail passes though some magnificent timber (huge mountain ash, vast tree
ferns, etc – with magnificent views down to the mighty Thomson River. The trail
passes a magnificent dam ten minutes out of Erica. There is also water at Micah
Creek between Knotts Siding and Platina (scramble down the gully on the uphill
side). You could camp there on the side of the track – as with many spots long
the track. Between Thomson Station and Walhalla the track crosses two side
gullies which often have water. The trail is wide enough to set up a tent
whilst still allowing others to pass. There are few walkers. Lots of people
used to camp on the ‘beach’ at the bottom of Stringers Gully (opposite Thomson
Bridge/Station ie East bank). You would have to scramble down off the main road
after you had crossed the bridge as they seem to have removed the vehicle
track…
The
township of Walhalla (General Store, Hotel, camp ground, accommodation, etc) is
a further 1 km (15 minutes) North from the railway Station up the main street.
The Upper Yarra and Alpine Walking Tracks start/end opposite the General Store
& Post Office where you will see a huge set of stairs ascending the
mountain towards the Long Tunnel Mine. The tracks are not signposted at the
main road (mysteriously) but there are signs about 100 metres up the hill,
though none mention the Upper Yarra Track! Walhalla seems to be suffering from
a fit of amnesia regarding this iconic track, so important to its existence for
so long!
There
is plenty to see and explore in and around Walhalla. You may want to spend a
few days thereabouts. If you have never been there before you are going to be
astonished by the beauty (and history) of this quaint old gold mining town
nestled in the deep valley of Stringers Creek. Take a look at the cemetery and
cricket ground. Maybe do a tour of the Long Tunnel mine. Most of the buildings
are authentic mid C19th. Heading out of Walhalla you can divert via Rawson to
pick up additional supplies if needed before you tackle the beautiful and
awesome Baw Baw Plateau. For example, a side trip via Happy-Go-Lucky to
Bruntons Bridge (water, toilets camps) is highly recommended.
The
Thomson River is a wonderful canoeing experience (beginning at the Thomson dam
outfall). It is 3-4 days of delightful white water interspersed with serene
long pools and many campsites before you reach Cowwarr Weir. A day from the dam
to the Thomson Bridge. Half a day from Thomson Bridge to Coopers Creek. The
section between the Thomson Bridge and Coopers Creek contains a river diversion
known as the Horseshoe Tunnel which is not canoeable, requiring a portage of
over 1 km (there is a track - easy if you are packrafting!) From Coopers Creek
to Bruntons is about half a day, another two days from Bruntons on. See: http://www.theultralighthiker.com/canoeing-the-thomson-river-gippsland-victoria/
& http://www.theultralighthiker.com/videos/thomson-river-canoe-trip-2006-complete/
(one hour video)
The
trail begins just as you enter Erica on the East side of the road opposite the
hotel next to a shelter, convenience stop and caravan park and these mementoes
of the region's logging history.
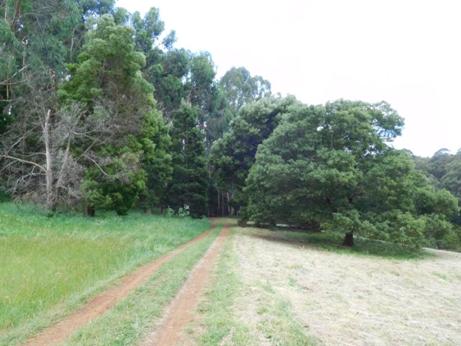
Right
on the outskirts of Erica the trail plunges from lush green paddocks replete
with fat kine into the enfolding forest.

Minutes
out of Erica a lovely dam makes for a refreshing rest stop.
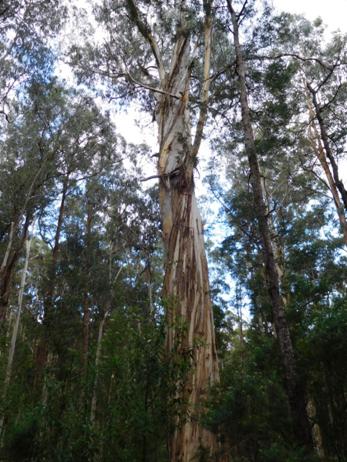
Straightaway
you plunge into magnificent mountain ash country: this species is the tallest
tree/plant in the world.
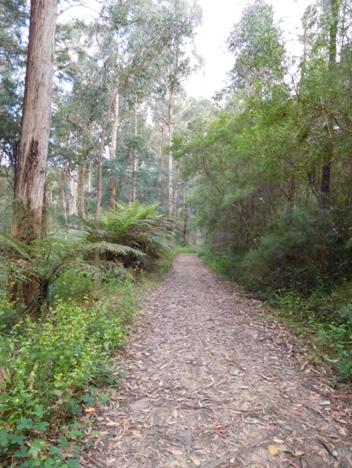
The
trail is in wonderful condition.
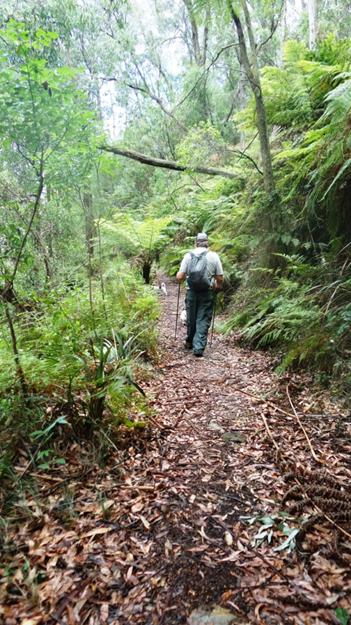
As
always the Jack Russels Spot and Tiny lead the way.
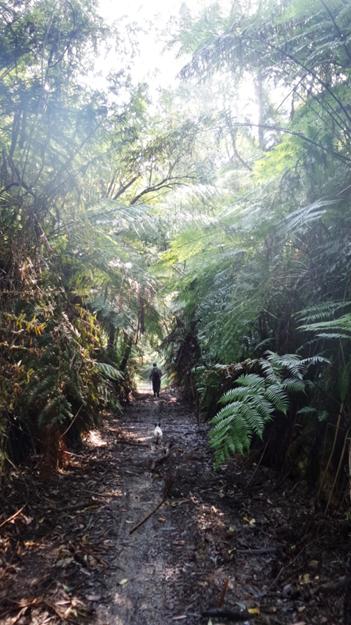
Through
beautiful tree fern tunnels.
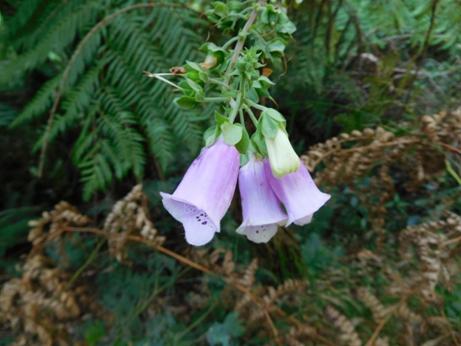
Along
the way a very late summer foxglove in a shady nook is a touching reminder of
the C19th goldfields women who followed their menfolk to the ends of the earth.
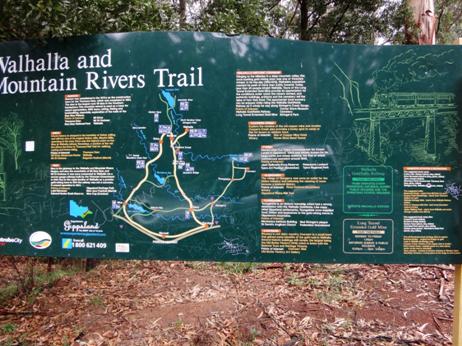
After
about 40 minutes the track crosses the Tyers-Rawson Rd to this information
point, formally Knotts Siding.
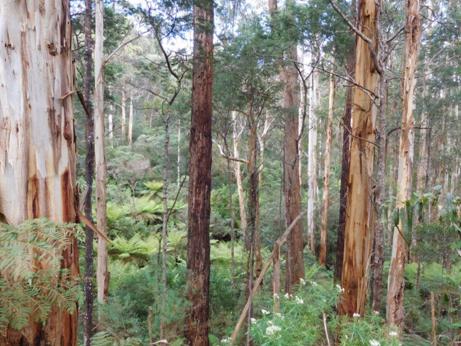
Once
again you are plunged into magnificent ash and tree fern. As we were walking
this section we heard a sound like a cannonade as one of these giants crashed
unexpectedly to the ground. This happens often over summer. Gums are
‘self-pruning’ – a dangerous habit should you be foolish enough to camp
underneath one!
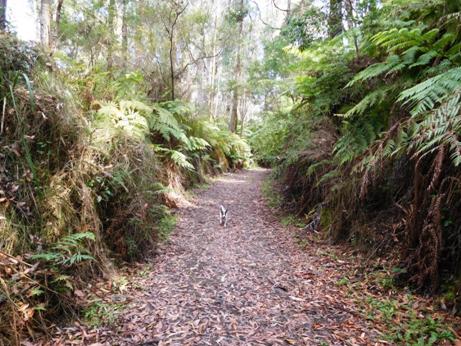
The
track is wide enough most of its length that two can walk abreast.
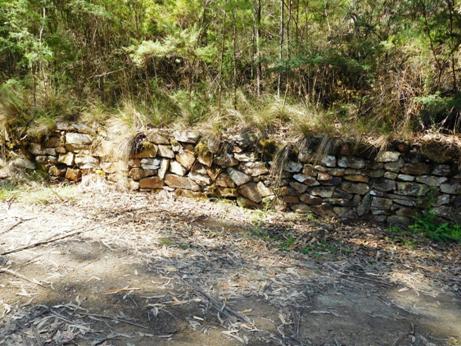
After
Micah Creek (water, camp) Platina Station marks the turn off for Coopers Creek
campground a couple of kilometres away and/or the Horseshoe Tunnel.
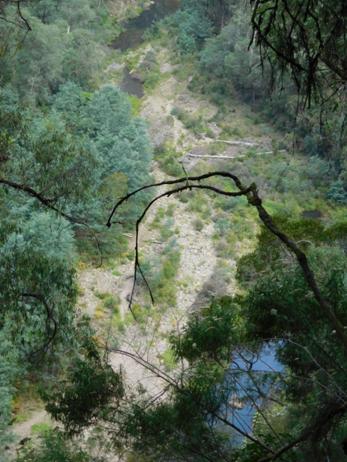
The
Horseshoe Tunnel diversion track below: as you can see an easy portage if you
are packrafting the Thomson.
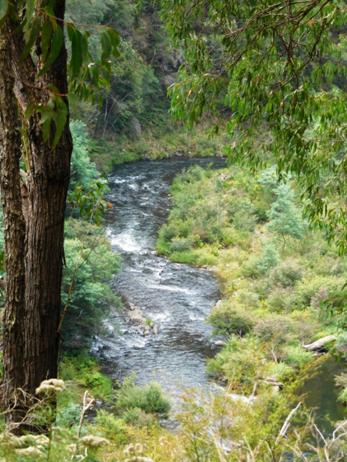
There
are many glimpses of the mighty Thomson River through a screen of trees.
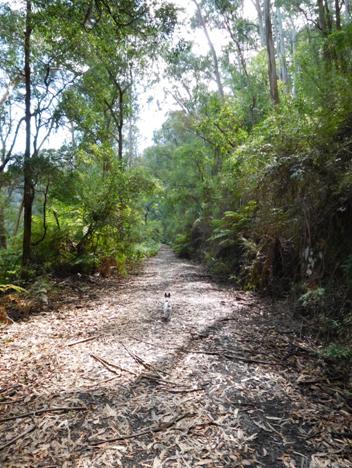
It
is a lovely wide well-graded track: easy walking. Spot, as usual is out in
front.
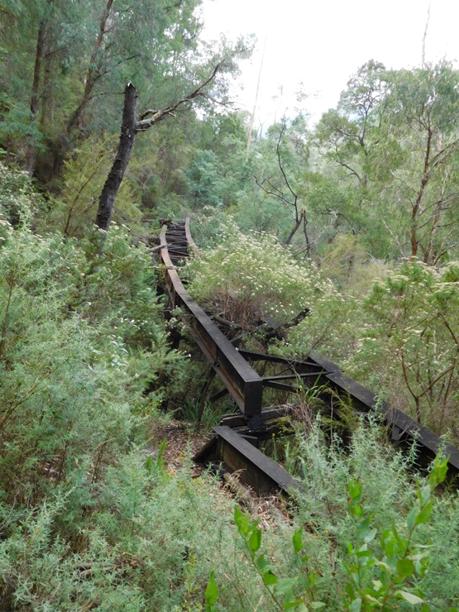
Many
mementoes of the old Moe-Walhalla line along the way. A fallen bridge.
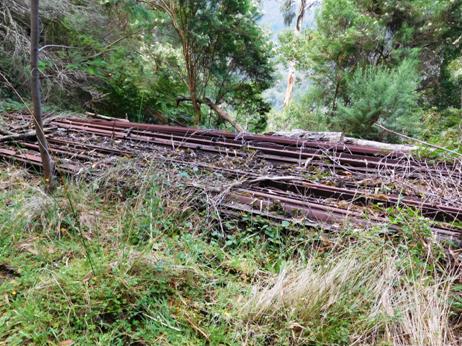
Abandoned
railway tracks.
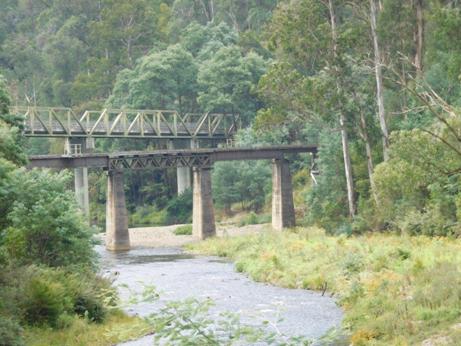
Road
and rail bridges span the river at Thomson Station. You can see from their
height how far this river can rise.
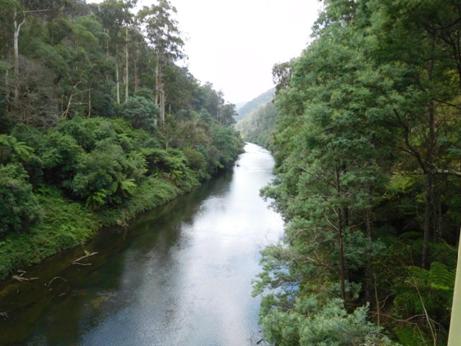
The
Thomson is a beautiful river to canoe: view upstream from the Thomson road
bridge towards the dam (starting point).
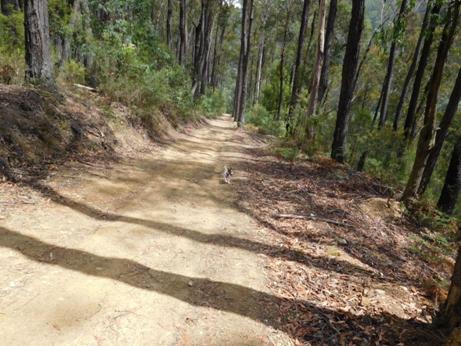
After
crossing the Thomson, the Mormon Town track on a dry ridge marks a change in
vegetation to peppermint gums.
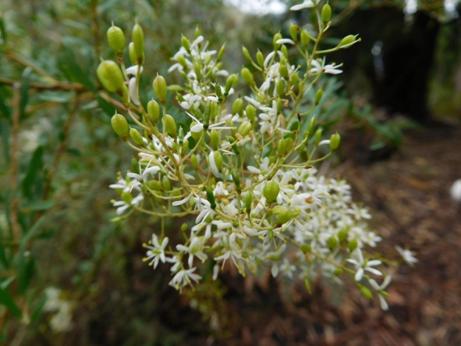
The
Australian bush is always a riot of wildlowers. Indeed very few places offer
the bewildering array of species you find all about you here.

Native
Bugle flower.

Native
trigger flower: a carnivorous variety.

This
is a wild cherry. It is a parasitic plant with an edible fruit (hence the
name). It is only one of two trees in the world which bears its nuts outside
its fruit (hence ‘exocarpus’), the other being the pecan.
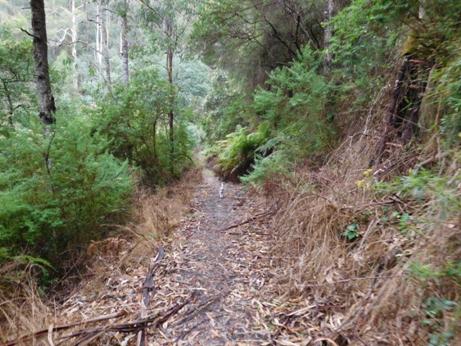
The
Poverty Point tramline was in many places hacked out of a near vertical hillside.
The main road is about fifty metres below - straight down!
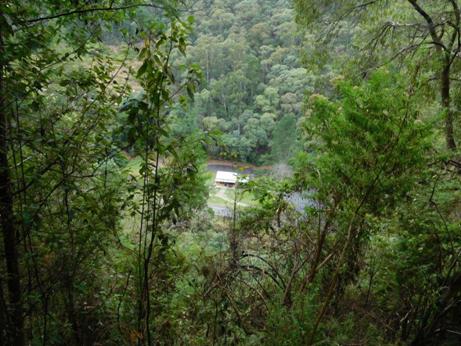
Early
glimpses of Walhalla through the trees: below the new 'Visitor's Centre'.
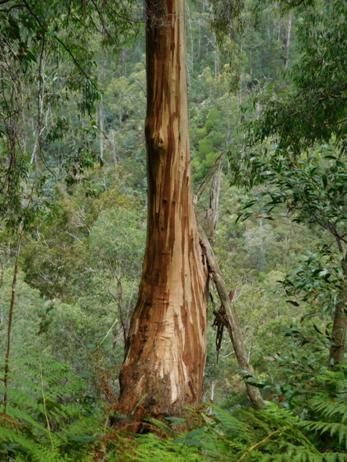
Early
settlers could not quite believe Australian Eucalypts, a dominant genera in
today's landscape as they kept their leaves
whilst shedding their bark. Another annoying habit they have is turning their
leaves to avoid the sun, thus casting little shade on a hot day.
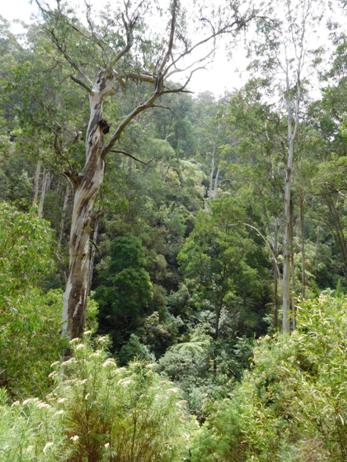
There
are some majestic examples in the wetter gullies. Hard to believe that a
hundred years ago there was not s single tree growing within thirty kilometres
of Walhalla - so great was its voracious appetite for wood! They are quite
quick growing. Trees which sprang up from seeds after the 1939 fires had trunks
which made a single semi-trailer load a mere fifty years later.
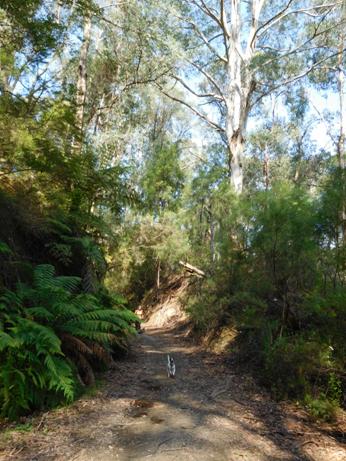
Spot
really enjoys a walk. He is way ahead of Della here.

The
road goes ever on and on...That is bark on the track, though we did see a small
snake and a water dragon at the river crossing – and at least fifty species of
birds!
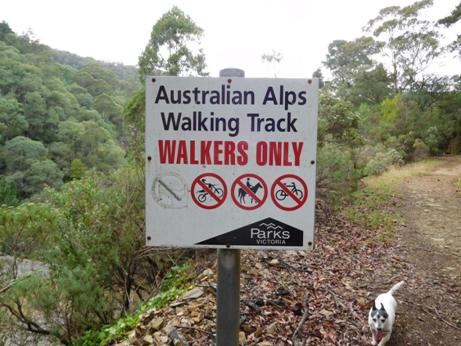
Someone
had removed one of the forbidden things on the sign. Tiny cannot believe it was
'dogs'. We saw indications that both horses and pushbikes have also ‘strayed’
onto this lovely track. Someday no doubt such misdeeds will be a capital
offence! Or forgotten quite.
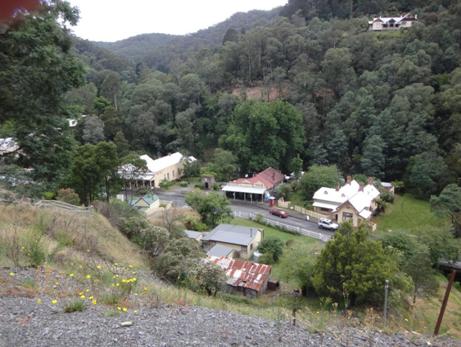
At
trail's end Walhalla lies nestled in the valley of Stringers Creek. The General
Store is centre; the old Post Office on the right. The staircase on the far
left marks the beginning/end of the trail.
See
also:
The
Vicmap for this section is Walhalla South T8122-2-S
See
also:
http://www.finnsheep.com/THE%20UPPER%20YARRA%20WALKING%20TRACK.htm
http://www.finnsheep.com/Track%20Instructions.htm
http://www.theultralighthiker.com/upper-yarra-track-update-section-one-moe-yallourn-rail-trail/
http://www.theultralighthiker.com/upper-yarra-track-update-section-two-yallourn-north-to-wirilda-park/
http://www.theultralighthiker.com/upper-yarra-track-update-section-three-wirilda-to-moondarra/
http://www.theultralighthiker.com/upper-yarra-track-section-four-moondarra-to-erica/
See
also Upper Yarra Track Winter Route:
http://www.theultralighthiker.com/western-tyers-river-great-for-crays/
http://www.theultralighthiker.com/the-western-tyers/
http://www.finnsheep.com/THE%20UPPER%20YARRA%20WALKING%20TRACK.htm
http://www.theultralighthiker.com/upper-yarra-track-update-section-one-moe-yallourn-rail-trail/
http://www.theultralighthiker.com/upper-yarra-track-update-section-three-wirilda-to-moondarra/
http://www.theultralighthiker.com/upper-yarra-track-section-four-moondarra-to-erica/
http://www.theultralighthiker.com/upper-yarra-track-summary-cumulative-distancestimes/
http://www.theultralighthiker.com/upper-yarra-track-osheas-mill/
http://www.theultralighthiker.com/a-beautiful-world/
http://www.theultralighthiker.com/upper-yarra-track-winter-route-caringal-scout-camp-tyers-junction/
http://www.theultralighthiker.com/upper-yarra-track-winter-route-western-tyers-morgans-mill-skinners-camp/
http://www.theultralighthiker.com/upper-yarra-track-winter-route-western-tyers-to-tanjil-bren/
http://www.theultralighthiker.com/kirchubel-if-you-go-nowhere-else-in-the-world-at-least-go-here/
http://www.theultralighthiker.com/upper-yarra-track-winter-route-downey-to-newlands/
Mobile
Phone works beautifully until you plunge downhill towards the Thomson River.
SMS may still work. You will come back into mobile range after you leave
Walhalla and begin the climb up from the Thomson River after the Poverty Point
bridge.
20/01/2016:
Clearview Tent: It is nice to be able to gaze out into the woods when camping.
An open tarp shelter (http://www.theultralighthiker.com/tyvek-solo-fire-shelter/)
or a cuben tent (http://www.theultralighthiker.com/zpacks-hexamid-solo-plus-tent/)
such as I use facilitates this, or you might try building a clearview tent as
in this instructable: http://www.instructables.com/id/Ultralight-clear-tarp-tent-2P/
You
get much the same 360 degree view camping in a hammock (as I often do) with a
small (say 7'x7' minimum) tarp for a shelter.
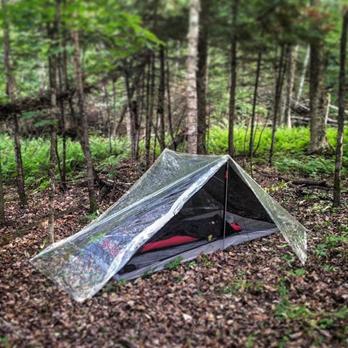
18/01/2016:
Tarp Bathtub Groundsheet: This is an interesting concept and should be easy
enough to emulate in Tyvek. I had already tried to shape a groundcloth so the
sides stood up like this, but without pegs or other supports it was less than
pefect. Using some elastic cord to make it conform to the shape of one’s
sleeping mat is a good idea. The SOL material ued here maybe would provide some
extra insulation but it would not stand up to many uses I suspect. I sometimes
use a space blanket as an emergency ultralight ground cloth myself. The older
thicker ‘Space Blanket’ might work better, but I suspect the insulation
advantage is over-rated compared to the weight/cost and that Tyvek will provide
a more serviceable alternative: http://www.instructables.com/id/Semi-Bivy-Keep-your-sleeping-bag-dry-and-warmer/

15/01/2016:
Perhaps incandescent bulbs have a future after all: http://www.smithsonianmag.com/smart-news/incandescent-lightbulbs-may-have-bright-future-after-all-180957800/?no-ist
15/01/2016:
Canoe clearing: When clearing trails or small rivers such as the Tanjil and
Latrobe, Fiskars Xtract Pruning Saw & Fiskars Brush Thinner Machete are
excellent tools. Both are lightweight and their cutting edge is protected so
that it does not damage you or the canoe. If more people took them along when
exploring eg the Tanjil, Latrobe or Tyers Rivers, we would soon have many days
more of excellent paddling. These rivers have good summer flows when many of the
bigger rivers (eg Mitchell-Wonnangatta, Macalister etc) have become unnavigable
– as is the case at this summer. See also: http://www.theultralighthiker.com/the-worlds-greatest-machete/
15/01/2016:
River Crossings: This could be you: undo your waist and sternum straps and
loosen your shoulder straps when crossing a river: http://www.cbc.ca/news/canada/north/kluane-hiker-drowned-in-creek-1.3309328 See also: http://www.theultralighthiker.com/river-crossings/
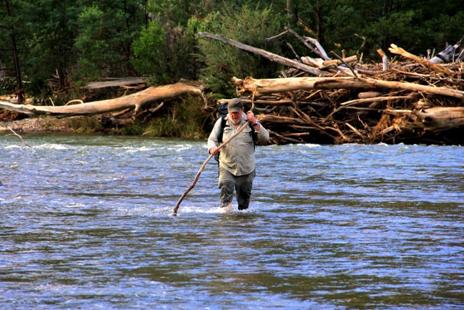
14/01/2016:
Tanjil River Canoeing: Update: My thanks to reader, Jake who
has just sent me this report of his ‘adventure’ on this lovely river: ‘Hi
Steve, Thanks for the write up on on rafting the Tanjil. Last weekend my
fishing partner and I drifted the Tanjil in a cheap inflatable boat with our
fly rods in hand. Beautiful day out on the water. Took us a bit longer than you
- lucky we set out early! Caught a few nice trout, although no monsters to
hand. Was hoping there might be some bigger ones lurking due to lack of
fishermen. Did see some enormous carp in the pools about 500-750m down from
gauging station. Also saw quite a few crays... Fishing from the El cheapo drift
boat was a blast...have just found an American drift boat producer that is
making a two person boat that is very nimble and can operate in only a few
inches of water. Check out http://www.flycraftusa.com/
. Better start saving for next season. Thanks again for all the info on your
great blog. Cheers, Jake.’ My reply: Thanks for that Jake.You can come all the
way down from Costins Rd. Next try the Latrobe from the Noojee Bridge down. Two
days probably. Also try this to toughen up your cheap raft for rapids: http://www.theultralighthiker.com/home-made-pack-raft/
& http://www.theultralighthiker.com/faux-packraft-vs-alpacka-raft/
Also
see:
http://www.theultralighthiker.com/canoeing-gippslands-rivers/
http://www.theultralighthiker.com/canoeing-the-thomson-river-gippsland-victoria/
http://www.theultralighthiker.com/videos/thomson-river-canoe-trip-2006-complete/
http://www.theultralighthiker.com/dusky-track-canoeing-the-seaforth/
http://www.theultralighthiker.com/canoeing-in-gippsland/
http://www.theultralighthiker.com/canoeing/
http://www.theultralighthiker.com/canoeing-the-macalister/
http://www.theultralighthiker.com/canoeing-the-macalister-river/
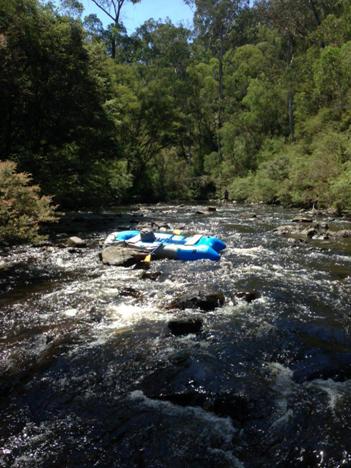
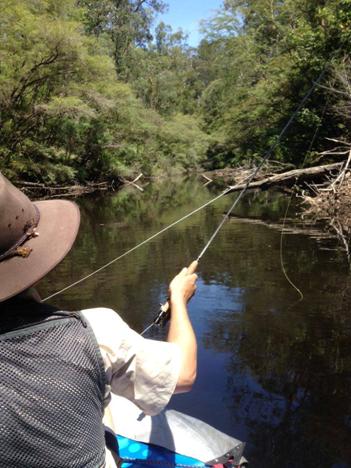
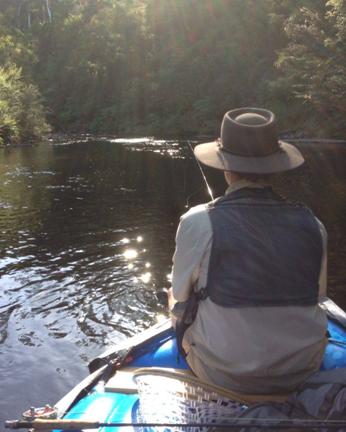
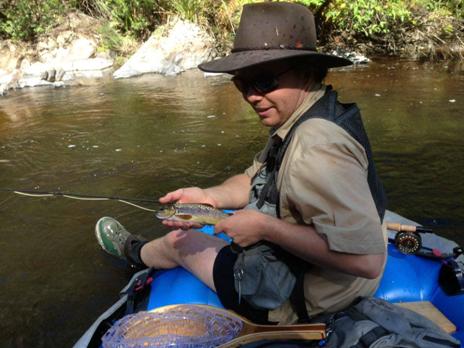
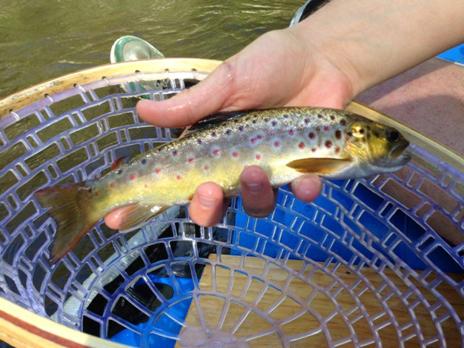
13/01/2016:
These little guys are great. Such a boon for old arthritic fingers and for any
other folk who don’t have the super strength or dexterity to operate the taps
which water drums normally come with. Usually under $10. Designed and
manufactured in Australia! Available BCF (and elsewhere). Standard 3/4″
BSP thread fits hose fittings, etc. Can be used to control a siphon if mounted
90 degrees in the bottom of a well with a float valve attached which turns the
water on when there is sufficient water, off when there is not enough. This
would be good if you wanted to ‘develop ‘ a spring on your hillside (eg by
trenching below it with plastic agricultural drainage pipe into a sump
containing the snap tap, then via siphon to a lower storage tank, thence maybe
creating enough pressure to run a garden sprinkler? Many other uses I’m sure.

10/01/2016:
How poignant is this? Always one of my favourite nostalgic songs (cf ‘Danny
Boy, Auld Lang Syne, Loch Lomond, Down in the Valley, Tom Dooley etc)…but this
is really sad: https://www.youtube.com/watch?v=aeO7WYa4r28
‘George W. Johnson, a school teacher, wrote the lyrics to this song in 1864 as
a poem for Maggie Clark, his young wife of 23 who was dying of Tuberculosis.
She died in 1865 before she could hear the words put to music by
J.A.Butterfield in 1866. This was an extremely popular song up through the
1920's. This and other songs of 19th century America are available on my CD –
‘Silver Threads Amongst the Gold’ available at: http://tomroush.us/ or
https://itunes.apple.com/us/album/sil...’ Remember when Peter Evans used to
play it every morning?
09/01/2016:
Ultralight Hunting Daypack Update: Some folks have commented that they want a
tougher pack than say the Osprey (http://www.theultralighthiker.com/osprey-ultralight-stuff-pack/) or Sea to Summit (http://www.seatosummit.com.au/products/outdoor/ultrasil-dry-day-pack/)
or Zpacks Zero (http://www.zpacks.com/backpacks/zero.shtml)
so they can carry lots of meat betimes (and are happy to carry over 100 grams!
They should maybe move to the 4.8oz/yd Dyneema fabric available in a green
check. Zpacks will option their Zero (in various sizes and with additional
options from US$105 and 168 grams) in their ‘Hybrid Cuben 2.92oz/yd fabric or
in this material. Mountain Laurel Designs also have these ready-made options
available in Dyneema or Hybrid Cuben also with bespoke options (talk to Ron): http://www.mountainlaureldesigns.com/shop/index.php?cPath=25
Their ‘Core’ at US$85 and 228 grams is a snap; for an overnight hike you might
chose their ‘Burn’ I own a number of MLD products. Their quality and sewing are
superb.
Mountain
Laurel Designs have their own version of the Klymit Airbeam Pad in a
configurable format (with instructions) http://www.mountainlaureldesigns.com/shop/product_info.php?cPath=46&products_id=186
- US$35. They also offer a pad pocket option for their packs - which is great
for load transfer: (http://www.mountainlaureldesigns.com/shop/product_info.php?cPath=25&products_id=208)
- US$45. The pad + pocket add about 120 grams.
MLD
Core
See
also:
http://www.theultralighthiker.com/hunting-daypack/
http://www.theultralighthiker.com/ultralight-pack/
http://www.theultralighthiker.com/the-ideal-pack/
http://www.theultralighthiker.com/air-beam-pad/
http://www.theultralighthiker.com/klymit-air-beam-inflatable-pack-frame-update/
04/01/2016:
Thrilling Tales: ‘The Revenant’, https://www.youtube.com/watch?v=LoebZZ8K5N0
yet another retelling of the amazing Hugh Glass epic. See also ‘Man in the
Wilderness’. I actually preferred the earlier version but I enjoyed this one
too. I just love Mountain Man movies, I guess. http://www.bigskywords.com/montana-blog/montanas-mountain-men-hugh-glass
02/01/2016:
Stick Pic: At $13.99 (& 11 grams!) I think this is almost indispensable if
you want to fuel your narcissism (& who does not these days!) ‘Now you can
finally be included in all of your trail photos. Be in your own shots or be
joined by friends and family. This size #2 StickPic (see Additional Info tab)
attaches to the tip of your pole. Use this fun little gadget for high and low
angle backcountry photography. In less then ten seconds screw the adapter on to
your camera and then attach to the trekking pole tip. Now you've created your
very own selfie stick, which you can easily carry into the backcountry. This
product is for users who already walk with hiking poles! Trail Tip: Works with a
Gopro using their Tripod Adapter. You can also attach your smartphone, with an
additional mount accessory. Standard 1/4-20 Camera-to-Tripod thread. Check that
it fits the tip of your poles (or buy the best: GG’s LT4s!) http://gossamergear.com/hiking-pole-selfie-stickpic.html & http://thestickpic.com/
See
also: http://www.theultralighthiker.com/these-hiking-poles-are-wonderful/
http://www.theultralighthiker.com/hiking-poles-2/
http://www.theultralighthiker.com/trout-fly-rod-conversion-for-hiking-pole/
http://www.theultralighthiker.com/hiking-poles/
01/01/2016:
Seriously clever sundial makes Stonehenge look very old hat; I so like that it
has no moving or electronic parts yet it displays the time digitally: http://www.gizmag.com/digital-sundial/41099/
Hiking 2015


![[object Object]](http://www.seatosummit.com.au/wp-content/uploads/2012/06/STS_AUDS-US-Dry-Sack-group.jpg)
![[object Object]](https://massdrop-s3.imgix.net/product-images/ultraspire-c2-cup/MD-25722_20160816115832_1298399c0c636c01.jpg?auto=format&fm=jpg&fit=crop&w=1023&dpr=1)


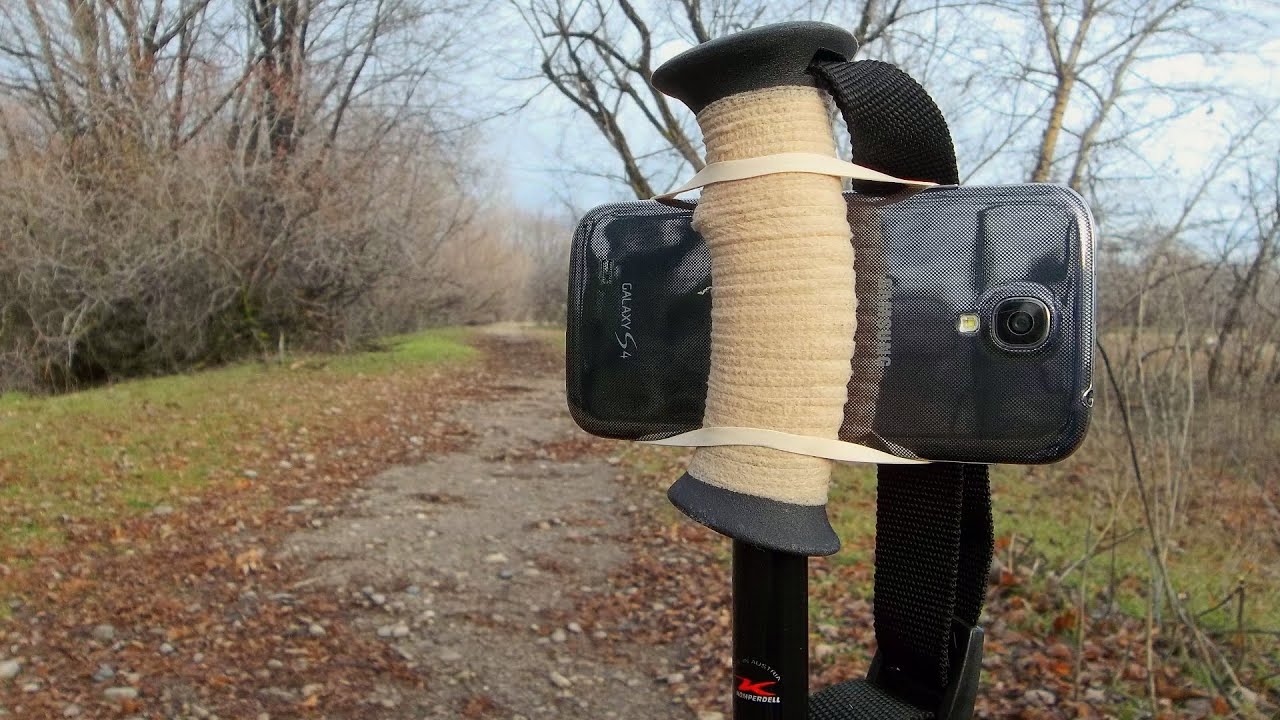


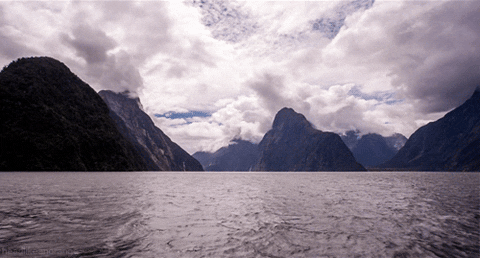


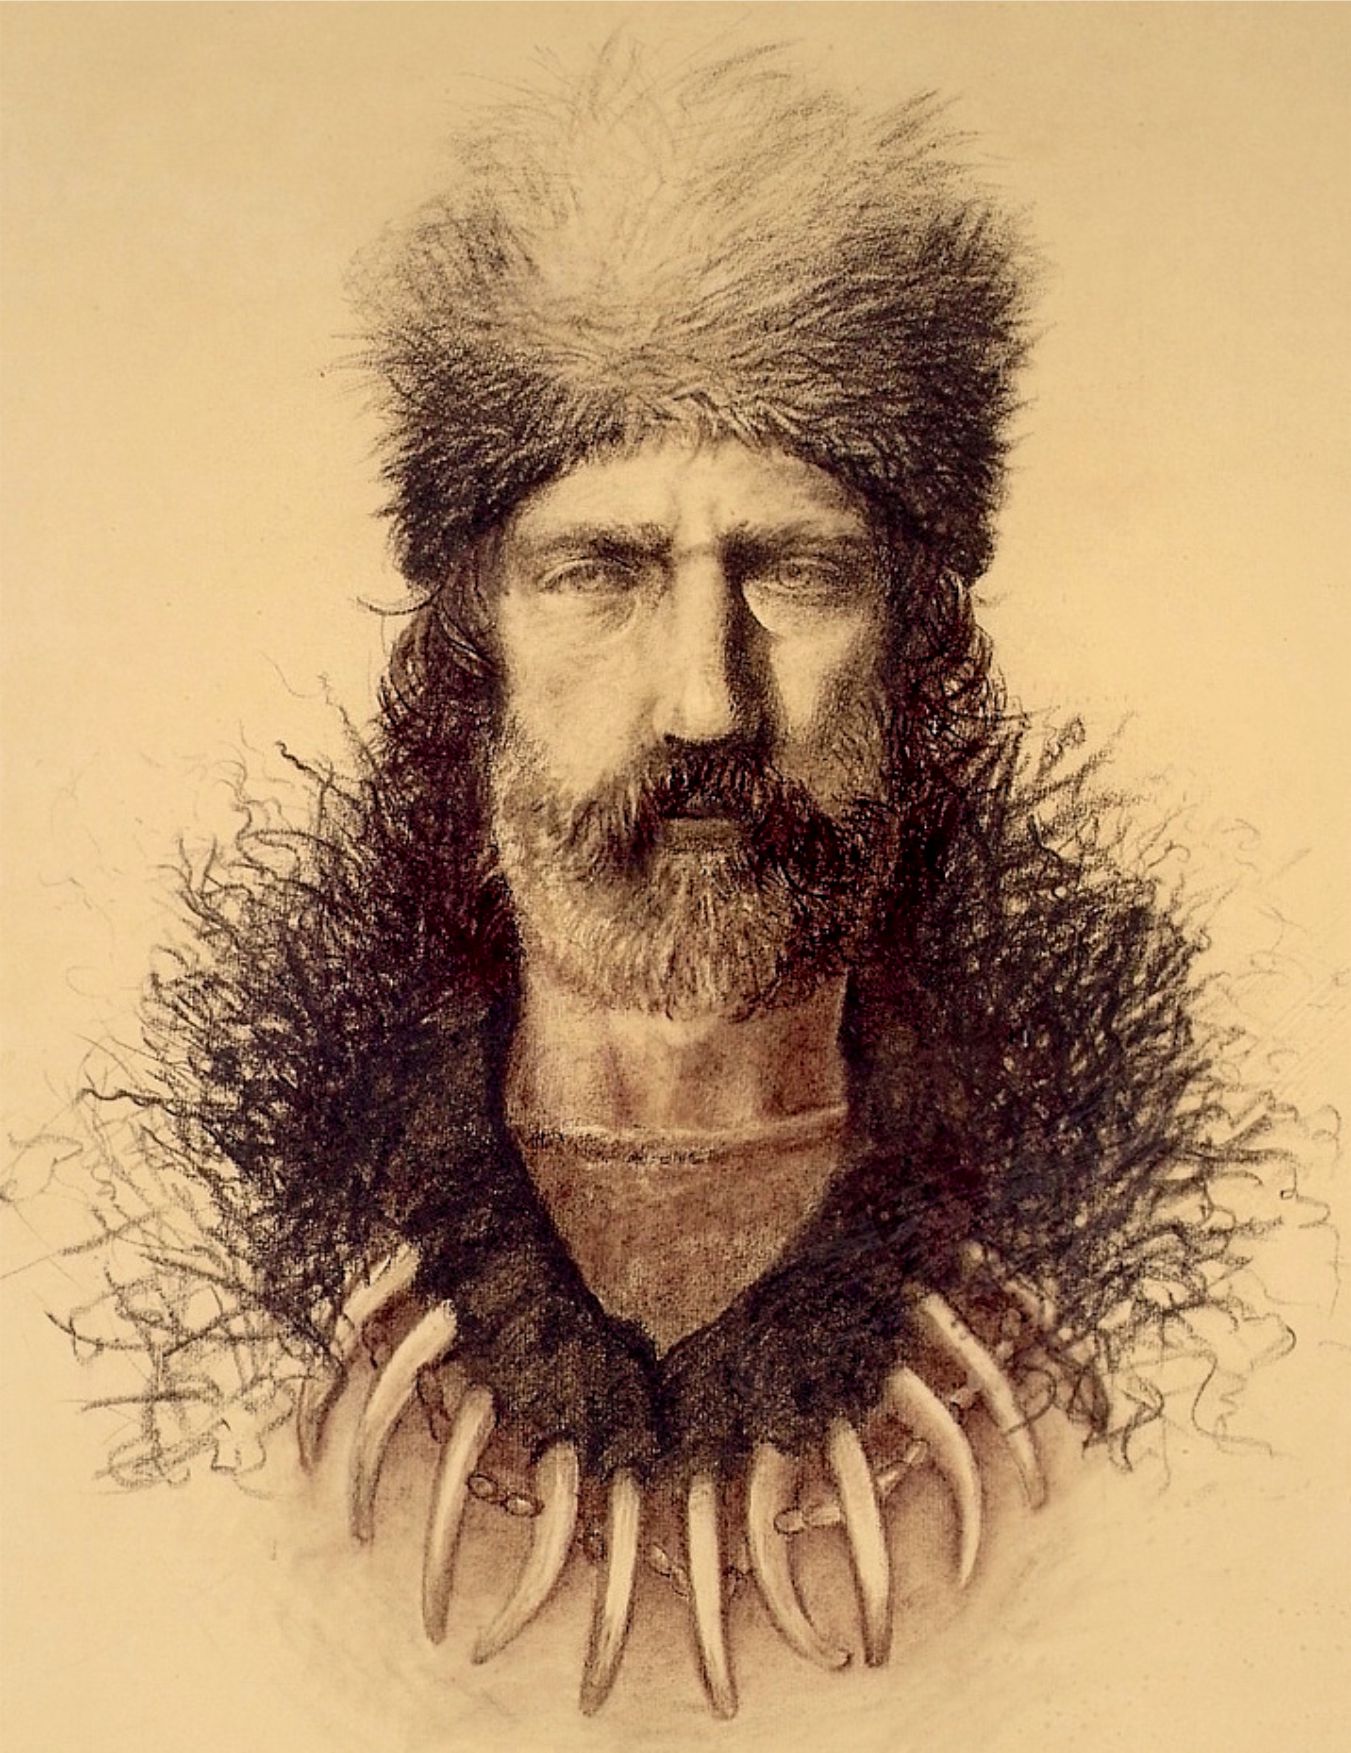


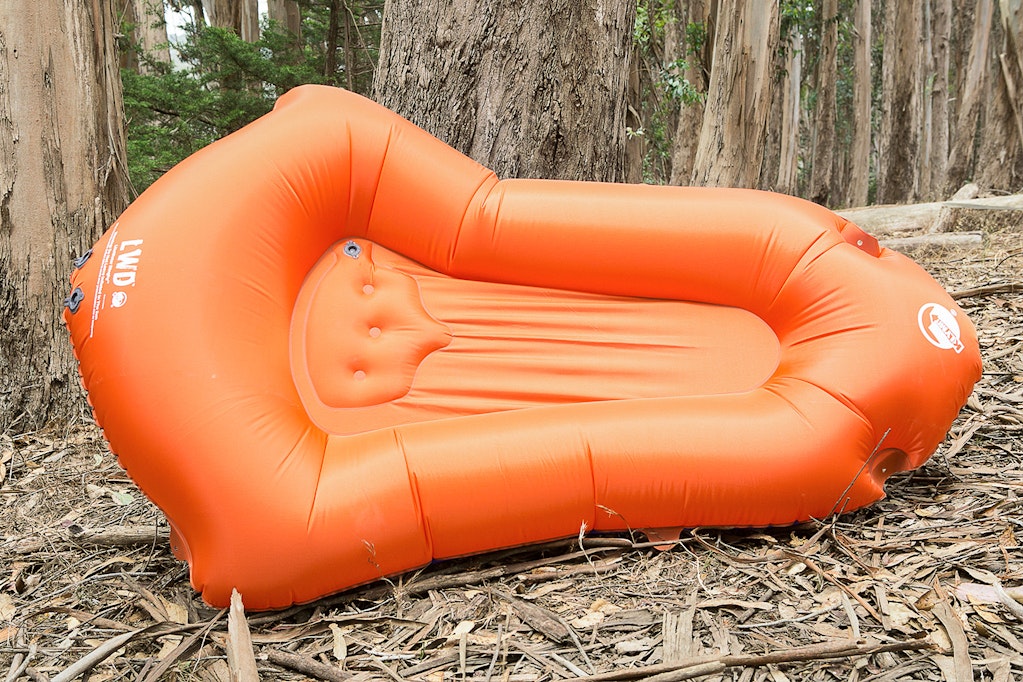

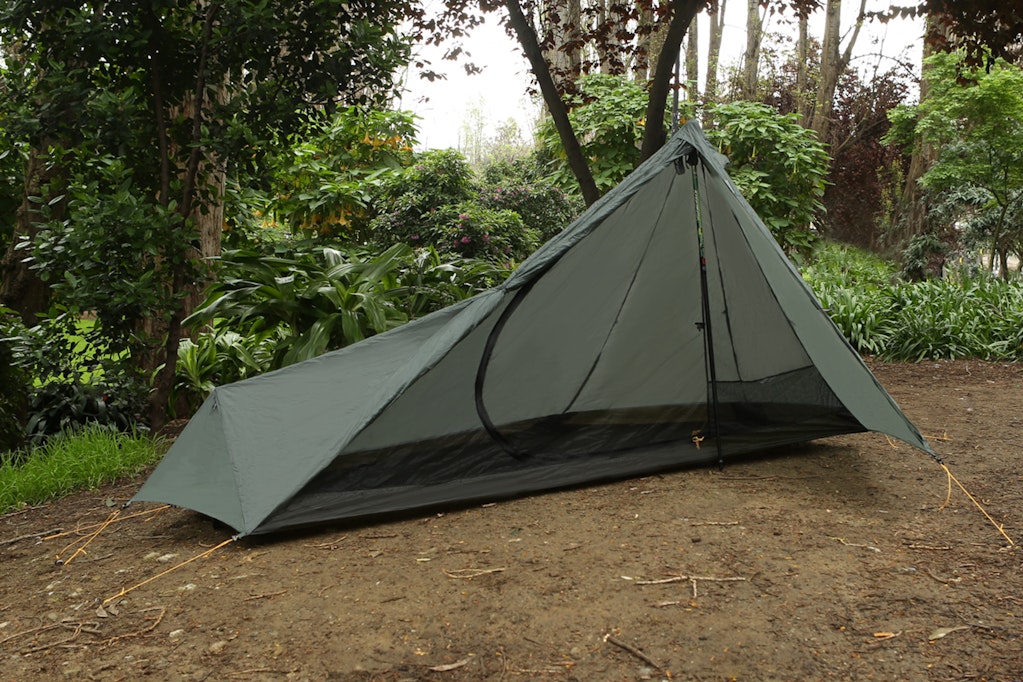


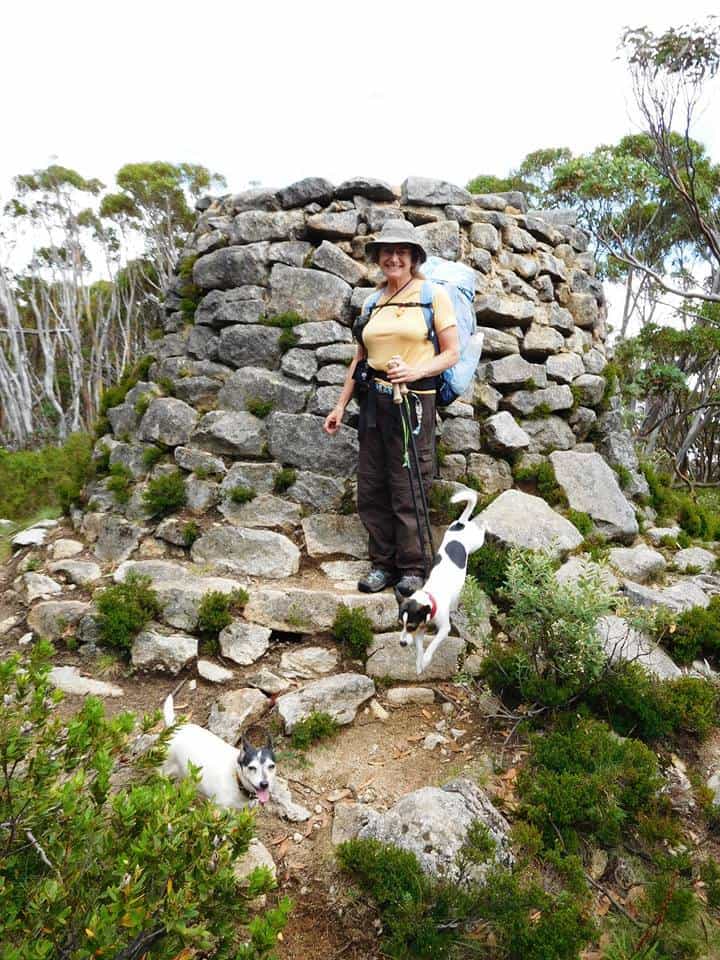

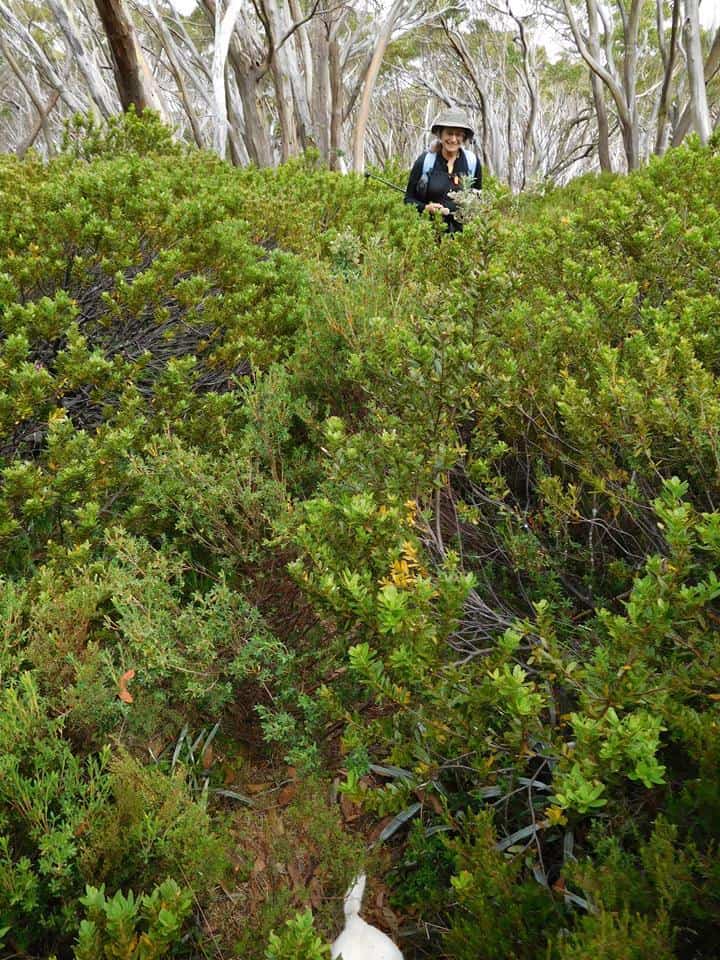
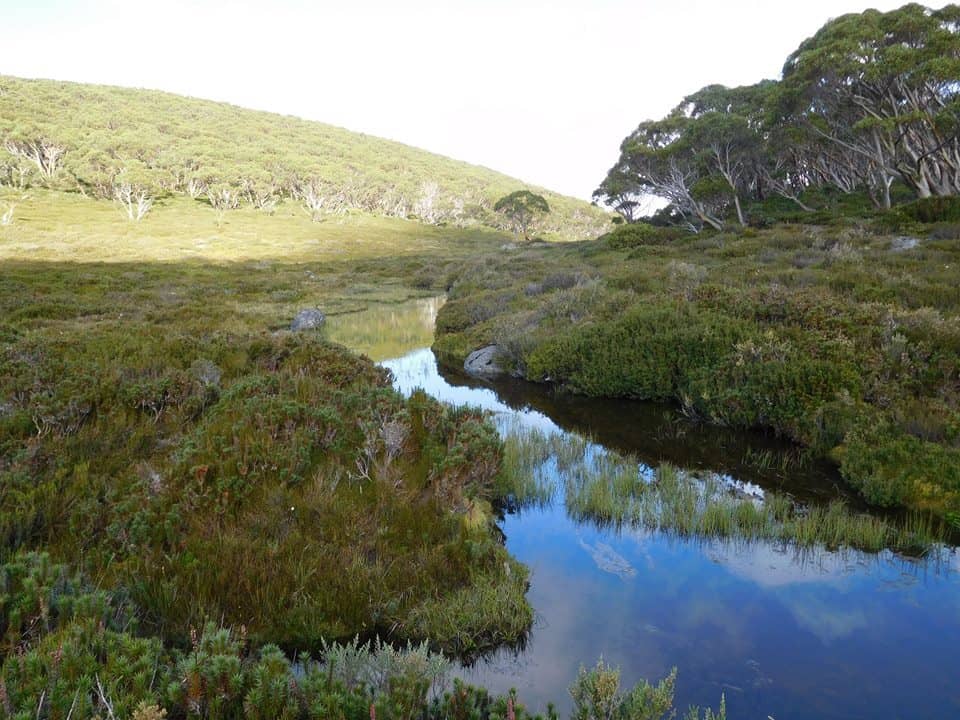
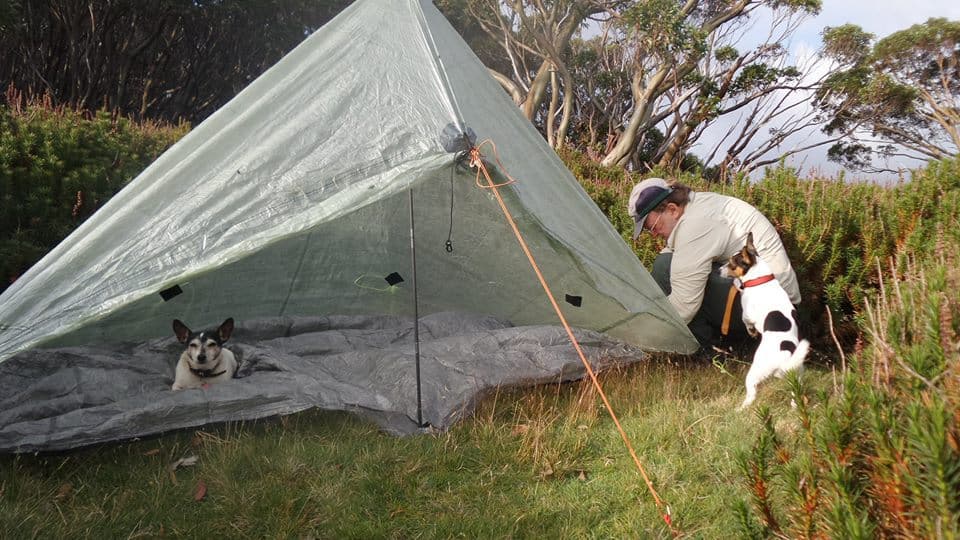
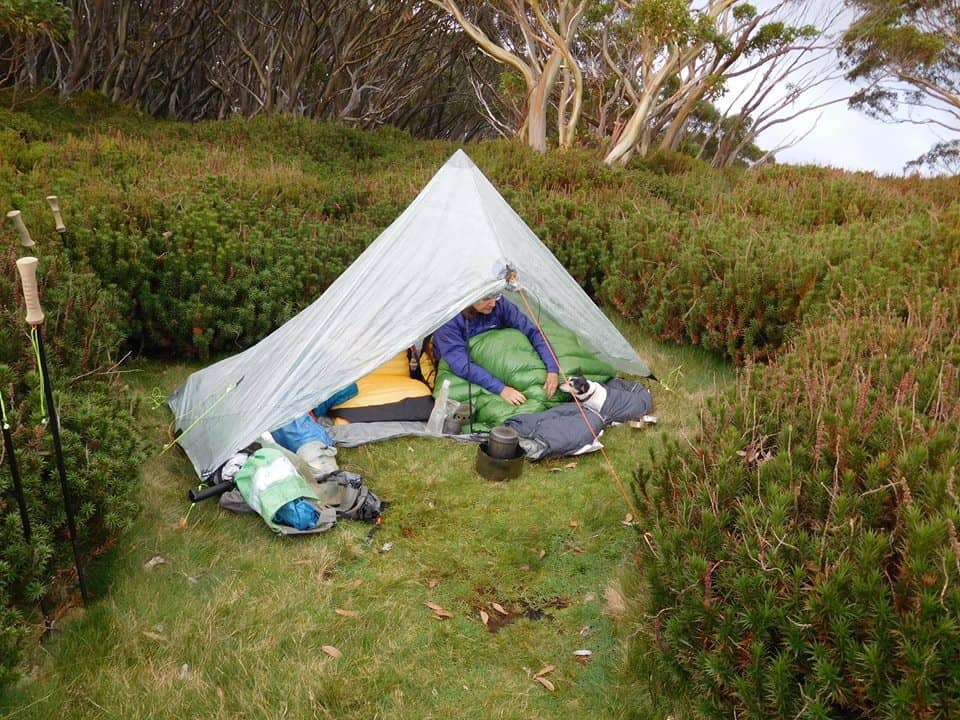
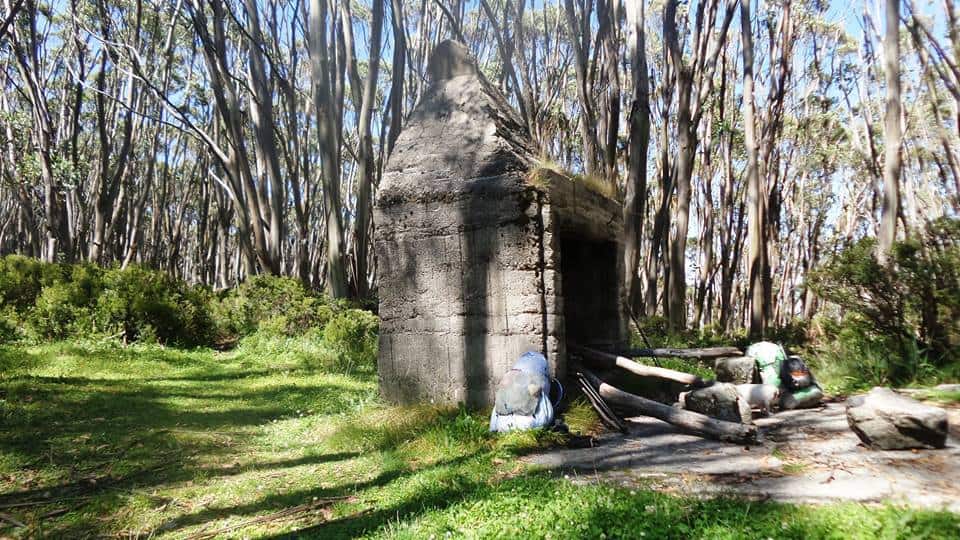
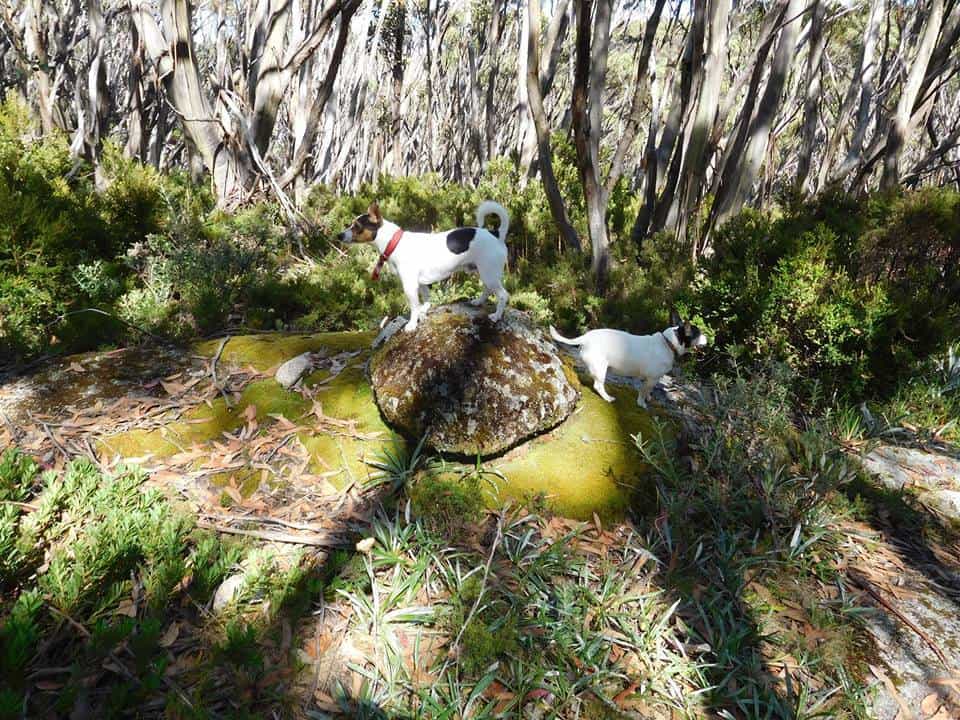
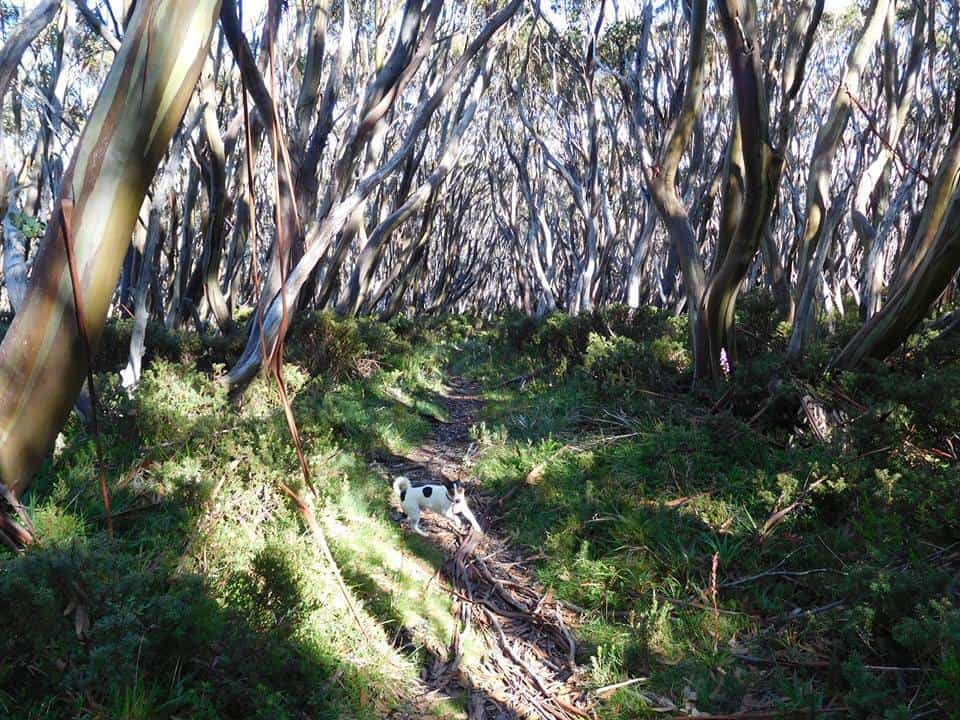
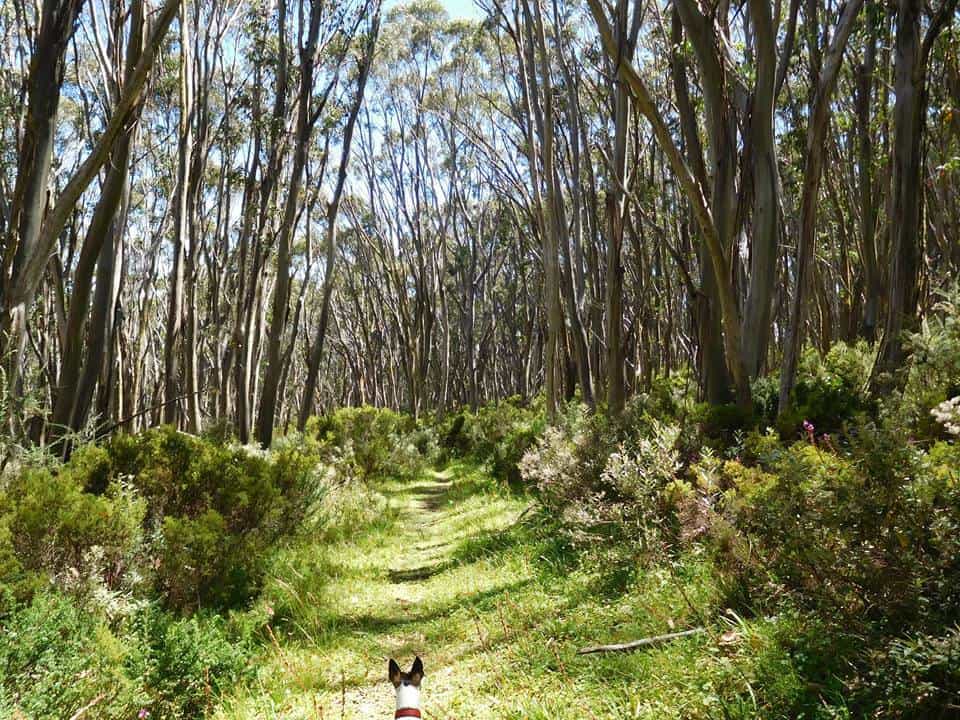


